
How to- Interior LEDs


Thread Starter
|
Senior Member
Joined: Dec 2007
Posts: 186
Likes: 1
From: N. California
I know when I tried it, it worked pretty well though I used a pencil beam LED with a beam of like 5 degrees so it really didn't flood over into any of the other color. I truthfully think the best way to do it is to either like you did mount the led in the needle or like I did mount the LEDs on the top of the board just under the needle. Unless you actually made a brand new diffuser board and then that just turns into another project. LOL.

Technical Article Contributor
Joined: Mar 2006
Posts: 1,460
Likes: 1
From: Near Houston
well you could probably get away with a single LED in the acc gauges but the revs and the speedo would be hard to do with one led, as they have a big 270 or so degree sweep. Either At the end and beginning or dead in the center it could produce a dead spot. I had planned on simply doing three or four of them in a very tight circle but again i had the white flooding into my blue. LOL thats why i just said screw the headaches and put them in the needles.

lsracer,
Nice thread and thanks for the plug. Question tho....I just finished my ac controls so the only thing I have left is the steering controls. I haven't a clue as to what bolts you were referring to in your write up. Any way to snap a few pictures showing the vicinity of the 4 bolts you spoke of in step 3/5.
Also is there any special trick one should know before trying to take it apart?
Thread Starter
|
Senior Member
Joined: Dec 2007
Posts: 186
Likes: 1
From: N. California
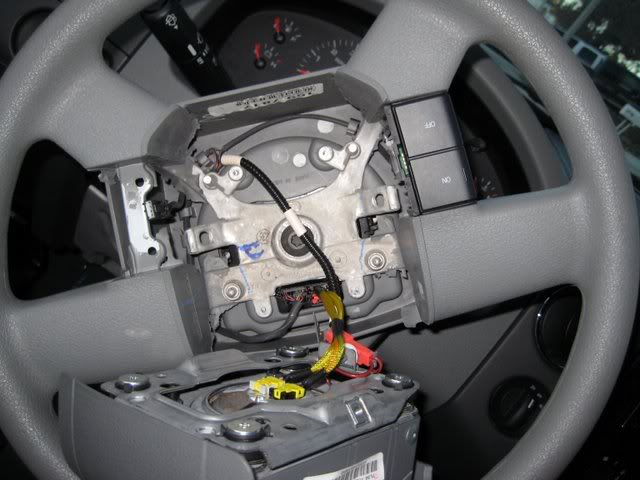
Ok I don't have the best pictures only because I haven't had much time to finish the write-up sadly. At least it has the bulk of the text done though  . Here are the pictures I have right now from the original project on my truck. It is actually six bolts, two to take out the airbag, two for each controls.
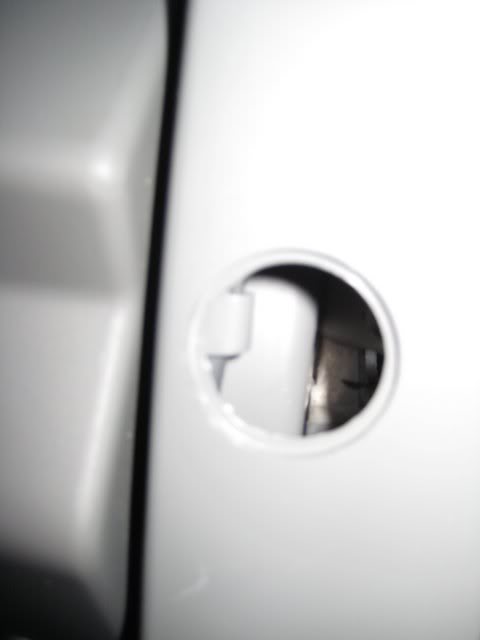
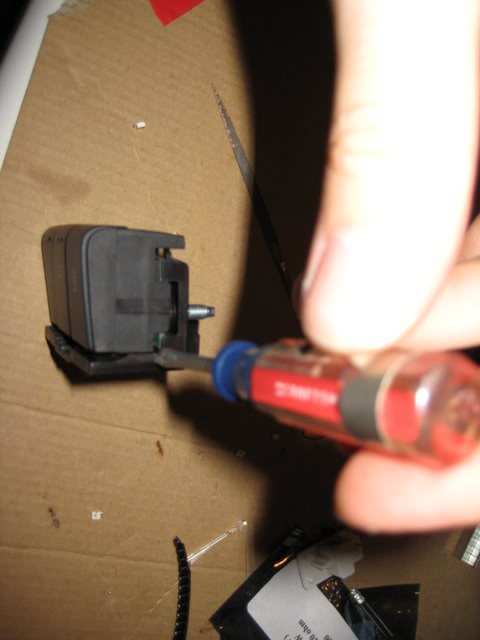
You'll two of these holes with cover on them of course on either side of the steering wheel column. Take off the two covers, one on each side. With whatever size socket I said, I think 8mm, and an extension take out the bolts.
Then you'll be looking at this once you slide out the airbag.
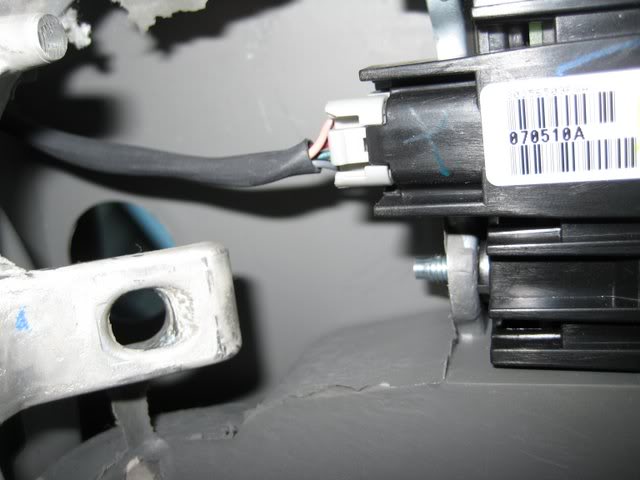
I would detach the plugs from the controls now. You can now take an 8mm wrench, i think, and work on taking out these two bolts on either control.
They are fairly long bolts, so it will probably take while, I used a very tiny ratchet.
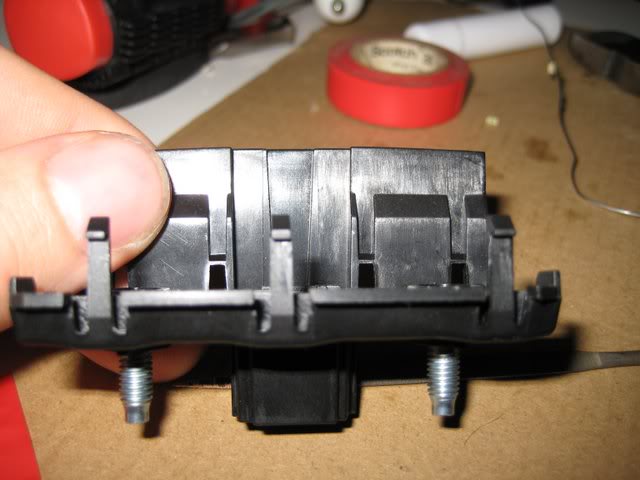
As far taking the controls apart I would press down on all 6 or 8 tabs, don't remember which, and slowly pry as shown. I broke my tabs the first time, but you can always super glue it and no one will ever no the difference, just make sure you test them first.
I think that should answer all of your questions having to do with that. Good luck!! And hope you enjoy it.
. Here are the pictures I have right now from the original project on my truck. It is actually six bolts, two to take out the airbag, two for each controls. You'll two of these holes with cover on them of course on either side of the steering wheel column. Take off the two covers, one on each side. With whatever size socket I said, I think 8mm, and an extension take out the bolts.
Then you'll be looking at this once you slide out the airbag.
I would detach the plugs from the controls now. You can now take an 8mm wrench, i think, and work on taking out these two bolts on either control.
They are fairly long bolts, so it will probably take while, I used a very tiny ratchet.
As far taking the controls apart I would press down on all 6 or 8 tabs, don't remember which, and slowly pry as shown. I broke my tabs the first time, but you can always super glue it and no one will ever no the difference, just make sure you test them first.
I think that should answer all of your questions having to do with that. Good luck!!
And hope you enjoy it.
That was simple. Took me about an hour from start to finish. Here are some pictures that might help you in your tutorial:
Board with green led's

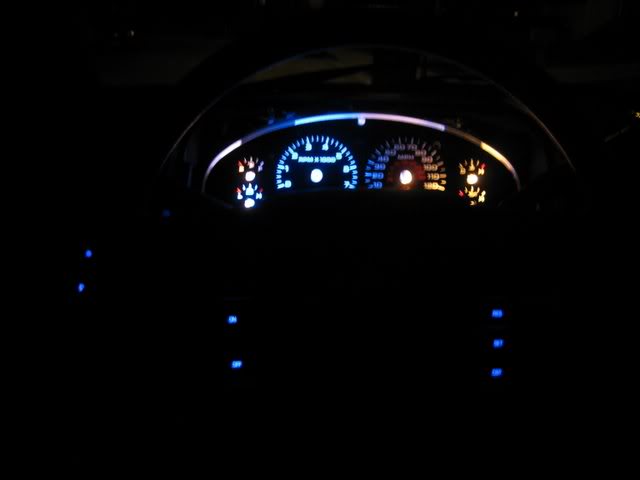
Blue LED's

Workstation (kitchen table, wife hates it):

On/off switch with green LED's off:

On/Off switch with new blue LED's on:

The blue LED's I have are very bright, something like 12,000mcd so on my ac controls, headlight and steering wheel I used a little permanent marker to help fade the brightness:

I also found out that there is a little silver ring, kind like a nut, that helps hold the 2 controllers together. Pop that off and you can get them apart easier. You can see what I'm referring to in this picture (center around black peg):

The RES/SET/CST button with blue LED's soldered on:

Steering wheel being put back together:

Again, big thanks to lsracer putting everything in one big thread.
Board with green led's

Blue LED's

Workstation (kitchen table, wife hates it):

On/off switch with green LED's off:

On/Off switch with new blue LED's on:

The blue LED's I have are very bright, something like 12,000mcd so on my ac controls, headlight and steering wheel I used a little permanent marker to help fade the brightness:

I also found out that there is a little silver ring, kind like a nut, that helps hold the 2 controllers together. Pop that off and you can get them apart easier. You can see what I'm referring to in this picture (center around black peg):

The RES/SET/CST button with blue LED's soldered on:

Steering wheel being put back together:

Again, big thanks to lsracer putting everything in one big thread.
Thread Starter
|
Senior Member
Joined: Dec 2007
Posts: 186
Likes: 1
From: N. California
I forgot about those stupid metal clips. Those things suck. But glad to see you were able to finish it fairly quickly. And I have to say at least your work station doesn't look like mine cause if it did your wife would really hate it lol.


http://autolumination.com/74.htm
Take cluster out, take back cover off and remove light.

