
How to- Interior LEDs


AHAH! i found out why i was having a hard time. i was looking at 3mm bulbs, and what i need for the passenger side window switch 1206! stupid me. The 3mm DOME bulbs are made for the Driver side window switches, and door switches! okay, now to find a dealer of 1206 bulbs. Thanks guys for all your help!

Thread Starter
|
Senior Member
Joined: Dec 2007
Posts: 186
Likes: 1
From: N. California
AHAH! i found out why i was having a hard time. i was looking at 3mm bulbs, and what i need for the passenger side window switch 1206! stupid me. The 3mm DOME bulbs are made for the Driver side window switches, and door switches! okay, now to find a dealer of 1206 bulbs. Thanks guys for all your help!

alright, i tried this little upgrade, and it is not so little. I did the anti-theft light with a 5mm blue. and one window switch, none of them work, i tried re soldering. Nothing. I have spare parts on my way for this project just for moments like these. Does anyone want to take this job for me? serious inquiries only. I will pay for a job like this and supply all materials including shipping and turn around shipping. PM me.
Thread Starter
|
Senior Member
Joined: Dec 2007
Posts: 186
Likes: 1
From: N. California
Well I decide that I would show a couple of teaser pictures of how the cluster is looking with the new system in there, or half the new system...
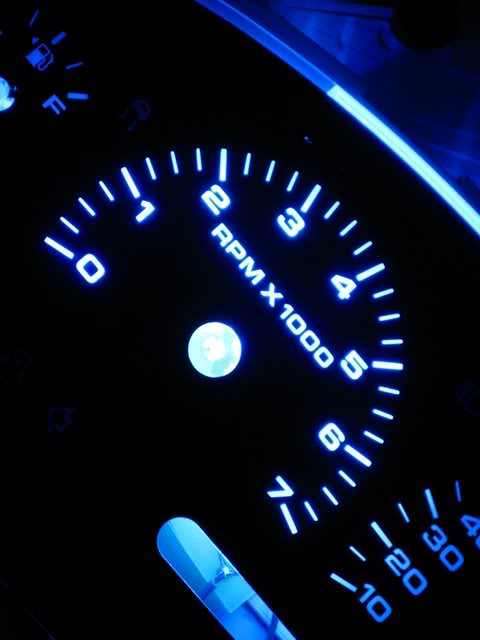
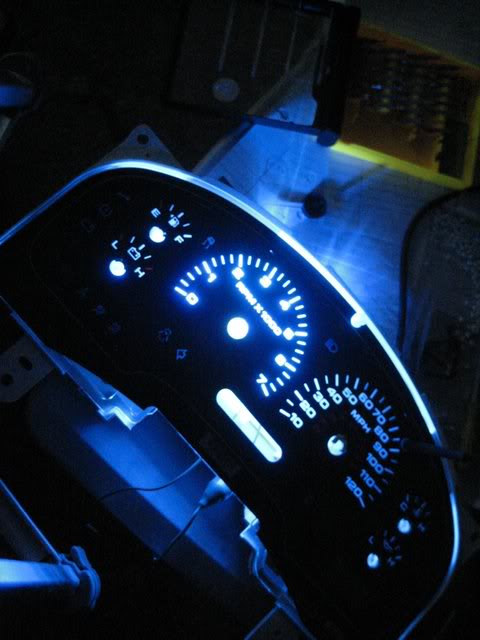
I know it look very bright but it is a lot dimmer than the other way I had done it and there are now absolutely no hot spots. Hope you guys like it.
I know it look very bright but it is a lot dimmer than the other way I had done it and there are now absolutely no hot spots. Hope you guys like it.


Thread Starter
|
Senior Member
Joined: Dec 2007
Posts: 186
Likes: 1
From: N. California
I actually came up with a couple of different ideas as of now, one is to use epoxy and attach some plcc-2 leds right below the needle, this worked out really well, and the other, which I'm going to use for the boards I produce, is to leave the LED leads just long enough to make the LED touch the button of the diffuser. I don't know either make sense without pictures but that's my best explanation while I'm finishing a web server for now. I'll try to get some picture sometime, when I have time again. LOL. As for your failed resistor, I would use some of the resistors from digikey, I forget what brand but they are amazing, just search for the 1/4 watt 1% tolerance through hole mount ones, they may be expensive but I bet you they won't fail.

Technical Article Contributor
Joined: Mar 2006
Posts: 1,460
Likes: 1
From: Near Houston
Those ideas sound good. I actually had a really good idea but just failed to follow thru as i wanted my cluster done. But ill share it with you since you seem to be taking the time to do it. I thought about making a diffuser, about as simple as the stock one, and having it taper down to a single bright white LED with the top (needle) side edged to put out the light toward the needles light entry point. Probably doesnt make sense but i can picture it in my head. Like that no matter what needles you used, or what color they were they would shine nice and bright without the hassle of doing the LEDs the way i did them.
And yea i have only had two resistors ever fail on me, and i have used at least a thousand of them. a .2% percent failure rate isnt bad IMO, i just hate that the one that did was on my needle. It also may be a failed connection. Those wires i used for the LED were very very fine, so im almost positive its going to be the fragile wire.
And yea i have only had two resistors ever fail on me, and i have used at least a thousand of them. a .2% percent failure rate isnt bad IMO, i just hate that the one that did was on my needle. It also may be a failed connection. Those wires i used for the LED were very very fine, so im almost positive its going to be the fragile wire.
Technical Article Contributor
Joined: Mar 2006
Posts: 1,460
Likes: 1
From: Near Houston
well that would be the simple solution, except that the factory diffuser makes the light transfer over to the blue or red or whatever color your numbers/markers are. It creates an ugly blending of colors. If you remove the factory diffuser then you have nothing really to stick the gauge overlay to and i didnt want to remove the factory diffuser incase i ever have to go back to stock.. Another problem is that the single bright LED aslo casts a glow around the base of the needle once everything is put back together.
So you see your nice glow then your glowing needle and a white halo around each needle where it should be black.
Trust me i tried all the simple stuff lol. Thats why my solution was to just put the LED in the entry itself.
So you see your nice glow then your glowing needle and a white halo around each needle where it should be black.
Trust me i tried all the simple stuff lol. Thats why my solution was to just put the LED in the entry itself.