


Project BULLETPROOF...dream or reality?


Thread Starter
|
Senior Member
Joined: Jul 1999
Posts: 2,233
Likes: 0
From: KC, MO
Oh yeah, I have about 8 more pics I can post later on...nothing special though, just wanted a visual to refer to in case I get lost in reassy, which I don't see happening. There's really nothing to it when you stop whining about it on the forums and start wrenching.  I am still worried about the timing process though. Both removal and reassy.
Tonight I will pull the plugs, remove the power steering pump, and oil pan bolts, drop the TC cover off, and try to find "safe mode". Then get the nuts up to start removing head bolts.
I planned on removing the water pump after getting the heads off, just to replace the seal. I didn't see where it would be in the way, but if you say so, I'm sure it is. I'll pull that too.
I am still worried about the timing process though. Both removal and reassy.Tonight I will pull the plugs, remove the power steering pump, and oil pan bolts, drop the TC cover off, and try to find "safe mode". Then get the nuts up to start removing head bolts.
I planned on removing the water pump after getting the heads off, just to replace the seal. I didn't see where it would be in the way, but if you say so, I'm sure it is. I'll pull that too.
Thread Starter
|
Senior Member
Joined: Jul 1999
Posts: 2,233
Likes: 0
From: KC, MO
Ah-hem...speaking of cams, check out this thread:
Well you asked for it. Hitech Stage 2 results automatic (303rwhp!!!!)
Well you asked for it. Hitech Stage 2 results automatic (303rwhp!!!!)
Thread Starter
|
Senior Member
Joined: Jul 1999
Posts: 2,233
Likes: 0
From: KC, MO
Originally Posted by ONELOWF
Last edited by Jackal; Mar 27, 2008 at 08:24 PM.
Thread Starter
|
Senior Member
Joined: Jul 1999
Posts: 2,233
Likes: 0
From: KC, MO
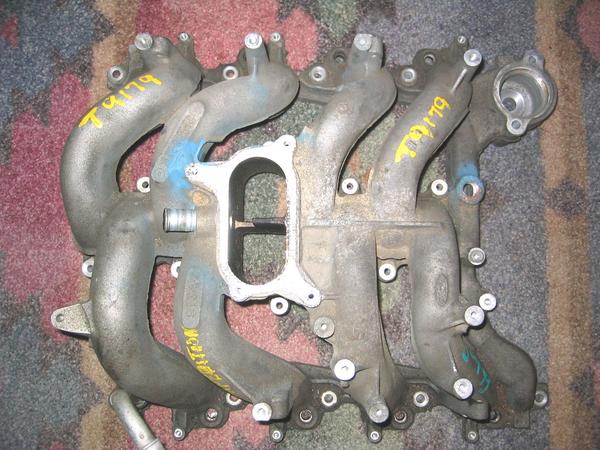
Bed full o parts...the garage isn't tall enough to get the full shot, but there are a lot more than that. Notice how nasty the intake manifold is.

Just before I removed the water pump and marked the chains & crank ring.

FYI, My crank gears are part of the crank, so those don't come off at all. (Least I don't believe they do.) #1TDC is 4 teeth to the right of the "missing" link, and "safe mode" is 9 links to the right. My cam gears don't have the 3/8 square hole in them, so I'm hoping I have enough slack in the chains to just drop them in place before letting the tensioners go. At first I couldn't get the crank to move using the harmonic balancer no matter how hard I tried, then I realized how much smaller the underdrive pulley is compared to the stocker. I'm glad I hung on to it all this time.
At the "safe mode" position, it looks like nearly all the pass. side valves are almost mostly closed...same on the driver's side except for 1, which is only about 1/2 way open. I think that's probably close enough to attempt the removal / installation without removing the followers.
I'm not sure how to proceed from here. The driver's side tensioner is just about fully "closed", and the pass. side is almost all the way "open". Do I just unbolt the tensioners as is or do I need to compress them with a c-clamp and hold with a paper clip? I assume you just squeeze chain, guide, and all in the process?
I don't see the point in setting the crank back to the #1TDC position to reinstall the timing components except maybe to check the markings afterward. "Safe mode" is so close, the markings still match the link, only a lot easier to see on the crank end.
I hope to have the heads off to the shop, and the pipes / cats off to the welder this Sat. Going to have time-certs / heli-coils installed in the plug holes if any of them look "bad". Two of them felt kind of rough coming out from grit in the threads. All the plugs looked good & consistant...maybe a little white. These Densos really look like they could go 80-100k.
Just before I removed the water pump and marked the chains & crank ring.
FYI, My crank gears are part of the crank, so those don't come off at all. (Least I don't believe they do.) #1TDC is 4 teeth to the right of the "missing" link, and "safe mode" is 9 links to the right. My cam gears don't have the 3/8 square hole in them, so I'm hoping I have enough slack in the chains to just drop them in place before letting the tensioners go. At first I couldn't get the crank to move using the harmonic balancer no matter how hard I tried, then I realized how much smaller the underdrive pulley is compared to the stocker. I'm glad I hung on to it all this time.
At the "safe mode" position, it looks like nearly all the pass. side valves are almost mostly closed...same on the driver's side except for 1, which is only about 1/2 way open. I think that's probably close enough to attempt the removal / installation without removing the followers.
I'm not sure how to proceed from here. The driver's side tensioner is just about fully "closed", and the pass. side is almost all the way "open". Do I just unbolt the tensioners as is or do I need to compress them with a c-clamp and hold with a paper clip? I assume you just squeeze chain, guide, and all in the process?
I don't see the point in setting the crank back to the #1TDC position to reinstall the timing components except maybe to check the markings afterward. "Safe mode" is so close, the markings still match the link, only a lot easier to see on the crank end.
I hope to have the heads off to the shop, and the pipes / cats off to the welder this Sat. Going to have time-certs / heli-coils installed in the plug holes if any of them look "bad". Two of them felt kind of rough coming out from grit in the threads. All the plugs looked good & consistant...maybe a little white. These Densos really look like they could go 80-100k.
Last edited by Jackal; Mar 28, 2008 at 12:02 AM.


Senior Member
Joined: Jun 2005
Posts: 2,805
Likes: 2
From: NEVADA
If you have the new style crank trigger, your two gears will be made as one piece. I'm not sure what year this changed, but it looks from your photo that you might have the pressed steel new style?? These should come off fairly easily.

Last edited by ONELOWF; Mar 28, 2008 at 09:10 AM.

Technical Article Contributor

Joined: Dec 1997
Posts: 9,417
Likes: 11
From: Windsor,Ontario,Canada
Originally Posted by Jackal
At the "safe mode" position, it looks like nearly all the pass. side valves are almost mostly closed...same on the driver's side except for 1, which is only about 1/2 way open. I think that's probably close enough to attempt the removal / installation without removing the followers. At safe mode the Cam gear keyways are at 90° to the valve cover surface and both dots are lined up to the chain marker links.
I'm not sure how to proceed from here. The driver's side tensioner is just about fully "closed", and the pass. side is almost all the way "open". Do I just unbolt the tensioners as is or do I need to compress them with a c-clamp and hold with a paper clip? I assume you just squeeze chain, guide, and all in the process? If you are in safe mode just unbolt the two bolts on the tensioner and remove it.
I don't see the point in setting the crank back to the #1TDC position to reinstall the timing components except maybe to check the markings afterward. "Safe mode" is so close, the markings still match the link, only a lot easier to see on the crank end. The reason that you set the engine to TDC on #1 is if you just installed the crank it may be at some other position and you need to reference TDC on #1 to be in safe mode. As a precaution when you go to reassemble the engine check the setting to be sure that you are at TDC on #1.
Jean Marc Chartier
Thread Starter
|
Senior Member
Joined: Jul 1999
Posts: 2,233
Likes: 0
From: KC, MO
Thanks guys, I do have the thin, stamped crank pos. ring, and I'm sure the 1 piece gears, but it didn't look like they came off. I'm sure they do, and I'll find out in about 6 hours.
Thanks for clearing that up JMC...I wasn't sure what the process was. I do know how to reinstall the new stuff though. Thanks for reminding me, I need to gank some paperclips from the secretaries.
Of course, I haven't put it back together yet, but now that I've done this there isn't anything to it, and now I know how to R&R anything else that goes bad cept the bottom end. Really helps ya appreciate things a little more too.
Does anyone know what the "intake manifold restriction" is that Troyer use to talk about removing for free HP? He said it was like a spot the factory used to hook up to move them around or something. I've searched and searched and can't find crap. I assume the PI intakes don't have this restriction?
Thanks for clearing that up JMC...I wasn't sure what the process was. I do know how to reinstall the new stuff though. Thanks for reminding me, I need to gank some paperclips from the secretaries.
Of course, I haven't put it back together yet, but now that I've done this there isn't anything to it, and now I know how to R&R anything else that goes bad cept the bottom end. Really helps ya appreciate things a little more too.
Does anyone know what the "intake manifold restriction" is that Troyer use to talk about removing for free HP? He said it was like a spot the factory used to hook up to move them around or something. I've searched and searched and can't find crap. I assume the PI intakes don't have this restriction?
Last edited by Jackal; Mar 28, 2008 at 10:18 AM.

Thread Starter
|
Senior Member
Joined: Jul 1999
Posts: 2,233
Likes: 0
From: KC, MO
Really? What did you do about the lower intake and the gasket? Isn't it split up for a reason? At least to balance the left / right sides?
Any idea what kind of gains from removing it on a 4.6? In searching, I see you also unshrouded the injectors...if that's a worthwhile mod, I might attempt some mild grinding there. MIGHT. I don't want to spend another whole day on a gasket match.
Any idea what kind of gains from removing it on a 4.6? In searching, I see you also unshrouded the injectors...if that's a worthwhile mod, I might attempt some mild grinding there. MIGHT. I don't want to spend another whole day on a gasket match.
Last edited by Jackal; Mar 28, 2008 at 03:59 PM.

Senior Member
Joined: Jan 2005
Posts: 5,389
Likes: 0
From: Fort Worth,Tx
Originally Posted by Jackal
Really? What did you do about the lower intake and the gasket? Isn't it split up for a reason? At least to balance the left / right sides?
Any idea what kind of gains from removing it on a 4.6? In searching, I see you also unshrouded the injectors...if that's a worthwhile mod, I might attempt some mild grinding there. MIGHT. I don't want to spend another whole day on a gasket match.
Any idea what kind of gains from removing it on a 4.6? In searching, I see you also unshrouded the injectors...if that's a worthwhile mod, I might attempt some mild grinding there. MIGHT. I don't want to spend another whole day on a gasket match.
yes making the intakes to a single plane made a fa nominal difference in top end power gains
Senior Member
Joined: Jan 2005
Posts: 5,389
Likes: 0
From: Fort Worth,Tx
https://www.f150online.com/forums/sh...15#post3135115
u might look into getton one of those twin screw blowers for it. lol if u got enugh motor to spin it. it pulls 196hp at full rpm.
u might look into getton one of those twin screw blowers for it. lol if u got enugh motor to spin it. it pulls 196hp at full rpm.
Thread Starter
|
Senior Member
Joined: Jul 1999
Posts: 2,233
Likes: 0
From: KC, MO
Pics coming soon...
Got the heads off...man what a mess. The deck isn't nearly as pretty as I thought it would be after spending an hour on each side cleaning it up. Any tips? I sprayed gasket remover on a rag and let it sit 10 min., and repeated 3 times each side. Then I used a crappy plastic scraper and wiped it down, before using brake parts cleaner on a rag, followed by a light coat of Mobil-1. The head bolt holes are full of BLACK oil and antifreeze...how do you get all that out?
I had the old style 3 layer gasket, so hopefully these 4 layer ones do the trick, along with the resurfacing. Might have the plug holes heli-coiled while they're at it.
I can't get the pass. side header to drop down from the top, so that rules out installing it on the head first. Maybe on the driver's side. I did manage to get the stubborn exhaust stud out though, so I plan on dropping the head back in and test fitting the header as soon as the ol lady gets back.
Got the heads off...man what a mess. The deck isn't nearly as pretty as I thought it would be after spending an hour on each side cleaning it up. Any tips? I sprayed gasket remover on a rag and let it sit 10 min., and repeated 3 times each side. Then I used a crappy plastic scraper and wiped it down, before using brake parts cleaner on a rag, followed by a light coat of Mobil-1. The head bolt holes are full of BLACK oil and antifreeze...how do you get all that out?
I had the old style 3 layer gasket, so hopefully these 4 layer ones do the trick, along with the resurfacing. Might have the plug holes heli-coiled while they're at it.
I can't get the pass. side header to drop down from the top, so that rules out installing it on the head first. Maybe on the driver's side. I did manage to get the stubborn exhaust stud out though, so I plan on dropping the head back in and test fitting the header as soon as the ol lady gets back.

Technical Article Contributor
Joined: Oct 2005
Posts: 25,641
Likes: 19
From: MI
That's a good deal if you drop the head in w/drivers side header attatched. The drivers side header is much harder to bolt to the head .
The passenger side is just harder to put in place. The bolts where a hell of a lot easier to get too.
The passenger side is just harder to put in place. The bolts where a hell of a lot easier to get too.
Last edited by jbrew; Mar 29, 2008 at 07:16 PM.

Senior Member
Joined: Jan 1999
Posts: 7,030
Likes: 3
From: WINDSOR, ONTARIO, CANADA

The head bolt holes are full of BLACK oil and antifreeze...how do you get all that out?
