
Quad retrofit..kinda

Thread Starter
|
Senior Member
Joined: Jul 2010
Posts: 2,519
Likes: 2
From: U.P. of Michigan
Quad retrofit..kinda
Well i decided to bite the bullet and ordered myself the Mini H1 projector kit from TRS. Now the projectors haven't made it to my door yet but I decided to tear apart my headlights today. Just for the record my heads are the Depos with the high beam projector.
Step one: Take off any plastic, screws, and bulb holders off the head light. This is more or less just to get them out of your way when working with the headlights. ( sorry no pics of that).
Step Two: I set my oven to 250 F degrees and put each headlight in for 15 minutes. This made the butyll glue holding the clear lens very soft and made the lens very easy to get off. Only needed a flat head screw driver for one corner to start prying apart the headlights. I tried to take the High beam projector out of the headlight so i could paint the headlight easier and also so i could fix the passenger high beam from being a few inches above the driver side. The projectors did not budge and i didn't dare let my headlights be in the oven any longer then they were. So for warning to anyone with these headlights don't try to take apart the high beam projector.
Step Three (skip if not painting): I taped off the part of the headlights i didn't want painted. I am painting the reflector and the shroud around the high beam projector white.
Here it is taped off [IMG] [/IMG]\
After sanding priming more sanding and final painting you get this [IMG] [/IMG] just need a little touch up once fully dry.
Decided to get artsy today and did this [IMG] [/IMG]
Finally got my projectors in a day late . Did some work on the tonight and here is what I got
Step four: Fitting your projector into the wierd **** housing. it actually isn't that bad you just got trim a little at a time till it fits perfect. The bad thing is everything need trimmed; projector, headlight housing, and shroud.
Your gunna need to trim the inside edge of your projector. Its just the shield on the outside so it doesn't effect performance at all. It should look like this: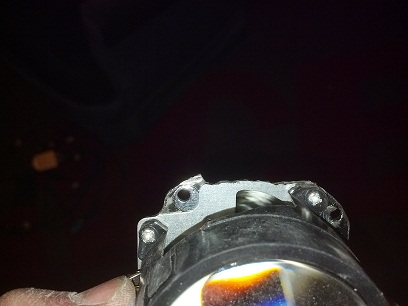
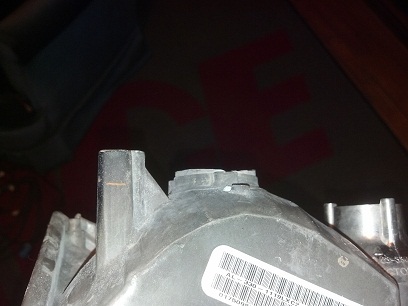
now that you can fit the projector in there better move it against the tunnel of the high beam projector so you can see where to grind down next on the housing. You will need to cut/sand on the housing in three different spots. the first is the tunnel to help make room so your projector is flush. (don't sand to much or you will break through the reflector like i did on my first one. simple fix just need silicone.) the second is in the middle of the reflector where your 9007 bulb is. you need to make it deeper so the threads of the projector will come out enough to get the lock nut and bulb holder on. Last is the back of the housing where the plastic locking nut was that held the 9007 bulb into place. you have to cut it down about a half inch. Just enough so the H1 bulb holder fits on top of the threads. Those cuts look like this: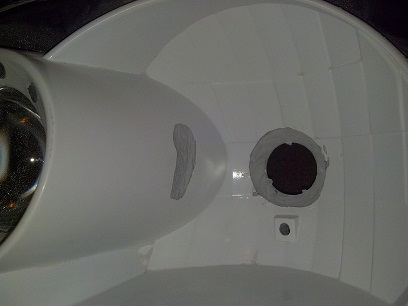
Now last you need to cut your shroud so it fits snug next to the high beam tunnel. This is pretty simple.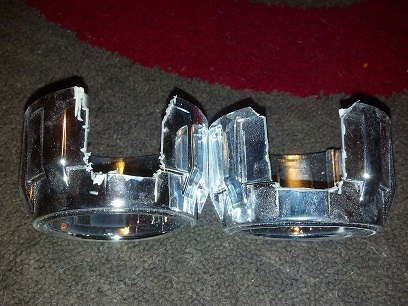
Since i am painting my shrouds i am soaking them in oven cleaner to dechrome them and then i plan on sanding them and painting them white.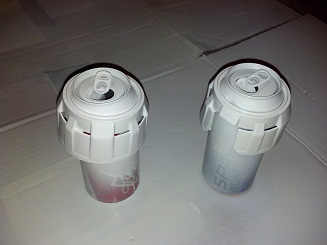
Step Five: Putting it all together. Order of operations to put them together go as follows: 1.(skip if doing l.e.d. different) I inserted the LED inside the shroud. This took a little shaving of the inside of the shroud to fit to wires and so the led would sit flat but not much. I also used a little bit of RTV silicone to hold them in place. 2. Screw the shroud onto the projector using the supplied 4 long screws. 3. Put small silicone/rubber washer onto thread shaft and then insert the whole projector into 9007 hole. 4. Insert the H7 adapter piece to help keep your projectors in rotation (try to keep the top flat piece 90 degrees with the head light, or straight up and down. 5. Thread locking nut onto thread being careful not to cross thread it. 6. Screw the H1 bulb holder onto shaft. 7. insert bulb into projector and use spring clip to hold in place. (sorry no pics)
Step six: Now that you have everything together you need to put your headlight back into your truck and align for rotation so the left side of the step down is flat. This took me a few times and i need to take my headlight apart again to cut the shroud once more but finally got it as close as i think it needs to be. Once your rotation is perfect you can tighten the nut more firmly onto projector.
Step seven: Here is where i ran into problems. The projector sticks out about a 1/8 or 1/4 inch to much so you need to try to mold your shield around it. What i tried to do and failed at was get the lens hot at 265 for 10 minutes then use c clamps to hold it onto headlight. This worked alright but not perfect so i ended up using RTV sealant where there were gaps.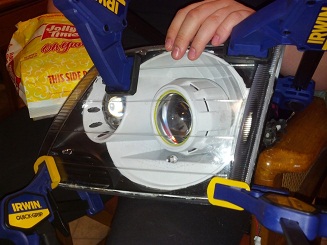 <- use that pic for molding and putting headlight lens back on..
 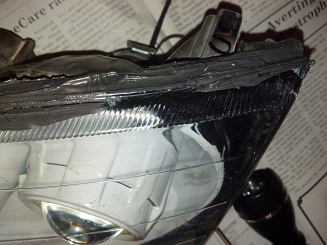 <- RTV sealant
Step eight: Put your headlights back into the oven with your new butyl glue and lens on for 265 for 7 minutes. Then your going to need to have them held with c clamps again for atleast a half hour some where cold to make sure the glue sets.
Step nine: once thats all done just finish your wiring and insert your headlights back into your truck and make sure you align them up and down and left and right and done...
My only two comments are to get the mini D2s projectors bc they are a half inch shorter so they will fit into your headlight without any molding of the lens and also i don't believe the high beams are very good on the Mini H1 but i will see once i align mine down some more. Also haven't gotten the splitter for the secondary high beams yet TRS messed up and they are sending me replacements once. Good luck with this Mod and if you have any questions don't hesitate to ask.
Step one: Take off any plastic, screws, and bulb holders off the head light. This is more or less just to get them out of your way when working with the headlights. ( sorry no pics of that).
Step Two: I set my oven to 250 F degrees and put each headlight in for 15 minutes. This made the butyll glue holding the clear lens very soft and made the lens very easy to get off. Only needed a flat head screw driver for one corner to start prying apart the headlights. I tried to take the High beam projector out of the headlight so i could paint the headlight easier and also so i could fix the passenger high beam from being a few inches above the driver side. The projectors did not budge and i didn't dare let my headlights be in the oven any longer then they were. So for warning to anyone with these headlights don't try to take apart the high beam projector.
Step Three (skip if not painting): I taped off the part of the headlights i didn't want painted. I am painting the reflector and the shroud around the high beam projector white.
Here it is taped off [IMG]
[/IMG]\After sanding priming more sanding and final painting you get this [IMG]
[/IMG] just need a little touch up once fully dry.Decided to get artsy today and did this [IMG]
[/IMG]Finally got my projectors in a day late . Did some work on the tonight and here is what I got
Step four: Fitting your projector into the wierd **** housing. it actually isn't that bad you just got trim a little at a time till it fits perfect. The bad thing is everything need trimmed; projector, headlight housing, and shroud.
Your gunna need to trim the inside edge of your projector. Its just the shield on the outside so it doesn't effect performance at all. It should look like this:
now that you can fit the projector in there better move it against the tunnel of the high beam projector so you can see where to grind down next on the housing. You will need to cut/sand on the housing in three different spots. the first is the tunnel to help make room so your projector is flush. (don't sand to much or you will break through the reflector like i did on my first one. simple fix just need silicone.) the second is in the middle of the reflector where your 9007 bulb is. you need to make it deeper so the threads of the projector will come out enough to get the lock nut and bulb holder on. Last is the back of the housing where the plastic locking nut was that held the 9007 bulb into place. you have to cut it down about a half inch. Just enough so the H1 bulb holder fits on top of the threads. Those cuts look like this:
Now last you need to cut your shroud so it fits snug next to the high beam tunnel. This is pretty simple.
Since i am painting my shrouds i am soaking them in oven cleaner to dechrome them and then i plan on sanding them and painting them white.
Step Five: Putting it all together. Order of operations to put them together go as follows: 1.(skip if doing l.e.d. different) I inserted the LED inside the shroud. This took a little shaving of the inside of the shroud to fit to wires and so the led would sit flat but not much. I also used a little bit of RTV silicone to hold them in place. 2. Screw the shroud onto the projector using the supplied 4 long screws. 3. Put small silicone/rubber washer onto thread shaft and then insert the whole projector into 9007 hole. 4. Insert the H7 adapter piece to help keep your projectors in rotation (try to keep the top flat piece 90 degrees with the head light, or straight up and down. 5. Thread locking nut onto thread being careful not to cross thread it. 6. Screw the H1 bulb holder onto shaft. 7. insert bulb into projector and use spring clip to hold in place. (sorry no pics)
Step six: Now that you have everything together you need to put your headlight back into your truck and align for rotation so the left side of the step down is flat. This took me a few times and i need to take my headlight apart again to cut the shroud once more but finally got it as close as i think it needs to be. Once your rotation is perfect you can tighten the nut more firmly onto projector.
Step seven: Here is where i ran into problems. The projector sticks out about a 1/8 or 1/4 inch to much so you need to try to mold your shield around it. What i tried to do and failed at was get the lens hot at 265 for 10 minutes then use c clamps to hold it onto headlight. This worked alright but not perfect so i ended up using RTV sealant where there were gaps.
<- use that pic for molding and putting headlight lens back on.. <- RTV sealant Step eight: Put your headlights back into the oven with your new butyl glue and lens on for 265 for 7 minutes. Then your going to need to have them held with c clamps again for atleast a half hour some where cold to make sure the glue sets.
Step nine: once thats all done just finish your wiring and insert your headlights back into your truck and make sure you align them up and down and left and right and done...
My only two comments are to get the mini D2s projectors bc they are a half inch shorter so they will fit into your headlight without any molding of the lens and also i don't believe the high beams are very good on the Mini H1 but i will see once i align mine down some more. Also haven't gotten the splitter for the secondary high beams yet TRS messed up and they are sending me replacements once. Good luck with this Mod and if you have any questions don't hesitate to ask.
Last edited by thelariat02; Mar 4, 2013 at 06:03 PM. Reason: Done
That's pretty cool. I'm sure there is a way to get that projector out. I'd put a real xenon projector in there without a cutoff shield and use that as a high beam only projector. OR keep it as-is and just get some HIRs

Identify it and maybe we can check. I know TRS has a list of swappable projectors for OEM cars with halogen projectors. More pics are needed, however. I'm curious of how you are getting on with the shroud. This is a nice build
Thread Starter
|
Senior Member
Joined: Jul 2010
Posts: 2,519
Likes: 2
From: U.P. of Michigan
If i could get it out i would get ya some more pics but it won't budge even after being in the oven. But I'm really thinking if just keeping it halogen not in my budget right now.. Isn't it bad to have a hid going on and off?
So far nothing came in the mail but i did try some artsy stuff on the high beam shroud. I'll add to original post in a bit.
So far nothing came in the mail but i did try some artsy stuff on the high beam shroud. I'll add to original post in a bit.

Trending Topics
Thread Starter
|
Senior Member
Joined: Jul 2010
Posts: 2,519
Likes: 2
From: U.P. of Michigan
Man that place is a wealth of information.

Thread Starter
|
Senior Member
Joined: Jul 2010
Posts: 2,519
Likes: 2
From: U.P. of Michigan
Bump.. ALL DONE!!!! Here are some finished pics
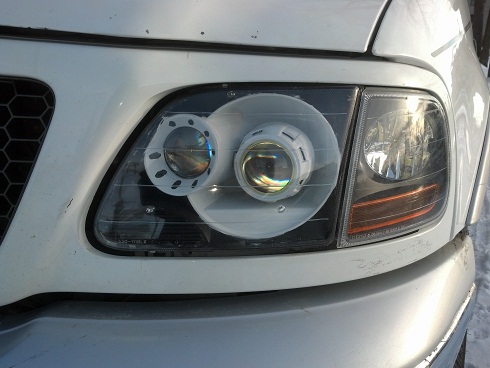
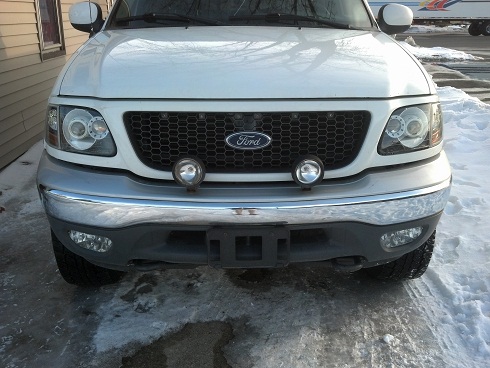
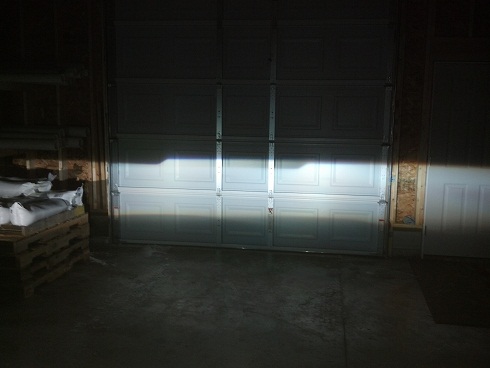
I believe the driverside bulb needs to be seated better what do you think?
Last question....Raptor can I be on your list now???
I believe the driverside bulb needs to be seated better what do you think?
Last question....Raptor can I be on your list now???
Thread Starter
|
Senior Member
Joined: Jul 2010
Posts: 2,519
Likes: 2
From: U.P. of Michigan
