Blackout Fogs Project

Old Apr 29, 2009 | 05:52 PM
  #1  
Cliff05FX4's Avatar
Thread Starter
|
Member
Joined: Jul 2005
Posts: 89
Likes: 0
From: Houston, Texas
Blackout Fogs Project

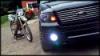
Well i figured i would paint my fogs black now that i have the Blackout Heads. Plus the had water in them so i needed to reseal them anyway. Of course the Chrome Pealed off on the outside rib so i fixed it by painting that rib black on both. Hopefully it will look good when i put them back on the truck. Here are some pics so far.


Reply
Old Apr 29, 2009 | 05:58 PM
  #2  
ab46501's Avatar
Technical Article Contributor
Joined: Mar 2009
Posts: 1,781
Likes: 0
From: Olive Branch, MS
Looks good! Be sure to post pics when you get them back on the truck.
 
Reply
Old Apr 29, 2009 | 06:16 PM
  #3  
BLACKOUT FX4's Avatar
Senior Member
Joined: Feb 2008
Posts: 2,048
Likes: 0
From: SW FLORIDA
it will go nice with the black headlights.. you may regret not painting all of the chrome, i painted the entire inside of the fogs and the light projects just fine.
 
Reply
Old Apr 29, 2009 | 07:10 PM
  #4  
Cliff05FX4's Avatar
Thread Starter
|
Member
Joined: Jul 2005
Posts: 89
Likes: 0
From: Houston, Texas
Originally Posted by BLACKOUT FX4
it will go nice with the black headlights.. you may regret not painting all of the chrome, i painted the entire inside of the fogs and the light projects just fine.
Yeah i am just wondering the same thing.....Oh well will see how it looks and go from there. I can always pull them off and paint the whole thing if need be.

The silicon is curing now will install them tomorrow, and post up some pics.
 
Reply
Old Apr 29, 2009 | 08:02 PM
  #5  
john1102's Avatar
Senior Member
Joined: Feb 2007
Posts: 873
Likes: 0
From: McKinney, TX
Looks good
 
Reply
Old Apr 29, 2009 | 08:25 PM
  #6  
IDNC76's Avatar
Senior Member
Truck of the Month
Joined: Jan 2007
Posts: 4,039
Likes: 0
From: NJ
those are gunna look great , cant wait to see pics
 
Reply
Old Apr 29, 2009 | 09:39 PM
  #7  
JWBFX4's Avatar
Senior Member
Joined: Jan 2009
Posts: 611
Likes: 0
From: Alabama
looking good so far,..can't wait to see them when you get them back on.
 
Reply
Old Apr 29, 2009 | 10:30 PM
  #8  
DarrenWS6's Avatar
Technical Article Contributor
Truck of the Month
Joined: Mar 2008
Posts: 16,436
Likes: 5
From: Mansfield, P.A.
I was thinking of painting the first ribs in mine too. After seeing that I wish I had done it. Very nice.
 
Reply
Old Apr 30, 2009 | 10:14 AM
  #9  
Cliff05FX4's Avatar
Thread Starter
|
Member
Joined: Jul 2005
Posts: 89
Likes: 0
From: Houston, Texas
Well i just installed them, and I must say i am very happy with them.
Will see how this work for a while.

Before:


After:

 
Reply
Old Apr 30, 2009 | 10:16 AM
  #10  
Patman's Avatar
Global Moderator &
Senior Member
20 Year Member
Joined: Aug 2005
Posts: 21,337
Likes: 159
From: DFW
they match perfectly, good work!
 
Reply
Old Apr 30, 2009 | 10:26 AM
  #11  
05_sprcrw's Avatar
Technical Article Contributor
Joined: Mar 2008
Posts: 2,268
Likes: 2
From: Rural NE
Looks good
 
Reply
Old Apr 30, 2009 | 10:48 AM
  #12  
johnnyd2723's Avatar
Senior Member
15 Year Member
Joined: Mar 2007
Posts: 2,869
Likes: 0
From: N.E. Ohio
Looks real good man. What type of paint did you use and what did you do prep wise. Where they easy to take apart?
 
Reply
Old Apr 30, 2009 | 10:57 AM
  #13  
DarrenWS6's Avatar
Technical Article Contributor
Truck of the Month
Joined: Mar 2008
Posts: 16,436
Likes: 5
From: Mansfield, P.A.
Looks absolutely great! I wish I had painted them first ribs now...
 
Reply
Old Apr 30, 2009 | 11:11 AM
  #14  
ab46501's Avatar
Technical Article Contributor
Joined: Mar 2009
Posts: 1,781
Likes: 0
From: Olive Branch, MS
Very cool! I think painting the first rib was really a nice touch.
 
Reply
Old Apr 30, 2009 | 11:48 AM
  #15  
Cliff05FX4's Avatar
Thread Starter
|
Member
Joined: Jul 2005
Posts: 89
Likes: 0
From: Houston, Texas
Originally Posted by johnnyd2723
Looks real good man. What type of paint did you use and what did you do prep wise. Where they easy to take apart?
I used Krylon Fusion for Plastics Black Satin.

Prep wise i ran 1000 grit sand paper over the outer ring to scuff it a little, probably could have skipped that though. Wiped them clean and painted.

Mine were easy, couple of screwdrivers working along the edge, started at corner and work around. Cleaned out old gasket material and the sealing area as best i could with alcohol. For reassembly, this is probably whats going to get me in the end lol. I used some cheapo black RTV silicon from OReily's, filled the grooves up with it and put the lenses back on. Overnight cure with some weight on top to make sure they were tight.

The only area to get messed up was the first rib. I read through some posts here and used some 3M painters tape, adhering it to cloth several times to get the adhesive wore down. Only chrome flaking occurred on the outer rib of both lights, so instead of wasting more money and time trying to fix it i just decided to paint it.
 
Reply

Thread Tools
Search this Thread

All times are GMT -4. The time now is 06:16 PM.