
OEM Trans Pan w/ Drain Plug


Thread Starter
|
Technical Article Contributor
Joined: Nov 2005
Posts: 889
Likes: 0
From: Land of 10,000 Lakes
It should, I will tell you tomorrow for sure when it gets here.

No Problem!

Thread Starter
|
Technical Article Contributor
Joined: Nov 2005
Posts: 889
Likes: 0
From: Land of 10,000 Lakes
Got the pan yesterday afternoon and got it all put back together.
Pan fits Prefect!!
It will be so nice the next time the filter needs to be changed now.
Here are some Pics
Pan and Part Number

Pan Inside

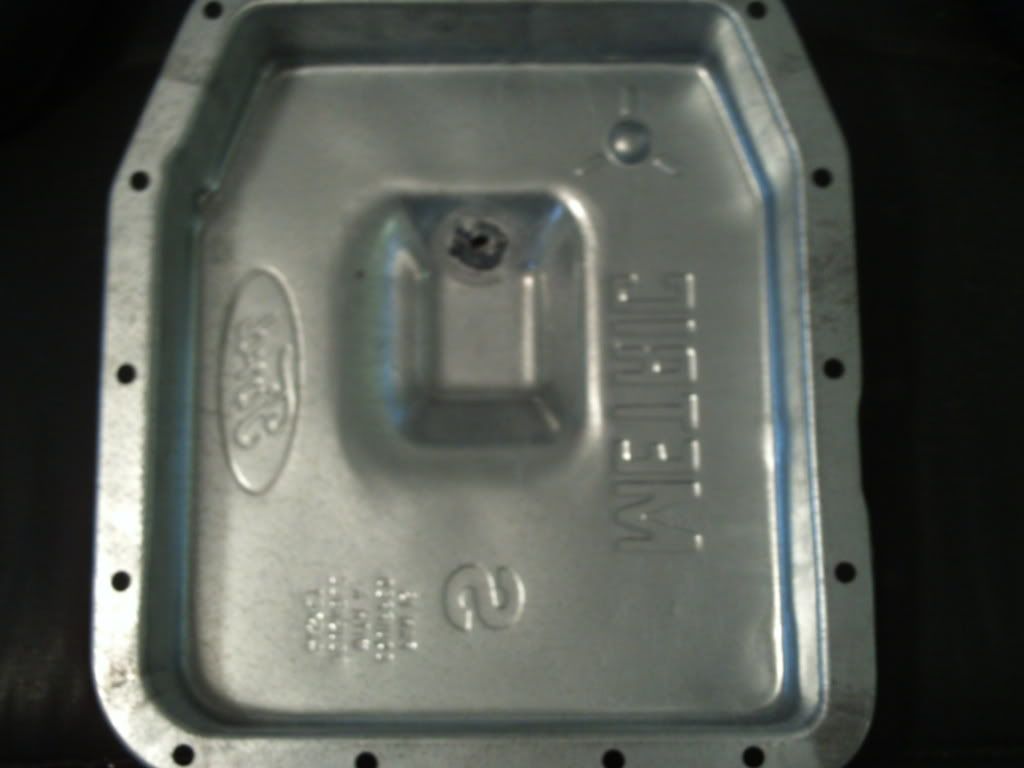
Pan outside


New Filter Installed

Pan ready to go up with magnet and gasket on

Installed


One quick thing is when installing the new trans filter the gasket for the old one did not come off with it, it stayed inside the hole. I could have just taken the rubber gasket off the new one and used the old one in there but since that is the only thing that holds the filter in I wanted to use the new one. I could not get it out with my finger so I took a small flat blade screw driver, wrapped it with a rubber glove and slowly and CAREFULLY worked it out. Came out easy then.
Pan fits Prefect!!
It will be so nice the next time the filter needs to be changed now.
Here are some Pics
Pan and Part Number
Pan Inside
Pan outside
New Filter Installed
Pan ready to go up with magnet and gasket on
Installed
One quick thing is when installing the new trans filter the gasket for the old one did not come off with it, it stayed inside the hole. I could have just taken the rubber gasket off the new one and used the old one in there but since that is the only thing that holds the filter in I wanted to use the new one. I could not get it out with my finger so I took a small flat blade screw driver, wrapped it with a rubber glove and slowly and CAREFULLY worked it out. Came out easy then.
Last edited by blackjack8900; Mar 31, 2011 at 05:15 PM.


Thread Starter
|
Technical Article Contributor
Joined: Nov 2005
Posts: 889
Likes: 0
From: Land of 10,000 Lakes
Also for anyone that did not know, The trans gasket is reusable. So if it is not damaged no need to go buy a new one!
And yes this is an great OEM mod to do!


Senior Member
Joined: Sep 2002
Posts: 2,605
Likes: 6
From: USA
I have been dropping this type of pan on AODs,4R70Ws,and now the 4R75E,for over 15 years now.Every time I have to refill the pan it only takes 4 qts. of fluid to get it in the cross hatched area of the dipstick.Sure,I could add a 1/2 qt. more to bring the level all the way to the top of the cross hatched area of the dipstick,but why waste the extra money on fluid that is not needed? 
Thread Starter
|
Technical Article Contributor
Joined: Nov 2005
Posts: 889
Likes: 0
From: Land of 10,000 Lakes
I have been dropping this type of pan on AODs,4R70Ws,and now the 4R75E,for over 15 years now.Every time I have to refill the pan it only takes 4 qts. of fluid to get it in the cross hatched area of the dipstick.Sure,I could add a 1/2 qt. more to bring the level all the way to the top of the cross hatched area of the dipstick,but why waste the extra money on fluid that is not needed?
I measured all of mine when I took it out and I got about 5.25 quarts plus what ever made it onto the floor which was enough

Senior Member
Joined: Sep 2002
Posts: 2,605
Likes: 6
From: USA
I just recently had my local Ford dealer change a shift solenoid and harness in the tranny.After they filled it with 5 qts. of fluid it was reading almost 1-1/4" past the cross hatched area.The tech had to drain over a qt. of fluid,and it read just inside the cross hatched area.So,...........

Senior Member
Joined: Sep 2009
Posts: 3,031
Likes: 45
From: The Shenandoah Valley
Thanks for the pics of the new pan. On my '77 F-150 with C-6 I installed a B&M drain plug kit many years ago, I have had the plastic washers crack and have replaced gaskets when servicing the trans, but it has never leaked a drop between changes. Seems it just happens when I go to remove center plug, disturbs it I rekon.
On my 2001 Merc and one of my T-Birds, what I did was very simular to this below.
Yeah, always pull the old filter seal out!

I took a piece of 1/8 or 3/16 thick steel about 2" long, 1" wide (cut from 1" bar stock), mark centers for 3 holes, one centered dead center and one each side 3/4" from it (ends are 1-1/2" apart at least).
I drilled a 7/16" hole in dead center, tapped it to 1/2-20 thread (fine thread), then inserted a 1/2-20 bolt in hole and threaded a new 1/2-20 nut down against the steel and welded it to the steel strap. Then after it cools, backed bolt out and cleaned up threads with a 1/2-20 tap.
Then over at each end of the bar I drilled a 3/16" or #7 hole. I then chose a place in the right rear of the pan where there was plenty of room, just opposite the magnet dimple.
I drilled a 1/2" hole for the drain, temporarily mounted it with a drain plug, then marked these two smaller holes center and drilled.
I then removed the part I made, tapped the small holes 1/4-20 and then remounted the piece back into the pan using two grade 8 1/4-20 bolts with some loctite and to be sure, I threw a couple nuts on the top ends with sealer and punched them center to make sure they were never coming loose accidentally.
I'll use 1/4-20 X 5/8" long rounded button headed screws with sockets for an allen wrench next time.
Now I use a regular oil drain plug for 1/2-20 thread and what you see in the picture is a piece of old aluminum that I drilled 1/2" holes and use as a seal washer. Last drain on the Merc was May 2010, I took this pic today.
I see that I'll have to wire brush and clearcoat those 1/4" bolts .... or replace them with the button headed ones I have?
This get's all but the last dribble out before I drop the pan for service, I thought about doing it where Ford did in the pics below, but chose this area instead. Ford's works if you want to drain all fluid and not drop pan or change filter. I'm going to drop pan and change filter anyway though.
First time I have the pan off the truck to service it, I'll make one for it too. I have a spare pan to go on the '95 Bird to do as well, it's the newer style ('95 has flat bottom).
Might just do them both like Ford did in "the well". I'll likely "bevel" the two lower corners somewhat so it'll fit better in the well rear wall.

No, the pan's not all rusty or corroded ..... just dirty under there. Camera and flash make it look worse.
Edited to correct some details.
On my 2001 Merc and one of my T-Birds, what I did was very simular to this below.
Got the pan yesterday afternoon and got it all put back together.
Pan fits Prefect!!
It will be so nice the next time the filter needs to be changed now.
Here are some Pics
Pan and Part Number
http://i221.photobucket.com/albums/d...n/DSCF2785.jpg
Pan Inside
Pan outside
... etc ...
One quick thing is when installing the new trans filter the gasket for the old one did not come off with it, it stayed inside the hole. ... etc ... I wanted to use the new one. I could not get it out with my finger so I took a small flat blade screw driver, wrapped it with a rubber glove and slowly and CAREFULLY worked it out. Came out easy then.
I took a piece of 1/8 or 3/16 thick steel about 2" long, 1" wide (cut from 1" bar stock), mark centers for 3 holes, one centered dead center and one each side 3/4" from it (ends are 1-1/2" apart at least).
I drilled a 7/16" hole in dead center, tapped it to 1/2-20 thread (fine thread), then inserted a 1/2-20 bolt in hole and threaded a new 1/2-20 nut down against the steel and welded it to the steel strap. Then after it cools, backed bolt out and cleaned up threads with a 1/2-20 tap.
Then over at each end of the bar I drilled a 3/16" or #7 hole. I then chose a place in the right rear of the pan where there was plenty of room, just opposite the magnet dimple.
I drilled a 1/2" hole for the drain, temporarily mounted it with a drain plug, then marked these two smaller holes center and drilled.
I then removed the part I made, tapped the small holes 1/4-20 and then remounted the piece back into the pan using two grade 8 1/4-20 bolts with some loctite and to be sure, I threw a couple nuts on the top ends with sealer and punched them center to make sure they were never coming loose accidentally.
I'll use 1/4-20 X 5/8" long rounded button headed screws with sockets for an allen wrench next time.
Now I use a regular oil drain plug for 1/2-20 thread and what you see in the picture is a piece of old aluminum that I drilled 1/2" holes and use as a seal washer. Last drain on the Merc was May 2010, I took this pic today.
I see that I'll have to wire brush and clearcoat those 1/4" bolts .... or replace them with the button headed ones I have?
This get's all but the last dribble out before I drop the pan for service, I thought about doing it where Ford did in the pics below, but chose this area instead. Ford's works if you want to drain all fluid and not drop pan or change filter. I'm going to drop pan and change filter anyway though.
First time I have the pan off the truck to service it, I'll make one for it too. I have a spare pan to go on the '95 Bird to do as well, it's the newer style ('95 has flat bottom).
Might just do them both like Ford did in "the well". I'll likely "bevel" the two lower corners somewhat so it'll fit better in the well rear wall.
No, the pan's not all rusty or corroded ..... just dirty under there. Camera and flash make it look worse.
Edited to correct some details.
Last edited by tbear853; Apr 16, 2011 at 10:20 PM.
Senior Member
Joined: Sep 2002
Posts: 2,605
Likes: 6
From: USA
Thanks for the pics of the new pan. On my '77 F-150 with C-6 I installed a B&M drain plug kit many years ago, I have had the plastic washers crack and have replaced gaskets when servicing the trans, but it has never leaked a drop between changes. Seems it just happens when I go to remove center plug, disturbs it I rekon.
On my 2001 Merc and one of my T-Birds, what I did was very simular to this below.
Yeah, always pull the old filter seal out!
I took a piece of 1/8 or 3/16 thick steel about 1-1/2" long, 1" wide (cut from 1" bar stock), drilled a 7/16" hole in dead center, tapped it to 1/2-20 thread (fine thread), then inserted a 1/2-20 bolt in hole and threaded a new 1/2-20 nut down against the steel and welded it to the steel strap. Then after it cools, backed bolt out and cleaned up threads with a 1/2-20 tap.
Then over at each end of the bar I drilled a 3/16" or #9 hole (I think it's #9). I then chose a place in the right rear of the pan where there was plenty of room, just opposite the magnet dimple.
I drilled a 1/2" hole for the drain, temporarily mounted it with a drain plug, then marked these two smaller holes center and drilled.
I then removed the part I made, tapped the small holes 1/4-20 and then remounted the piece back into the pan using two grade 8 1/4-20 bolts with some loctite and to be sure, I threw a couple nuts on the top ends with sealer and punched them center to make sure they were never coming loose accidentally.
Now I use a regular oil drain plug for 1/2-20 thread and what you see in the picture is a piece of old aluminum that I drilled 1/2" holes and use as a seal washer. Last drain on the Merc was May 2010, I took this pic today.
I see that I'll have to wire brush and clearcoat those 1/4" bolts?
This get's all but the last dribble out before I drop the pan for service, I thought about doing it where Ford did in the pics below, but chose this area instead. Ford's works if you want to drain all fluid and not drop pan or change filter. I'm goping to drop pan and change filter anyway though.
First time I have the pan off the truck to service it, I'll make one for it too. I have a spare pan to go on the '95 Bird to do as well, it's the newer style ('95 has flat bottom).
Might just do them both like Ford did in "the well".
No, the pan's not all rusty or corroded ..... just dirty under there. Camera and flash make it look worse.

Last edited by BlueOvalFitter; Apr 16, 2011 at 01:32 PM.

Senior Member
Joined: Jul 2010
Posts: 557
Likes: 1
From: Virginia Beach, VA
I just ordered the pan AGIAN! The first go around they "changed" the P/N based on my VIN and when I called to have them change it back to the one I wanted, they just canceled that line item on the order because I got everything else except the pan.")
I have re-ordered and left the VIN blank and added a statement to the comment section that this was a mod for the truck.
I have re-ordered and left the VIN blank and added a statement to the comment section that this was a mod for the truck.
Senior Member
Joined: Sep 2009
Posts: 3,031
Likes: 45
From: The Shenandoah Valley
works if you have a tig welder, which I don't.
Last edited by tbear853; Apr 17, 2011 at 01:38 AM.