When you click on links to various merchants on this site and make a purchase, this can result in this site earning a commission. Affiliate programs and affiliations include, but are not limited to, the eBay Partner Network.
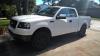
My truck was keyed a few years ago and it is a deep scratch, there was no buffing this out. I picked up a Dupli-color paint pen matched to my truck color and want to try to patch this scratch. I've seen some horrible touch ups done before and want to do this as best I can. Does anyone have any tips on how to do this without making it look tacky or even worse?
A lot of this depends on the color of your truck. For instance, a "pearl" color or a metallic color just about needs the whole panel to be repainted, at least that's the way I've done it. Small color chips can be touched up carefully though.
I THINK a non-metallic, regular color can be touched up just in the scratch though. The way I've done it is to carefully clean the area and then, as carefully as possible, try to get the paint only IN the damaged area. I use several coats until the damaged area is completely filled and fully cured. Then, using a backing pad, I buff the damaged area by hand with rubbing and polishing compound until the new paint is flush with the original surface around it. If the damage is only a scratch, I've found it doesn't need clear coating, but, if your truck is clear coated and you want to do that, it complicates matters.
I've actually had very good results using spray paints and clearcoat on partial panels, blending the new into the old. I sand the damage first, to get everything absolutely smooth, then spray the color. I feather the edges of the new paint with compound, then go over it with clearcoat. I use "filling", sandable primer first if the damage is deep.
One more thing though: I've not had particularly good results with DupliColor pens. I get custom mixed touchup paint online for these repairs. My "goto" source is this place: http://www.automotivetouchup.com/
- Jack
Last edited by JackandJanet; Dec 19, 2015 at 05:40 PM.
The only reason I'm even thinking about doing this myself is because my truck is Oxford white, it's pretty plain. I have a few small chips around the truck maybe I will try the pen out there on the small areas first before I attempt the scratch. This scratch starts at the passenger front headlight and goes down the entire side of my truck and around the back to the center emblem.....if I ever find out the mother f'er who did it....ugh!!!
How do you apply the paint to the scratch? A small brush? Toothpick or something? Thanks for the link to the paint source, we will see where I end up with the pen and go from there.
I've tried all the pens on the market, along with the rattle cans. All rubbish.
The best way to do it, is to get a cheap small touch up gravity fed sprayer, and feather it in. Sand it, then load the gun with clear coat and finish it off.
I did this with my bumpers last summer. Works great.
If you want to test your ability or practice, I've gone to the scrap yard and junk yards and gotten hoods to mess with, since they are easier to paint.
I've got a nice Kobalt 7 oz gravity fed, along with this sucker:
I think with Oxford White, you have a pretty good chance of doing a good repair. The source I gave you also sells little plastic application daubers (they're a lot like toothpicks, but they have a "ball" end).
I think their custom mixed paint is a VERY close match to the original. I bought a spray can of their Dark Metallic Copper for my old King Ranch and was able to repair scratches (into metal) on the rear fender as well as a large scrape (down to the plastic) on the front plastic upper bumper. I top coated it with clearcoat and the repairs were not seen when I traded it in for my current truck. I touched up small dings with a small bottle of touchup paint from the same source.
I completely filled gouges and a serious dent and painted both the front and rear bumpers themselves with DupliColor paint in the Arizona Beige color. It was not an exact match to the OEM paint, but once topcoated it was very close to the original. Again, the repairs passed a dealer's inspection.
I'm an old model builder, and I use finishing techniques I learned on those. It takes time, but the results are worth it.
I’ll second the motion that nothing short of a professional re-spray will truly give you anything close to an “invisible” repair. Oh, and the same goes for a repair that will not crack, peel or rust faster than the surrounding paint. If you can live with a less than perfect repair, I’ll offer my thoughts based on past experience.
The first thing you need to determine is how deep the scratch truly is. Did it just go through the clear coat? Did it go through both the clear coat and the base (color)? Did it go all the way to the base metal? The answers to these questions will drive what types of products you will need to use. All the way through will require a primer first. Through the base and clear will require both of them, but no primer. Just the clear … Well, you get my drift.
No matter how minor or serious the scratch is, you will need to thoroughly clean out the scratch and surrounding area. I’d recommend a solvent such as Lacquer Thinner or Acetone, but be very careful with either of them because left on too long, they will damage the surrounding paint. Just use enough to get the area clean.
Next - using pinstripe tape – carefully mask off the scratch leaving just a little bit of room for the paint to overlap onto the surrounding “good” paint. Make sure the tape is fully adhered and the area clean and dry. This usually means another solvent wipe.
Layer in appropriate paint (primer, base, clear) with at least one coat of each as needed. Then remove the masking tape before the paint has fully dried. (To avoid pulling up the fresh paint.)
After the paint has fully cured, carefully block / wet sand the area with 400-800 grit paper using lots of water. You may want to wrap the paper around a medium sized socket. This will allow you to level the (currently) raised freshly painted surface down to the level of the surrounding paint.
Finally, polish the surface (including the surrounding area) to blend / feather/ correct any remaining defects, then let it set for a few weeks before applying a good coat of wax.
Will this give you a perfect repair? Unfortunately not, but it’s a hell of a lot cheaper than a professional re-spray of the whole panel.
I'll see if I can get some good pics of this scratch. It is through the clear, through the color and down to the primer all the way around. It's not too wide. I'm not about going the sprayer route, I'd end up spraying nearly the entire side of the truck. I'm not really expecting professional results here, the truck is about to turn 12 years old but the rest of the paint is in good condition. I think I'll see about getting some paint and the applicator that JackandJanet suggested and give it a shot. I'm pretty patient and will take my time, maybe do one panel at a time (fender, then door, then bedside, then tailgate) and learn as I go. I think start on the tailgate and as I get a little practice and better move around to the high visible areas. I'll see about some pics.
If I might, I'd suggest the "fill the scratch only" method first. Why? Because you have a much smaller (measured in square inches) area to possibly screw up. If you don't like the results, grab a spray gun and have at it.
Agreed! And, I'd suggest starting on the tailgate first. My reason for this is that you can take it off and work on it in a horizontal position. My experience with filling scratches is that working on vertical surfaces makes the process more difficult.
And, I'd use white primer, instead of the gray stuff. You can fill the crack better with primer and using white means less difficulty covering it with the color coat.
Once you've done the tailgate, you will have a good idea about how the repair is going to look on the rest of the truck. Work slowly and patiently, it's been like this for quite a while, it doesn't have to be fixed overnight.
It's not going to be invisible, probably, but I THINK you can repair it so you'd have to look for the damage to see it. And, as 2stroked said, if you don't like the results you can always spray over it.
I'm sorry I never took before/after pictures of the work I did on my King Ranch. I was very pleased with the results.
BTW, I used RustOleum automotive primer in my repairs. It seems to work fine under the color paints. As I recall, I also used their automotive clearcoat sprays.
- Jack
Last edited by JackandJanet; Dec 20, 2015 at 04:30 PM.
What happened, couldn't take the picture from the neighbors driveway ?
Hard to tell what you are working with there, that picture almost looks like a transfer smudge and I went to max magnification in FF.
I would expect the primer not be a dark color like that. The heavy rock dings on my Dark Stone 06 were a beige color in the ding.
Have you tried using a compound like Meguiars M101 / 105 or Optimum Hyper Compound to see what it really going on ?
- I am in supposition territory here not really being able to see the mark that well, and confirm the color being seen really is primer.
You can test with the shorter horizontal mark as a starting point. Maybe work to what looks like a lighter drag when the direction changed.
I put a scratch in the rear fender and cap when I slipped putting the 38' extension ladder on the cap. The metal foot on the ladder got both the cap and the truck. They were not through the clear, only had to compound and polish them.
This is a seabring convertible that had a metal lawn chair dropped on it.
someone decided they were bad enough to touch up ( not the owner ):
They were not through the clear. It took compound & cutting pad to get it off
If you have the equipment, I would think taking the time to see what is really going on would be step #1. I am not a professional though, so YMMV.
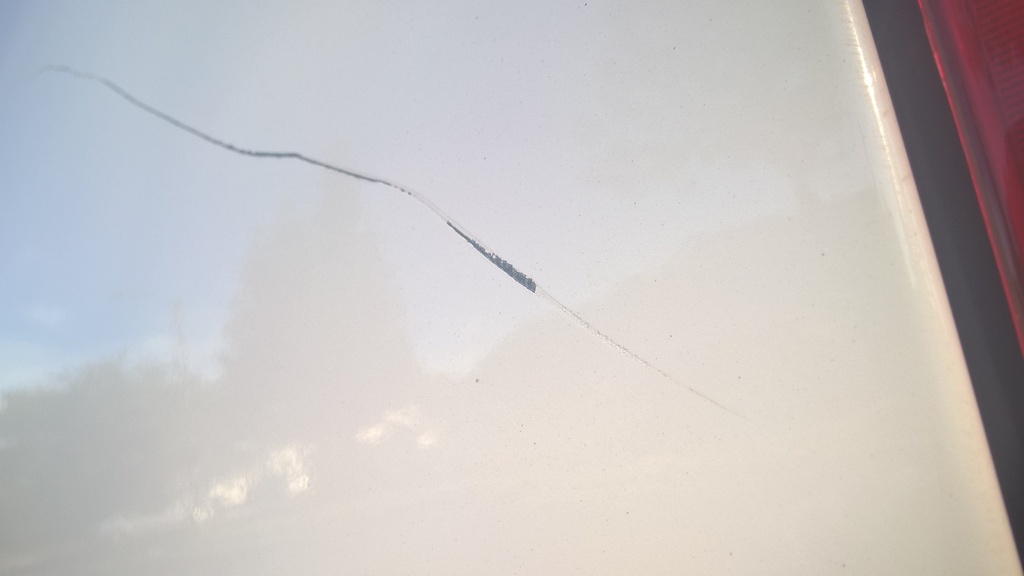
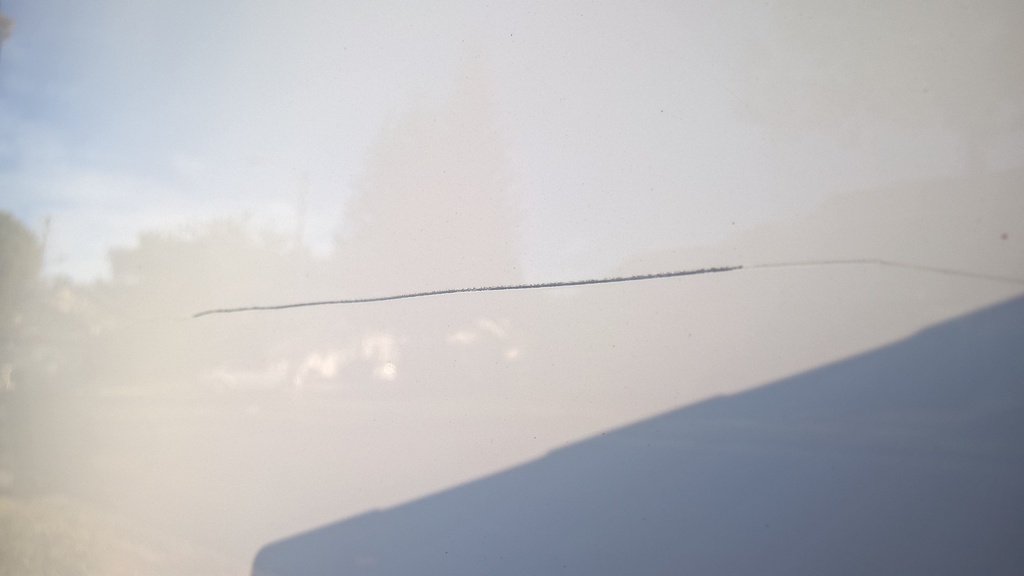
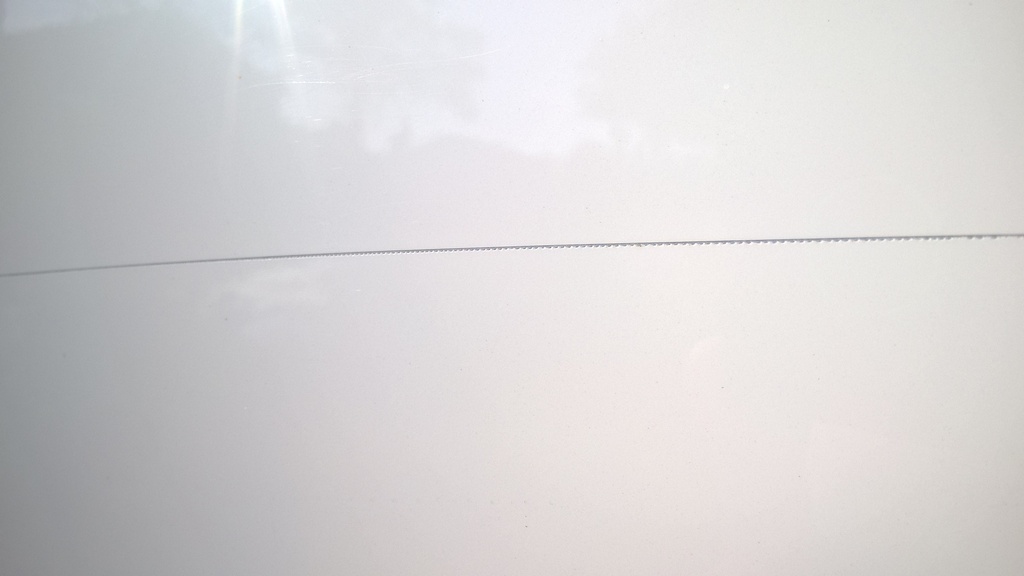
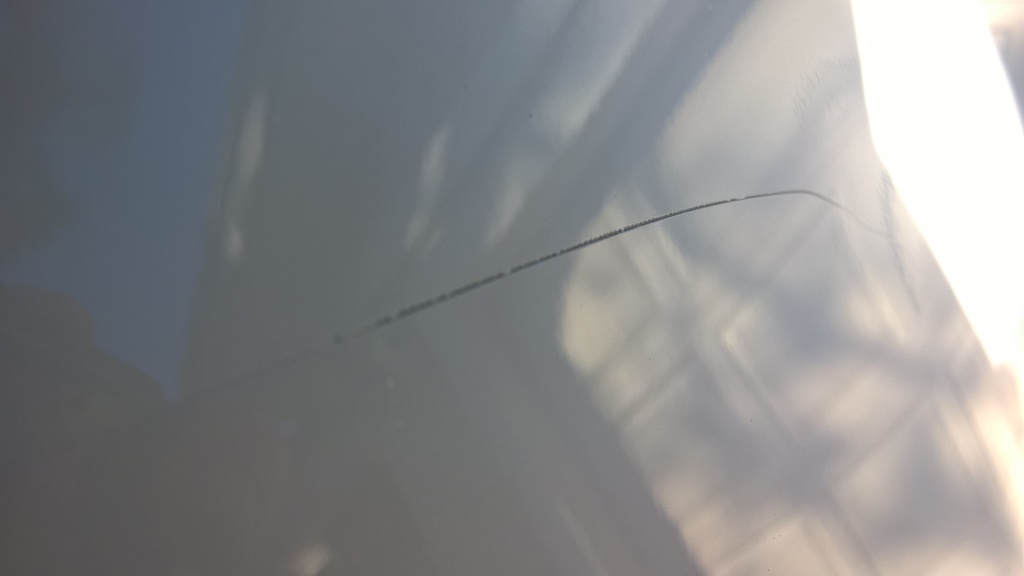
I went out and took some pictures and tried to capture the detail of the scratch as best I could, but I only have a cell phone camera so this is as best I could do. Haha.
It definitely varies in depth after a closer look. I don't think that it went down to metal in any areas, it looks grey under it and I think that by now it would have rusted a bit. Some spots it's wide, others it's narrow, some areas its only through the clear coat. Looks like a bigger job than I expected.
I am no means a professional and all I have to work with is a variable speed dual action Porter Cable polisher. I am VERY leery about sanding anything because of making it worse. Maybe I will enlist the help of a guy at work that just went to an advance painting school.
Here are the pics:
Right side of tailgate
Right bedside, just forward of wheel opening
Passenger side front door
Passenger front fender just forward of the wheel opening (sorry for the shadows)
Some of that is to the metal from the looks of those pictures magnified
- Took (+) magnification in Pbucket and then view image & magnify.
You can try micro brushes to primer, oxford white and clear those in, but that is going to take some time to do. If you have the time it should turn out well.
Sanding with 1000 or 2000 grit is not bad at all. It will take some with compound / polish on a cutting pad on a PC to get the sanding marks out.
It is not as bad as it sounds by any means. Just use something with rounded edges on it ( socket ) so you don't cut into the paint around the scratch.
Some of that is to the metal from the looks of those pictures magnified
- Took (+) magnification in Pbucket and then view image & magnify.
You can try micro brushes to primer, oxford white and clear those in, but that is going to take some time to do. If you have the time it should turn out well.
Sanding with 1000 or 2000 grit is not bad at all. It will take some with compound / polish on a cutting pad on a PC to get the sanding marks out.
It is not as bad as it sounds by any means. Just use something with rounded edges on it ( socket ) so you don't cut into the paint around the scratch.
Go for it with the tailgate, just have the time to spend on filling it in, don't rush it.
It will be a zen moment with your truck, taking the time to do the work.
Man I didn't **** of anyone! I had literally just moved into town and hadn't even lived here for a week before that happened. The only thing I can think of is I parked in somebodys "spot" in my apartment complex. No assigned parking or anything, that's the only possible thing I can think of. I thought about setting up a camera and parking in that spot again to see if they would do it again but I didn't want to risk further damage. It makes me sick when I start thinking about it again.
Anyway I think after the holidays I'll pull the tailgate off and put it in the garage and give it a go. I'll get the good stuff and might as well go for it. I can take my time on it and perfect my technique. I appreciate the tips and advice.