F150 Rear Seat Removal 2004-2008 - MY WAY
#1
 01-18-2009, 12:30 AM


F150 Rear Seat Removal 2004-2008 - MY WAY
Yes, this is ANOTHER article about how to remove the backrest from the rear wall of the 2004-2008 F150 (Super Cab or SuperCrew).
I am about to begin a full blown audio system instillation and need to gain access to my rear wall in order to mount my amplifiers.
You may ask why...why another one? For a couple of reasons:
1. Because this backrest is (seemingly) a real PAIN IN THE AXX.
2. Because I downloaded and printed three different articles during my initial attempt to remove my backrest and NONE of them were very clear. Dont get me wrong, their information was accurate, but each of them was either more difficult than necessary or not articulate enough for my taste.
First of all let me say this is its frankly VERY easy to remove the backrest. Oh sure, it is not as easy as a factory folding seat (that we all wish we had) but its not as bacd as it seems. Trust me, I know because I spent almost 90 minutes following the other install articles and got NO where other than getting the two bolts off the seatbelt tower. I never got the backrest to budge even a fraction of an inch.
So I gave up and went to my computer. I did find an article by Mitchell Repair systems that seemed to have information in it that is directly from Ford. After reading this, suddenly the light bulb went off and I went back outside and attempted the removal. In thirty seconds the seat was off!!
From start to finish, this backrest removal can be done in 5-10 minutes. If not, you are doing something wrong. And, despite some REALLY strenuous effort the first time, the second time, it took no effort at all.
Without further adeu....here is my attempt at a more articulate and clear method of removing the backrest.
F150-SEAT-REMOVAL2-1.jpg?t=1234573332
In the image above you see a blue tubular bar and a pink metal tab....now here is an actual photo of the backside of that component:
P5090319.jpg?t=1242710343
Last edited by ARCuhTEK; 05-19-2009 at 01:19 AM.
#2
01-18-2009, 12:39 AM
To further paraphrase this entire backrest removal:
1. Just remove the top of the seat belt tower. It is very obvious what you have to do once you are looking at it.
2. Stick a screw driver beside one of the two latches (see photo) and aim toward the roof. Push forward. Your screw driver will slide in the access hole (it may take you a couple of tries). Once you feel the screw driver stop, push hard. At the same time take your free arm and push the seat down (not very much effort is required) Keep pushing the screw driver,....yo will feel a liitle movement. When you feel the movement, quickly grab the bottom of the seat and lift up. One side is done!
Repeat.
After wasting 90 minutes when it really only took 5 mins....I was somewhere between embarrassed and angry. So I wrote this artilce to save YOU time.
Edit on 05/19/09: Included link to new photos of backrest.
If you want actual pictures of the back side of the back rest....of the clips....etc. Go to one of my other threads:
https://www.f150online.com/forums/20...back-rest.html
Good luck!
Last edited by ARCuhTEK; 05-19-2009 at 01:17 AM.
#3
01-18-2009, 12:55 AM


Join Date: Aug 2006
Location: Northern California
Posts: 7,862
Likes: 0
Received 0 Likes
on
0 Posts
It took me all of 30 seconds to get it off. The screwdriver method does work well, but i found it easier to just mash my arm back behind the seat around the lower side of it, and pull the clip with my finger and pop the seat out.
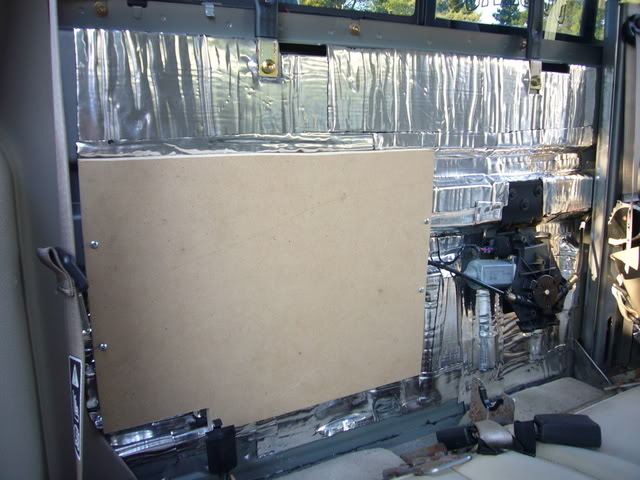
One thing you should add to your post: ZIP TIE THE CLIPS ONCE YOU GET THE SEAT OFF. That way, all you have to do the next time is take the 2 nuts off and pull the seat right off.
Look at the lower right of my picture, you can see where i zip tied the clips:
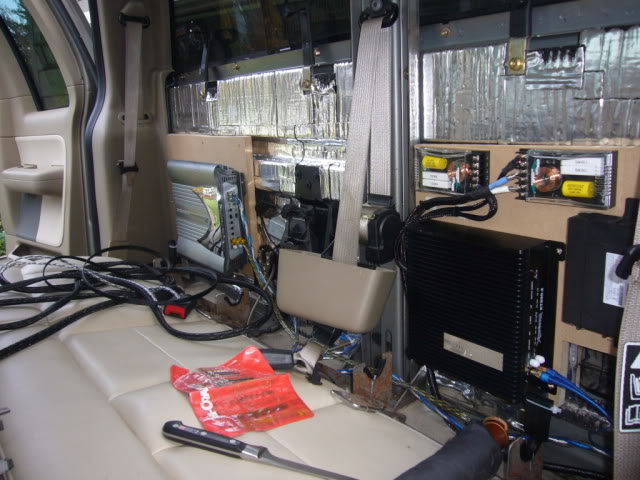
One thing you should add to your post: ZIP TIE THE CLIPS ONCE YOU GET THE SEAT OFF. That way, all you have to do the next time is take the 2 nuts off and pull the seat right off.
Look at the lower right of my picture, you can see where i zip tied the clips:
#4
01-18-2009, 01:05 AM
I have no idea how you got your arms behind the backrest. I did, but not without a lot of strain and effort. Once to got my hand on the slip, I found that I had no range of motion left in order to even attempt to free the clip (even when pushing down on the seat..etc.).
#5
01-18-2009, 01:08 AM
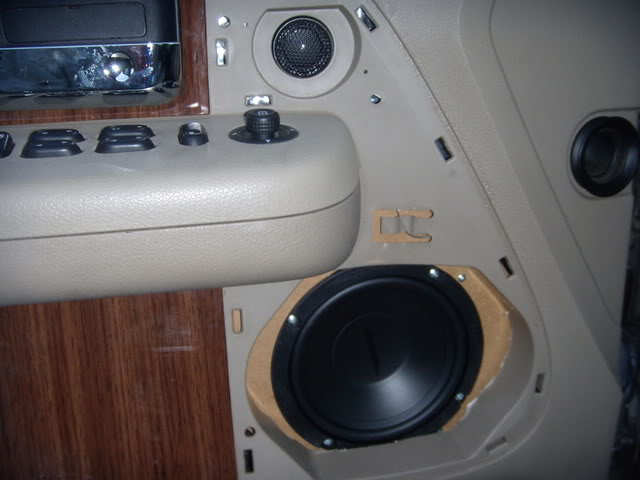
Nice photo of your install. Now that I have seen my own truck stripped, I can more easily tell what you have done.
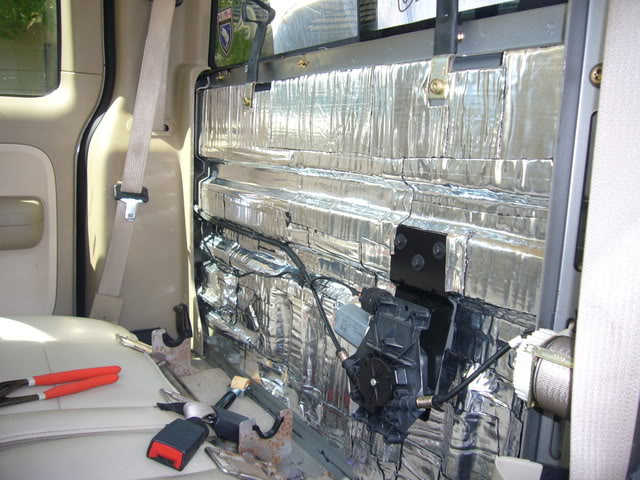
It looks like you also have the window motor. Is there any chance that the motor can be relocated, even slightly?
I have a total of three amps to mount, plus a sound processor, plus positive and ground distribution blocks and of course, the MDF board itself.
Did you use 1/2" or 3/4" thick MDF? It appears you used 3/4" I think most amps are approx. the same height. I know all three of mine (from different mfr.s) are within 1/16" in height. SO that is good. From your photo, it appears you have plenty of room between the amp and the backside of the backrest. Well at least more than I expected.
One more thing: Did you cut out areas on the MDF board to allow air passage to the rear vents at each side of the rear wall? I can see an open area on the drivers side, but not sure on your passenger side. I had no idea these vents were on thye rear wall until tonight.
#6
01-18-2009, 05:12 AM
Join Date: Aug 2006
Location: Northern California
Posts: 7,862
Likes: 0
Received 0 Likes
on
0 Posts
Nice photo of your install. Now that I have seen my own truck stripped, I can more easily tell what you have done.
It looks like you also have the window motor. Is there any chance that the motor can be relocated, even slightly?
I have a total of three amps to mount, plus a sound processor, plus positive and ground distribution blocks and of course, the MDF board itself.
Did you use 1/2" or 3/4" thick MDF? It appears you used 3/4" I think most amps are approx. the same height. I know all three of mine (from different mfr.s) are within 1/16" in height. SO that is good. From your photo, it appears you have plenty of room between the amp and the backside of the backrest. Well at least more than I expected.
One more thing: Did you cut out areas on the MDF board to allow air passage to the rear vents at each side of the rear wall? I can see an open area on the drivers side, but not sure on your passenger side. I had no idea these vents were on thye rear wall until tonight.
2) That picture was taken a while ago, i currently have 3 amps plus 2 distro blocks in there. Luckily my HU can do al the processing and time alignment I need. 2 amps + distros on the left side, and that single amp on the right. The window motor cannot be relocated, so i worked with what I could, and mounted the amps in directions that they would all fit. Capable of 1800 RMS+ at full tilt.
3) 3/4" MDF. No problem fitting the amps, and I like it loud so i tend to really crank it, yet never have had a problem with overheating.
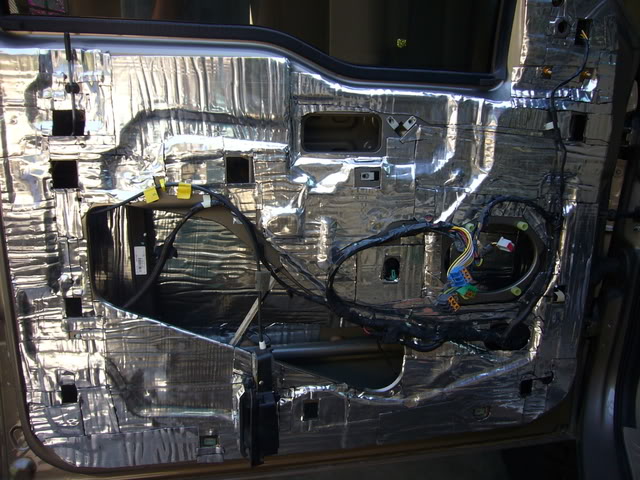
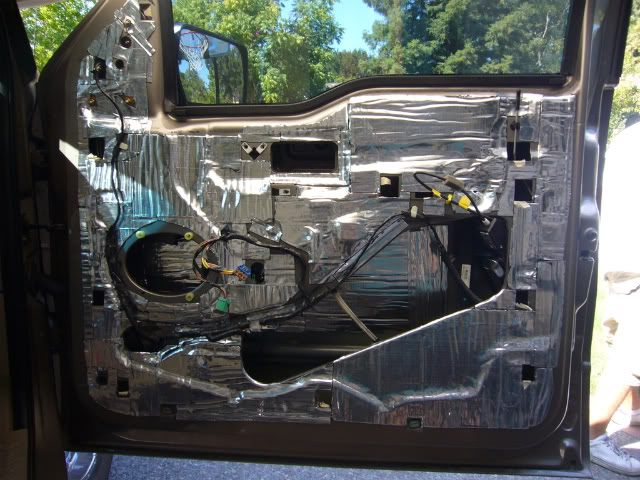
4) I closed up the vent on the passenger side (covered with 2 layers duct tape then 3 layers of sound deadener). I'm going to do the driver's side soon too. It reduces noise A TON. Reduces exhaust and tire noise big time. I have 35" mud terrains and a 9" Borla muffler and the interior sounds nearly stock on the highway cruising @ 70mph. Slap 1800 watts ontop of that and its SEXY!
The rear vent:
Doors:
rear wall:
#7
01-18-2009, 02:56 PM
Thanks. I have three amps, distribution blocks and a signal processor. I do not have crossovers. It will be tight. I am pretty ****, so I can envision me taking my sweet time on the amp board, wiring pathways etc. I am thinking about mounting my amp board with "feet" or pegs on the rear side, perhaps using small blocks of 1/2" or 3/4" MDF. This woudl allow me to do wiring on the back side and just penetrate to the front side when necessary. Makes for a really clean install. But its tough to get too picky when no one will ever see it. I am more about being organized than anything. I hate opening things up and seeing a plate of spaghetti.
I will be making my chip board template for the amp board today.
Since I am trying to mock up my amp board, I am thinking about getting some 1/2", 3/4" or 1" rigid board (blue board) insulation and mocking it up, including some rudementary blocks representing my amps. Tape it to the wall, put the seat back (release clamps zip tied) and then sitting on the seat, jumping up and down...etc. Remove the backrest and see if there are any impressions or other damage in the blue board. This would give me an idea of how tight it is....since you really cannot see what is going on back there when you put the back rest back on.
Trending Topics
#8
01-18-2009, 03:23 PM

Senior Member
Join Date: Jul 2008
Location: Chicago IL
Posts: 964
Likes: 0
Received 0 Likes
on
0 Posts
#9
01-28-2009, 05:17 PM

Senior Member
Join Date: Dec 2006
Location: St Paul, MN
Posts: 130
Likes: 0
Received 0 Likes
on
0 Posts
Read this thread, got all excited, figured I was going to finally install that nice rear seat cover I bought for the hound. First step took all of a minute. Fast forward 45 minutes, many cuss words later, and I am no further. Tried the screwdriver method, as well as the jam my fat hand behind the seat method, all with no luck. What the hell could I possibly be doing wrong?

#12
02-07-2009, 10:51 PM

Join Date: Dec 2006
Location: Central Indiana
Posts: 670
Likes: 0
Received 0 Likes
on
0 Posts
I wish I would've had this this afternoon. 
I did my leather install, and fought for about 30 minutes before finally getting it.
I came here and looked at 05redfx4's install but the clip in his post doesn't show HOW to remove it, only what it looks like.
I ended up removing the seat bottoms and could get in there much better.
The screwdriver method looks much easier.
#13
02-08-2009, 12:48 AM

Senior Member
Join Date: Oct 2008
Location: Fort Myers, FL
Posts: 1,742
Likes: 0
Received 0 Likes
on
0 Posts
I tried this and just could not get my screwdriver in how I wanted it to hit the clips. Just to clarify because I am not looking at it right now, does the screwdriver go over or under the seat when detaching the clips?
I found it easier to take off the side panels covering the rear pillar (C pillar?) and then get my arm around snugly. People who say get your arm behind the seat are crazy, I haven't the slightest clue what size arm people have, lol.
I found it easier to take off the side panels covering the rear pillar (C pillar?) and then get my arm around snugly. People who say get your arm behind the seat are crazy, I haven't the slightest clue what size arm people have, lol.
#14
02-08-2009, 11:31 AM
Take your hand or fingers and find this bar first. Just to be familiar with it. Your screw driver needs to be aimed above this bar....in essence....toward the ceiling of the truck...but only at about a 30-45 degree angle. The trick is knowing where....along the horizontal length of the seat backrest....to insert the screw driver. Essentially you are immediately adjacent to those metal latches that you see sticking out of the crevice between the backrest and the actual bench seat. There are only two release clips, which are located at the far ends of the seat.
That narrows it down pretty far....so you should be able to view my diagram and get the seat off pretty easily. If you have never done this, expect som frustration....and about 15 mins of work the first time. If you get lucky you will have the seat off in 5 mins. If you struggle...maybe 30 mins.
The second time you do it...I bet you can get the seat off in under 5 mins!
#15
02-13-2009, 08:05 AM

Senior Member
Join Date: Jul 2001
Location: Motor City Suburbs
Posts: 681
Likes: 0
Received 0 Likes
on
0 Posts
I bought my 2006 Lariat Scab used and realized well after that I didn't have the keypad code. I assumed it was just under the dash like previous Fords I've owned. After finding out the module with the code printed on it was behind the rear seatback and reading about people's trouble removing it I was at one point about ready to pay the dealer to scan or whatever they do to get me the code. Being cheap, I decided to do it myself but had been dreading it and putting it off for months. After I read this thread, I decided to take it on last night. I stared for 20 minutes at the lower exposed tubes and almost decided my truck wasn't like the picture. Finally it dawned on me that the picture was showing the tubes up inside the seatback. From there it took me all of 5 minutes to get it off, retreive the code and reinstall the back. I used a pair of shoes that were in my truck to prop the seatback up while I did the second side. When I was done, I only had one shoe....I had left the other somehow wedged behind the seatback. I had that thing off the second time, shoe removed and reinstalled in 2 minutes flat.
At least with the Supercab, one of the keys is the right length screwdriver. You go in on the inboard edge of the notched out area that clears the anchor points, and then to get the blade angled up high enough to get above the tube a relatively short screwdriver lets you do this without too much resistance from the seat bottom. I had my seat cushions (bottoms) in a sort of half folded position.
Thanks for the help. Now I can stop worrying about locking the keys in too.