
How to Paint Headlights


Senior Member
Joined: Nov 2010
Posts: 199
Likes: 0
From: Baltimore, MD
Thanks OP for the write up.
Been wanting to attempt this and it doesnt sound easy but will be worth it I believe.
By the way, I got stuck on page 5 for the longest time.
Thanks "BlackFX4inTN" 2 years later and she's still rockin
Been wanting to attempt this and it doesnt sound easy but will be worth it I believe.
By the way, I got stuck on page 5 for the longest time.
Thanks "BlackFX4inTN" 2 years later and she's still rockin
Last edited by CAGE RATTLER; Feb 14, 2012 at 04:10 AM.


Senior Member
Joined: Jan 2008
Posts: 119
Likes: 0
From: Indiana
I picked up a set of OEM headlights off Craigslist recently for this mod (so I wouldn't have to use mine), and separated the headlight halves today. I had to do three heat/pry cycles for the first one, and two for the second one.
Once I got a gap in the first corner (top inside corner as viewed on vehicle), I worked across the top. The key to getting that first corner started is to slide a screw driver back into the seam between the clear lens and the black backing piece, then pry. You want to get the screw driver to hook the hidden lip of the clear lens, so you can pry against it. It may take a few tries to get the screw driver behind that edge. In fact, this may be all that you accomplish before you have to put it in the oven again. Once you get that tiny gap opened in the corner, you can leave a screw driver in the gap to keep it from closing, then use a second screw driver to continue prying along the top.
Once I got the top and upper sides gapped open a little bit, I squeezed the fingers of both hands into the top gap and pulled the two halves away from each other. Be careful here, as it is very easy to get your fingers pinched, and let me tell you, it's painful. LOL!
I found that getting the excess black sealant out of the black housing's groove to be fairly easy. In fact, I managed to remove it in pretty long strips. I took a narrow screw driver (probably 1/8"), and slid it under the sealant until I had about an inch free. I then grasped that loose end of sealant with one hand and pulled up gently, while using the screw driver in the other hand to pry up the sealant in the bottom of the groove right on the edge of where it was still stuck to the housing. If you take your time and tug gently, you can do a fairly long run without breaking the sealant.
I don't have a T-10 Torx handy, so I won't be disassembling it any further today.


Junior Member
Joined: Jan 2014
Posts: 4
Likes: 0
I also used black PlastiDip on my front chrome bumper and it came out great! Been on about four months without any issues. Through the salt and winter in Western NY.

Senior Member

Joined: Mar 2013
Posts: 6,677
Likes: 0
From: Houston and College Station, TX
I've thought about doing it, because I have a bunch of white PD laying around. Just go for it. What's the worst that can happen? My only thought was that if you use PD because you want to remove it later, it may get "stuck" to the headlight and not come off when you heat them up again to remove it. But who knows how that stuff reacts under moderate heat, it might be completely fine.

Junior Member
Joined: Mar 2014
Posts: 2
Likes: 0
My buddy put aftermarkets in his 05 and gave me his factory headlights. I wanted to do something and found this thread, great write up and I just got finished taking the lights apart. It was pretty easy to do, now to decide exactly what i want to do. I'm thinking about adding some accent lighting in there to make it just a little something different.
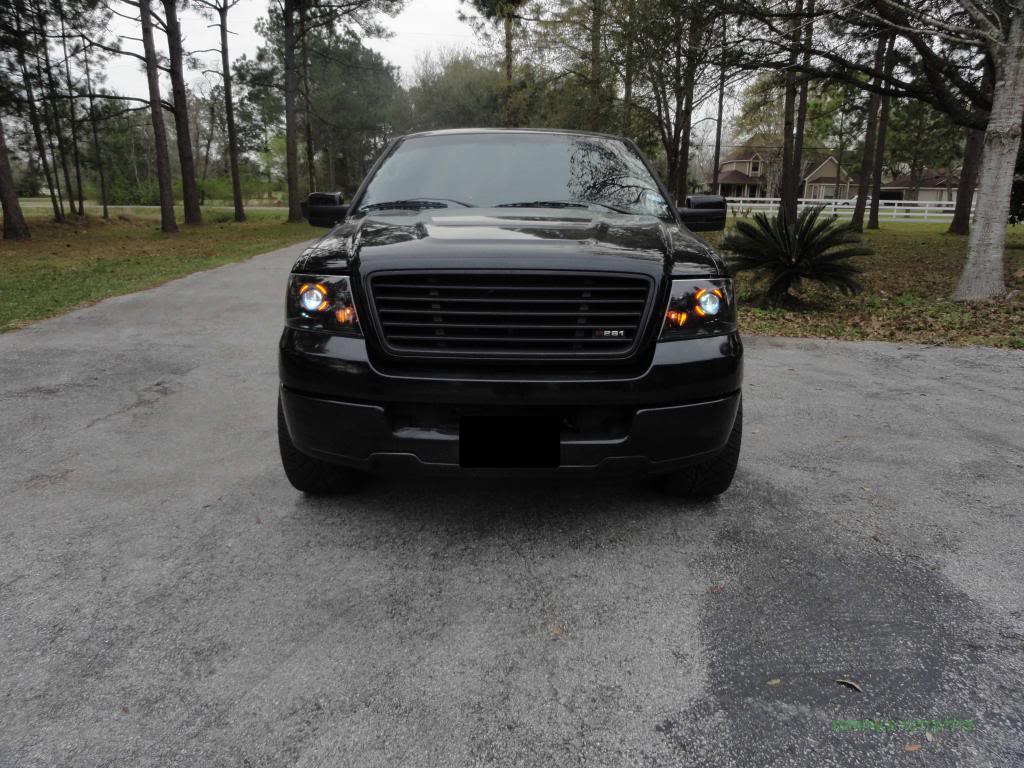
Just wondering if anyone that has painted the turn signal reflector has a picture of the lights on for reference. I want to paint mine but am just curious how it will look.
Just wondering if anyone that has painted the turn signal reflector has a picture of the lights on for reference. I want to paint mine but am just curious how it will look.

Senior Member
Joined: Feb 2004
Posts: 10,390
Likes: 10
My buddy put aftermarkets in his 05 and gave me his factory headlights. I wanted to do something and found this thread, great write up and I just got finished taking the lights apart. It was pretty easy to do, now to decide exactly what i want to do. I'm thinking about adding some accent lighting in there to make it just a little something different.
Just wondering if anyone that has painted the turn signal reflector has a picture of the lights on for reference. I want to paint mine but am just curious how it will look.
Just wondering if anyone that has painted the turn signal reflector has a picture of the lights on for reference. I want to paint mine but am just curious how it will look.
Here ya go:
From this thread -in case you needed some ideas, and a nice Plug fror Saleen's excellent work
https://www.f150online.com/forums/pa...e-hid-kit.html
More here: https://www.f150online.com/forums/20...-retrofit.html
As you can see, output is reduced. May want to consider a better/brigher bulb to compensate for the loss of the reflector - these (switchbacks) are recommended:
http://www.vleds.com/v3-triton.html
good luck
MGD

Junior Member
Joined: Jul 2015
Posts: 1
Likes: 0
Painted mine blue! Here are the pictures with a comparison slider: http://shmegaming.com/Headlights/
Had a bitch of a time separating the lens and the backing! Used buytl tape and silicone2 to seal them. No fogging up after 2 weeks of driving. Just used the dupli-color perfect match spray can stuff and the same brand of clear coat for them.
Had a bitch of a time separating the lens and the backing! Used buytl tape and silicone2 to seal them. No fogging up after 2 weeks of driving. Just used the dupli-color perfect match spray can stuff and the same brand of clear coat for them.
Member
Joined: Jan 2016
Posts: 47
Likes: 1

Member
Joined: Apr 2013
Posts: 41
Likes: 2
This job is a pain in the ***.
I've spent about 6 hours baking open and cleaning the remaining sealant out of the headlights. I had 3 spare OEM headlights to work with. Two came apart fairly easily, just slowly, and the third was a nightmare. Couldn't get it to spread open, wound up ruining the black bucket portion. I gathered together the remaining good parts and I have enough for two good condition headlights.
I was using 250 degrees in the oven for 8 minutes at a time. To do it again, I'd probably recommend 270 for 7 minutes.
So I guess someone was right that said it's the luck of the draw how easy these come apart.
Add in an hour or so to prep and paint and I'm up to about 7 hours of work, and I still need to clean the lenses and bake them back together with fresh sealant.