How to Paint Black Out Badges w/ DSG Inlays (Pics)
#1
 05-06-2009, 10:55 PM


Join Date: Sep 2006
Location: Texas
Posts: 754
Likes: 0
Received 0 Likes
on
0 Posts
How to Paint Black Out Badges w/ DSG Inlays (Pics)
I have had a couple of questions about how I did the black out badges, so I thought I would post a thread with a few pictures to show how I did it.
To start, I removed the front oval so I could paint it off the the truck. There are two nuts on the inside of the grille which makes it very easy to remove. Once the nuts were off, I had to push with a screw driver to get the Oval to pop out of the grille.
Front Oval Removed.

I used a Red Scotch Pad to scuff up the Oval and I painted it with Krylon Sandable Primer as a first coat. The primer was not really needed, but I wanted to see if there was a difference between using primer and not using primer. On the rest of the badges, I did not use primer and they turned out darker and smoother. I recommend skipping the primer coat.

After the primer coat, I used Krylon Fusion Satin Black to paint the Oval. Notice the final badge looks flatter in color and somewhat bumpy. Maybe I should have sanded it after the primer coat, but the rest of the badges turned out much better.

For the badges on the truck, I taped them first with narrow automotive masking tape. I was sure to get the tape behind the badges as much as possible to allow me to paint the chrome edges and to keep the paint off of the truck. I used the same red scotch pad to rough up the chrome plastic before painting them with Krylon Fusion Satin Black. I did not use a primer coat on the F150 badges or the rear Oval.


Then, I used wider tape to add the newspaper around the badges to provide better coverage for over spray. I also used the cardboard in the first picture to keep the paint from floating around.


Here are the other badges after painting them without primer. They look darker in color and smoother than the front Oval.


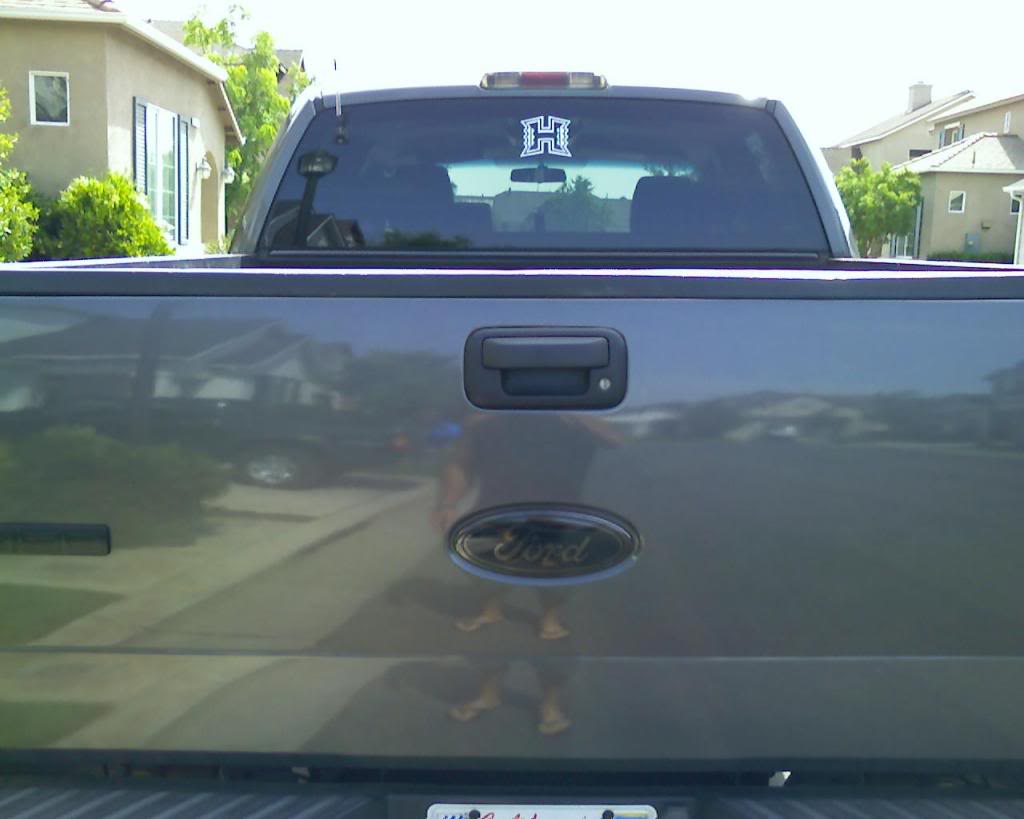
I bought the DSG Overlays with Flat Black letters for the front and back. As recommended, I used Windex to make them easier to install. Once they were on the truck, it was hard to get all of the kinks out of the vinyl near the curves on the side of the oval. I used a hair dryer to finally get them to adhere without popping back up on the edges. From the picture, you will see they do not line up perfectly with the curved surface and raised letters of the Oval. The DSG color is also a little lighter than the truck. However, I think they look very good and I would definitely use them again.

More on next Post...
To start, I removed the front oval so I could paint it off the the truck. There are two nuts on the inside of the grille which makes it very easy to remove. Once the nuts were off, I had to push with a screw driver to get the Oval to pop out of the grille.
Front Oval Removed.
I used a Red Scotch Pad to scuff up the Oval and I painted it with Krylon Sandable Primer as a first coat. The primer was not really needed, but I wanted to see if there was a difference between using primer and not using primer. On the rest of the badges, I did not use primer and they turned out darker and smoother. I recommend skipping the primer coat.
After the primer coat, I used Krylon Fusion Satin Black to paint the Oval. Notice the final badge looks flatter in color and somewhat bumpy. Maybe I should have sanded it after the primer coat, but the rest of the badges turned out much better.
For the badges on the truck, I taped them first with narrow automotive masking tape. I was sure to get the tape behind the badges as much as possible to allow me to paint the chrome edges and to keep the paint off of the truck. I used the same red scotch pad to rough up the chrome plastic before painting them with Krylon Fusion Satin Black. I did not use a primer coat on the F150 badges or the rear Oval.
Then, I used wider tape to add the newspaper around the badges to provide better coverage for over spray. I also used the cardboard in the first picture to keep the paint from floating around.
Here are the other badges after painting them without primer. They look darker in color and smoother than the front Oval.
I bought the DSG Overlays with Flat Black letters for the front and back. As recommended, I used Windex to make them easier to install. Once they were on the truck, it was hard to get all of the kinks out of the vinyl near the curves on the side of the oval. I used a hair dryer to finally get them to adhere without popping back up on the edges. From the picture, you will see they do not line up perfectly with the curved surface and raised letters of the Oval. The DSG color is also a little lighter than the truck. However, I think they look very good and I would definitely use them again.
More on next Post...
Last edited by KR-Texas; 07-10-2009 at 06:17 PM.
#2
05-06-2009, 11:00 PM
Join Date: Sep 2006
Location: Texas
Posts: 754
Likes: 0
Received 0 Likes
on
0 Posts
The side inlays were a little harder to install because they suggested you put them on one letter at a time. I tried their method with the first side, but it took a long time to get the "5.4 Triton" letters lined up correctly. On the other side, I installed the F150 all at once and the 5.4 Triton letters all at once and it was much easier. They both turned out good in the end, but doing them together was much faster for me.

In case you missed my other post in the Wheels section, here is the truck with the badges painted and the inlays/overlays done.


KR-Texas
In case you missed my other post in the Wheels section, here is the truck with the badges painted and the inlays/overlays done.
KR-Texas


#4
05-06-2009, 11:27 PM

Senior Member
Join Date: Apr 2008
Location: Fairfield,CA
Posts: 1,016
Likes: 0
Received 0 Likes
on
0 Posts
#5
05-07-2009, 12:02 AM

Senior Member
Join Date: Jul 2008
Location: arkansas
Posts: 682
Likes: 0
Received 0 Likes
on
0 Posts
#6
05-07-2009, 12:34 AM

Senior Member
Join Date: Feb 2008
Location: Miami
Posts: 226
Likes: 0
Received 0 Likes
on
0 Posts
nice man...real nice did you paint your grill yourself also? I want something along that line. Not sure if to paint my honeycomb,get an fx2 ,or get one like yours.
Could the rest of the painted emblem guys chime in to see how they hold up....I'm a bit skeptical about painting chrome, even if it really is plastic...afraid it will chip and flake
Could the rest of the painted emblem guys chime in to see how they hold up....I'm a bit skeptical about painting chrome, even if it really is plastic...afraid it will chip and flake
#7
05-07-2009, 12:58 AM

Member
Join Date: Mar 2009
Location: New Hampshire
Posts: 81
Likes: 0
Received 0 Likes
on
0 Posts
Trending Topics
#8
05-07-2009, 01:39 AM

#9
05-07-2009, 07:34 AM


#10
05-07-2009, 09:16 AM
Join Date: Sep 2006
Location: Texas
Posts: 754
Likes: 0
Received 0 Likes
on
0 Posts
nice man...real nice did you paint your grill yourself also? I want something along that line. Not sure if to paint my honeycomb,get an fx2 ,or get one like yours.
Could the rest of the painted emblem guys chime in to see how they hold up....I'm a bit skeptical about painting chrome, even if it really is plastic...afraid it will chip and flake
Could the rest of the painted emblem guys chime in to see how they hold up....I'm a bit skeptical about painting chrome, even if it really is plastic...afraid it will chip and flake
KR-Texas
Last edited by KR-Texas; 07-10-2009 at 06:18 PM.
#11
05-07-2009, 09:28 AM
Join Date: Sep 2006
Location: Texas
Posts: 754
Likes: 0
Received 0 Likes
on
0 Posts
The truck is a 2007 Dark Shadow Gray FX4. The Oval overlays and F150 inlays are also Dark Shadow Gray (DSG) from a company in Texas called Patriot Decals. They have the different Ford truck colors available, so you can either match your truck or go with something else. I paid $40 for the overlays and inlays with shipping.
http://www.patriotdecals.com/
Click on Emblem Overlays and then Ford Overlay.
Click on Auto and then Truck for other Ford Emblems (FX4, etc.)
I also bought flat black FX4 decals for the back, but I have not decided if I am going to install them. They were $36 for both.
KR-Texas
#12
05-07-2009, 09:36 AM
Join Date: Sep 2006
Location: Texas
Posts: 754
Likes: 0
Received 0 Likes
on
0 Posts
I removed the running boards before painting them because I thought it would be easier to paint them off of the truck. I will post another thread on the process I used to paint the boards.
KR-Texas
#13
05-07-2009, 02:37 PM

Senior Member
Join Date: Apr 2007
Location: GA
Posts: 1,670
Likes: 0
Received 0 Likes
on
0 Posts

#15
05-08-2009, 12:33 AM

Senior Member
Join Date: Aug 2007
Location: somewhere
Posts: 334
Likes: 0
Received 0 Likes
on
0 Posts