
new here


Thread Starter
|
Senior Member
Joined: Jul 2010
Posts: 527
Likes: 0
From: Louisville, KY
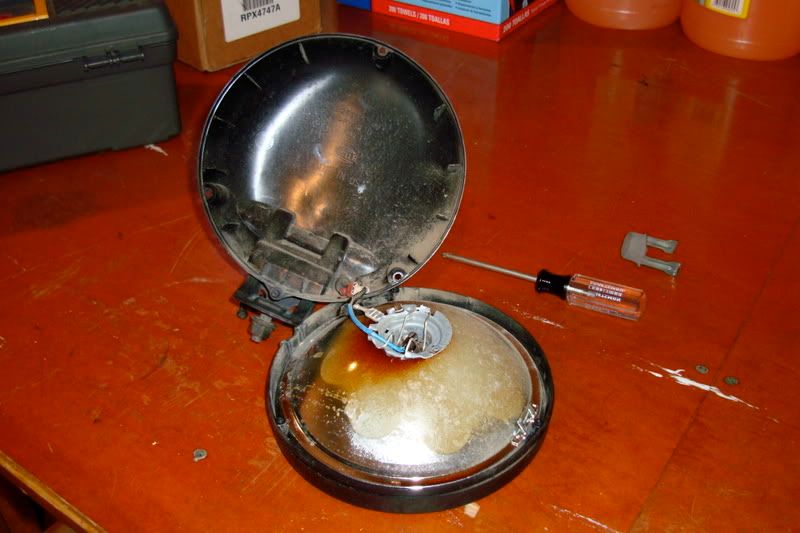
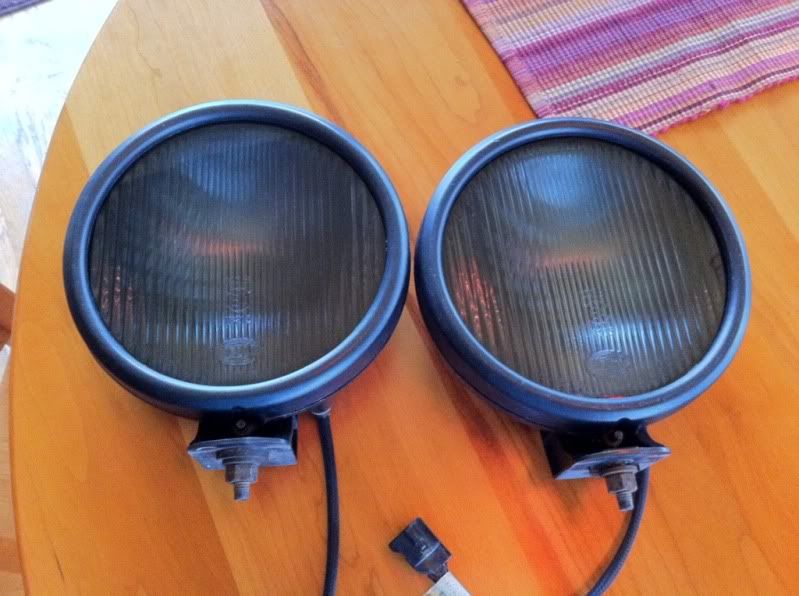
got to work today on my "behind the grille" lights that i want to make. i started out with my old set of fog lights from my Jeep:
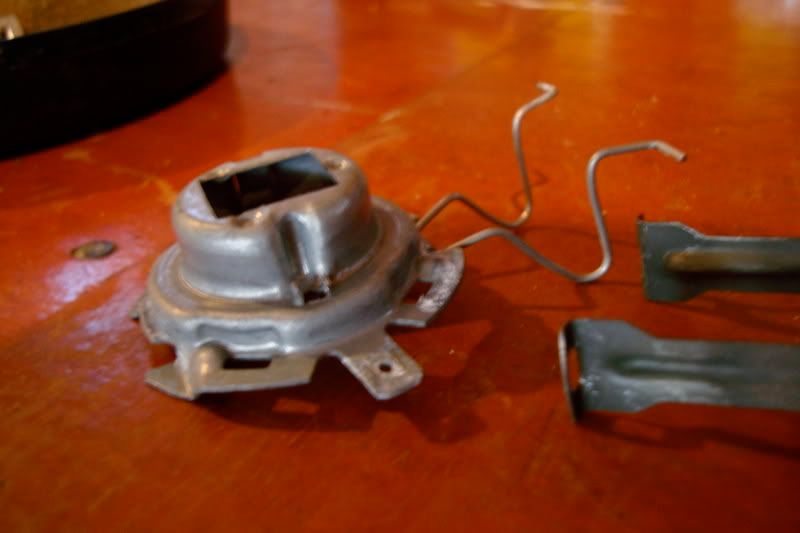
i did this bit of my mod 2 years ago for my wrangler, converting the fogs to driving lights

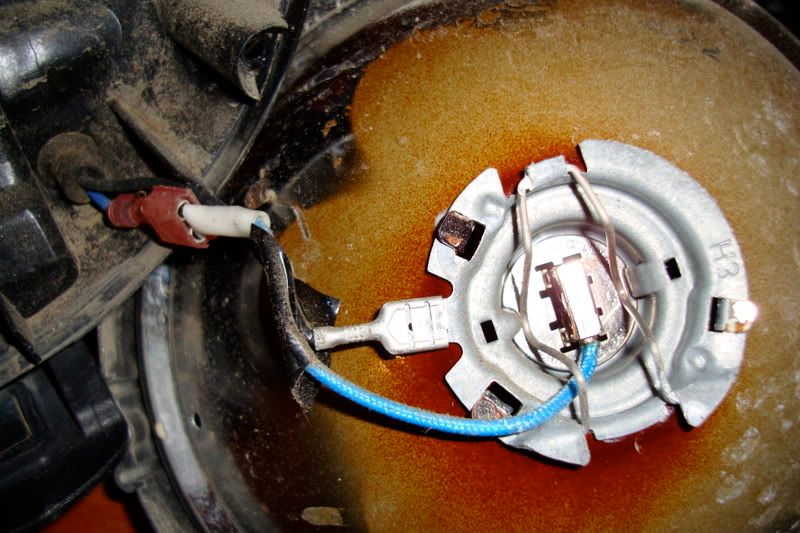
this shield cap forced none of the light to hit the top or bottom of the reflector, along with shrouding 50% of the H3 bulb. soooo it had to go
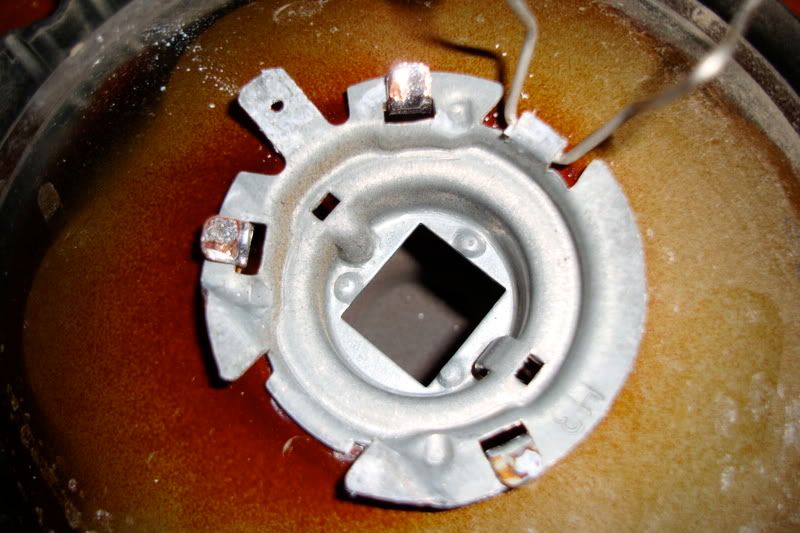
tada!
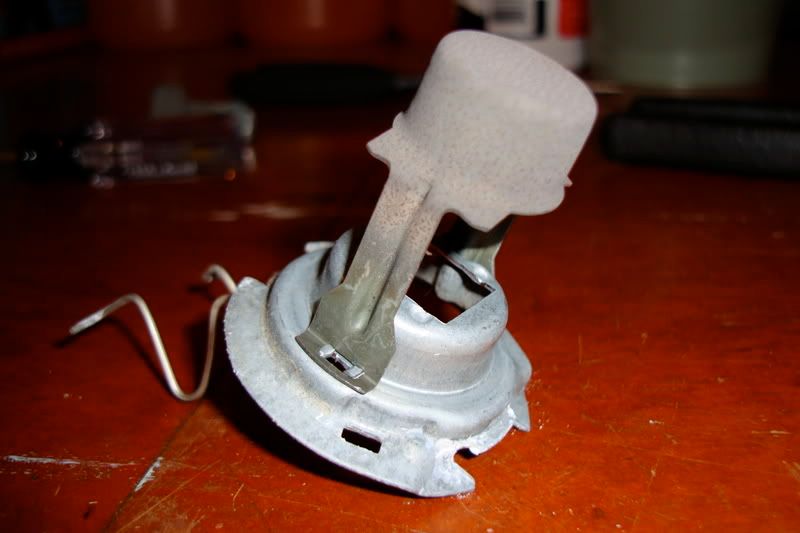
somewhere in here i converted the lights from using a 35watt H3 bulb to a 75watt-er and 4100K in color. also, through a year of use (before i upgraded to SolTek lights) i dunked them and the reflector got spotted with mud and some had caked up on the bottom
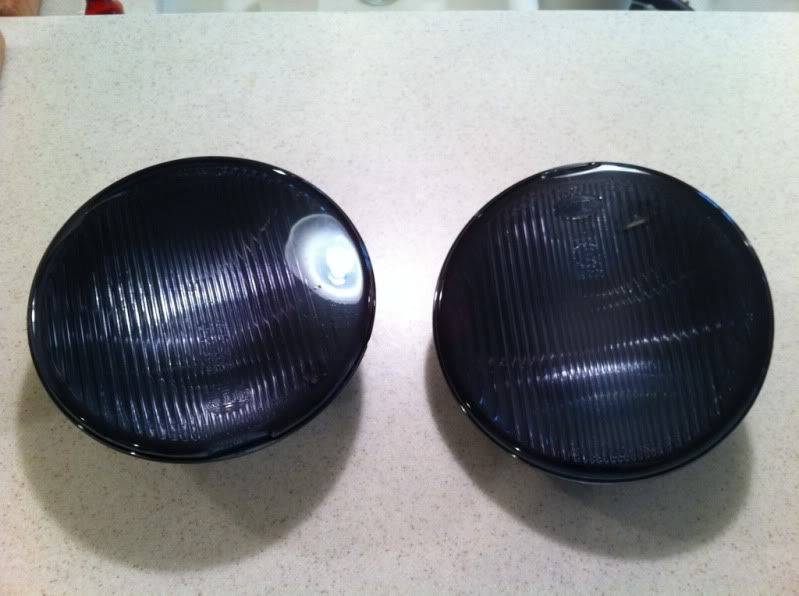
sooo disassembly!
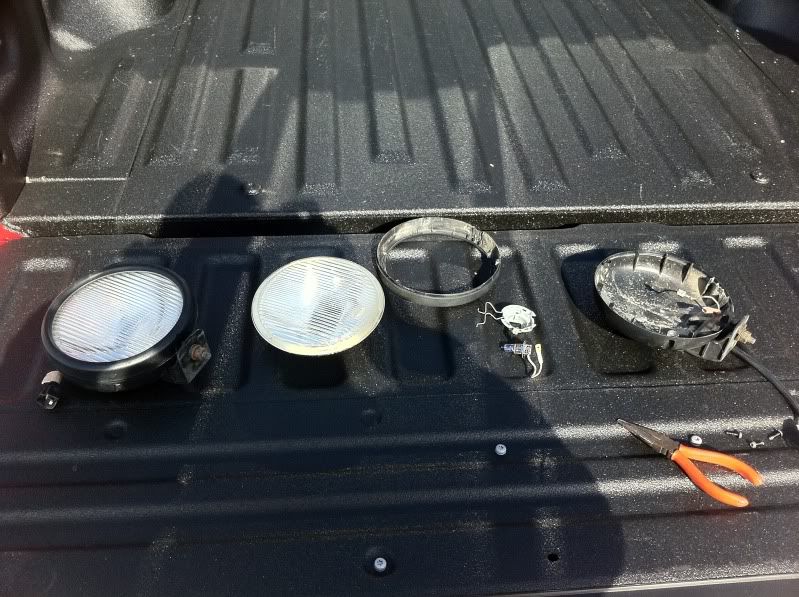
these are the lenses after theyve been cleaned up. they're really nice high quality made in Germany Hella stuff. glass lens and a steel refelctor so they're good for up to 100watts. my plan is to put a very very light tint on the lens so that they're not so visible behind my grille

more to come!
i did this bit of my mod 2 years ago for my wrangler, converting the fogs to driving lights
this shield cap forced none of the light to hit the top or bottom of the reflector, along with shrouding 50% of the H3 bulb. soooo it had to go
tada!
somewhere in here i converted the lights from using a 35watt H3 bulb to a 75watt-er and 4100K in color. also, through a year of use (before i upgraded to SolTek lights) i dunked them and the reflector got spotted with mud and some had caked up on the bottom
sooo disassembly!
these are the lenses after theyve been cleaned up. they're really nice high quality made in Germany Hella stuff. glass lens and a steel refelctor so they're good for up to 100watts. my plan is to put a very very light tint on the lens so that they're not so visible behind my grille
more to come!
Thread Starter
|
Senior Member
Joined: Jul 2010
Posts: 527
Likes: 0
From: Louisville, KY
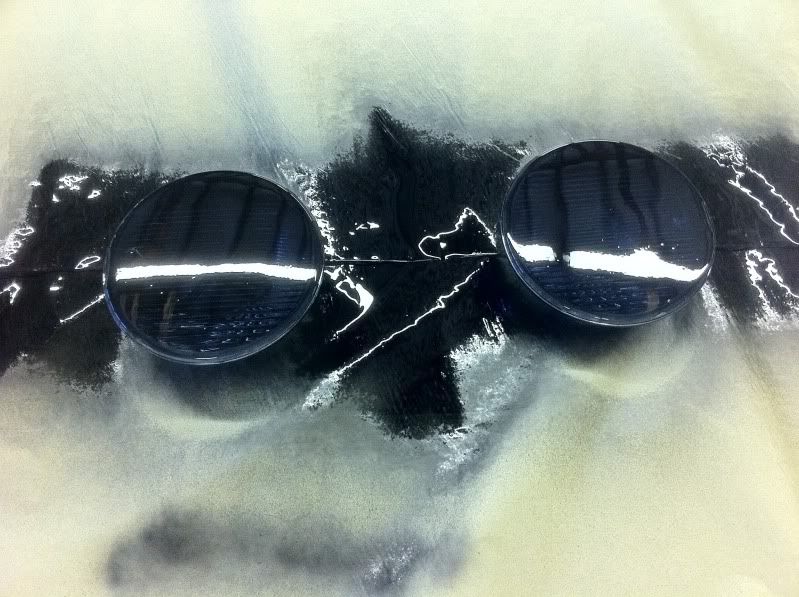
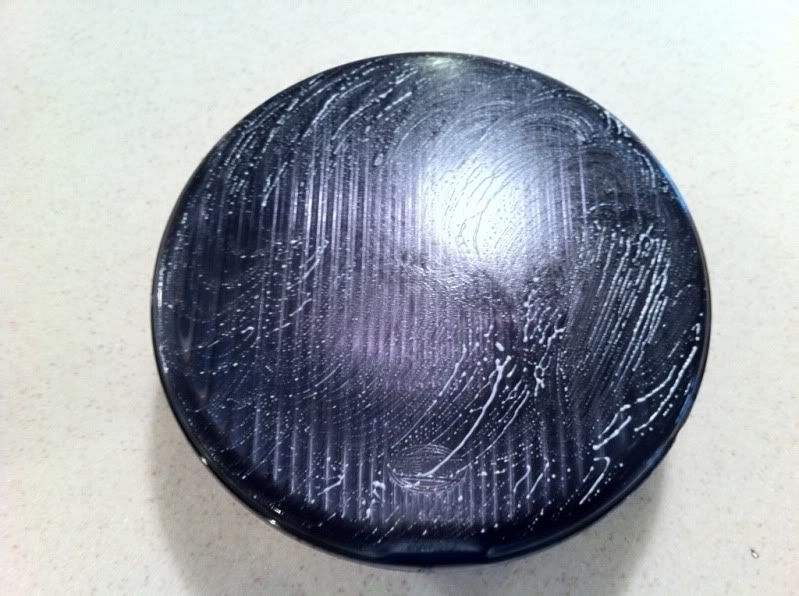
i wet sanded the glass on the lenses with 2000 grit, i was in no way attempting to rough the surface, but to mainly remove debris and things that some how managed to either fuse or attach themselves with the glass. once that was done i cleaned them with simple green to make sure that they were degreased so i wouldnt have another cracking incident and then cleaned them with rubbing alcohol. i applied the night shades and so far so good. this is a bit darker than what i was originally thinking, but it darkens up as it dries so we'll see what it turns into and i can go from there with sanding it down to what i want.
also, today was a nice day - so i had to take atleast 1 picture
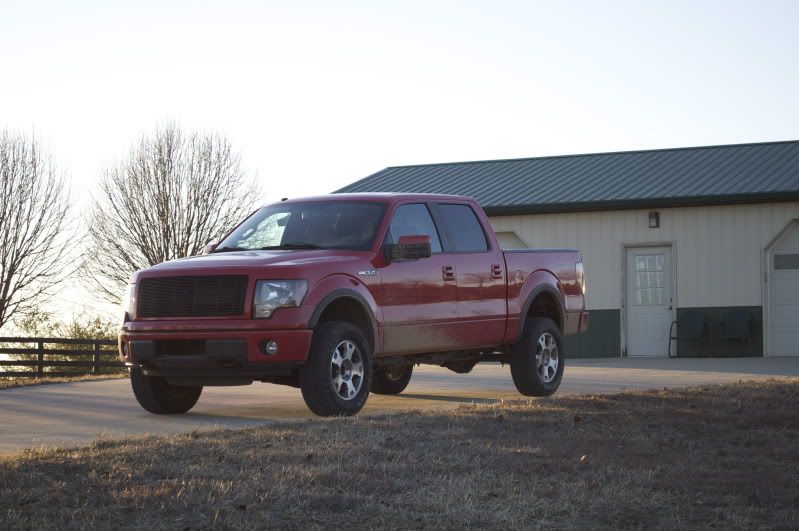
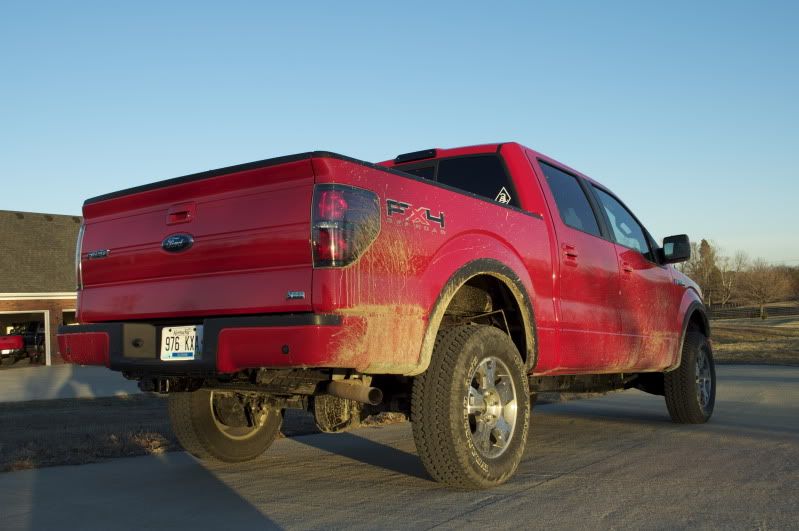
also, today was a nice day - so i had to take atleast 1 picture

Senior Member
Joined: Jun 2008
Posts: 1,000
Likes: 0
From: College Station , TX
Looking Good Marshal! I love the looks of that grille on you truck. I will have to keep my eyes peeled for your rig when my girlfriend does her clinical this summer in Louisville.

Senior Member
Joined: Nov 2010
Posts: 128
Likes: 0
Hey Marshall lookin Good!!!
I got a question tho. If rear blocks are 1 and 1/4 inches and then the block is 3 inches isn't there a problem with the bilstein 5100 in the rear. That would be 1.75 inch lift. Because according to what i read the rear shocks can accommodate up to a 1 inch lift. So are yours just overextended? or is not a full 3 inches?
http://www.shockwarehouse.com/site/p....cfm?id=863271

Senior Member
Joined: Mar 2010
Posts: 1,526
Likes: 1
From: Calgary, Alberta
Hey Marshall, nice job on the grill. Was it as smooth going as you hoped? Also, did you consider transferring the blue oval over to the new grill? I preferred mine with the oval, over what it looked like without.
Thread Starter
|
Senior Member
Joined: Jul 2010
Posts: 527
Likes: 0
From: Louisville, KY
Yeah, it went smoothly. Once I had everything cut out the fitment of it only took about a half hour. The prep work was the longest and most labor intensive. I ended up getting frustrated with those clips and just ripped the grille off and broke all of them. It was easier for me to just plastic weld them back on than it was for me to screw with them.
I thought about it, but I like the way it looks without it. Plus, I painted my blue oval black when my nightshading project bit the dust, so theres no point.
Hopefully shell have new meats on her by the time march is through. Today I picked up some steel stock for my bracket
I thought about it, but I like the way it looks without it. Plus, I painted my blue oval black when my nightshading project bit the dust, so theres no point.
Hopefully shell have new meats on her by the time march is through. Today I picked up some steel stock for my bracket


Thread Starter
|
Senior Member
Joined: Jul 2010
Posts: 527
Likes: 0
From: Louisville, KY
thanks for the well wishes guys.
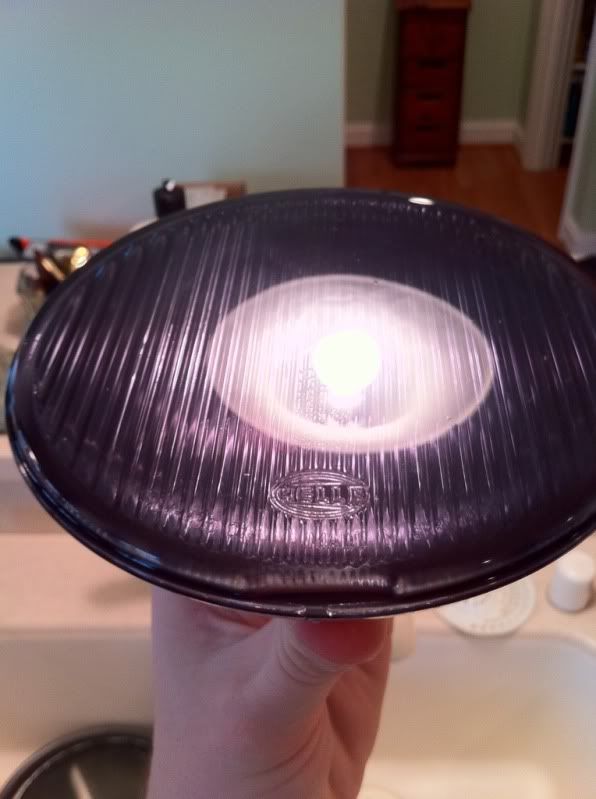
i had a couple free minutes last night to apply 6 very heavy coats of clear coat to the lenses and let them dry overnight. this morning i brought them into the house to see the results:
so far so good, im really happy with the darkness. not too dark that its solid black and keeping light from getting out, but dark enough that in the shade of the hood they wont be seen till they're turned on or someone is specifically looking for them.
there were a few defects in the surface so i got out my polishing compound and went to work:
finished:
then i sat down and got the lights all back together.
im really happy so far with the results, and im hoping that tomorrow with all the baby stuff settling down that i'll be able to spend some time fabricating my bracket for the lights. im pretty confident that i'll be able to get the parts i need bent, bent and everything ground and finished off and ready to be welded up. we'll see how long it takes me to find time to weld it. once thats complete all i need to do is paint it and build a wiring harness for the lights and decide where i want to place the switches.
does anyone know where i can get the same style switches that ARB supplies with their kit? hopefully a place that i can have symbols or words screen printed onto them as well.