
How to: 04-08 OEM headlights FX-R Projector HID retrofit.


Technical Article Contributor
Joined: Mar 2006
Posts: 1,460
Likes: 1
From: Near Houston
Thats correct fellers. A proper projector has a specific bulb mounted in a specific manner which reflects the light from the "bowl" of the projector thru a focal point, at which a cut-off shield is mounted to provide the low beam (on bi-xenon which means hi and low in HID, the shield moves to project a high beam.) It then travels thru a glass lens which optimizes the light output towards the road.
Most "projector" style lights are junk. they use your standard halogen bulbs and usually are worse in light output and performance verses a stock light. If i am not mistaken they dont have cuttoff shields nor proper reflection for an HID setup.
They are essentially a cosmetic item made to look like high end projector style lights.
Heres a good review on this site,
and this link is a great resource for HID lighting.
Last edited by Fabian06SC; Dec 3, 2010 at 12:56 AM. Reason: edited for links


Senior Member
Joined: Sep 2010
Posts: 104
Likes: 0
From: MS
If you look at the original post, he says he spent $100 on extra headlights, so I think he did that, plus I'm sure it was handy to be able to drive around while he was working on this project as well.
Technical Article Contributor
Joined: Mar 2006
Posts: 1,460
Likes: 1
From: Near Houston
another thing i noticed is that those projector style lights have a high beam light on them too. so the crappy projector doesnt even do hi beam duty...
just do it right, and put a bi-xenon projector into the OEM lights or some OEM repros.
Exactly, a pair of oem style lights is about a hundred bucks. why spend an extra 150 to buy the ugly projector style junk.
Last edited by Fabian06SC; Dec 3, 2010 at 08:10 PM.
Senior Member
Joined: Sep 2010
Posts: 104
Likes: 0
From: MS
Where did you get your headlights? I have been searching around and $100 is a good price. How have they held up since you installed them?

Thread Starter
|
Technical Article Contributor
Joined: Apr 2009
Posts: 566
Likes: 0
From: ED, AB, Canada
*** I added 4 new lows and highs pictures bottom of post 3

Technical Article Contributor
Joined: Aug 2006
Posts: 7,862
Likes: 0
From: Northern California
Hey powerz, I'll be doing this soon. How do I go about aiming mine differently, seeing as my headlights sit about 9" higher off the ground than yours do. At this height, being only 2-3" down at 25 ft is going to put my cutoff pretty high, dont you think?
Also, what Kelvin are your D2S bulbs? I want something around 5000k.
Also, what Kelvin are your D2S bulbs? I want something around 5000k.
Last edited by mSaLL150; Dec 12, 2010 at 08:47 PM.
Thread Starter
|
Technical Article Contributor
Joined: Apr 2009
Posts: 566
Likes: 0
From: ED, AB, Canada
Also, what Kelvin are your D2S bulbs? I want something around 5000k.
The iphone picture in post 3 is 4300K. The snow picture below the iphone picture is 5000K. And the fog light picture below is 4300K but in projectors are 5000K. 4300K in a projector have no yellow, and no blue except for the band from cutoff. At first I had 5000K then switched to 4300K then back to 5000K but now i think I like the 4300K and will switch them again.
 I guess Philip's came out with a 5000K D2S bulb that throws as much light as a 4300K. I think thats my problem I like the look of 5000K but the brightness of 4300K.
 Sorry for the confusion!
Technical Article Contributor
Joined: Aug 2006
Posts: 7,862
Likes: 0
From: Northern California
When you drive by parked cars or pull up beside one see where your headlight sits at the car. If your lights sit at drivers head height I don't think you can do much. But you are right, you will have to aim them down more. The problem with that is the lower you aim your lights the more feet you lose in distance. But at the same time you are higher up so the light might travel a bit further. When I was aligning my lights I had them 5 inches below level and highway driving was crap on lows but highs was great. How are your lights now? Is it like your driving with high beams on all over the place?
I definitely like your 5000k pics much more, I'll go with that. Also plan to do angel eyes for both the shroud and the turn signals. Think a 120mm halo will fit on the turn signal reflector?
Last edited by mSaLL150; Dec 14, 2010 at 01:37 AM.

Technical Article Contributor
Joined: Mar 2006
Posts: 1,460
Likes: 1
From: Near Houston
I trimmed out both shrouds and got one projector mounted in the headlight. I just snapped on the clear cover to see what it would look like and wow... they look great with the apollo shrouds! They were easier to fit than what Powers posted on the Gatling shrouds. Just three small clearance cuts and they cover a whole lot more area than the gatlings and they come with a mounting ring so its a breeze to install. I was so excited i threw on the one i had finished just to see the result. I was blown away at the difference between the halogen and the projector! It is literally and figuratively a night and day difference! took some pics but its late. Ill post them up tomorrow.
Technical Article Contributor
Joined: Aug 2006
Posts: 7,862
Likes: 0
From: Northern California
I trimmed out both shrouds and got one projector mounted in the headlight. I just snapped on the clear cover to see what it would look like and wow... they look great with the apollo shrouds! They were easier to fit than what Powers posted on the Gatling shrouds. Just three small clearance cuts and they cover a whole lot more area than the gatlings and they come with a mounting ring so its a breeze to install. I was so excited i threw on the one i had finished just to see the result. I was blown away at the difference between the halogen and the projector! It is literally and figuratively a night and day difference! took some pics but its late. Ill post them up tomorrow.
Thread Starter
|
Technical Article Contributor
Joined: Apr 2009
Posts: 566
Likes: 0
From: ED, AB, Canada
I trimmed out both shrouds and got one projector mounted in the headlight. I just snapped on the clear cover to see what it would look like and wow... they look great with the apollo shrouds! They were easier to fit than what Powers posted on the Gatling shrouds. Just three small clearance cuts and they cover a whole lot more area than the gatlings and they come with a mounting ring so its a breeze to install. I was so excited i threw on the one i had finished just to see the result. I was blown away at the difference between the halogen and the projector! It is literally and figuratively a night and day difference! took some pics but its late. Ill post them up tomorrow.

How much space from the apollo shroud to clear lens?
It's cool to see how the DIY projector retrofits are looking better and better. As more people are doing them, and adding different things to them. Did you use my markings on the bowl? If you did how close were they?
Technical Article Contributor
Joined: Mar 2006
Posts: 1,460
Likes: 1
From: Near Houston
NICE!
How much space from the apollo shroud to clear lens?
It's cool to see how the DIY projector retrofits are looking better and better. As more people are doing them, and adding different things to them. Did you use my markings on the bowl? If you did how close were they?
How much space from the apollo shroud to clear lens?
It's cool to see how the DIY projector retrofits are looking better and better. As more people are doing them, and adding different things to them. Did you use my markings on the bowl? If you did how close were they?
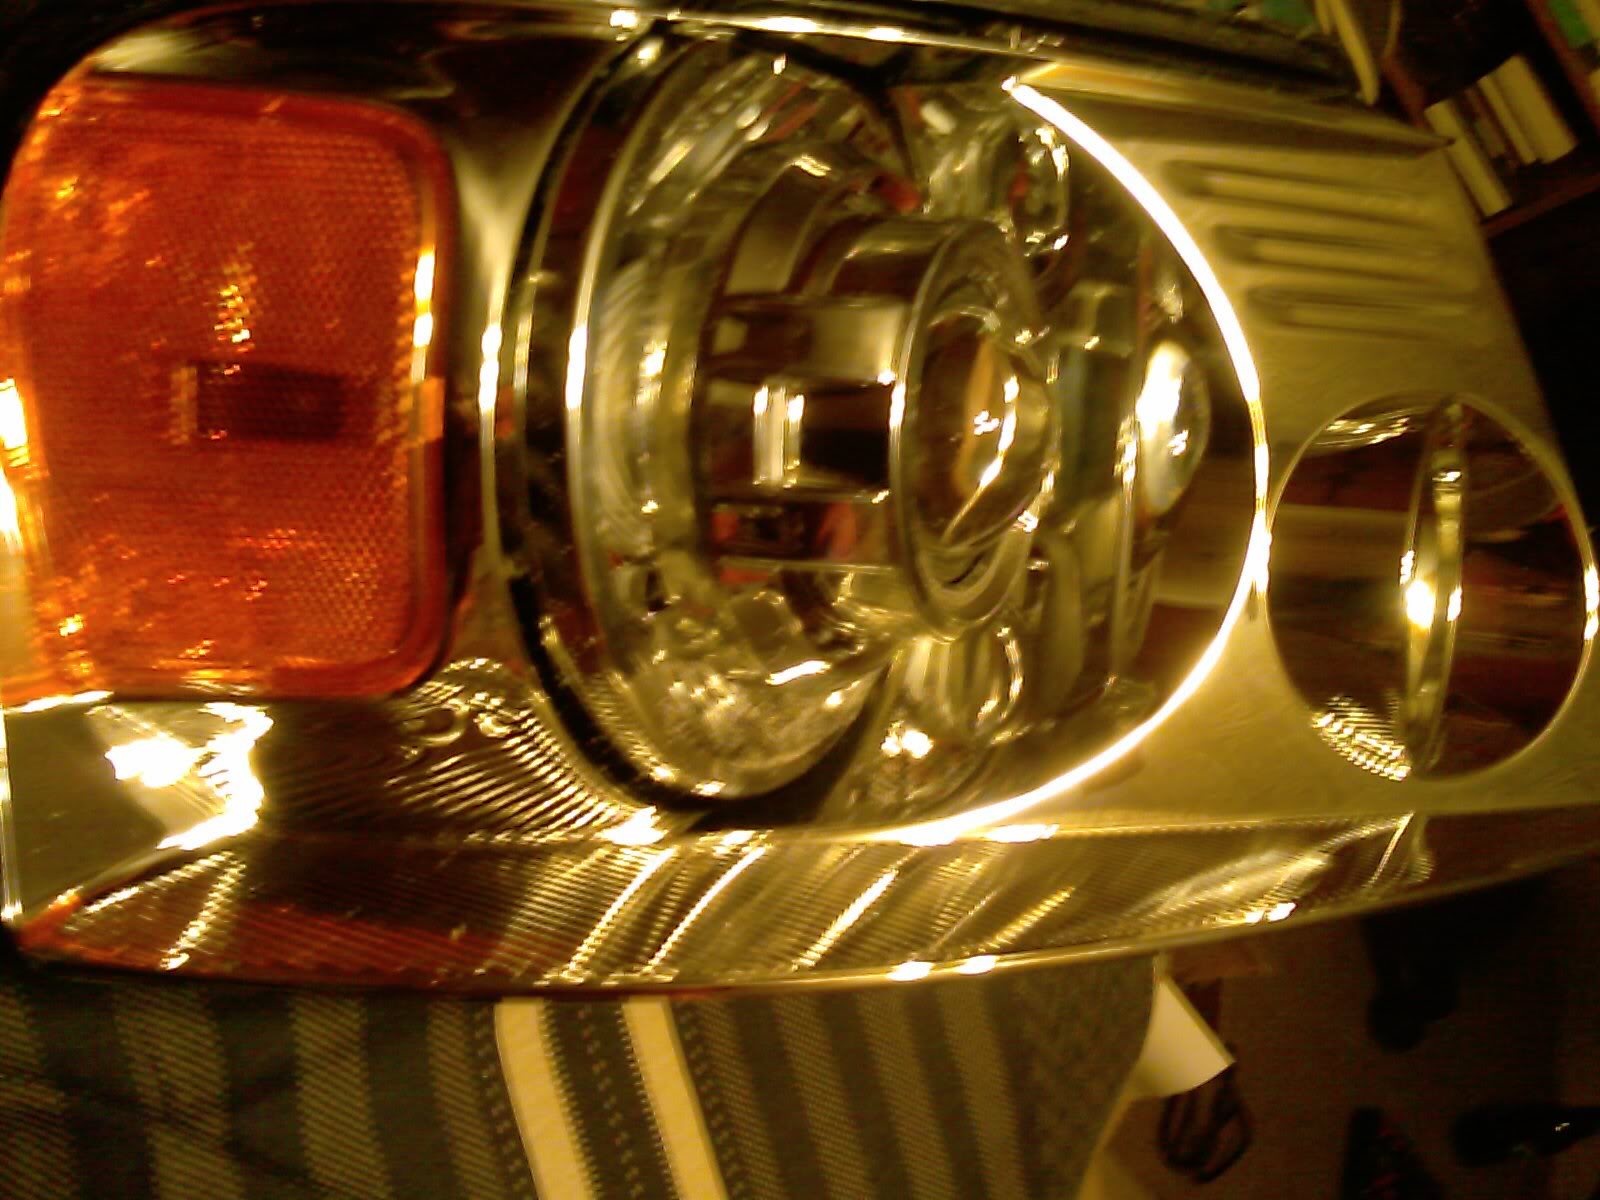
I did sink the projector just a tad bit more (+-1/8"). Its not even evident in pics but it made the shroud fit just perfect to where you really cant see the projector housing at all.
The shroud has plenty of room to spare from the front clear lens. I would estimate between 1/2 to 3/4 of an inch.
Technical Article Contributor
Joined: Mar 2006
Posts: 1,460
Likes: 1
From: Near Houston
here we are. These are the semi finished pics. Projector mounted, shroud fit. The headlight still is a bit dirty from the cutting and sanding so thats why it looks a bit hazy and lighting wasnt that great. No clear lens yet
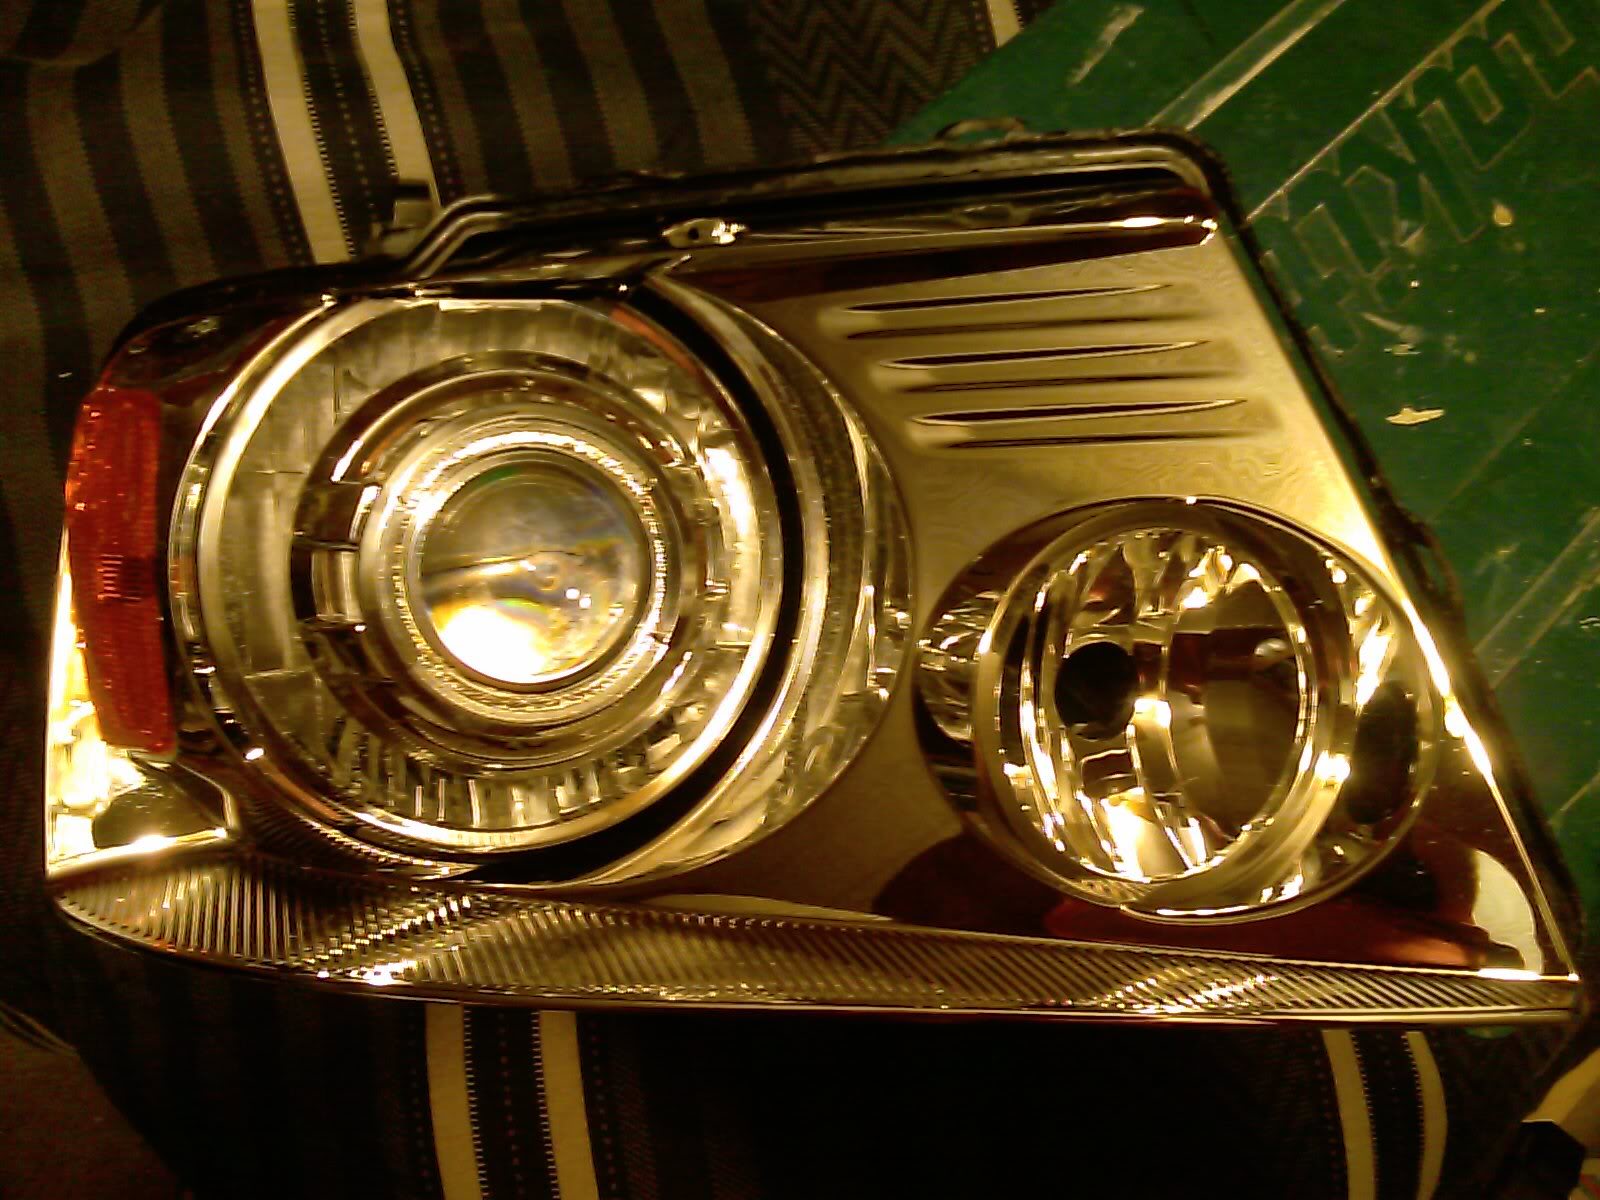
Clear lens on in these
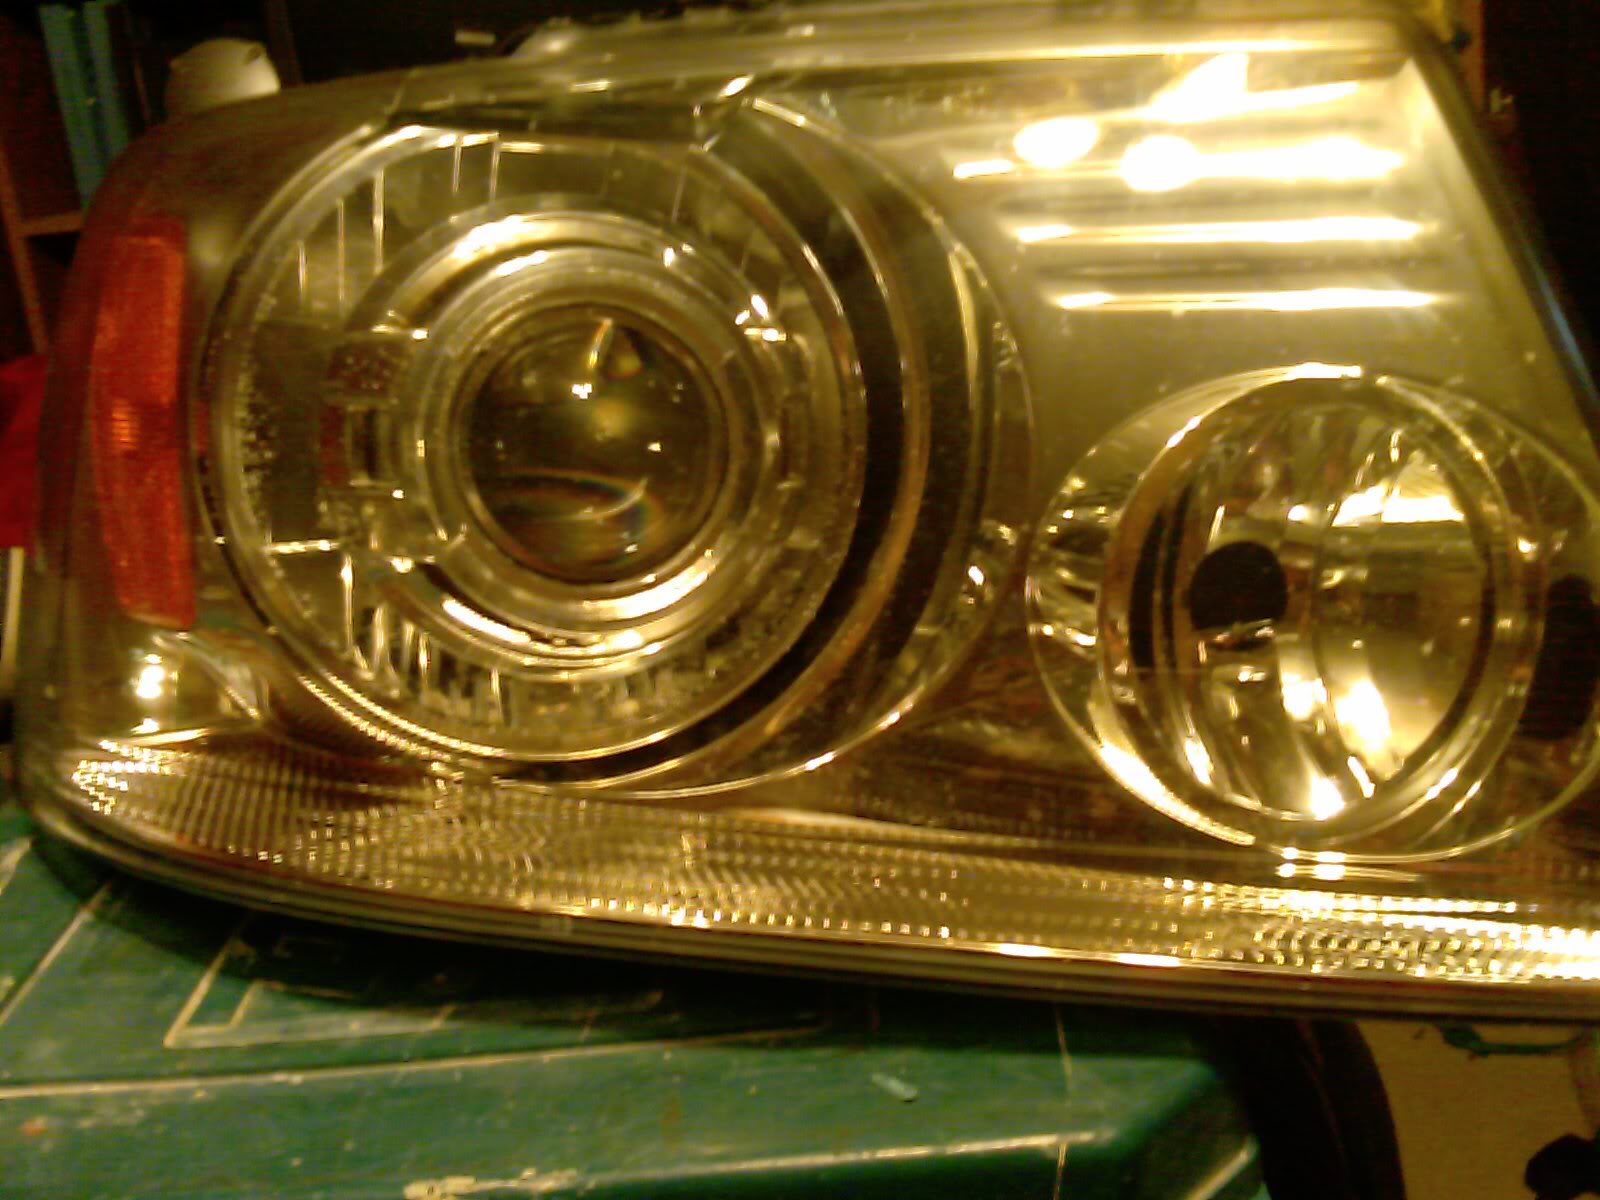
This was the initial fitment. Crappy pic but you can see the projector still, thats why i decided to recess it another 1/8

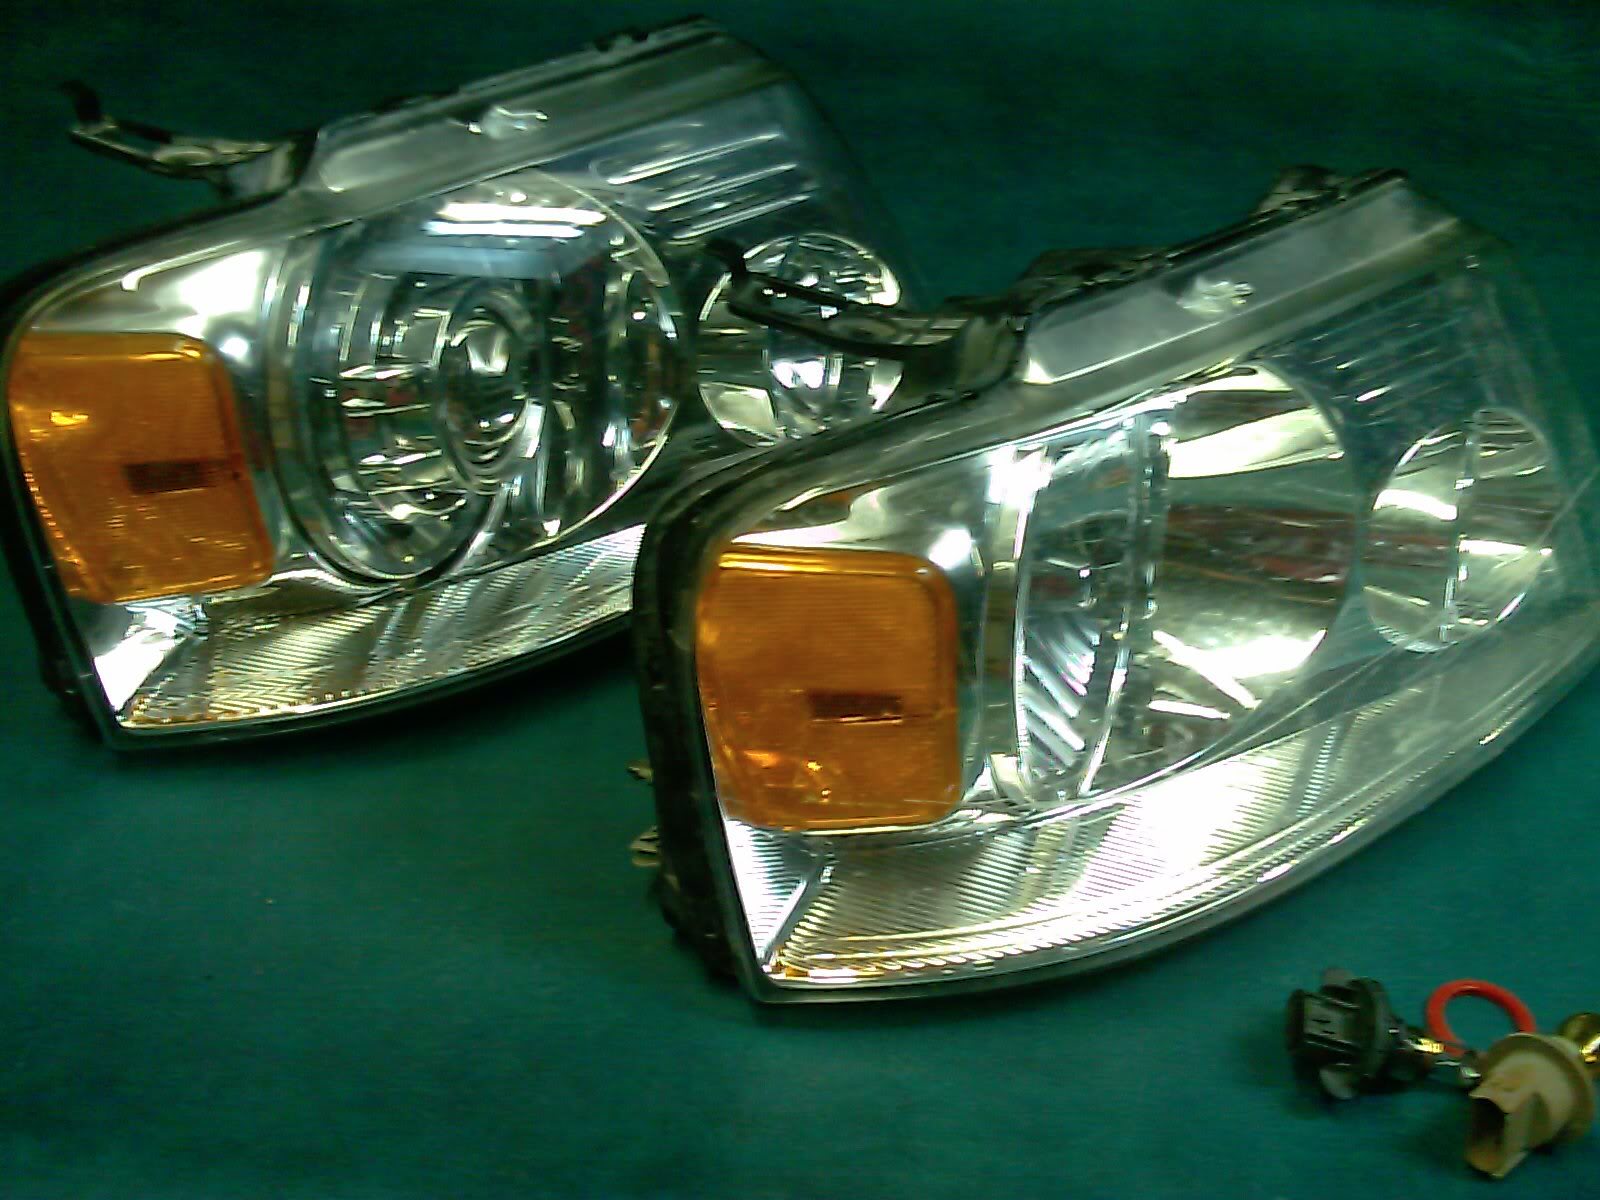
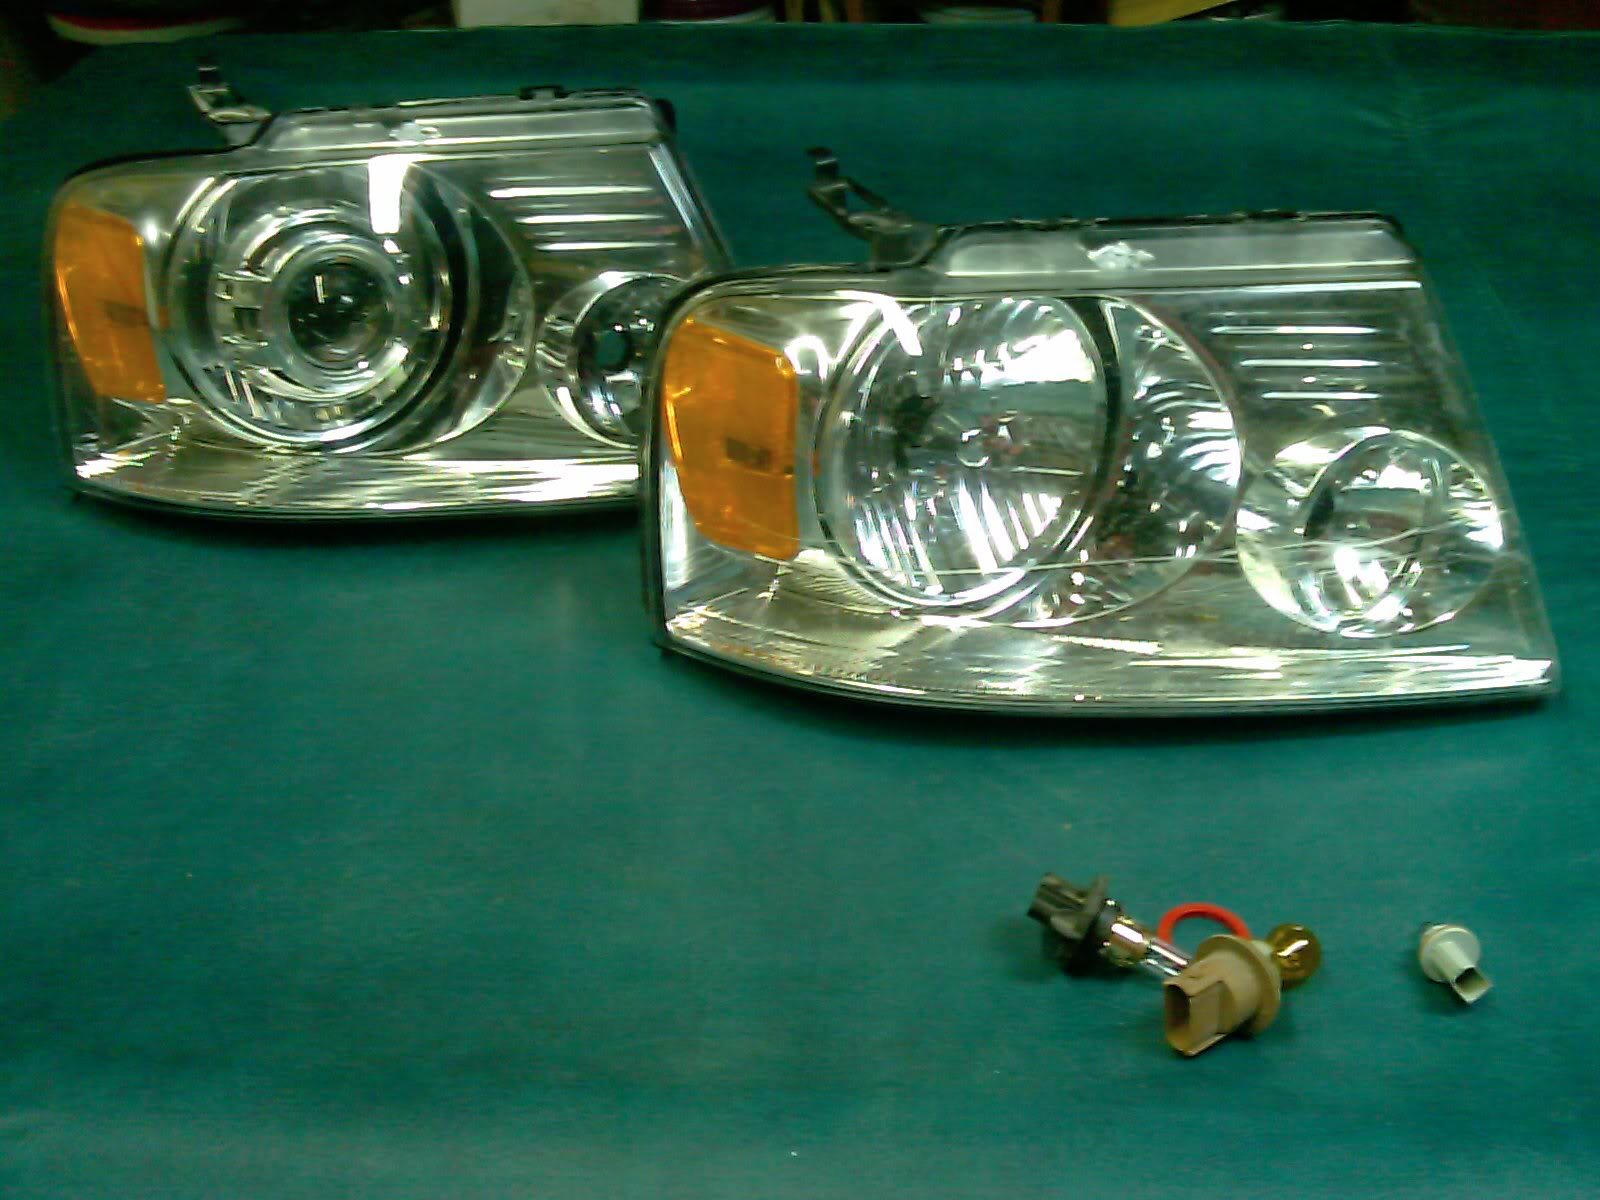
Retro'ed and OEM side by side comparison
Quick fit and lit up.
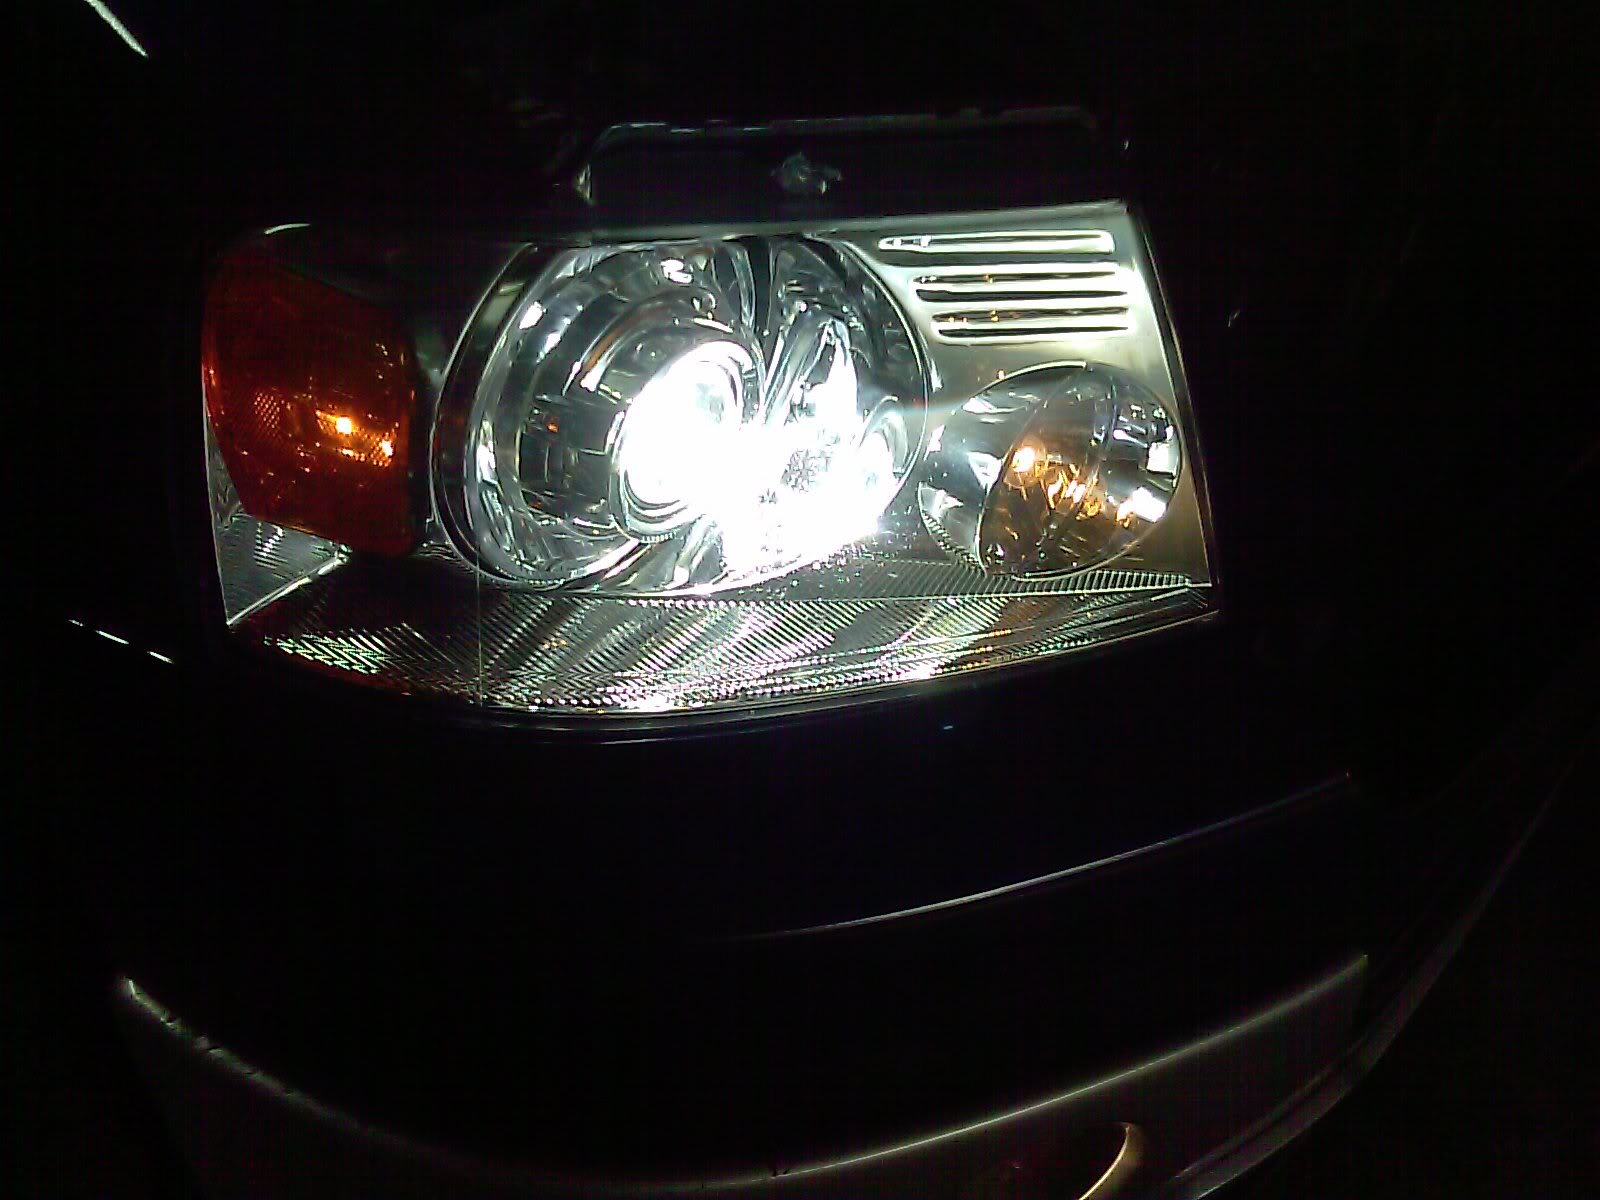
And finally the money shot. For you guys questioning this, here is your answer, this is why we do this.
This picture alone is worth a thousand words and is why a projector is above and beyond any halogen or crappy HID replacement setup.
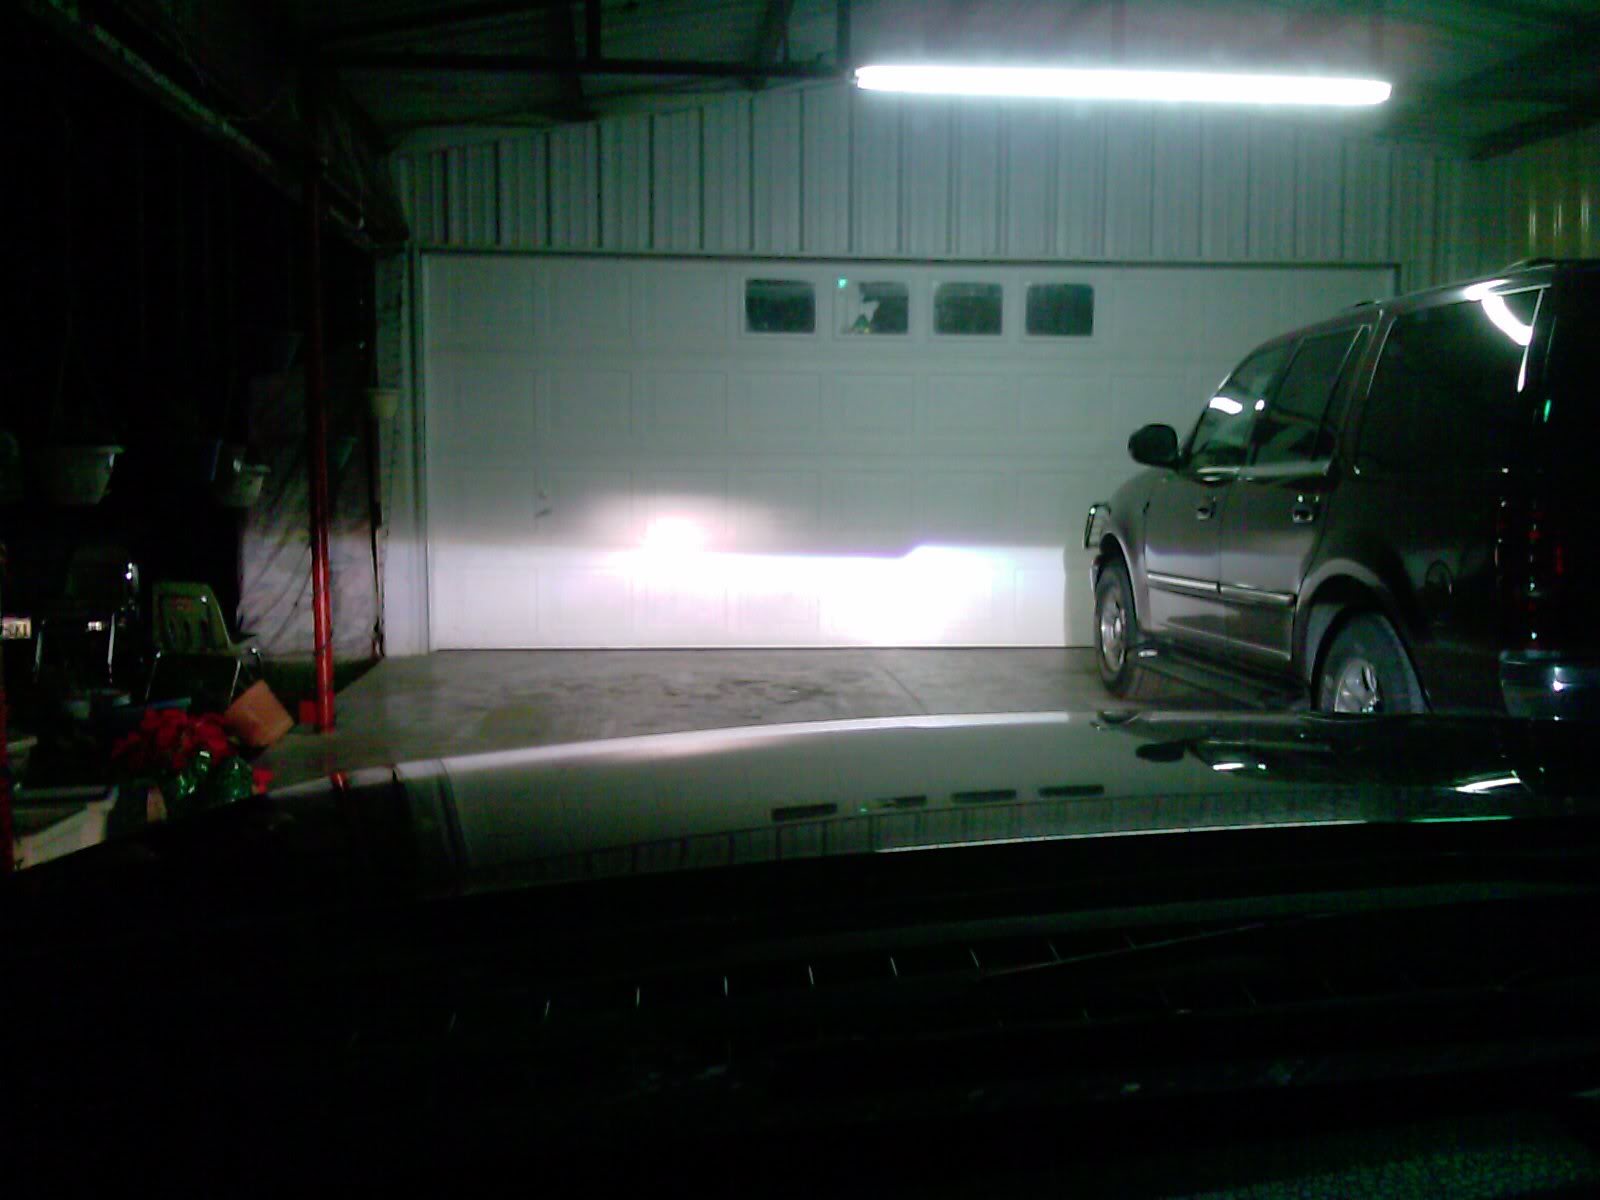
Stock halogen on the left, projector on the right. Notice the cuttoff, the brightness and the 4-5 times larger diameter light output. This is about 4 foot from the door.

About 25 foot back
Clear lens on in these
This was the initial fitment. Crappy pic but you can see the projector still, thats why i decided to recess it another 1/8
Retro'ed and OEM side by side comparison
Quick fit and lit up.
And finally the money shot. For you guys questioning this, here is your answer, this is why we do this.
This picture alone is worth a thousand words and is why a projector is above and beyond any halogen or crappy HID replacement setup.
Stock halogen on the left, projector on the right. Notice the cuttoff, the brightness and the 4-5 times larger diameter light output. This is about 4 foot from the door.
About 25 foot back
Last edited by Fabian06SC; Jan 6, 2011 at 01:45 AM.