

Progress Thread...


Senior Member
Joined: Mar 2008
Posts: 128
Likes: 0
From: Atlanta
Originally Posted by Grafix Ink.
easiest way is finding some seats from a scrap yard... or i've even seen them on ebay for you guys in the states

Originally Posted by GrifN
for the passenger seat, did you just use a 2nd driver's seat? or find a passenger seat somewhere? Also, did you have to get new mounting hardware, or use the same stuff from the 60 part of your 60/40 seat??
Originally Posted by thedanielson109
nice... i like the look of the expy console  i cant wait to start modding my F150
i cant wait to start modding my F150 Last edited by Grafix Ink.; Mar 29, 2008 at 03:42 PM.
Senior Member
Joined: Mar 2008
Posts: 128
Likes: 0
From: Atlanta
Originally Posted by Grafix Ink.
read.. answer's there in the post

Senior Member
Joined: Nov 2007
Posts: 581
Likes: 1
From: Melbourne, FL
Originally Posted by Grafix Ink.
Few things done this week.
Yesterday got the powerwindow kit installed.
Today... tint... pics to come.
Yesterday got the powerwindow kit installed.
Today... tint... pics to come.
Originally Posted by GrifN
Sorry, must have gone straight to the pics on that post. So, perhaps I'm an idiot and don't know how to read/comprehend what I read (entirely possible), but what you are saying is that you got them to essentially cut off a chunk of the seat and re-upholster it, then got a new foot (and slider bar) from someone else so that your seat had a 2nd leg to stand on? Is this correct? (Damn, I'm tired, so sorry if I am not making sense and/or not reading your post correctly. Please correct me if I'm wrong.)
Originally Posted by Nettershakes
How well does your power window kit work? I got the same kit and it was junk. It kept getting stuck and then overheated.
i too was having the same problem at first where the windows were getting stuck after i did the install. - the windows were very stiff to begin with prior to install and i figured i would have an issue. i figure more then likely its the track itself.. if you look at your window when its going down chances are it shifts and goes down on an angle.. thus jamming itself and making things harder.
but i grease them up very well; track, mechanism, everything. i encourage everyone to do the same if they are thinking of doing this as well... now there are pretty decent... doesn't get stuck at all now...pretty smooth it does slow down at certain spots but never stops... but i do plan on taking the truck to a glass specialist so they can free up the windows for smoother operation though. weird only issue is going down, going up its mint. still love them... power windows ftmfw
Last edited by Grafix Ink.; Apr 1, 2008 at 09:47 AM.

has been a busy week... here's some updates...
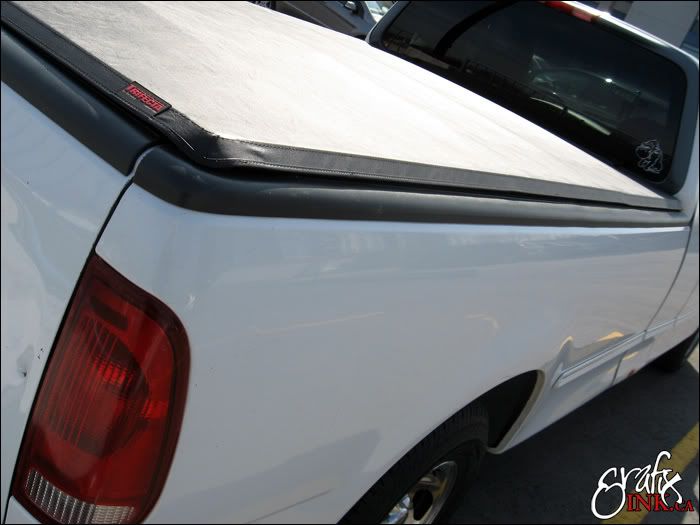
extang trifecta tonneau cover... love it; lifetime warranty, 2 min install, looks good, super cheap in price, and works great... even works as a locking tailgate as you need to open the tailgate to open the tonneau.
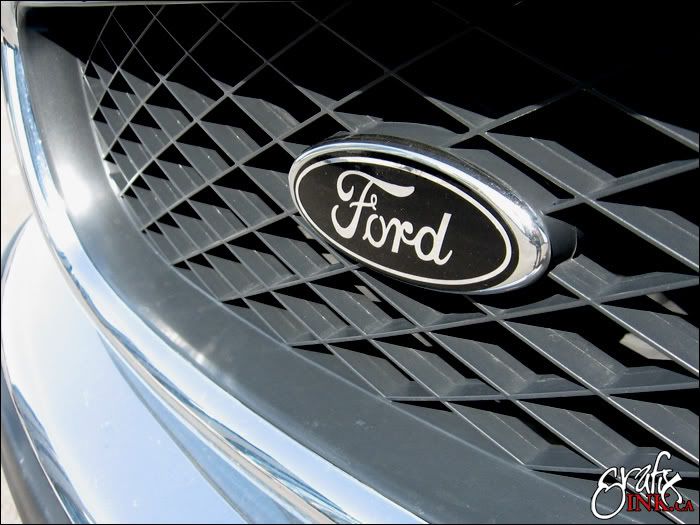
decided to do a changeover from blue to black. making the decals were a pain but looks great imo as they match the truck better... front grill/tailgate emblems.

POWER WINDOWS FTW... install went well.. took a bit of time as i did them myself and wanted wiring done properly etc. the stock windows where horribly stiff so i had to use lubricating grease to get things going. i might head to a glass specialist to re-align the track properly for easier use... for now the grease is working fine. covered the factory manual window crank with the window controls... looks weird in the pic, but in the truck position is fine and not out in the open. passenger obviously is matching minus 1 switch.
extang trifecta tonneau cover... love it; lifetime warranty, 2 min install, looks good, super cheap in price, and works great... even works as a locking tailgate as you need to open the tailgate to open the tonneau.
decided to do a changeover from blue to black. making the decals were a pain but looks great imo as they match the truck better... front grill/tailgate emblems.
POWER WINDOWS FTW... install went well.. took a bit of time as i did them myself and wanted wiring done properly etc. the stock windows where horribly stiff so i had to use lubricating grease to get things going. i might head to a glass specialist to re-align the track properly for easier use... for now the grease is working fine. covered the factory manual window crank with the window controls... looks weird in the pic, but in the truck position is fine and not out in the open. passenger obviously is matching minus 1 switch.
Last edited by Grafix Ink.; May 27, 2009 at 03:44 PM.

door were off so i figure i would skip some steps and install some 6.5" component speakers. made a speaker adapter to fit the new speakers as obviously stock isn't 6.5"... love em.. orion ftw great sound quality.

last thing for the week lol... tint.
went with 35% all around.. find it matches the rear window perfect... love it.
not too dark for nights, dark enough for me...
trucks no where where i want it to be... more parts planned still
what a day yesterday....
first my lower valance had started to rust only 3 months after purchasing... so i exchanged it due to 3 year warranty....
what a pain taking this thing off and on.
the good - i finally pieced together an intake... total cost $30...
pics to come...
first my lower valance had started to rust only 3 months after purchasing... so i exchanged it due to 3 year warranty....
what a pain taking this thing off and on.
the good - i finally pieced together an intake... total cost $30...
pics to come...
Last edited by Grafix Ink.; Apr 28, 2008 at 08:29 AM.
wohoo bought a new toy... canon 10d digital slr.. amazing camera
(although a few years old comparable cameras today are $1300+)
--
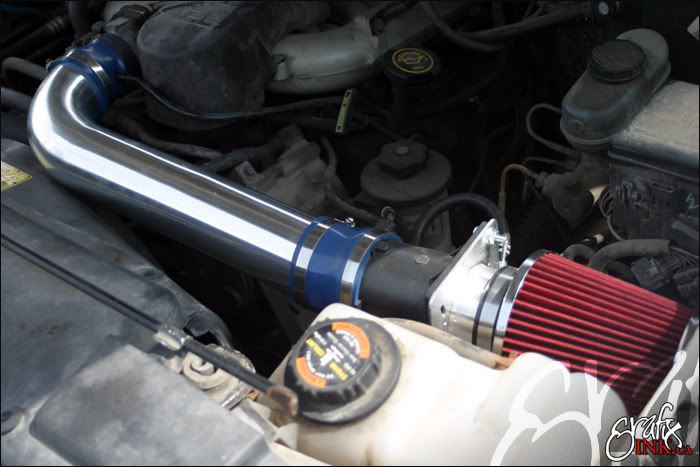
installed the intake yesterday... came out pretty well.
materials used
- a cold air intake system from a honda civic
(came with 2 tubes only used one) and a maf sensor adapter
- maf sensor adaptor plate
...total cost for me was $30.
much better then a $300 K&N intake and just the same imo other then branding. the filter is the same material as the K&N comes pre-oiled and is washable/reusable at cost of only $15-20 per filter here at a local performance shop it makes it pretty much disposable.
install wasn't hard at all... i did have to cut the tubes and re-drill holes in the maf sensor, etc.
as it stands thus far i am very happy with. added throaty sound and a noticeable gain/ease in acceleration.
it isn't however complete as I am planning on doing the diy battery box intake addon in the next few days...
this will help bring in colder air and cleaner air (far far less dust etc by just having an open filter in the engine bay) by isolating the filter in the box.
(although a few years old comparable cameras today are $1300+)
--
installed the intake yesterday... came out pretty well.
materials used
- a cold air intake system from a honda civic
(came with 2 tubes only used one) and a maf sensor adapter
- maf sensor adaptor plate
...total cost for me was $30.
much better then a $300 K&N intake and just the same imo other then branding. the filter is the same material as the K&N comes pre-oiled and is washable/reusable at cost of only $15-20 per filter here at a local performance shop it makes it pretty much disposable.
install wasn't hard at all... i did have to cut the tubes and re-drill holes in the maf sensor, etc.
as it stands thus far i am very happy with. added throaty sound and a noticeable gain/ease in acceleration.
it isn't however complete as I am planning on doing the diy battery box intake addon in the next few days...
this will help bring in colder air and cleaner air (far far less dust etc by just having an open filter in the engine bay) by isolating the filter in the box.

wanted to do the drop right away, but i'm deciding to take care of the rust on the extended cab door first... so that might be the next thing.

