Mustang coil covers on 5.0L F150


Thread Starter
|
Senior Member
Joined: Dec 2010
Posts: 695
Likes: 0
From: Red Deer Ab.
Mustang coil covers on 5.0L F150
Bought some Blue boss 302 coil cover for my f150 5.0L.

could not find the ball studs that mount the coil covers to the valve covers so i got some m6x1.00"x25mm mechine screws.three per side total of six.

you can se the three spots where the stud should be.

so i screwed the machine screws into the valve covers.

screwed machine screws till they bottomed out then screwed them out a turn and a half. i then removed the pcv line and oil cap on passenger side. then lined up coil covers with machine screws and then pushed them on. put pcv line back on then repeated for other side its that easy. (had to play with the hight of the screws to get the right fit of the coil covers). if you do this you might want to lightly grease the screws to help the cover install. plus be careful to line up the covers just right if not you'll push the rubbers out of the covers and will need to remove them and try again.

covers installed.


the hardest part of the install was the back screws by the fire wall on ether side. total time 15 min. i still need to adjust the one side and will be lighty greasing the screws so i'll let you know how that goes.
could not find the ball studs that mount the coil covers to the valve covers so i got some m6x1.00"x25mm mechine screws.three per side total of six.
you can se the three spots where the stud should be.
so i screwed the machine screws into the valve covers.
screwed machine screws till they bottomed out then screwed them out a turn and a half. i then removed the pcv line and oil cap on passenger side. then lined up coil covers with machine screws and then pushed them on. put pcv line back on then repeated for other side its that easy. (had to play with the hight of the screws to get the right fit of the coil covers). if you do this you might want to lightly grease the screws to help the cover install. plus be careful to line up the covers just right if not you'll push the rubbers out of the covers and will need to remove them and try again.
covers installed.
the hardest part of the install was the back screws by the fire wall on ether side. total time 15 min. i still need to adjust the one side and will be lighty greasing the screws so i'll let you know how that goes.


Global Moderator &
Senior Member
Senior Member

Joined: Mar 2005
Posts: 26,080
Likes: 85
From: Burleson/Athens/Brownsboro, TX
Those covers should allow you to wash the engine without worring about the COPs getting wet. How much and where do you get them?
__________________
Jim
Jim
Trending Topics

Technical Article Contributor
Joined: Apr 2009
Posts: 10,697
Likes: 14
From: In the fast lane from LA to Tokyo...
Intake and coil covers......http://www.latemodelrestoration.com/...ging-Cover-Kit
Last edited by 88racing; Nov 9, 2011 at 10:03 AM.

Senior Member

Joined: Oct 2010
Posts: 852
Likes: 12
From: Timbuk3 MI
2007 Loaded FX4 ... if not how the heck do you keep the engine bay so clean?
Following this regiment, spiffing-up the engine bay takes very little time and/or effort.
Example - Here's a couple of engine bay pic' of my 2003 Crown Victoria LX Sport with 107,000 miles .....

Last edited by gDMJoe; Nov 9, 2011 at 11:14 AM.

Senior Member
Joined: Sep 2008
Posts: 461
Likes: 0
From: Ontario, Canada
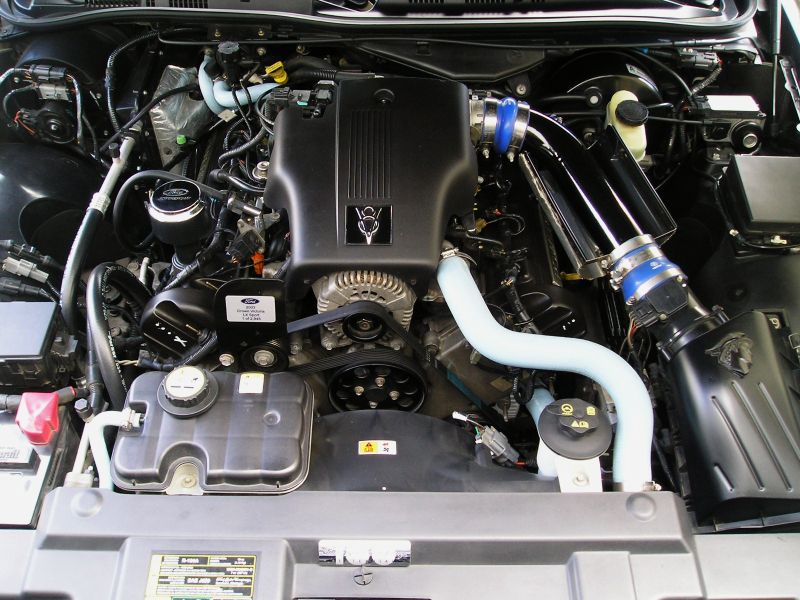
Don't let it get REALLY dirty. Meaning: The engine bay gets cleaned each time the vehicle is washed.
Following this regiment, spiffing-up the engine bay takes very little time and/or effort.
Example - Here's a couple of engine bay pic' of my 2003 Crown Victoria LX Sport with 107,000 miles .....
Following this regiment, spiffing-up the engine bay takes very little time and/or effort.
Example - Here's a couple of engine bay pic' of my 2003 Crown Victoria LX Sport with 107,000 miles .....
Thread Starter
|
Senior Member
Joined: Dec 2010
Posts: 695
Likes: 0
From: Red Deer Ab.
they were $150 Canadian all in from Ford Racing. order them threw my dealership.
Thread Starter
|
Senior Member
Joined: Dec 2010
Posts: 695
Likes: 0
From: Red Deer Ab.
Here's one place......http://www.latemodelrestoration.com/...s-M-6P067-M50b
Intake and coil covers......http://www.latemodelrestoration.com/...ging-Cover-Kit
Intake and coil covers......http://www.latemodelrestoration.com/...ging-Cover-Kit