
HOW TO: USB 2 to Glove Box install (no console)


Thread Starter
|
Technical Article Contributor
Joined: Feb 2001
Posts: 425
Likes: 1
From: College Station TX
Thanks to Barritia for the initial thread. This thread is for those of us without the center channel speaker or center console that would like to do the USB 2 install.
*FYI this is an '09 F150 XLT with the 40/20/40 bench with a single CD radio with SYNC.
*Project time 15 minutes.
Materials needed
Socket wrench with 9/32 socket
(Thanks to scandalous for the links to the cables)
USB A Female to Mini 5 pin (B5) Male Adapter $1.84
USB 2.0 A Male to Mini-B 5pin Male 28/24AWG Cable w/ Ferrite Core - (Gold Plated) - 3ft $1.19
Coat hanger
* I used a 250gb Western Digital Passport for my hard drive/ media player since it is powered by USB only.
-------------------------------------------------------------------------
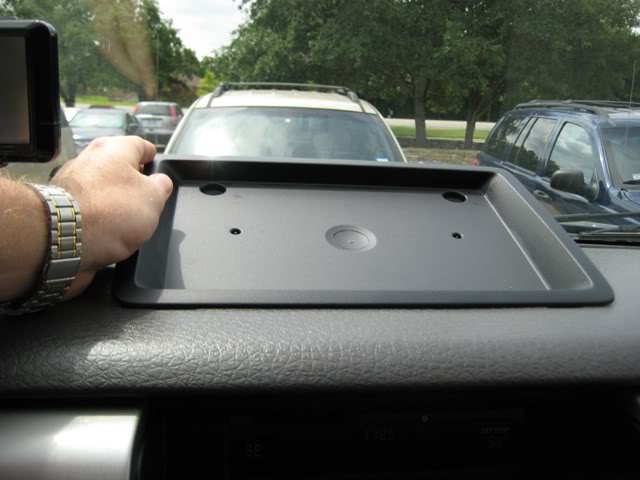
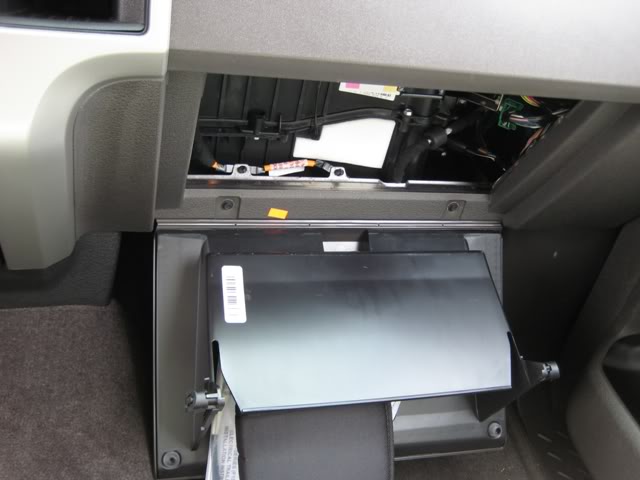
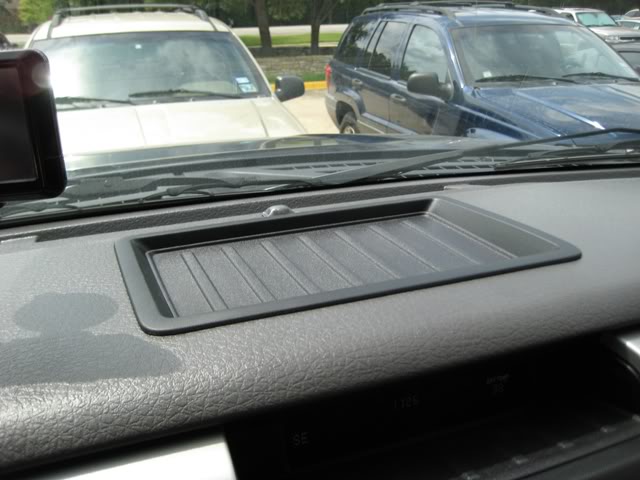
This is how it looks just sitting there.
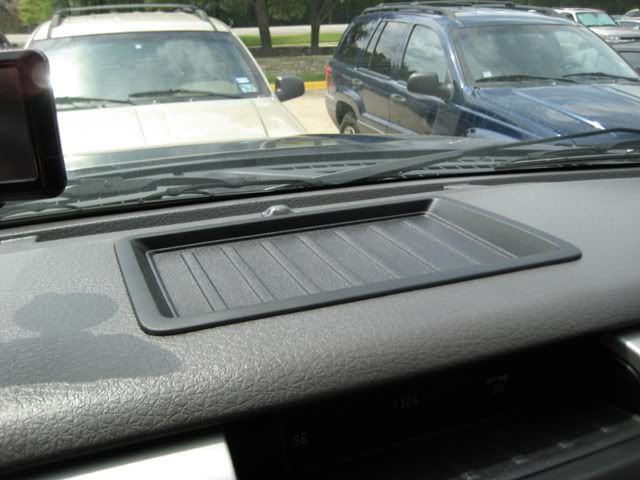
There is a thin mat that rests inside this tray, pull it out and set aside.
There are 2 bolts holding this tray in, they are located in the two corners closest to the windshield.
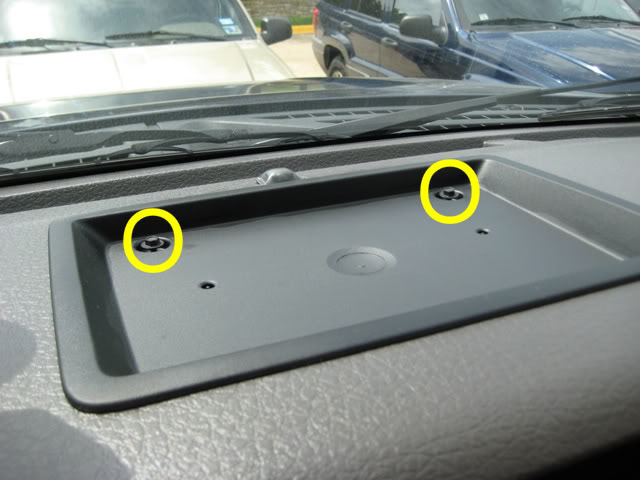
I used a 9/32 socket to remove them.
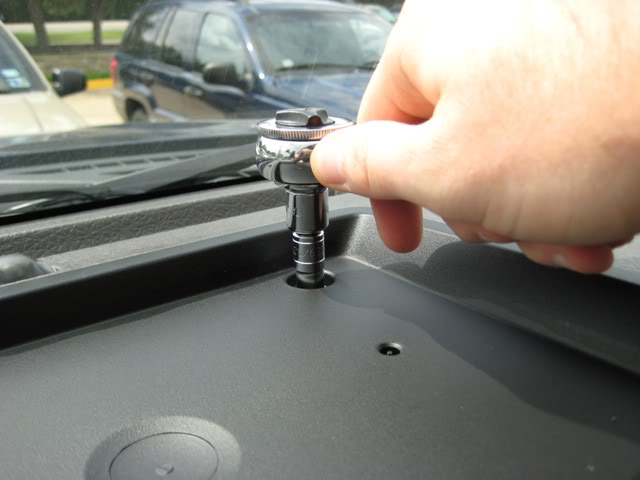
Once they are out enough you can twist them out by hand.

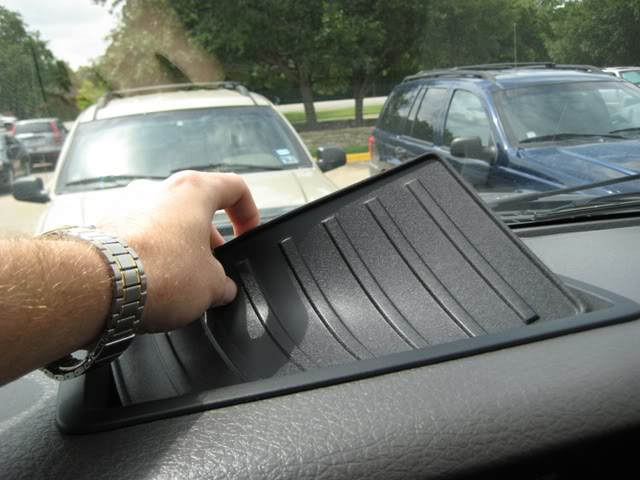
Now that the bolts are out you can lift the tray out. you have to lift up on the window side and lift is out towards the window. There is a lip that prevents you from lifting the front end of the tray up.
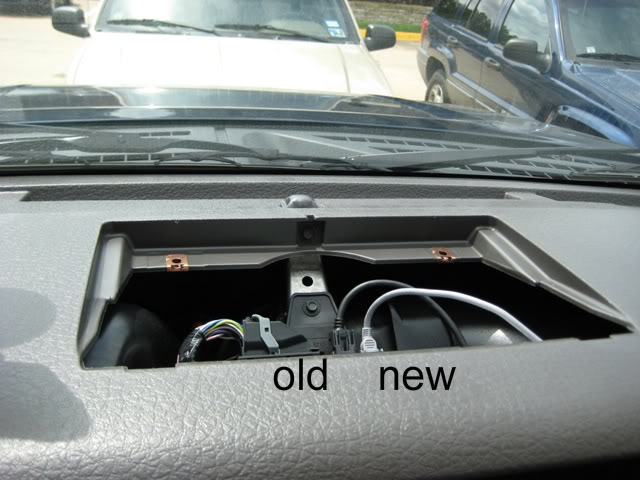
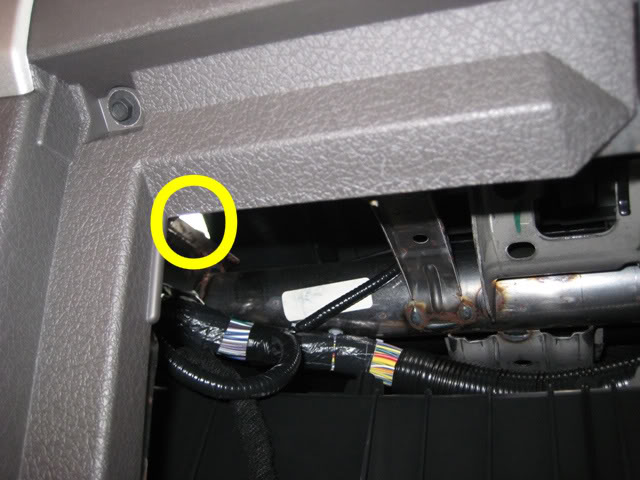
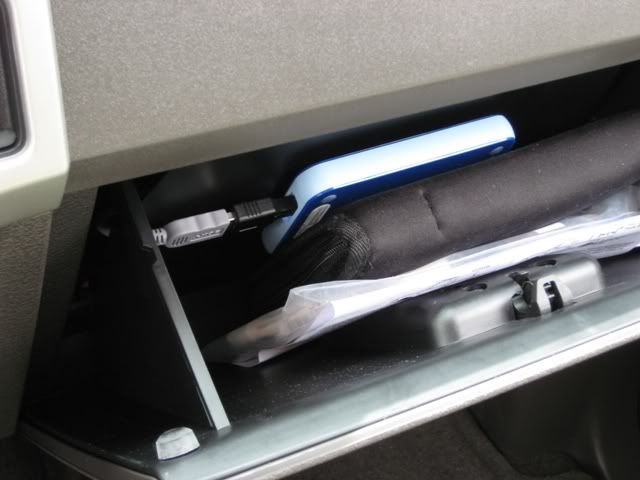
Now the tray is out. The cable that is already attached is the black one on the left, the grey one on the right is the new cable that you will be installing.
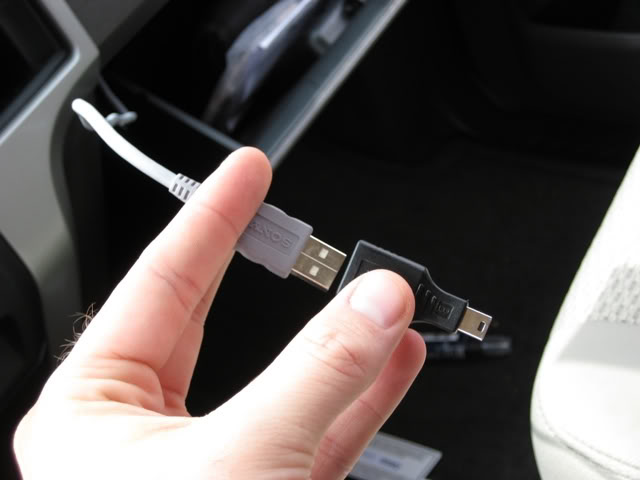
Plug the USB mini B end of your cable into the right slot and it should look like this.
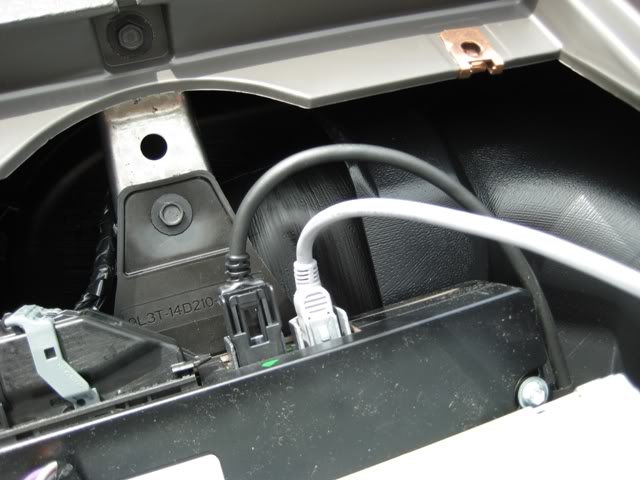
You are now done with the radio end.
*FYI this is an '09 F150 XLT with the 40/20/40 bench with a single CD radio with SYNC.
*Project time 15 minutes.
Materials needed
Socket wrench with 9/32 socket
(Thanks to scandalous for the links to the cables)
USB A Female to Mini 5 pin (B5) Male Adapter $1.84
USB 2.0 A Male to Mini-B 5pin Male 28/24AWG Cable w/ Ferrite Core - (Gold Plated) - 3ft $1.19
Coat hanger
* I used a 250gb Western Digital Passport for my hard drive/ media player since it is powered by USB only.
-------------------------------------------------------------------------
This is how it looks just sitting there.
There is a thin mat that rests inside this tray, pull it out and set aside.
There are 2 bolts holding this tray in, they are located in the two corners closest to the windshield.
I used a 9/32 socket to remove them.
Once they are out enough you can twist them out by hand.
Now that the bolts are out you can lift the tray out. you have to lift up on the window side and lift is out towards the window. There is a lip that prevents you from lifting the front end of the tray up.
Now the tray is out. The cable that is already attached is the black one on the left, the grey one on the right is the new cable that you will be installing.
Plug the USB mini B end of your cable into the right slot and it should look like this.
You are now done with the radio end.
Last edited by F150Aggie; Oct 10, 2010 at 10:23 PM.
Thread Starter
|
Technical Article Contributor
Joined: Feb 2001
Posts: 425
Likes: 1
From: College Station TX
Next step is to fully access your glove box.
There are 2 tabs, one on either side of the inside of the glove box that you can squeeze towards the middle to release the glove box door.
Now your glove box door can swing all the way down, dumping everything inside of it onto the floor.
Looking up from there you can see an easy path that you can take to feed the cable through.
This part I forgot to take a picture of but it is self explanatory, I used a wire coat hanger and fed it up through the dash and out through the top hole where the tray used to be.Bent it around the USB A side of the cable, and pulled it through to the glove box.
Now that the cable is where your glove box is, you can lift the glove box door back up where it can latch. Pull the USB A side of the cable and plug it into the USB A to USB B mini adapter.
Once attached plug that adapter into your hard drive.
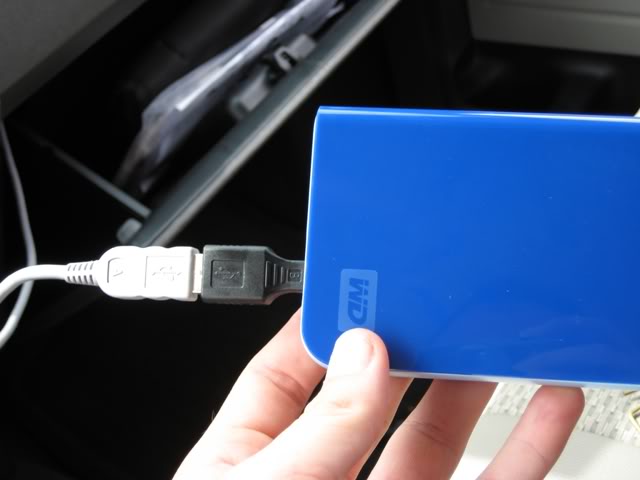
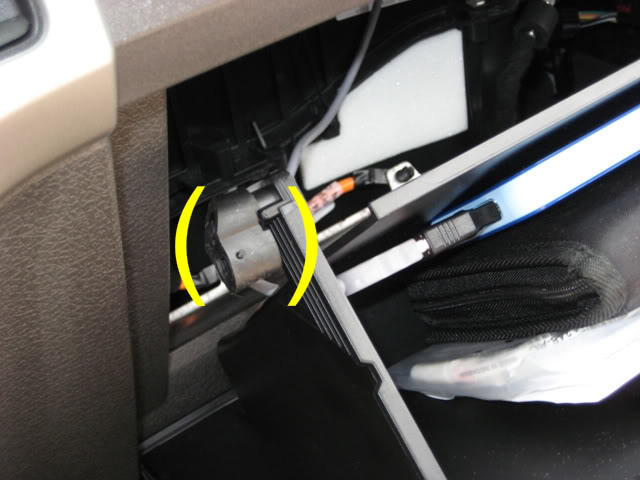
I just placed the hard drive in the glove box and tucked the wires behind the glove box, and ran the cable through the slot on the left hand side.
Now that it's in place close the glove box and get ready to install the tray the exact opposite way you took it out.


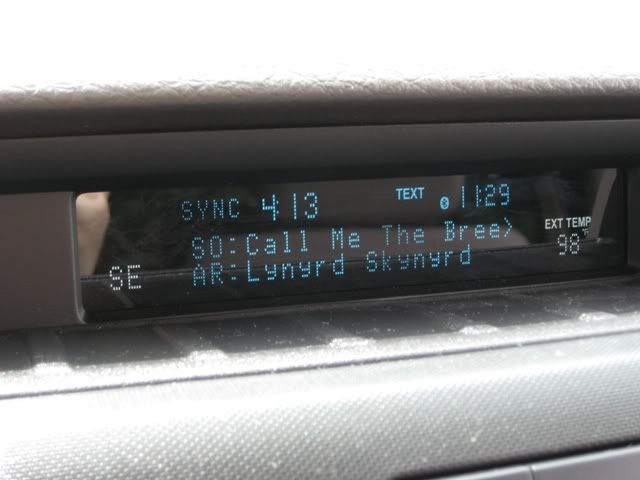
Now when you push your voice activation button on your steering wheel, simply say "USB 2" and you are ready to rock and roll.
Hope this helps, let me know if I need to add anything or answer any questions! This took me 15 minutes while on a break at work. Totally worth it to have a hidden source of music, plus this leaves the main USB connection to charge my phone.
There are 2 tabs, one on either side of the inside of the glove box that you can squeeze towards the middle to release the glove box door.
Now your glove box door can swing all the way down, dumping everything inside of it onto the floor.
Looking up from there you can see an easy path that you can take to feed the cable through.
This part I forgot to take a picture of but it is self explanatory, I used a wire coat hanger and fed it up through the dash and out through the top hole where the tray used to be.Bent it around the USB A side of the cable, and pulled it through to the glove box.
Now that the cable is where your glove box is, you can lift the glove box door back up where it can latch. Pull the USB A side of the cable and plug it into the USB A to USB B mini adapter.
Once attached plug that adapter into your hard drive.
I just placed the hard drive in the glove box and tucked the wires behind the glove box, and ran the cable through the slot on the left hand side.
Now that it's in place close the glove box and get ready to install the tray the exact opposite way you took it out.
Now when you push your voice activation button on your steering wheel, simply say "USB 2" and you are ready to rock and roll.
Hope this helps, let me know if I need to add anything or answer any questions! This took me 15 minutes while on a break at work. Totally worth it to have a hidden source of music, plus this leaves the main USB connection to charge my phone.
Last edited by Bluejay; Jul 6, 2009 at 02:50 PM.

Senior Member
Joined: Jun 2007
Posts: 358
Likes: 0
From: Iowa
Nice write up. I am planning on doing this once my truck arrives but my xlt has captain chairs so I am going to still try to get to the center consule. I will just have to find a way to hide the wires since it will not have the floor shifter. But if I can't this looks like a good alternative.
Global Moderator &
Senior Member
Senior Member

Joined: Mar 2005
Posts: 26,080
Likes: 85
From: Burleson/Athens/Brownsboro, TX
Thanks for taking the time to do a very nice write-up. I have copied it to our How To section and amy recommending that you get the new title of Technical Article Contributor.
Thanks again,
Jim
Thanks again,
Jim
__________________
Jim
Jim

Senior Member
Joined: Feb 2009
Posts: 262
Likes: 0
From: Ontario, CAN
NO! You beat me to it! I took my truck apart last week and did a test install, and ordered the parts hopefully installing next week. I was going to do the exact same setup but was going to place something in the glove compartment to reduce shock vibrations to the hard drive. Your write is a lot better than one was going to be anyways so its a good thing you did it first. Thanks.

Senior Member
Joined: Oct 2009
Posts: 100
Likes: 0
From: Northwest
Did this mod myself last week with the Ford USB cable. Even though I have the flow through console, I decided I would rather have the Ipod in the glove box (simpler install also). Works great and USB2 is recognized as the media source automatically. Only question I have now is when I plug my phone into the USB1 port, it doesn't appear to charge my phone. Does this USB have to be activated to charge, or should it charge the phone automatically?
Trending Topics
Thread Starter
|
Technical Article Contributor
Joined: Feb 2001
Posts: 425
Likes: 1
From: College Station TX
It should be automatic. Have you tried another device in your USB1 port to make sure its active? If it is active have you tried a different iphone cable?
I run USB2 exclusively and my iPhone charges as soon as I plug it into USB1.
I run USB2 exclusively and my iPhone charges as soon as I plug it into USB1.
Senior Member
Joined: Oct 2009
Posts: 100
Likes: 0
From: Northwest
Thanks. I will try another device in the USB1 port.


Senior Member
Joined: Apr 2004
Posts: 279
Likes: 0
From: MA
Just tried this mod but no luck. Got my WD Passport drive loaded with mp3s. Plugged everything in while the truck was off. Turned the key and gave the USB2 command but it says nothing is connected. Did I miss something?

Senior Member
Joined: Feb 2005
Posts: 414
Likes: 0
From: Alberta, Canada
I gave you a reply in the other thread you posted in.