How to: remove and replace Instument cluster lamps with step by step pics.
#1
 04-09-2015, 04:13 PM


How to: remove and replace Instument cluster lamps with step by step pics.
TI've looked, and didn't see and exact how to with pics for this, so here it is.
First off, no matter what the ford dealer has told you, the odomiter lamp and all other backlights (warning lamps are led from the factory) are replaceable. They are #37 or #74 bulbs. Either work and I've heard #74 are brighter. You can also replace with LEDs. I'd recommend something at least 10+ lumen with 3smd LEDs per lamp.
Tools:
9/32nd socket
T-15
Key
Butter knife (only if removing needles).
Step 1.
Locate both screws at bottom of dash. Use your 9/32nd and remove them.
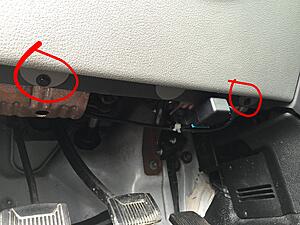
Step 2.
Remove both clips from the top of the same panel. Pull out, toward yourself.
Step 3.
Locate the two screws for the panel directly above the one you just removed. Remove both.
You may notice this harness behind your dash that's not connected to anything. If so, you do not have power adjustable pedals. If you do, you'll need to unclip that harness.
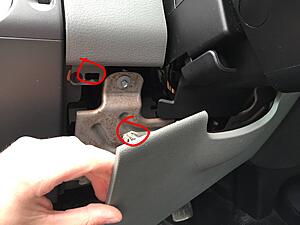
Step 4.
Gently pry upward to remove top panel. Start on the side next to the radio, and pull out and up. You'll feel the clips start to unhook.
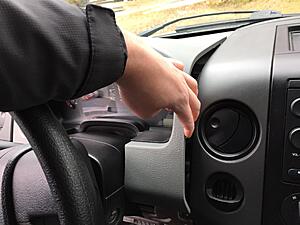
Start doing the same thing on the other side until the panel pops off.

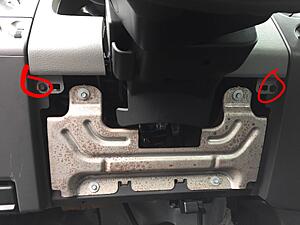
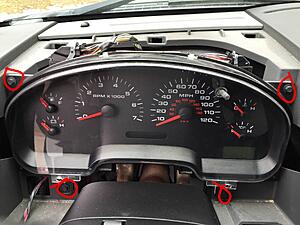
Step 5.
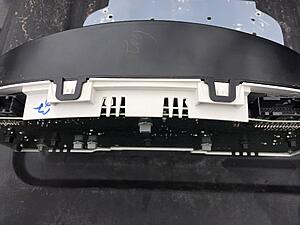
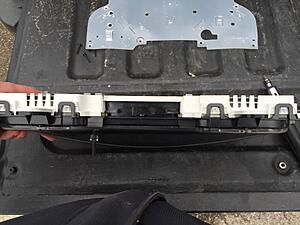
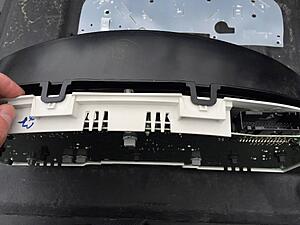
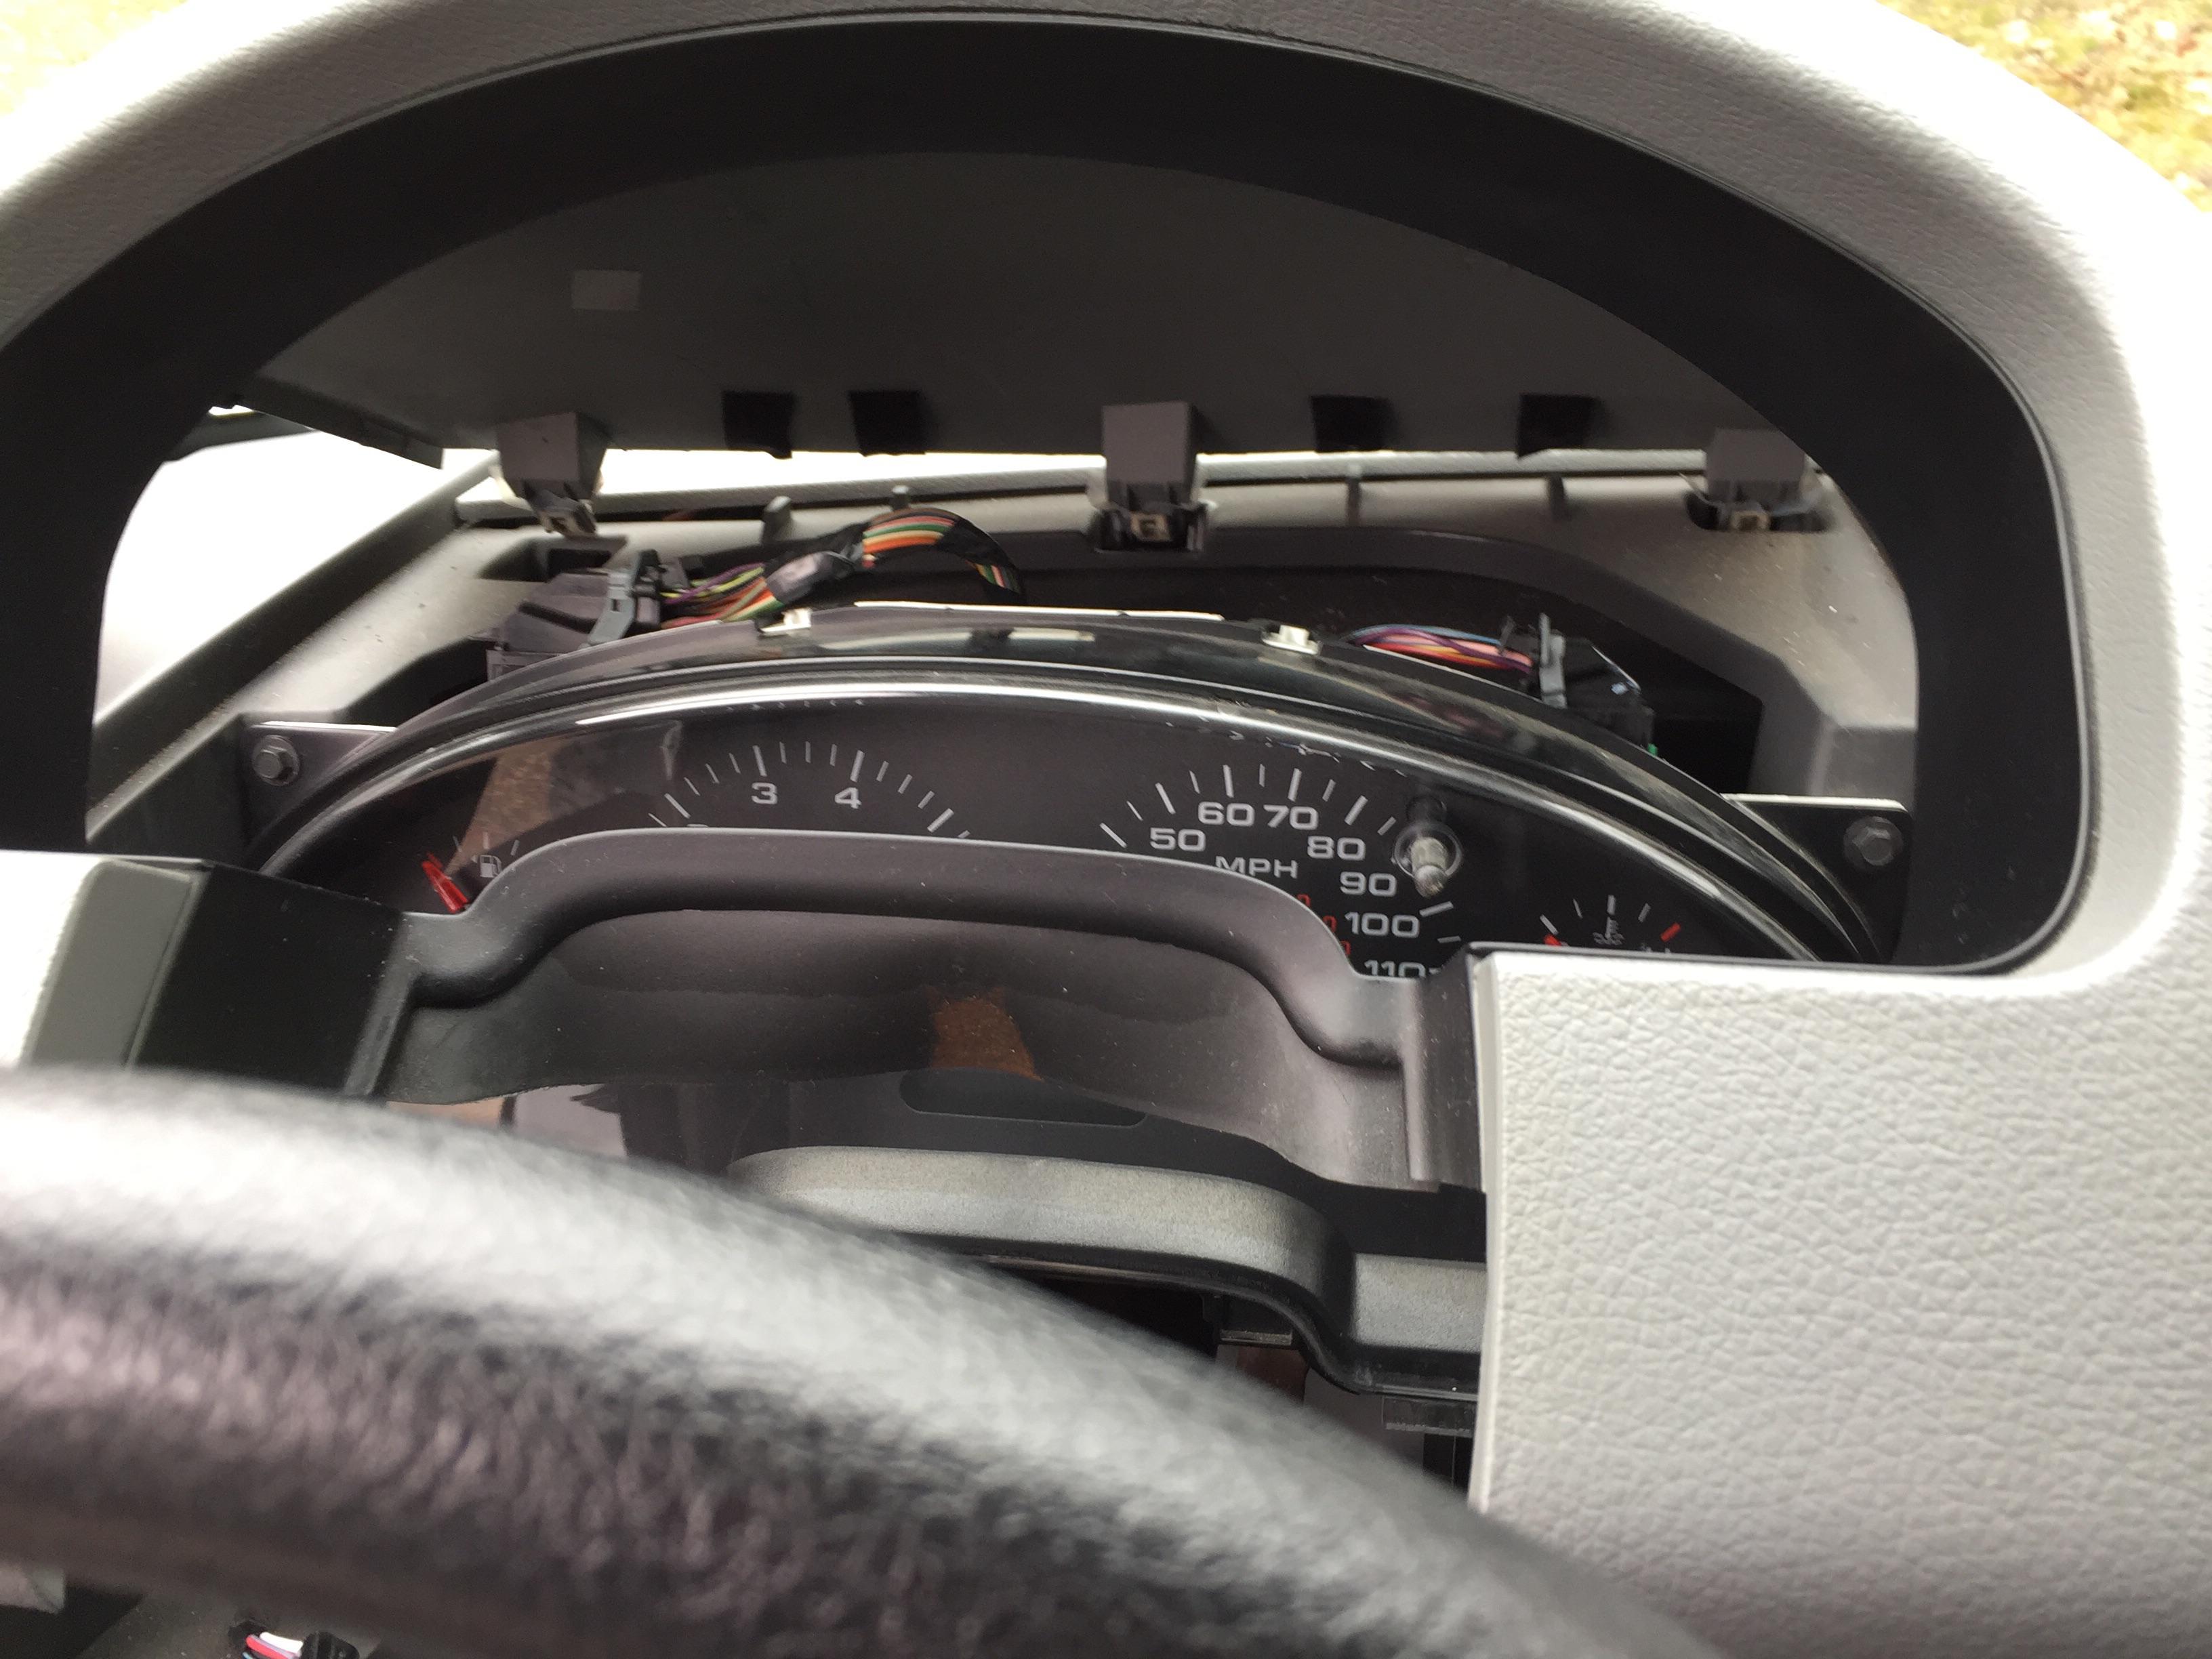
Locate the 4 screws (again 9/32nd) holding the cluster in place and remove.
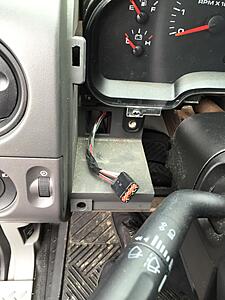
Step 6.
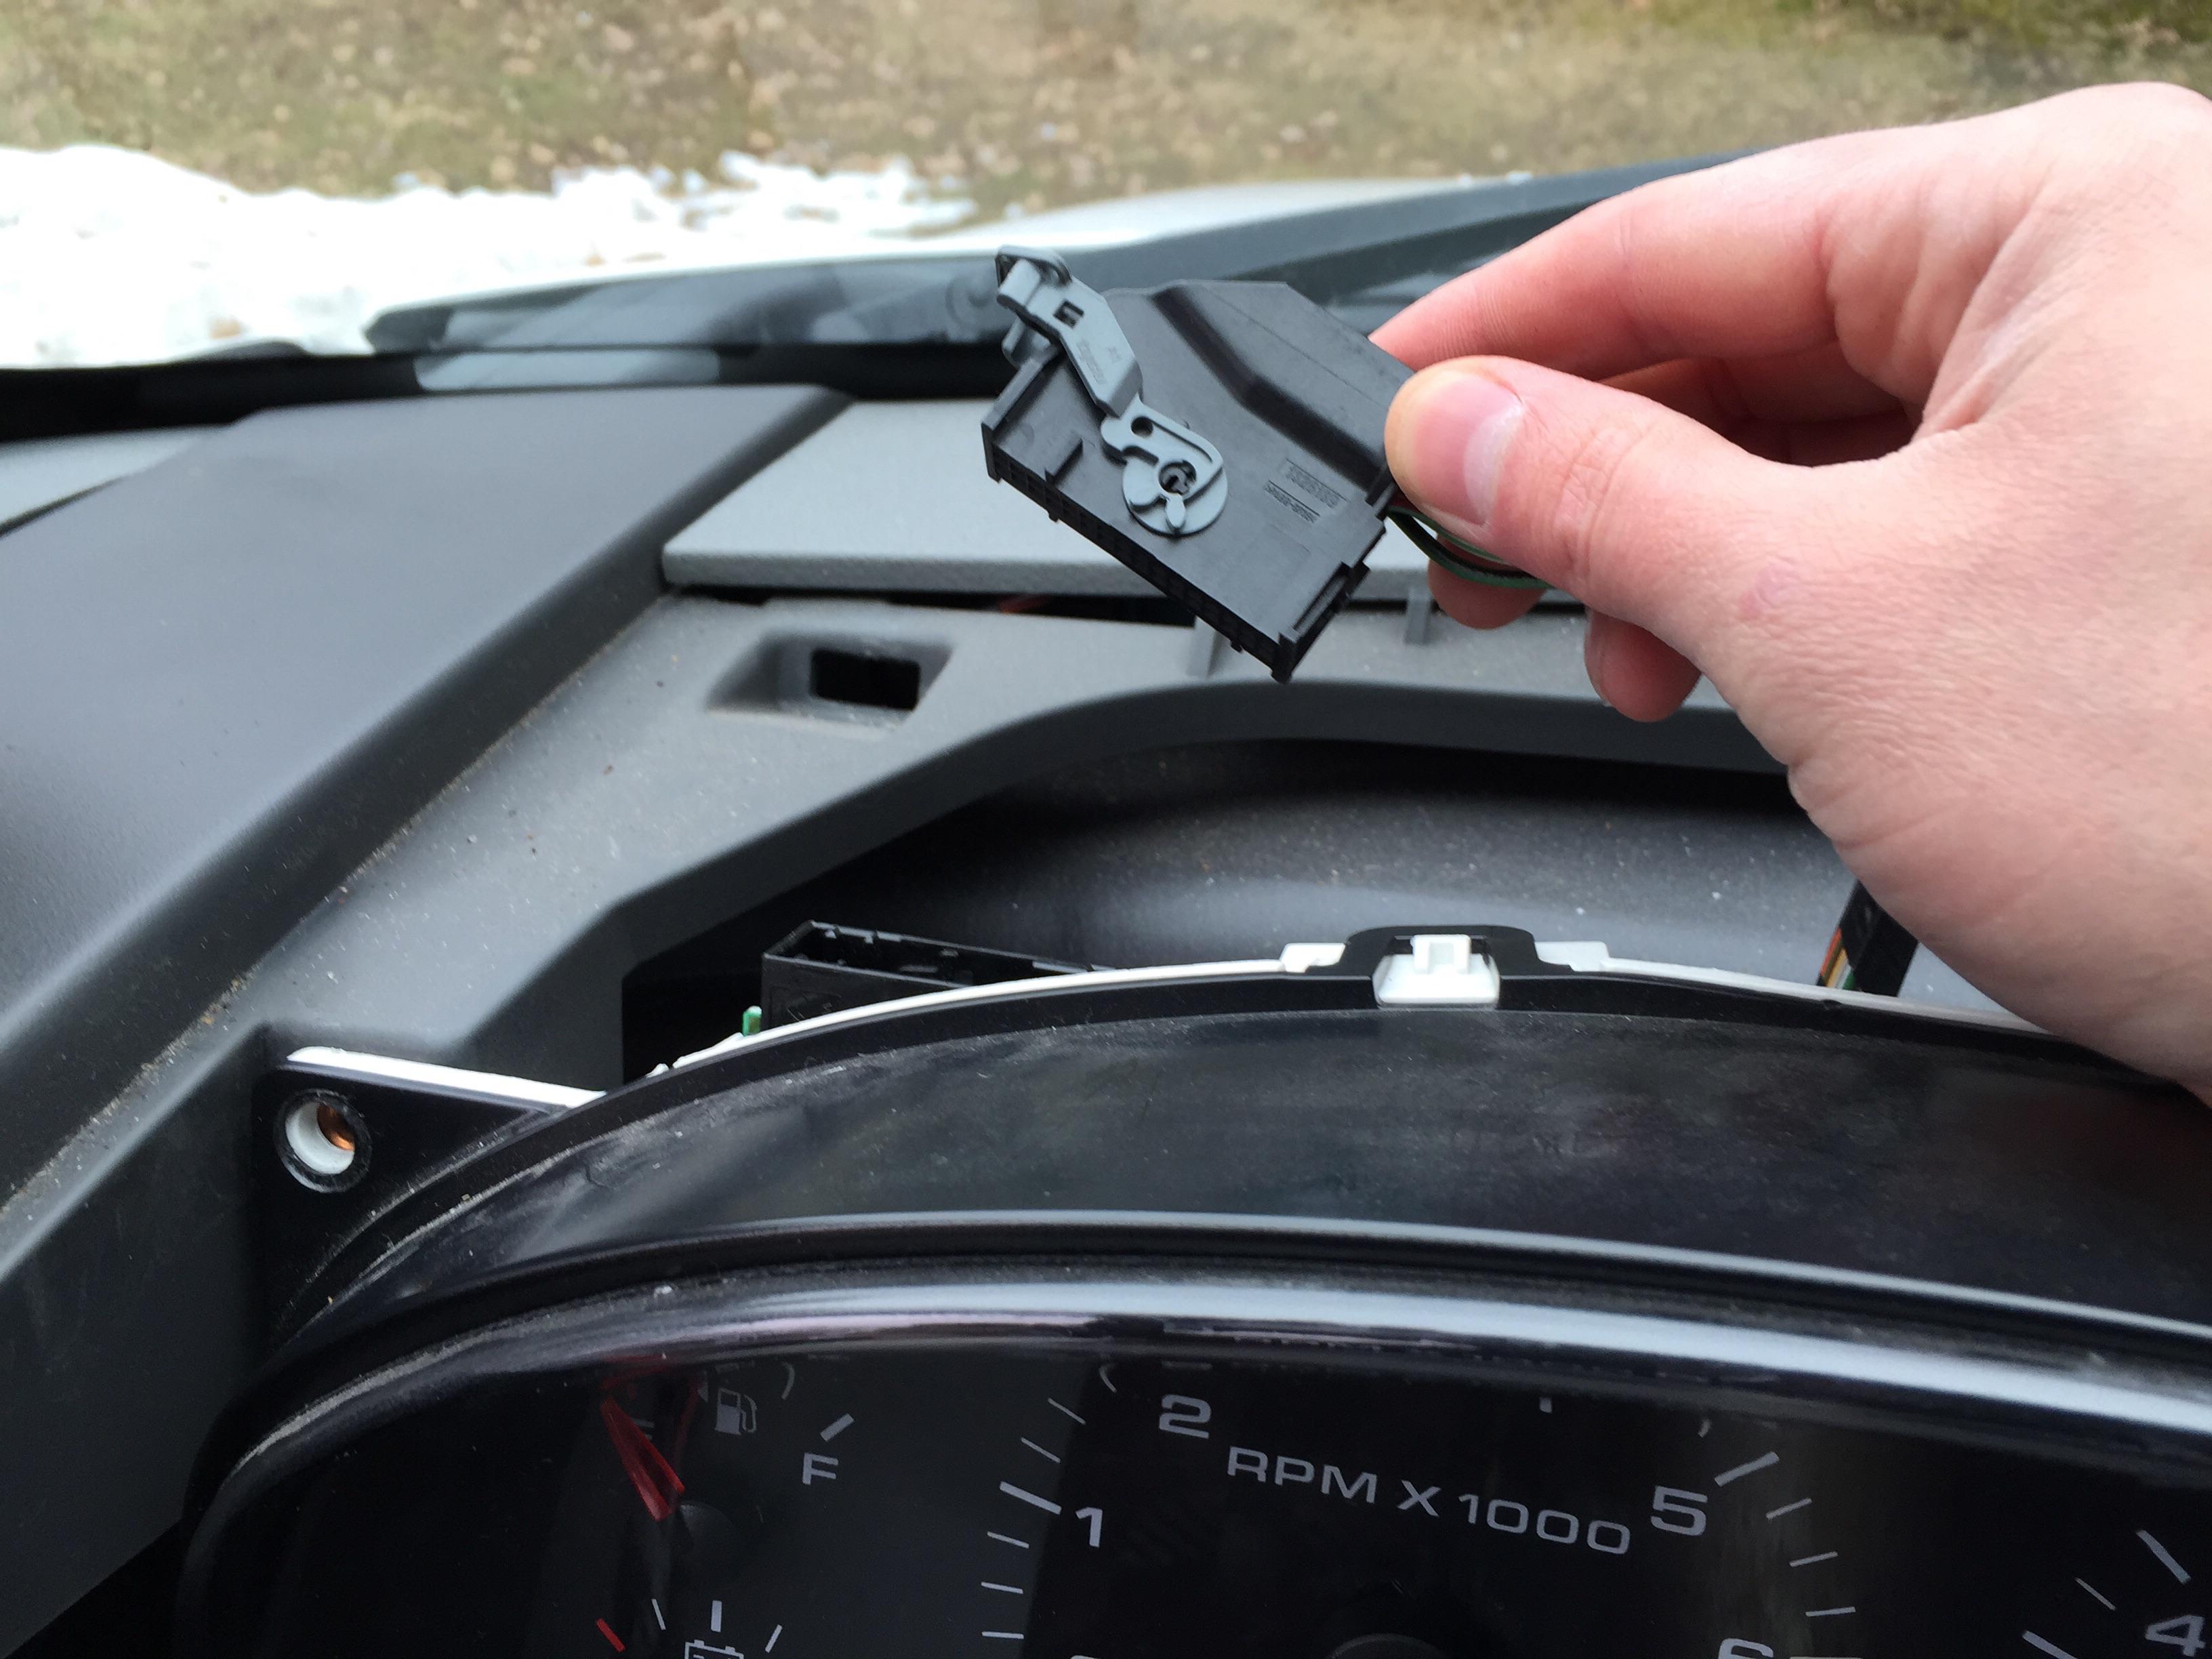
Use a key or small screwdriver, and press the pins to unlock the gray clips for the cluster harnesses. Then you will slide the gray lock to the left for the left side harness and to the right for the right side harness.
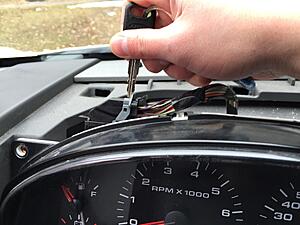
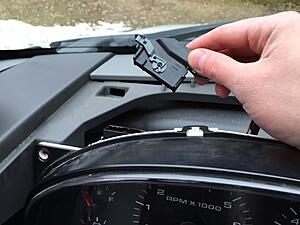
My truck is manual, if yours is auto, you will also need to remove the shift indicator, or you can keep it connected and replace the bulbs where it is, however, you will have less room to work.
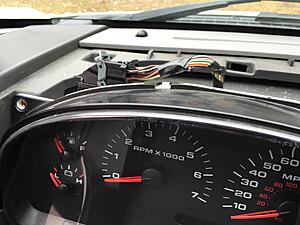
Cluster removed
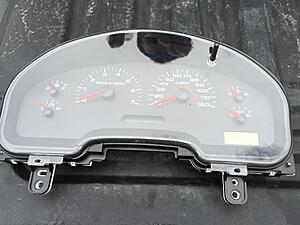
Step 7.
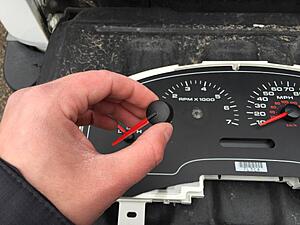
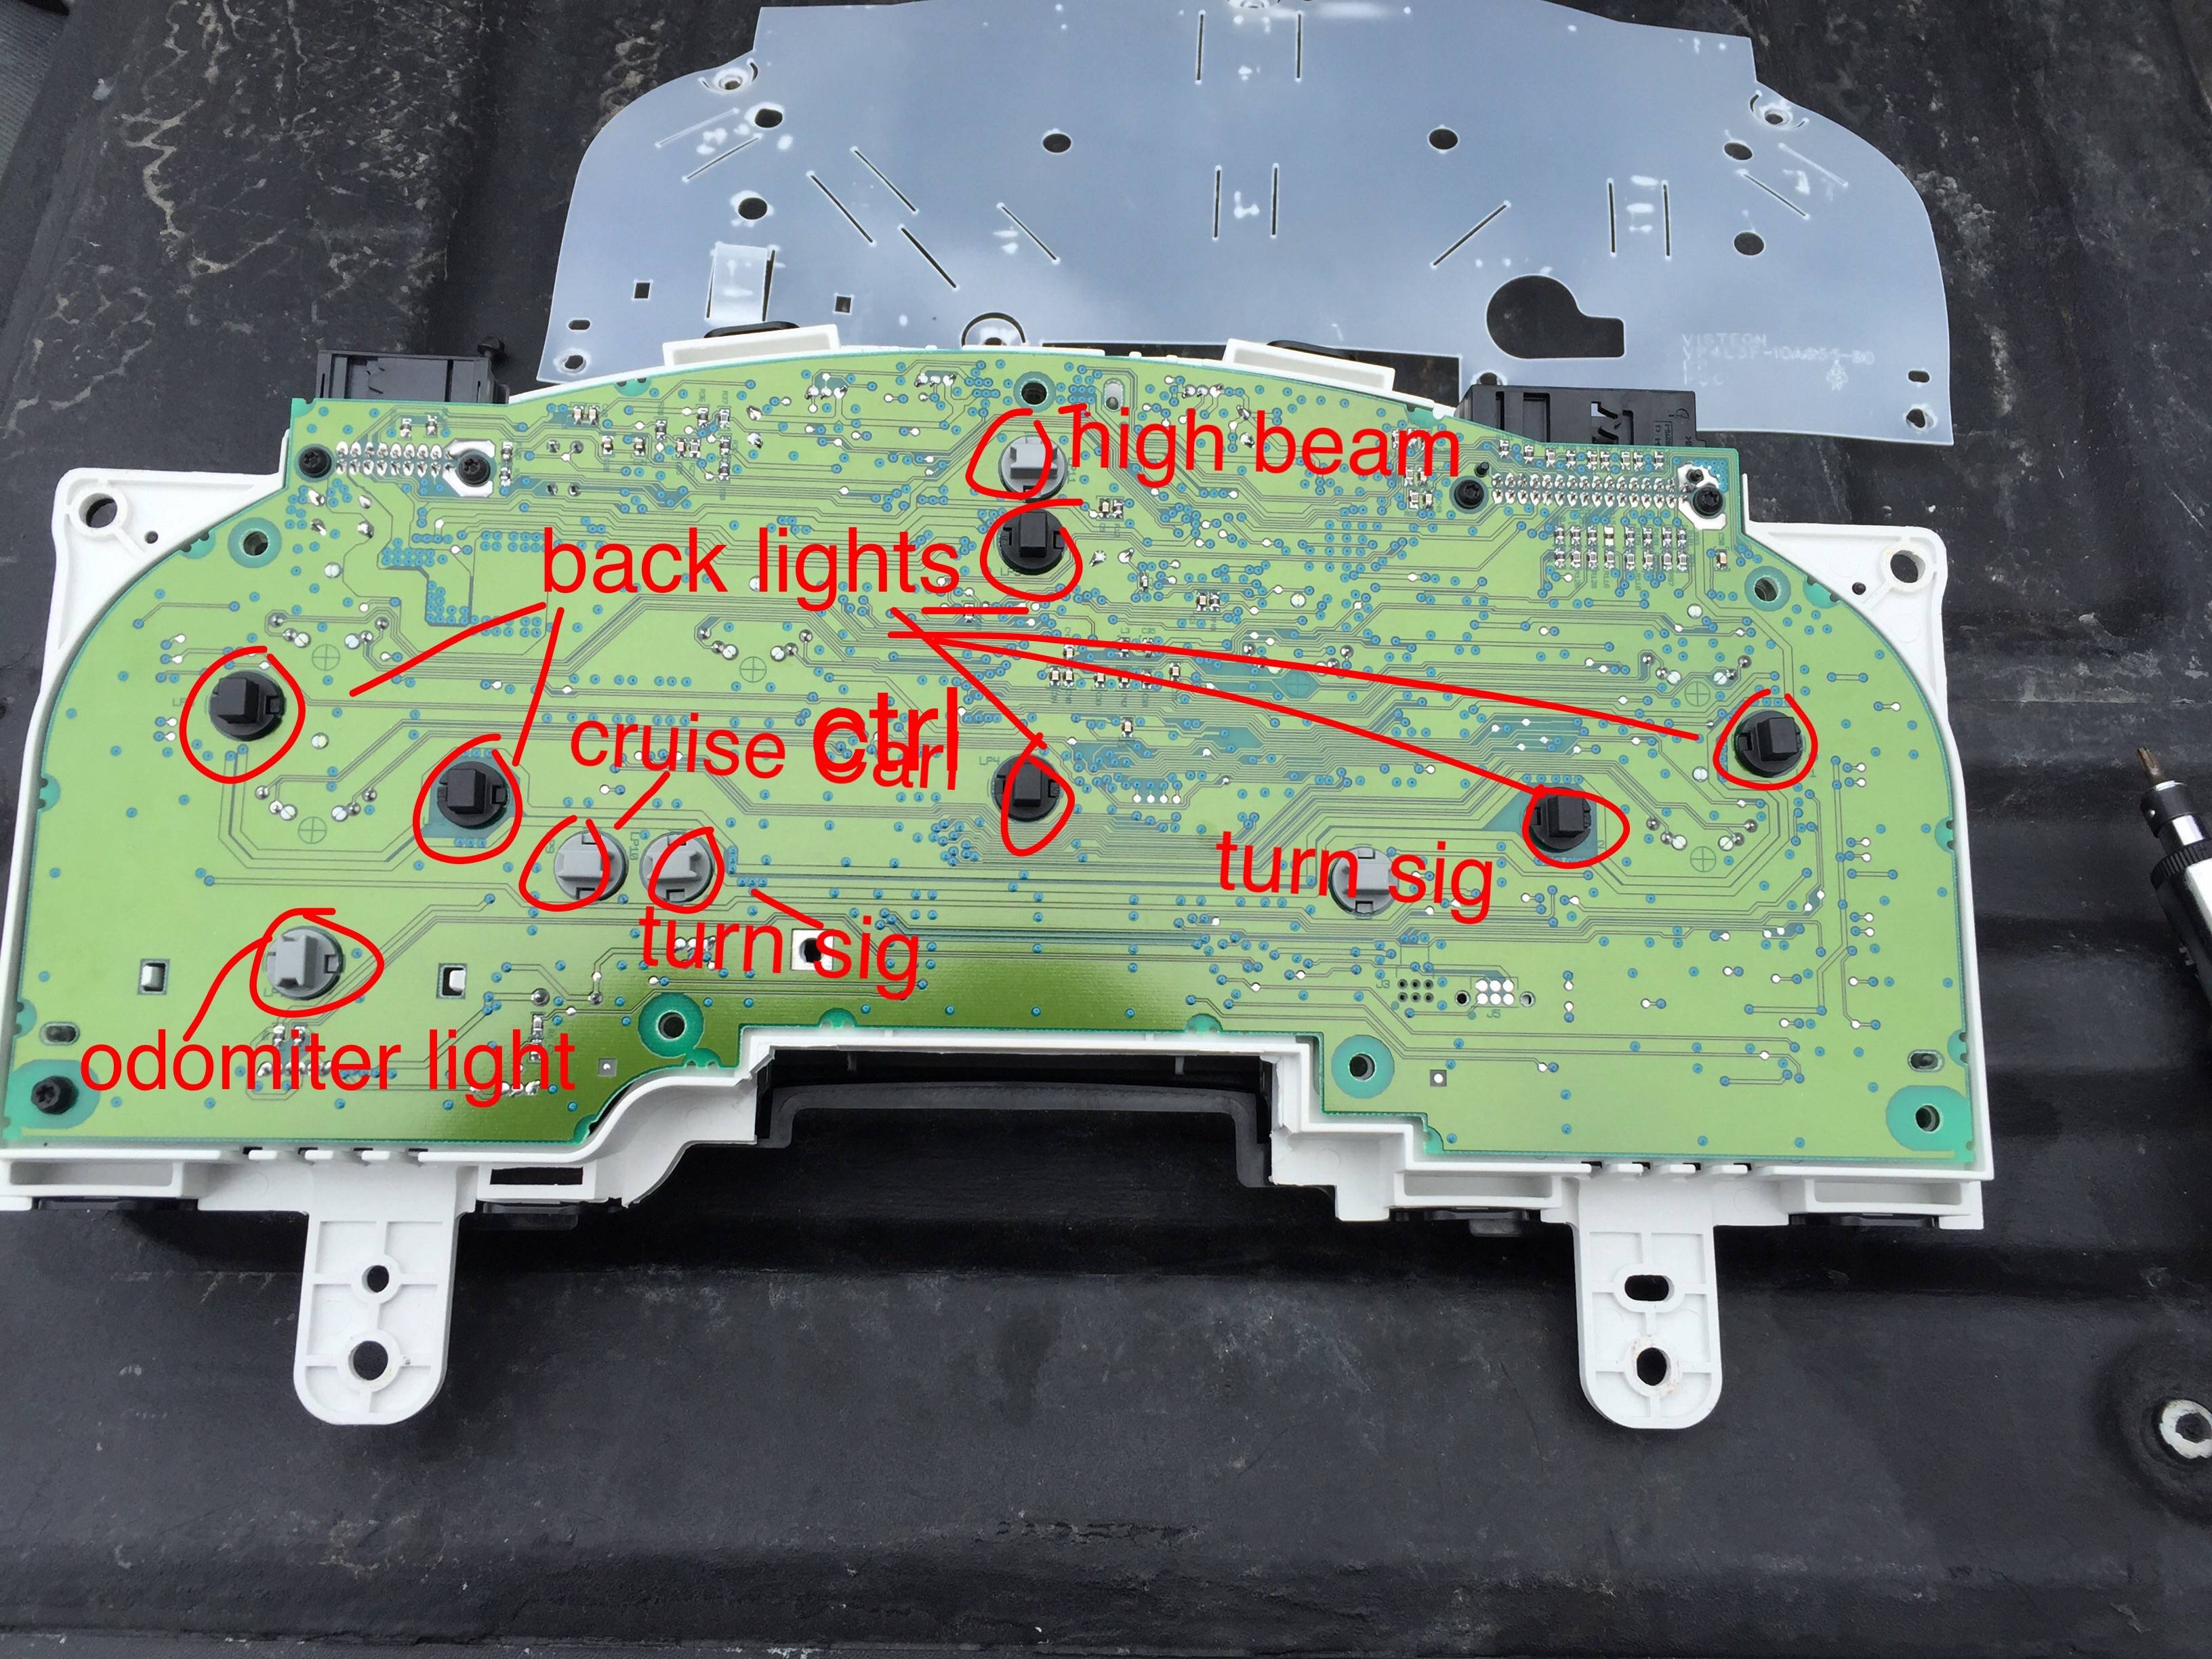
Remove all 7 T-15 screws to remove clear plastic access cover.
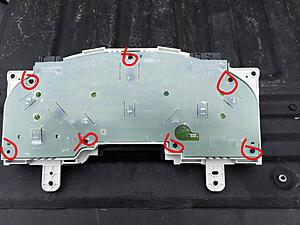
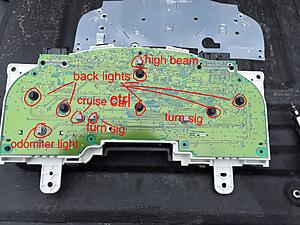
Now locate the bulb(s) you want to replace. The black and gray "buttons" are the bulb sockets. They twist counter clockwise to remove. You may need pliers to make removal easier.

If you want to remove the needles to access the inside of the panel for any reason, here's how. However, I wouldn't recommend doing this because all of your needles will be off and in the wrong position. It took me many tries plugging them in, taking them off and so forth to get them back to their original possition. So, do not do this unless you have to or want to remove the green film to change colors.
There are 2 clips on top, and 4 on the bottom of the cluster. Lightly pull up and they'll pop out.

Use a butter knife to pry the needs up. Be very gentle as the needles can easily break.
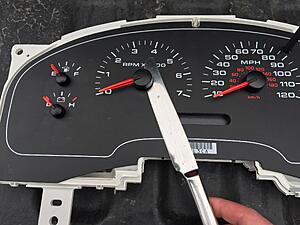
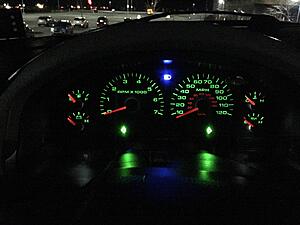
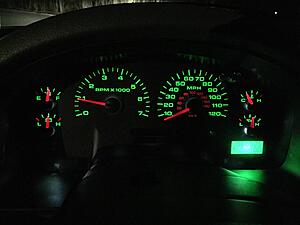
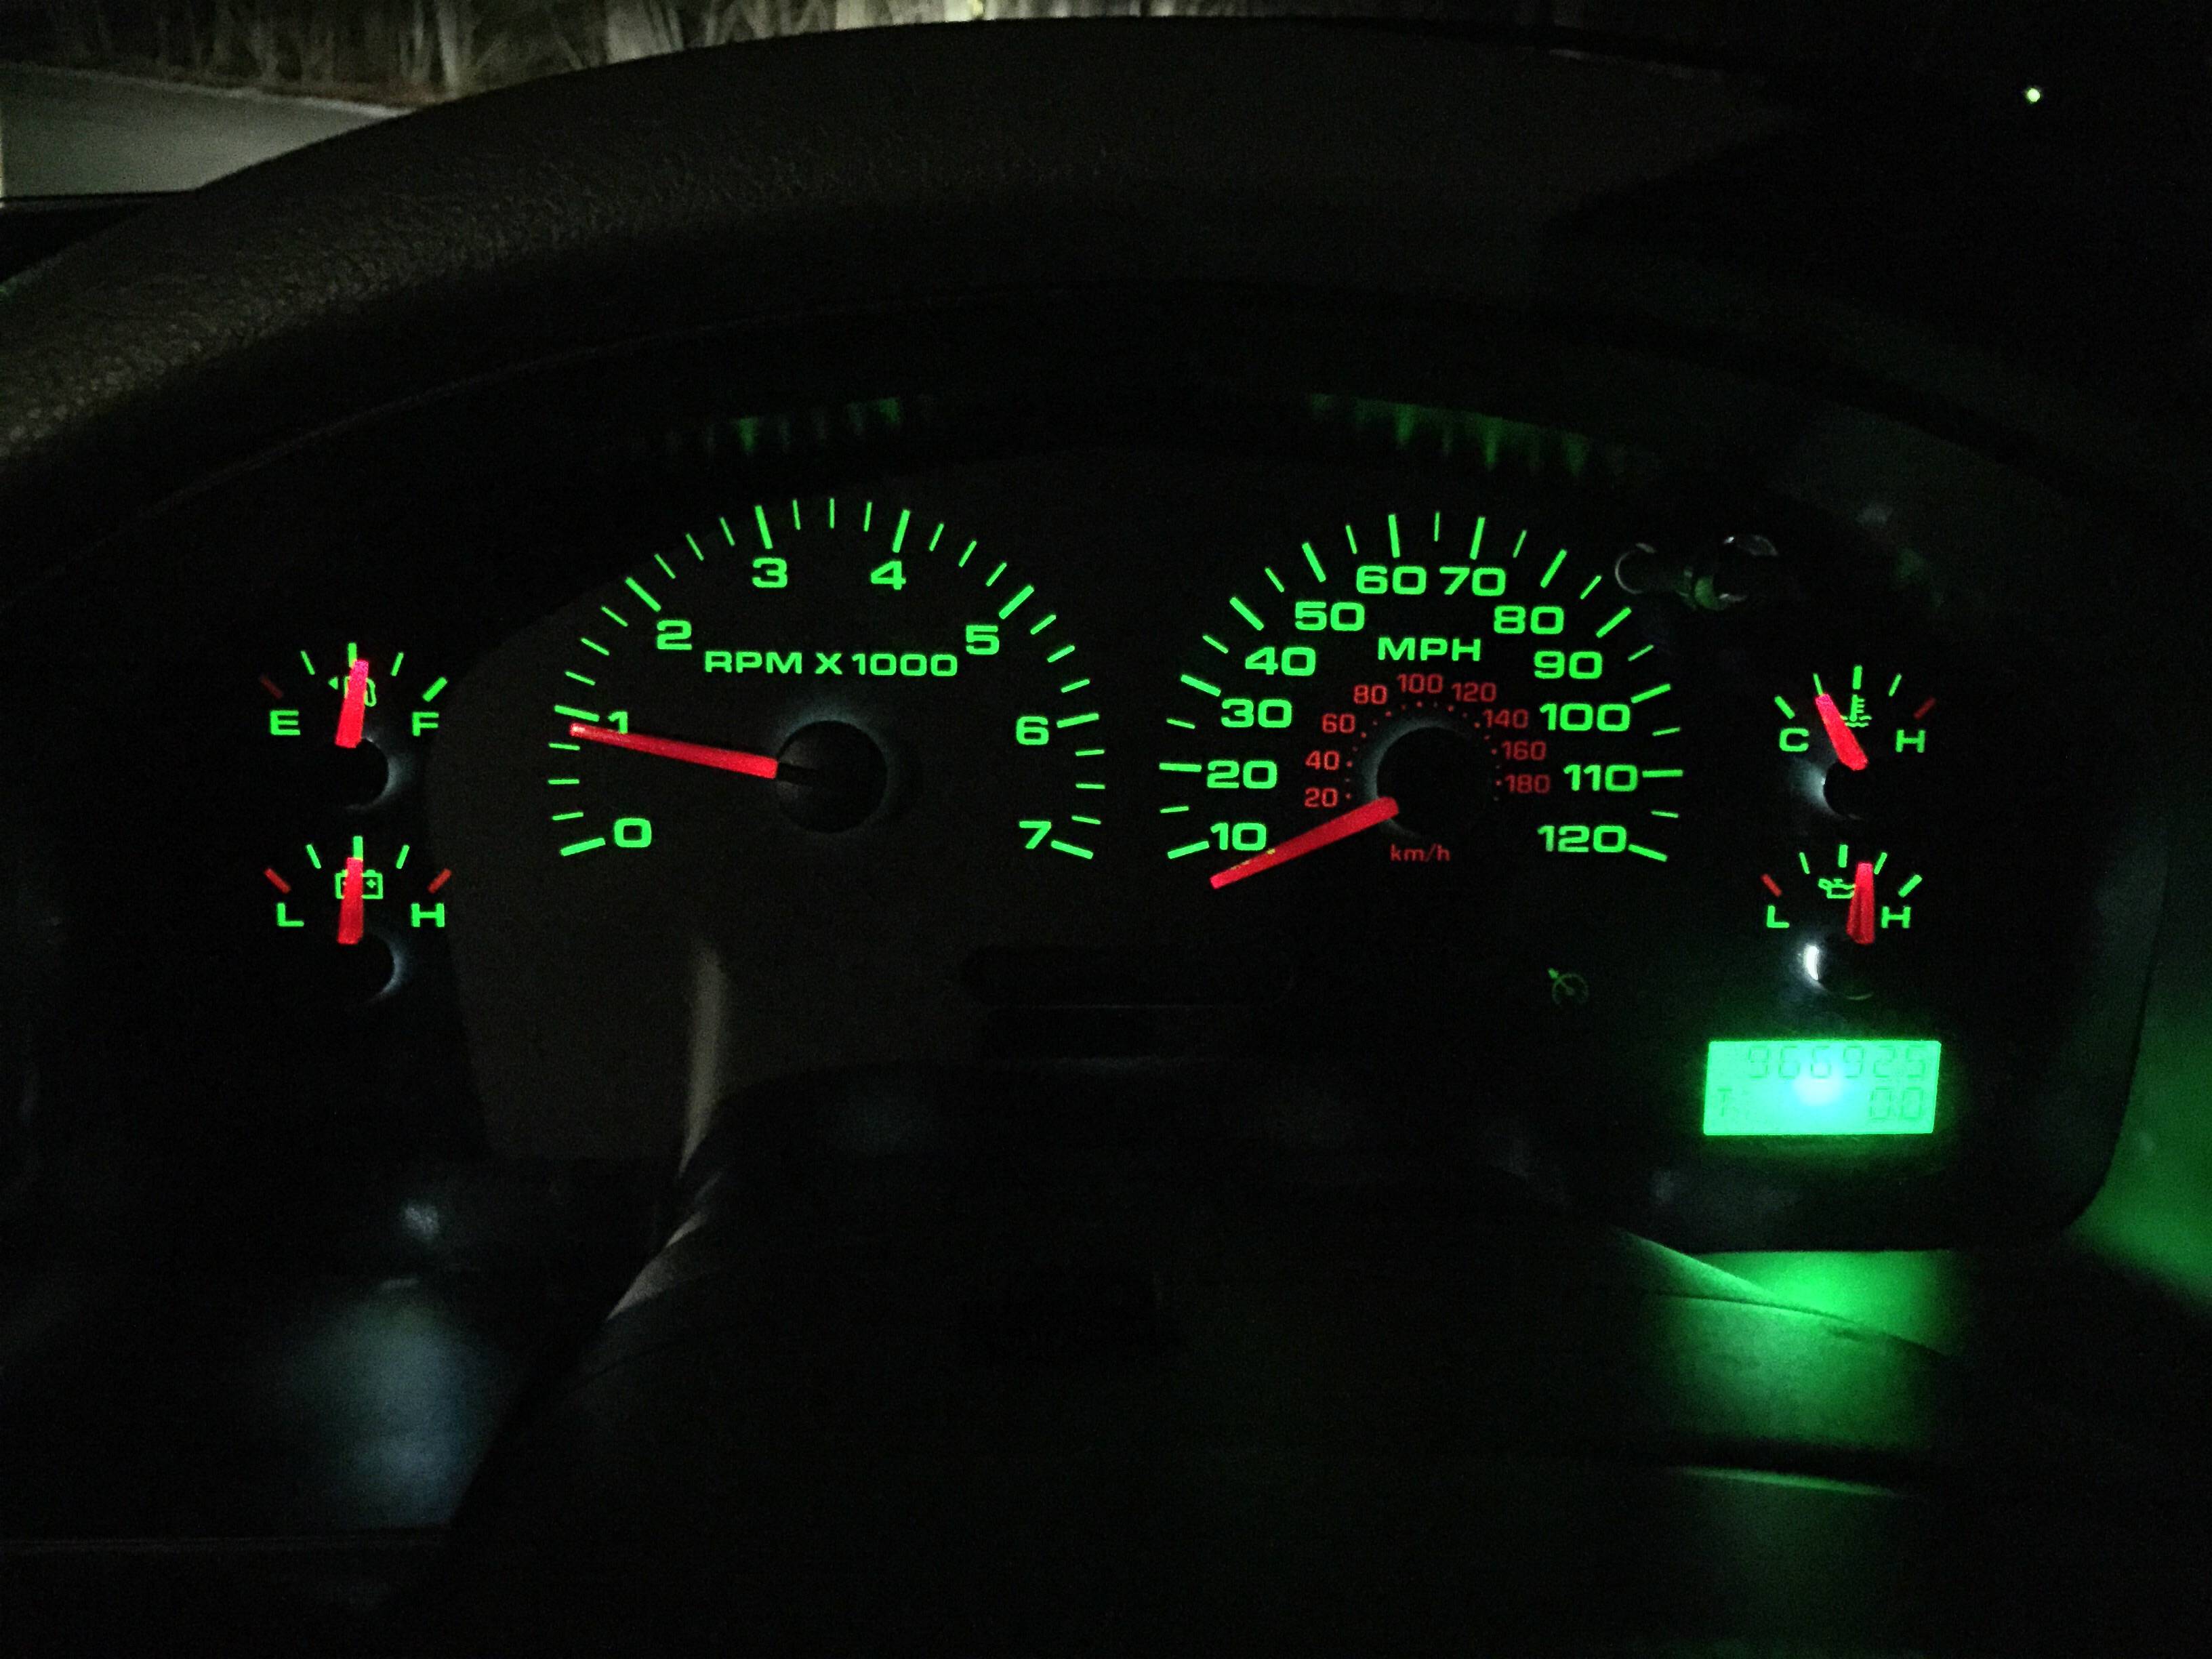
With 6000k white LEDs in all bulb sockets
Reassembly is the exact reverse. Very straight forward. Here's it all back together.
Estimated time: 30 min.
First off, no matter what the ford dealer has told you, the odomiter lamp and all other backlights (warning lamps are led from the factory) are replaceable. They are #37 or #74 bulbs. Either work and I've heard #74 are brighter. You can also replace with LEDs. I'd recommend something at least 10+ lumen with 3smd LEDs per lamp.
Tools:
9/32nd socket
T-15
Key
Butter knife (only if removing needles).
Step 1.
Locate both screws at bottom of dash. Use your 9/32nd and remove them.

Step 2.
Remove both clips from the top of the same panel. Pull out, toward yourself.

Step 3.
Locate the two screws for the panel directly above the one you just removed. Remove both.

You may notice this harness behind your dash that's not connected to anything. If so, you do not have power adjustable pedals. If you do, you'll need to unclip that harness.

Step 4.
Gently pry upward to remove top panel. Start on the side next to the radio, and pull out and up. You'll feel the clips start to unhook.

Start doing the same thing on the other side until the panel pops off.
Step 5.
Locate the 4 screws (again 9/32nd) holding the cluster in place and remove.

Step 6.
Use a key or small screwdriver, and press the pins to unlock the gray clips for the cluster harnesses. Then you will slide the gray lock to the left for the left side harness and to the right for the right side harness.


My truck is manual, if yours is auto, you will also need to remove the shift indicator, or you can keep it connected and replace the bulbs where it is, however, you will have less room to work.
Cluster removed

Step 7.
Remove all 7 T-15 screws to remove clear plastic access cover.

Now locate the bulb(s) you want to replace. The black and gray "buttons" are the bulb sockets. They twist counter clockwise to remove. You may need pliers to make removal easier.

If you want to remove the needles to access the inside of the panel for any reason, here's how. However, I wouldn't recommend doing this because all of your needles will be off and in the wrong position. It took me many tries plugging them in, taking them off and so forth to get them back to their original possition. So, do not do this unless you have to or want to remove the green film to change colors.
There are 2 clips on top, and 4 on the bottom of the cluster. Lightly pull up and they'll pop out.


Use a butter knife to pry the needs up. Be very gentle as the needles can easily break.


With 6000k white LEDs in all bulb sockets

Reassembly is the exact reverse. Very straight forward. Here's it all back together.

Estimated time: 30 min.
Last edited by 2008_XL; 04-09-2015 at 11:44 PM.
#2
04-09-2015, 04:17 PM


#5
01-18-2016, 08:16 PM
Senior Member
Join Date: Nov 2015
Location: Texas
Posts: 323
Likes: 0
Received 0 Likes
on
0 Posts
#6
01-18-2016, 08:20 PM
You can peel away the green film, and maybe you could find some white or clear needles? I will say, taking off the needles and getting them back to where they're supposed to be kind of sucks! I know all too well, haha
#7
01-18-2016, 08:42 PM
Senior Member
Join Date: Nov 2015
Location: Texas
Posts: 323
Likes: 0
Received 0 Likes
on
0 Posts

Trending Topics
#8
01-18-2016, 08:44 PM
But I'd love to see something blue workout for you because that would go really well with the interior of your truck, and look awesome too. My only worry are the red needles not showing up.
Last edited by 2008_XL; 01-18-2016 at 08:47 PM.
#9
01-18-2016, 08:47 PM
Senior Member
Join Date: Nov 2015
Location: Texas
Posts: 323
Likes: 0
Received 0 Likes
on
0 Posts
may give it a try, won't cost anything and very little time involved as well... not gonna mess with the film or needles, but think i can get a more blueish hue from it...
thanks for the thread man. i will post a finished pic of mine when i convert....
#10
01-18-2016, 08:49 PM
oh ok, thanks for that info...
may give it a try, won't cost anything and very little time involved as well... not gonna mess with the film or needles, but think i can get a more blueish hue from it...
thanks for the thread man. i will post a finished pic of mine when i convert....
may give it a try, won't cost anything and very little time involved as well... not gonna mess with the film or needles, but think i can get a more blueish hue from it...
thanks for the thread man. i will post a finished pic of mine when i convert....
#11
01-18-2016, 09:14 PM
Senior Member
Join Date: Nov 2015
Location: Texas
Posts: 323
Likes: 0
Received 0 Likes
on
0 Posts
thanks man, appreciate the kind comments about my truck. i will update this thread for sure.
on the subject of the needles, i am hoping they are purple and do show up

#12
01-18-2016, 09:33 PM
Just make sure when you get the LEDs that you get REALLY bright ones. Since they're blue and have to show through different shaded colors with the green film and the red needles, which reduce their intensity, that'll take a lot of light away.
5730 and 5630 are known to be bright led chips. Try to find LEDs that have 3-4 chips each. #74 I believe, are the correct part number.
I'd install 6000k LEDs for your directionals, unless you want those blue as well.
By all means, please post your results. I think a blue instrument cluster would look way better than the green. If yours comes out cool, I'll be replacing my white LEDs with blue ones as well!
#13
01-18-2016, 09:39 PM
Senior Member
Join Date: Nov 2015
Location: Texas
Posts: 323
Likes: 0
Received 0 Likes
on
0 Posts
#15
01-18-2016, 10:03 PM
Senior Member
Join Date: Nov 2015
Location: Texas
Posts: 323
Likes: 0
Received 0 Likes
on
0 Posts