How to replace Lower Steering Shaft (04-08)
#1
 05-30-2011, 07:38 AM


Join Date: Jun 2009
Location: Easton, MA
Posts: 215
Likes: 0
Received 0 Likes
on
0 Posts
How to replace Lower Steering Shaft (04-08)
If your steering wheel is getting hard to turn and won't return coming out of a corner, the lower steering shaft may be the culprit.
The lower steering shaft connects the stem of the steering column to the rack and pinion unit.
This is a short shaft that contains two small u-joints which due to their size,
can't be equipped with grease fittings. (I agree- lousy design)
The shaft is expandable to ease its installation. (stop laughing)
Please excuse the pictures,
I'm not sure why they load so big.
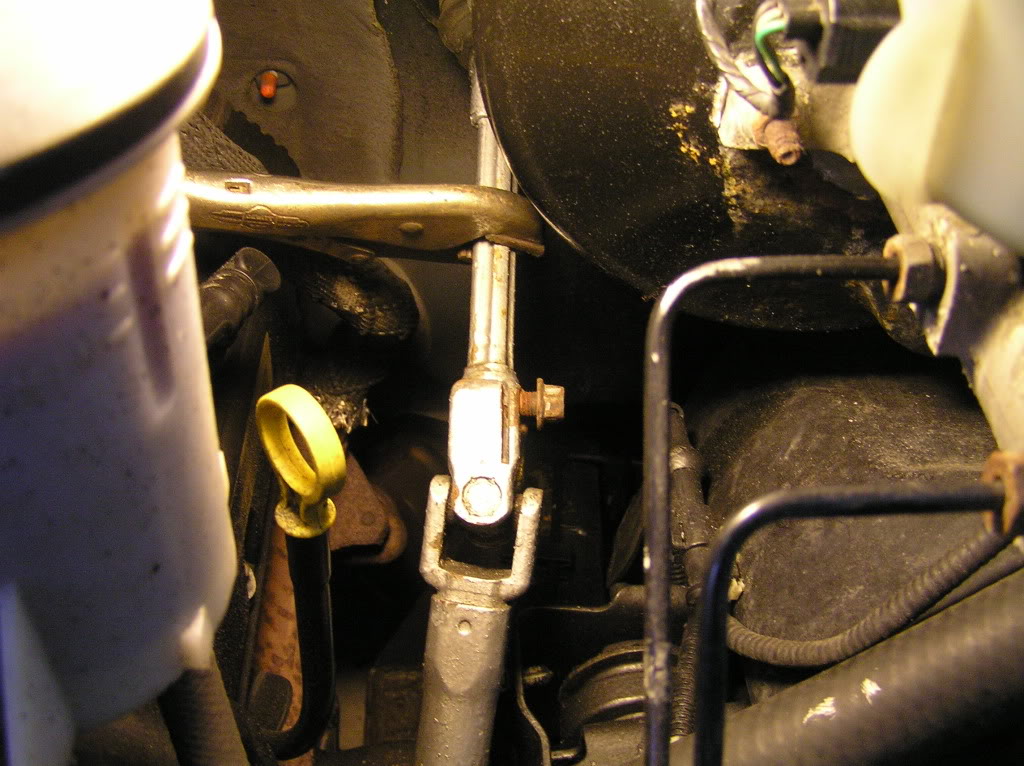
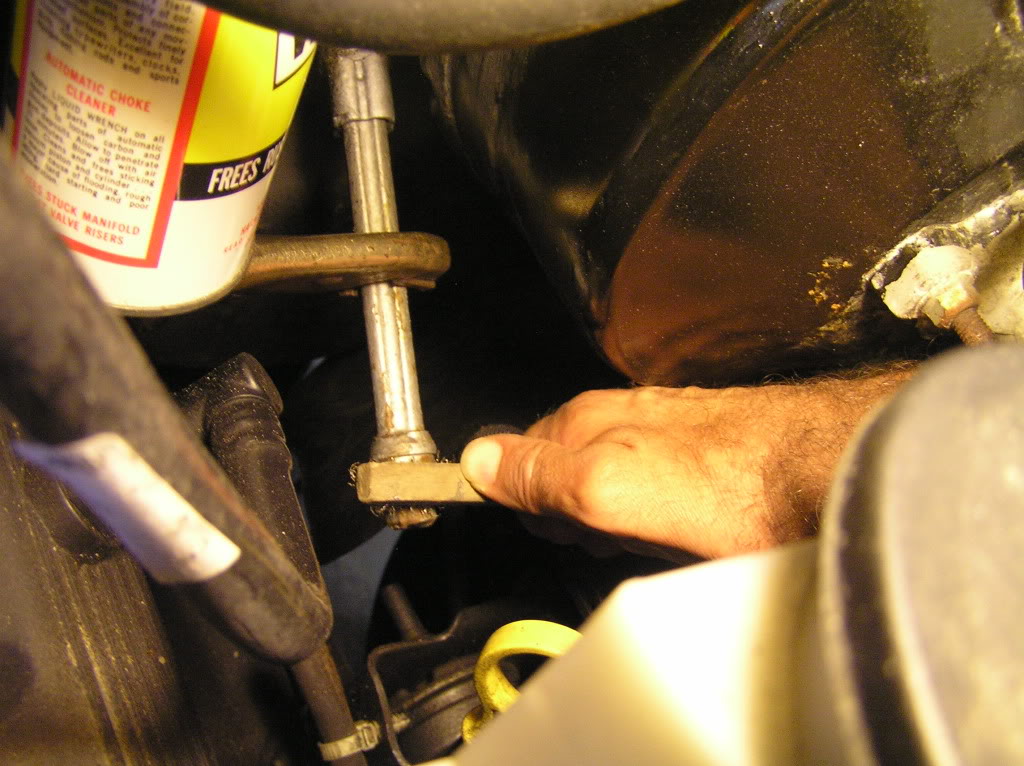
There are two bolts that secure it in place, the upper bolt is 13mm,
the lower is 10mm.
Turn the steering wheel so that the lower bolt is facing the radiator to allow you access.
(Spray Liquid Wrench or PB Blaster on it now to help remove it later)
[IMG] [/IMG]
To keep the steering wheel in proper alignment,
I installed a pair of vise-grips to hold the upper shaft stem.
(This will turn on its own if you don't do this).
>>>DO NOT FORGET TO REMOVE THE VISE-GRIPS WHEN FINISHED.<<<
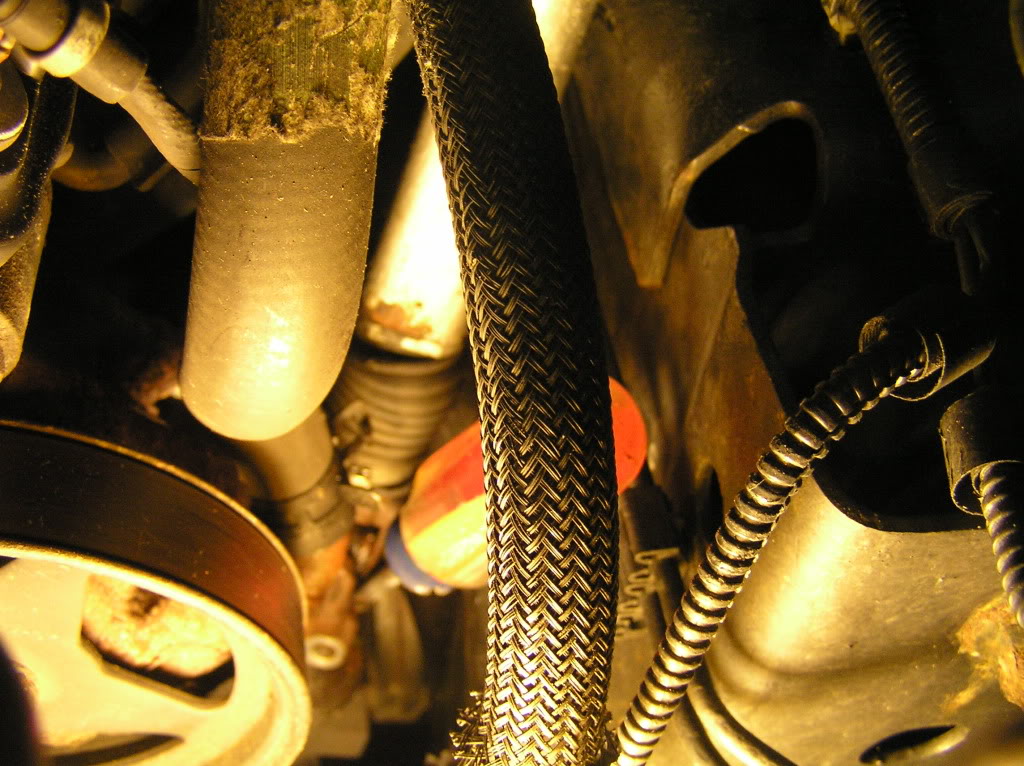
Once the upper bolt is removed, pull the top from the upper stem.
At this point compress the shaft and push the top under the radiator fluid supply hose, (it's tight, but it will go).
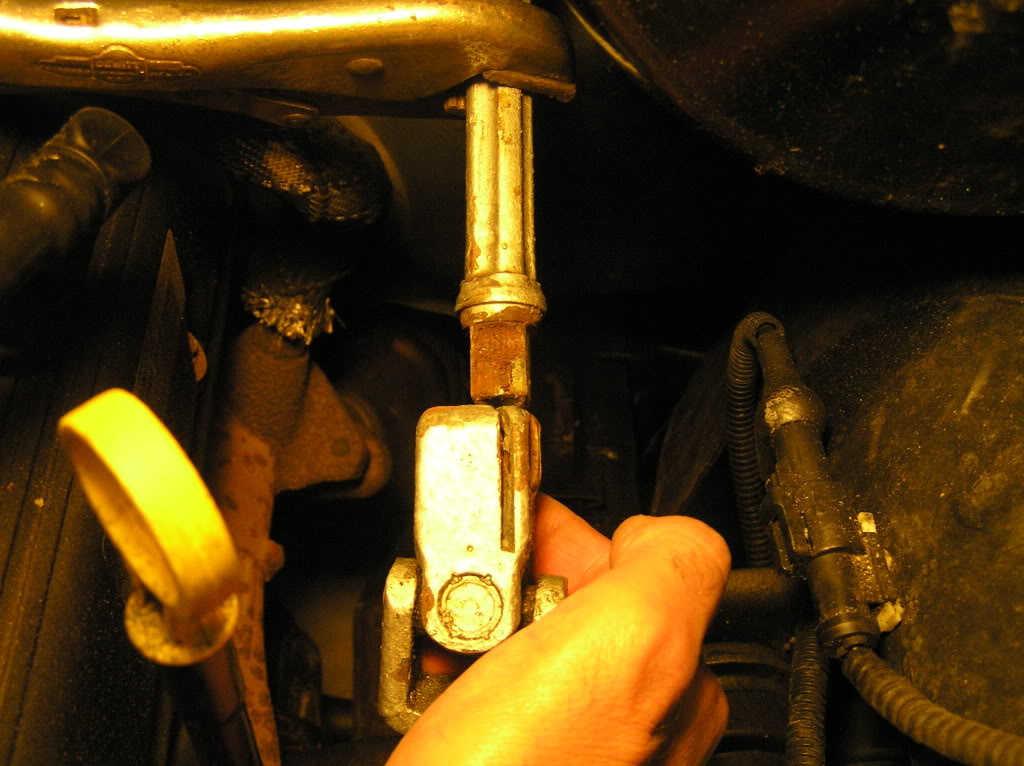
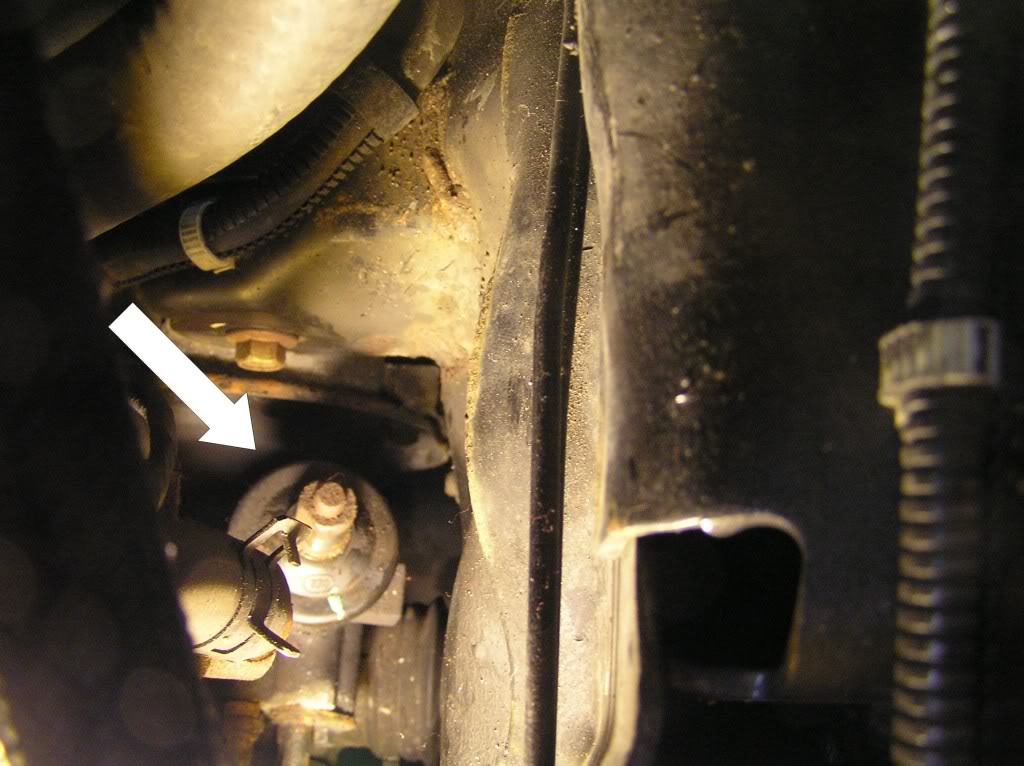
Now comes the tricky part, the lower connection will probably be rusted to the shaft.
If you look closely, there is a slot where the bolt clamps this in place.
I hammered a screwdriver in to loosen it, (your long 1/2" socket extension or a piece of pipe helps).
>>>Leave the screwdriver in it to ease removal<<<.
If you remove the screwdriver, the metal closes just enough to make it difficult to remove.
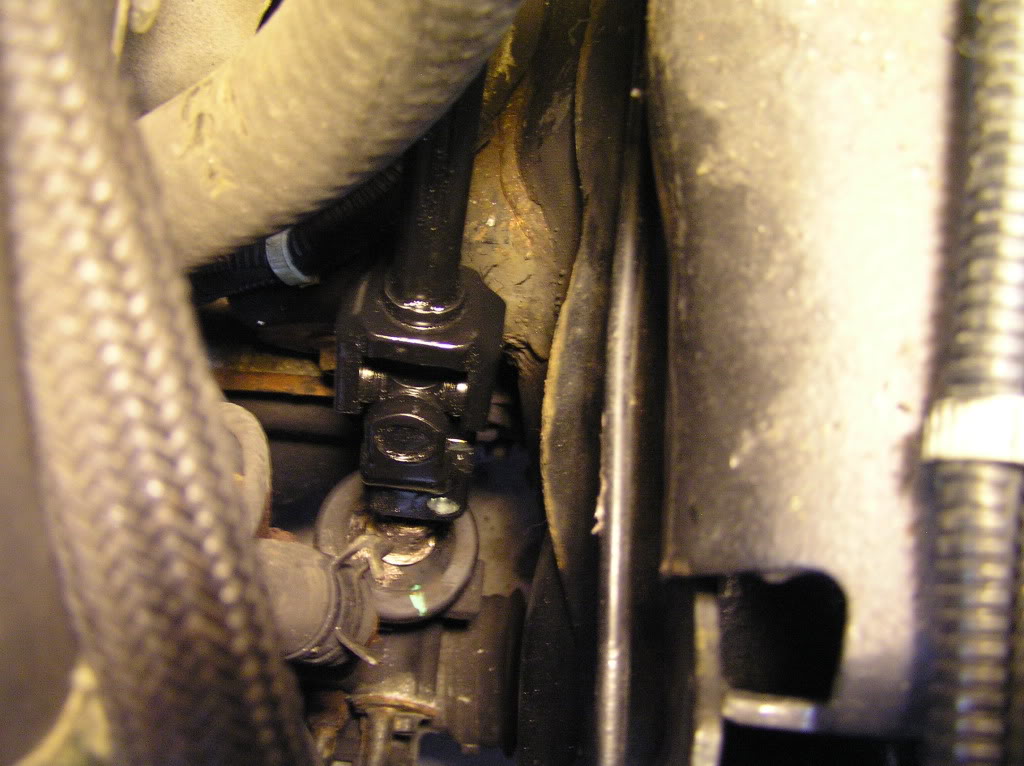
The shaft removed, screwdriver still in place....
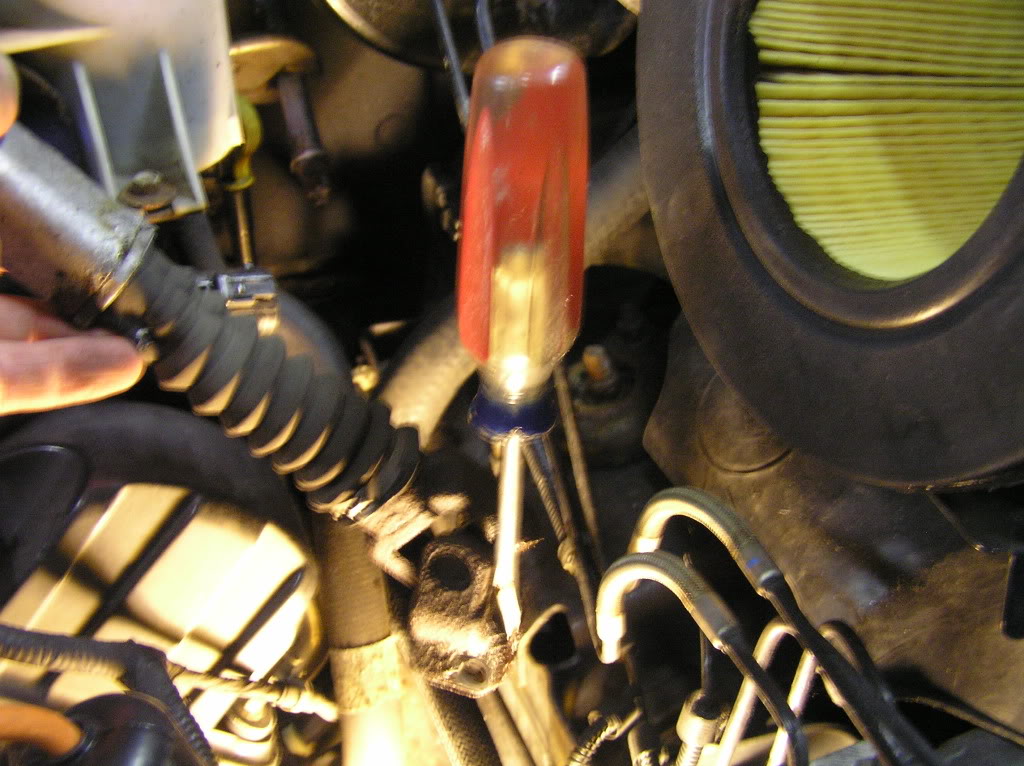
Next I wire brushed the end of the upper shaft.
Wipe the rack and pinion post, and apply some anti-seize to both.
Install the new shaft under the radiator supply hose, bottom first.
Good Luck...this took me about 1 1/2 hours to complete.
(messing with the camera included)
The lower steering shaft connects the stem of the steering column to the rack and pinion unit.
This is a short shaft that contains two small u-joints which due to their size,
can't be equipped with grease fittings. (I agree- lousy design)
The shaft is expandable to ease its installation. (stop laughing)
Please excuse the pictures,
I'm not sure why they load so big.
There are two bolts that secure it in place, the upper bolt is 13mm,
the lower is 10mm.
Turn the steering wheel so that the lower bolt is facing the radiator to allow you access.
(Spray Liquid Wrench or PB Blaster on it now to help remove it later)
[IMG]
[/IMG]To keep the steering wheel in proper alignment,
I installed a pair of vise-grips to hold the upper shaft stem.
(This will turn on its own if you don't do this).
>>>DO NOT FORGET TO REMOVE THE VISE-GRIPS WHEN FINISHED.<<<
Once the upper bolt is removed, pull the top from the upper stem.
At this point compress the shaft and push the top under the radiator fluid supply hose, (it's tight, but it will go).
Now comes the tricky part, the lower connection will probably be rusted to the shaft.
If you look closely, there is a slot where the bolt clamps this in place.
I hammered a screwdriver in to loosen it, (your long 1/2" socket extension or a piece of pipe helps).
>>>Leave the screwdriver in it to ease removal<<<.
If you remove the screwdriver, the metal closes just enough to make it difficult to remove.
The shaft removed, screwdriver still in place....
Next I wire brushed the end of the upper shaft.
Wipe the rack and pinion post, and apply some anti-seize to both.
Install the new shaft under the radiator supply hose, bottom first.
Good Luck...this took me about 1 1/2 hours to complete.
(messing with the camera included)
Last edited by mjb1032; 01-21-2013 at 07:18 AM.

#3
06-02-2011, 10:01 AM

Member
Join Date: Apr 2010
Location: Rochester NY
Posts: 41
Likes: 0
Received 0 Likes
on
0 Posts
#4
06-02-2011, 10:37 AM

#5
06-02-2011, 03:24 PM

Senior Member
Join Date: May 2007
Location: NE Ohio
Posts: 240
Likes: 0
Received 0 Likes
on
0 Posts
Mine has been giving me issues for a few years now. Every now and again I have to WD40 it and/or get some oil on the joint which helps for a few weeks.
My stealership quoted me a few hundred bucks to fix it. Looks like I should be able to do this in a few hours...especially with my very limited mechanical aptitude.
Where did you get the new lower shaft? How much? Part Number?
Thanks!! Great write up!
My stealership quoted me a few hundred bucks to fix it. Looks like I should be able to do this in a few hours...especially with my very limited mechanical aptitude.
Where did you get the new lower shaft? How much? Part Number?
Thanks!! Great write up!
Last edited by Bluejay; 06-02-2011 at 03:27 PM. Reason: language
#6
06-04-2011, 01:19 AM

#7
06-05-2011, 12:49 AM

Senior Member
I hope that is all it takes to fix your issues. I had a stiff steering and the first dealership where I bought my last 3 new vehicles said there was nothing wrong. Took it to another dealer and they diagnosed the rack as bad. I ended up replacing the rack and pump, with labor I came in at $1000. Fixed my issue, but the steel on aluminum in the rack got fouled up some how and starting chewing on each other which also took out the pump.
Trending Topics
#8
06-05-2011, 06:57 AM
Join Date: Jun 2009
Location: Easton, MA
Posts: 215
Likes: 0
Received 0 Likes
on
0 Posts
#9
06-08-2011, 11:19 PM
Member
Join Date: Apr 2010
Location: Rochester NY
Posts: 41
Likes: 0
Received 0 Likes
on
0 Posts
#10
06-09-2011, 04:59 AM

Senior Member
Join Date: Mar 2010
Location: Wisconsin
Posts: 268
Likes: 0
Received 0 Likes
on
0 Posts

#11
06-20-2011, 09:49 PM

i don't quite understand the exact way these parts link and work together and what exactly makes the part above "bad". i mean, is it rust build-up to the point where the part corrodes too much to work right anymore? it's really hard to tell, even from your good pics. the damn thing is so buried under everything in there! anyway, from my experience-mine got stiff after sitting and not being driven much due to having a work truck for my job. i tried lubing the hell out of the joints with seafoam. that worked for about a week. i then used an old-fashioned oil can with old-fashioned oil. i haven't had a problem in a month and the steering feels like new. i dripped it down from above in the engine compartment very liberally.
#12
06-21-2011, 06:44 AM
Join Date: Jun 2009
Location: Easton, MA
Posts: 215
Likes: 0
Received 0 Likes
on
0 Posts
Dozer,
The steering column exits the firewall at a (+-)45 degree angle, and the rack and pinion shaft faces upward.
This shaft with two u-joints provides the flexibility that's needed to bend while turning.
The lower u-joint gets wet and rusts, which leads to it becoming hard to turn.
I sprayed, oiled, lubed, etc, but the tough-turning always came back.
MB
Last edited by mjb1032; 06-21-2011 at 06:46 AM.
#13
06-21-2011, 08:20 PM
Dozer,
The steering column exits the firewall at a (+-)45 degree angle, and the rack and pinion shaft faces upward.
This shaft with two u-joints provides the flexibility that's needed to bend while turning.
The lower u-joint gets wet and rusts, which leads to it becoming hard to turn.
I sprayed, oiled, lubed, etc, but the tough-turning always came back.
MB
The steering column exits the firewall at a (+-)45 degree angle, and the rack and pinion shaft faces upward.
This shaft with two u-joints provides the flexibility that's needed to bend while turning.
The lower u-joint gets wet and rusts, which leads to it becoming hard to turn.
I sprayed, oiled, lubed, etc, but the tough-turning always came back.
MB
#14
06-22-2011, 06:48 AM
Join Date: Jun 2009
Location: Easton, MA
Posts: 215
Likes: 0
Received 0 Likes
on
0 Posts
#15
06-26-2011, 09:17 AM

Senior Member
Join Date: Apr 2005
Location: Maryland
Posts: 117
Likes: 0
Received 0 Likes
on
0 Posts

Did this yesterday, fixed a long standing problem, thanks!
Got the new part from Tasco, it is a bit different than the original. I found it easiest to remove the lower joint first. Turn the steering wheel so that the bolt on the lower joint faces the forward engine compartment and remove the 11mm(or 10, I've forgotten) bolt from the shaft, accessing it from inside of the engine compartment. Then turn the steering wheel counter-clockwise a quarter turn or so until the slot is visible from underneath the car. Drive a long, blunt screwdiver into the slot from underneath the car and the joint will pop right off. The upper one is easier. As mentioned by th OP, clean up the posts so that the new assembly will slide on easy, I used steel wool. And use some anti-seize. You should also use thread-lock or sealer when replacing the bolts, you really don't want this puppy to come off unexpectedly!
I also found that this truck will not run with the air filter out, at least at idle. The airflow over the MAF is apparently too turbulent. Cleaned the MAF with a couple of shots of electronic parts cleaner and that seems to have helped a rough idle.
There was one partially seized joint in the lower steering assembly, it feels much better now! Fixed two problems in under two hours, a very successful effort, thanks mjb1032