Flush Mount Cubes for Reverse Light install w/ Pictures
#1
 12-31-2015, 09:26 PM


Flush Mount Cubes for Reverse Light install w/ Pictures
Good Evening and Happy New Year to everybody! With my windows tinted to 5% on all windows, it made backing up super sketchy. (only took me almost 2 years to solve this problem) 
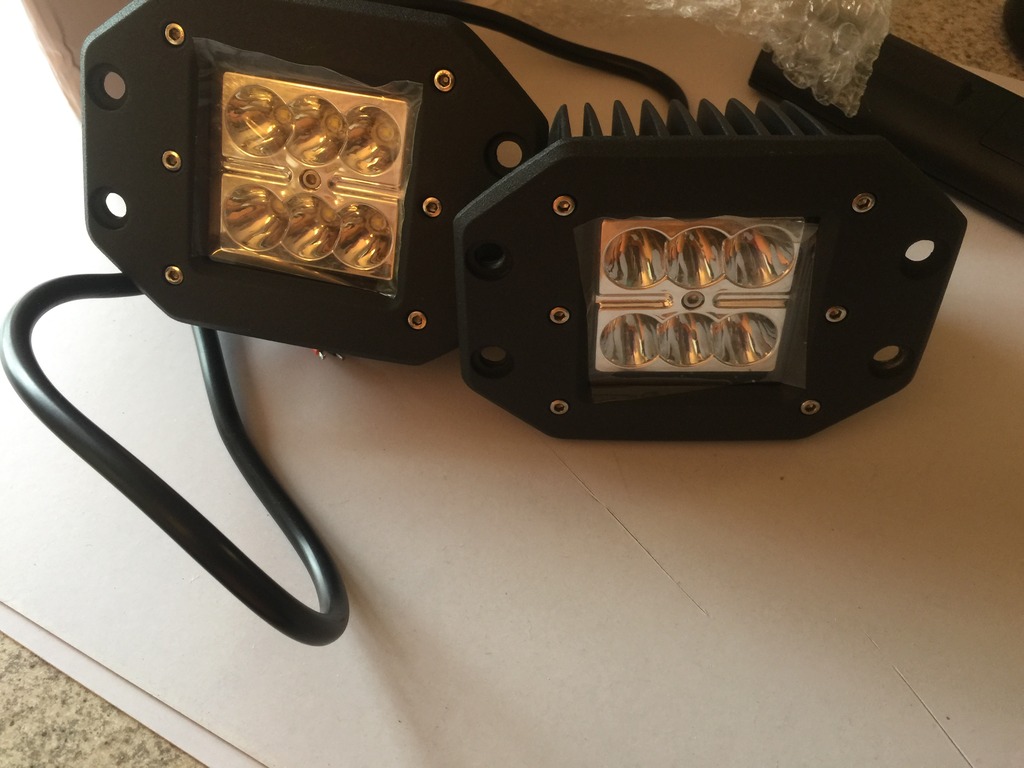
So I found these Turbo Marketing Flush mount Flood Beam LED pods for $30, free shipping. The reviews were good, so I pulled the trigger. Here's a link:
Tools used:
Pneumatic High Speed Metal Saw w/ Fine blade
Pneumatic 4" cut off wheel
Angle Grinder with Grinding wheel
Metal File
Drill with step bit
Wire pliers
Wire Strippers
Wire Crimpers
18" Hemostats
Allen Wrenches
Red Thread locker
Lighter
SAFETY GLASSES!!
Electrical Supplies:
1/4 Wire Loom
1 Inline Fuse
7 Crimp Connectors
1 Large Eyelet Connector
Heat Shrink
1 Red Splice Connector
Black Electrical Tape
Several Zip-ties
1 1/8" Self tapping screw
Here they are out of the box:
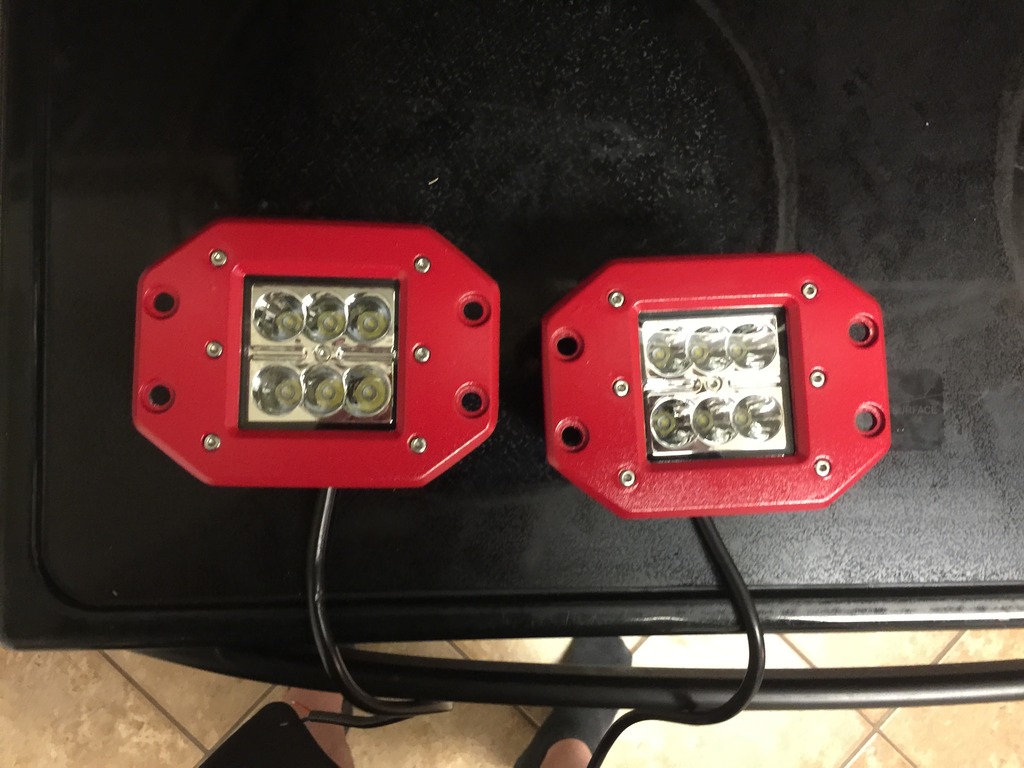
I painted them to match my truck. Simple to paint, 2 coats of Primer, 3 coats of Perfect Match, Ford Cardinal Red, 2 Coats of Clear.
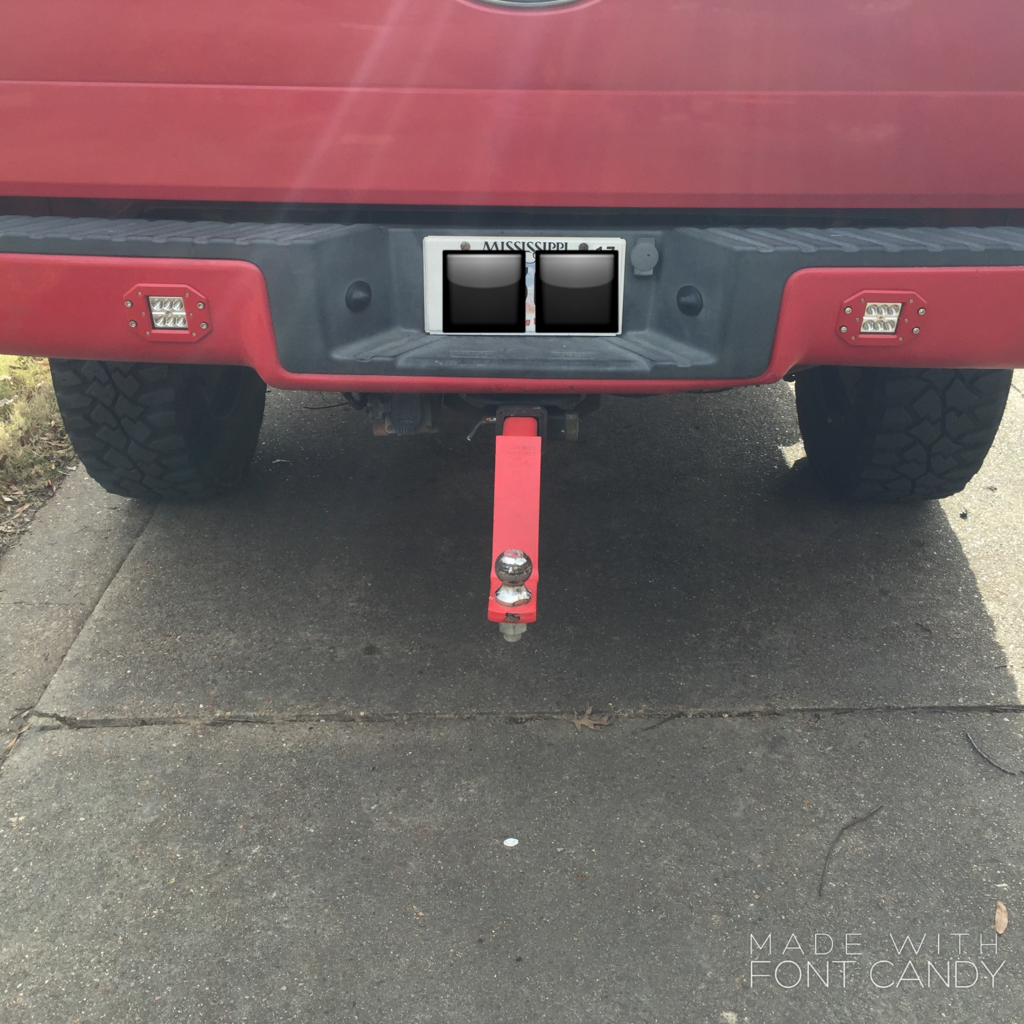
I then Located the location to were I wanted to install them. About the only place to put them in the rear bumper, if you have a hitch is about 3 1/8" from the plastic trim in the center of the bumper. I taped off this area with painters tape.

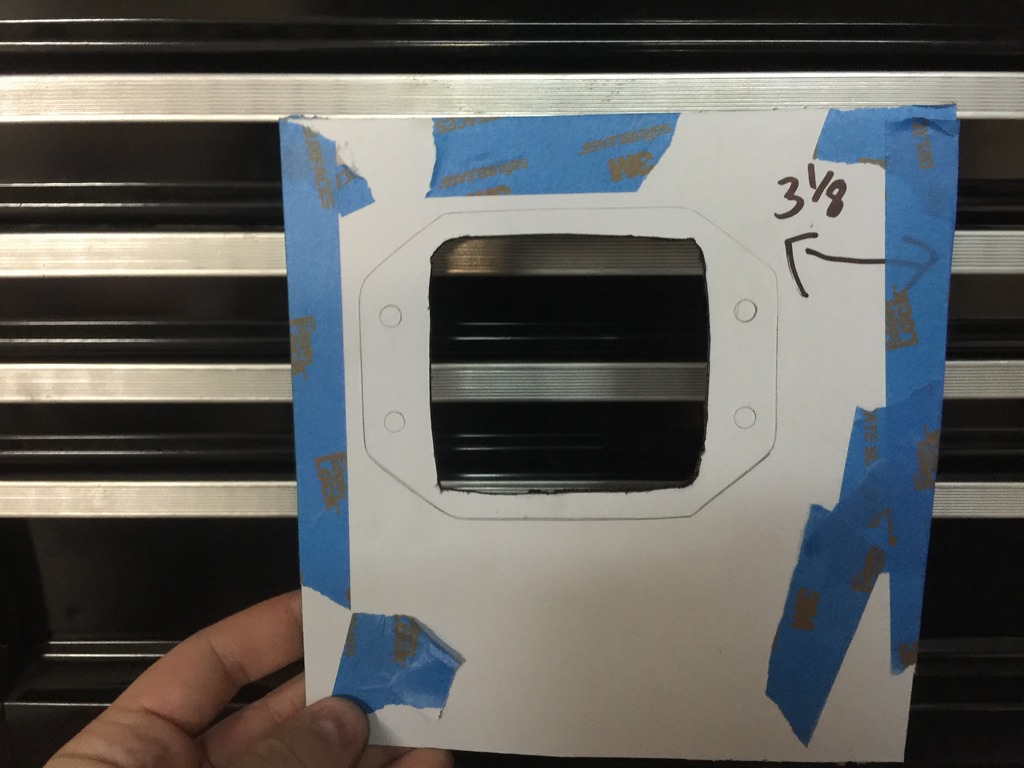
I taped my template to my bumper and traced out my opening. Using the Cut Off Wheel and The Metal Saw I cut out the traced hole. I repeatedly placed the pod in the hole and made adjustments with the grinder. Once the Pod fit, I marked my holes for drilling.
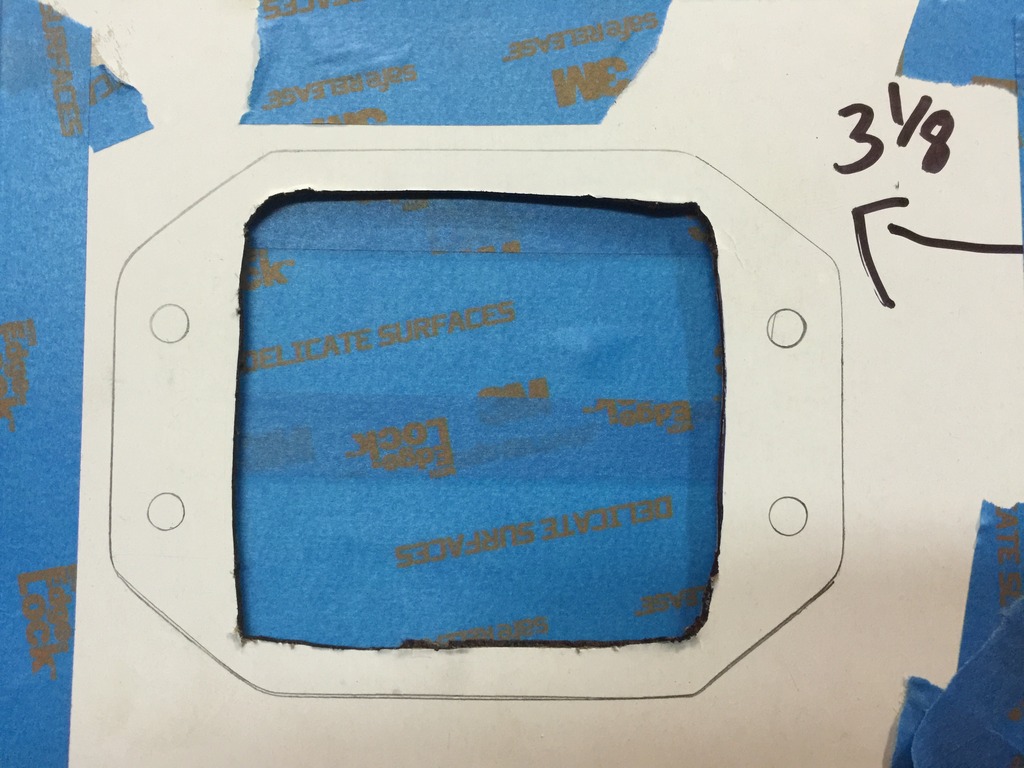
Template:
The Pods didn't come with a wiring harness or switch or instructions so I made my own. Ive attached a diagram of the one I made. I didn't wire them to a switch because I wanted them to only come on when I placed my truck in the reverse gear. (Black wire with PINK Stripe)
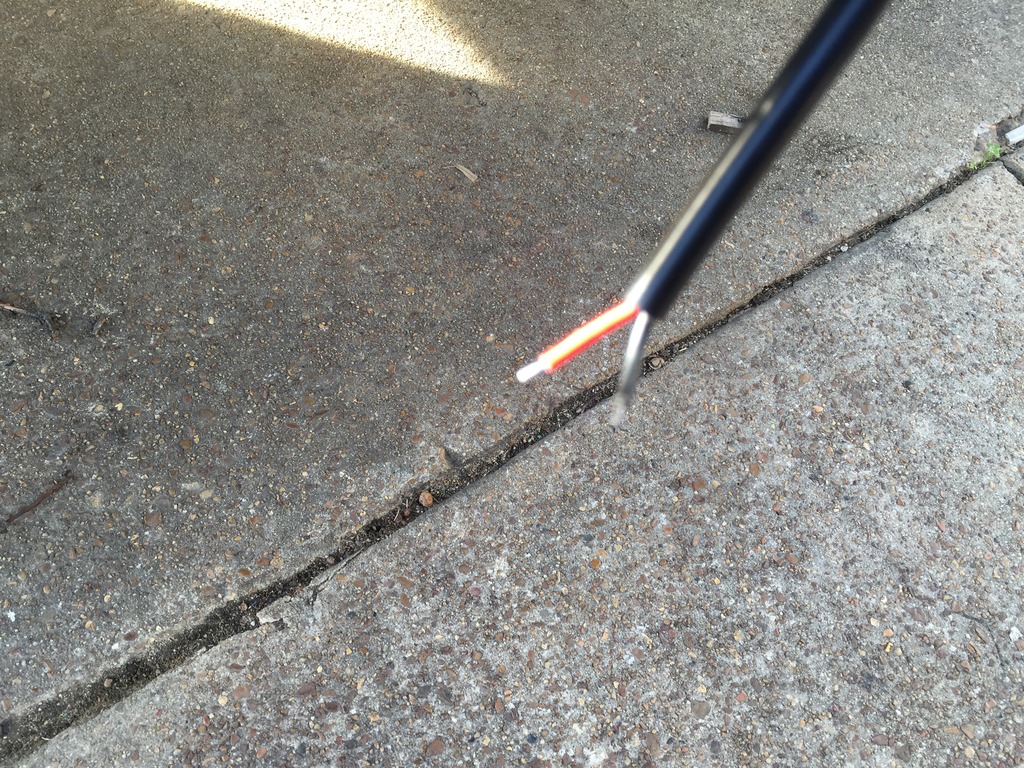
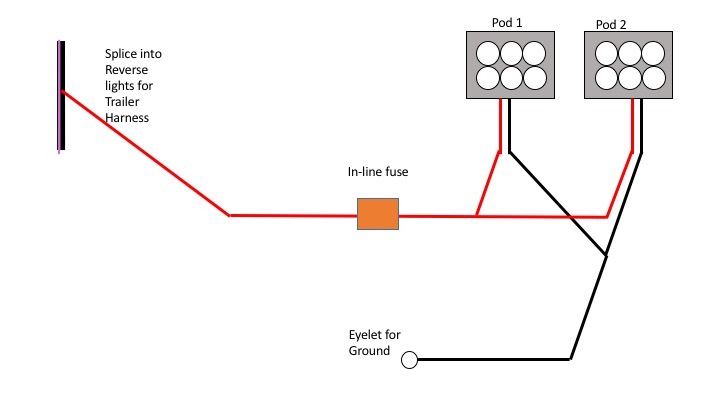
I basically attached both Ground wires together and then to the frame and then attached both positive wires to a in line fuse and then tapped into the Trailer hook up harness.
I cleaned up the hanging wires and put them in the protective loom and zip tied them to out-of-the way places.
Ill post a picture of the Wiring harness installed tomorrow. Sorry, it got really cold and I was ready to finish. Only in Mississippi is it 80 on Christmas and 30 5 days later.
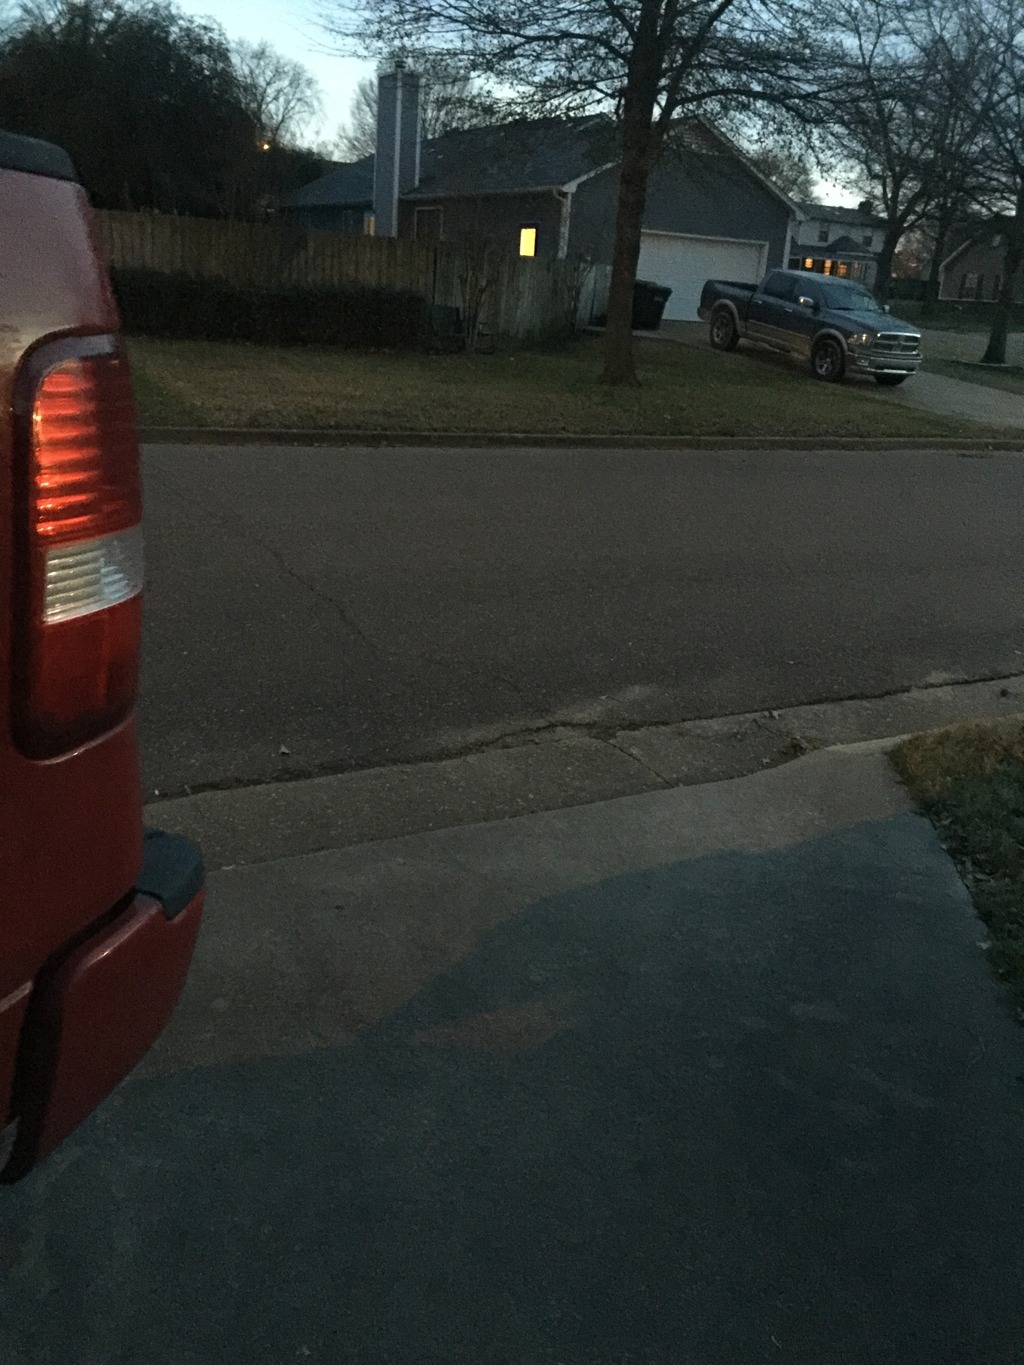
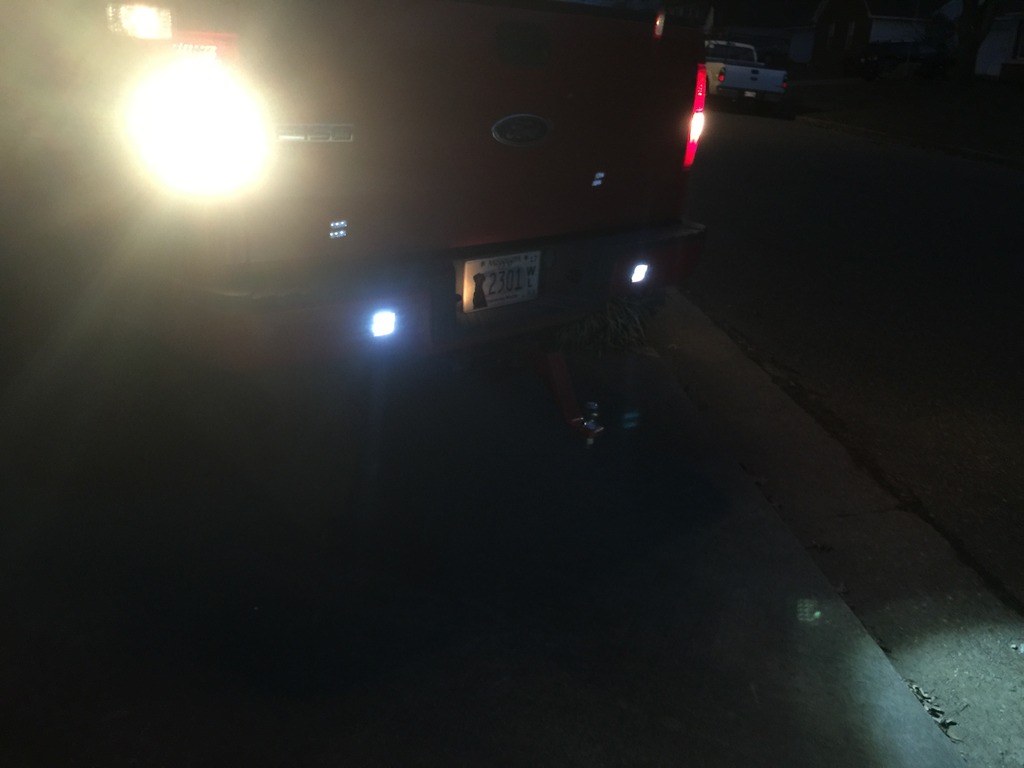
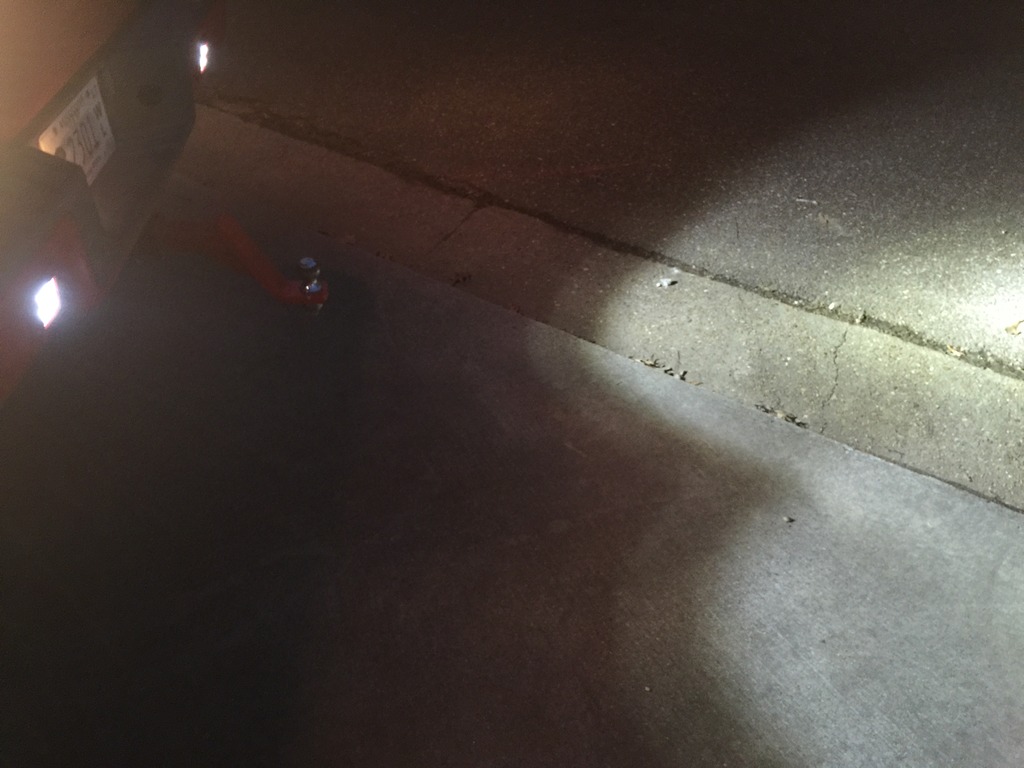
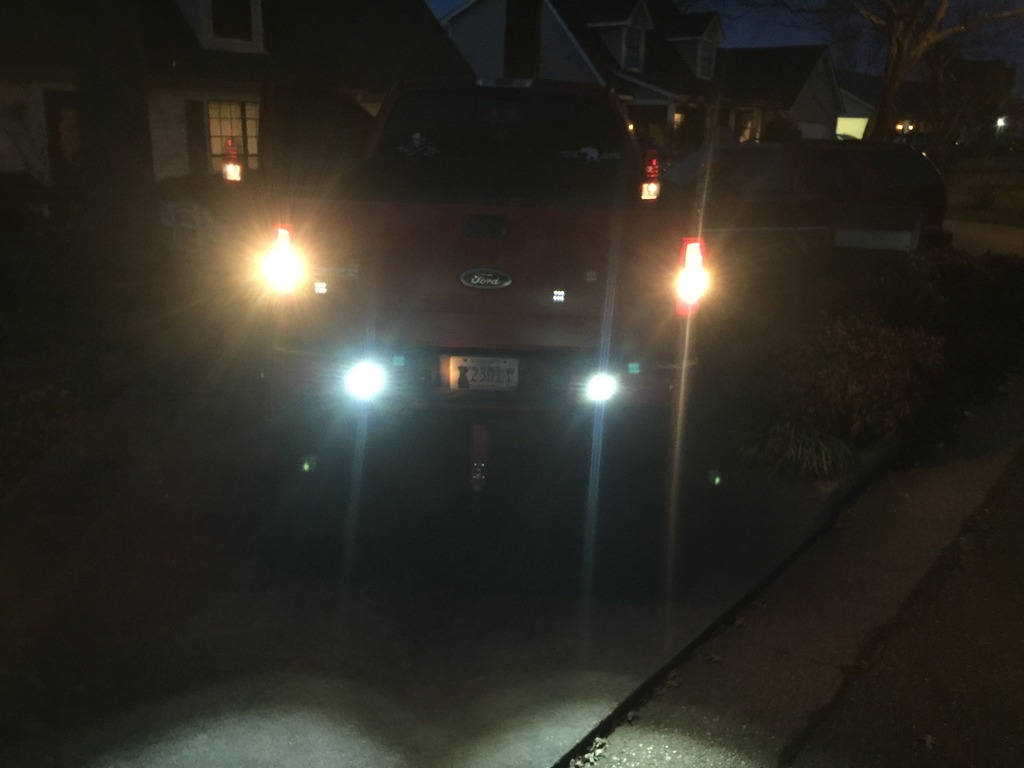
Here are the lights installed and some On/Off pictures.
Lights Off:
Lights On:
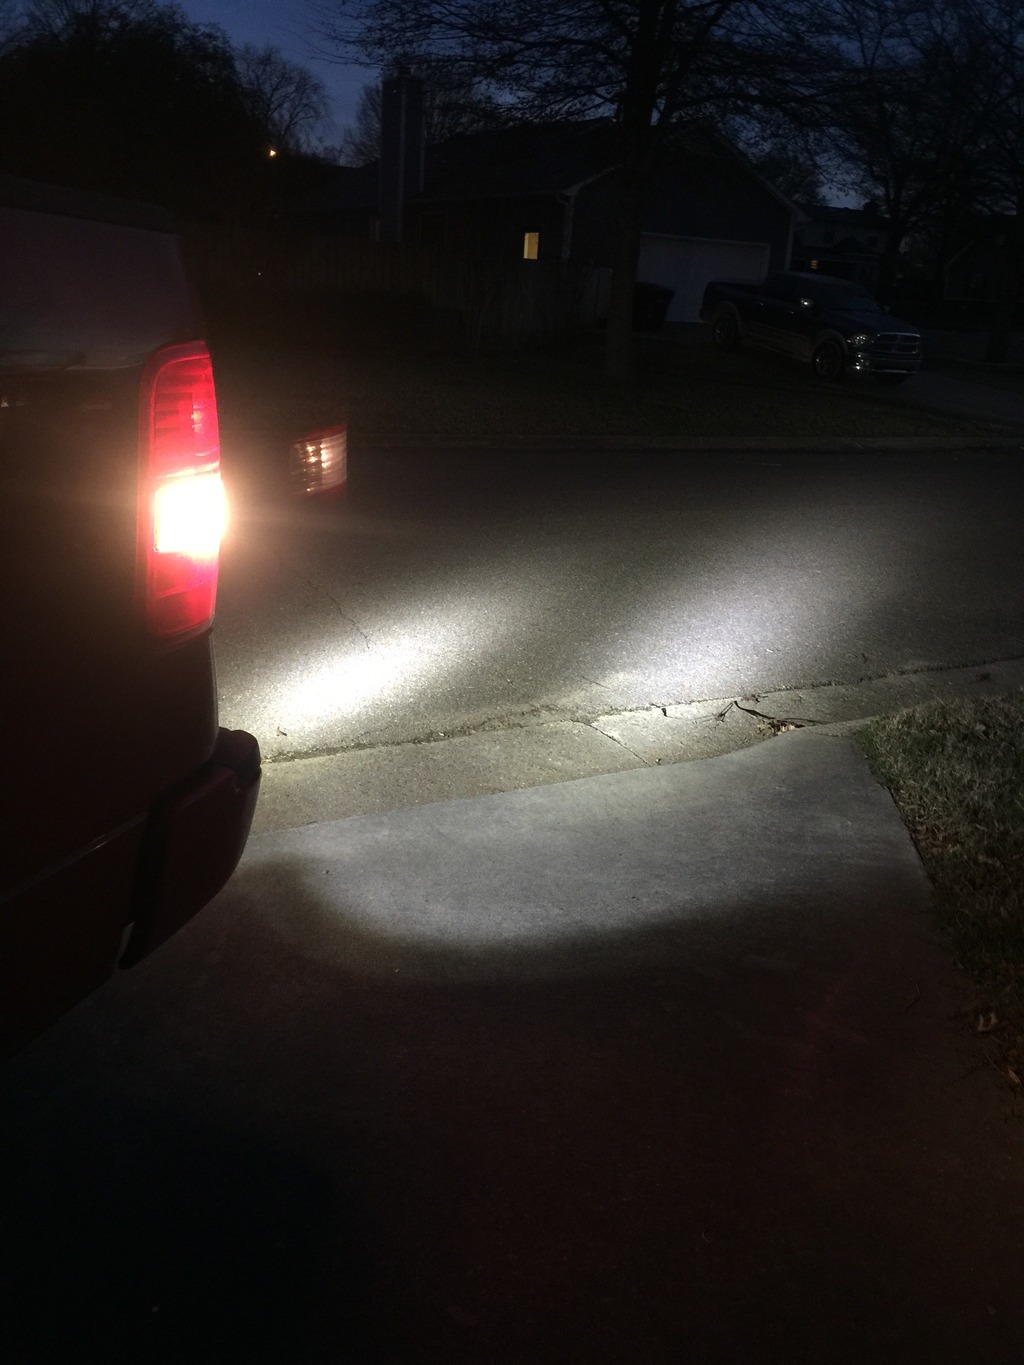
Other Pictures
Planing to switch to some LED Revers bulbs in my tail-lights.
If you have any questions feel free to comment or send me a message.
So I found these Turbo Marketing Flush mount Flood Beam LED pods for $30, free shipping. The reviews were good, so I pulled the trigger. Here's a link:
Tools used:
Pneumatic High Speed Metal Saw w/ Fine blade
Pneumatic 4" cut off wheel
Angle Grinder with Grinding wheel
Metal File
Drill with step bit
Wire pliers
Wire Strippers
Wire Crimpers
18" Hemostats
Allen Wrenches
Red Thread locker
Lighter
SAFETY GLASSES!!
Electrical Supplies:
1/4 Wire Loom
1 Inline Fuse
7 Crimp Connectors
1 Large Eyelet Connector
Heat Shrink
1 Red Splice Connector
Black Electrical Tape
Several Zip-ties
1 1/8" Self tapping screw
Here they are out of the box:

I painted them to match my truck. Simple to paint, 2 coats of Primer, 3 coats of Perfect Match, Ford Cardinal Red, 2 Coats of Clear.

I then Located the location to were I wanted to install them. About the only place to put them in the rear bumper, if you have a hitch is about 3 1/8" from the plastic trim in the center of the bumper. I taped off this area with painters tape.

I taped my template to my bumper and traced out my opening. Using the Cut Off Wheel and The Metal Saw I cut out the traced hole. I repeatedly placed the pod in the hole and made adjustments with the grinder. Once the Pod fit, I marked my holes for drilling.

Template:

The Pods didn't come with a wiring harness or switch or instructions so I made my own. Ive attached a diagram of the one I made. I didn't wire them to a switch because I wanted them to only come on when I placed my truck in the reverse gear. (Black wire with PINK Stripe)


I basically attached both Ground wires together and then to the frame and then attached both positive wires to a in line fuse and then tapped into the Trailer hook up harness.
I cleaned up the hanging wires and put them in the protective loom and zip tied them to out-of-the way places.

Ill post a picture of the Wiring harness installed tomorrow. Sorry, it got really cold and I was ready to finish. Only in Mississippi is it 80 on Christmas and 30 5 days later.
Here are the lights installed and some On/Off pictures.
Lights Off:

Lights On:

Other Pictures


Planing to switch to some LED Revers bulbs in my tail-lights.
If you have any questions feel free to comment or send me a message.
#2
12-31-2015, 10:53 PM

Senior Member

#3
01-01-2016, 07:51 AM
Senior Member
#4
01-01-2016, 08:19 AM


#5
01-03-2016, 11:30 AM

Senior Member
Join Date: Jan 2006
Location: Howell, NJ
Posts: 410
Likes: 0
Received 0 Likes
on
0 Posts


#6
01-03-2016, 11:31 AM
Senior Member
Join Date: Jan 2006
Location: Howell, NJ
Posts: 410
Likes: 0
Received 0 Likes
on
0 Posts
#7
01-03-2016, 03:39 PM

Trending Topics
#8
01-03-2016, 04:40 PM
#9
01-03-2016, 04:50 PM
#10
01-12-2016, 09:37 PM
Senior Member
Join Date: Jan 2006
Location: Howell, NJ
Posts: 410
Likes: 0
Received 0 Likes
on
0 Posts

#11
01-12-2016, 09:39 PM
Senior Member
Join Date: Jan 2006
Location: Howell, NJ
Posts: 410
Likes: 0
Received 0 Likes
on
0 Posts

#12
01-12-2016, 10:55 PM
#13
01-13-2016, 07:59 PM
Senior Member
Join Date: Jan 2006
Location: Howell, NJ
Posts: 410
Likes: 0
Received 0 Likes
on
0 Posts


#15
01-14-2016, 10:19 AM