
My install experience - long writeup


Thread Starter
|
Senior Member
Joined: Oct 2010
Posts: 327
Likes: 1
From: Austin, Tx
I was feeling frisky this weekend and took it to one of the only car audio shops here in Austin. I am thinking about adding another ID 10" sub or maybe switching to 2 BI MKIIIs.
A few of the guys that worked there wanted to hear it and they thought it sounded really good.
The Focals are real clean but can be a little bright to some. I am running them passive and have the crossovers at -3db on the tweets.
I can honesty say I really really like them.
I got lucky in that the center support beam is where I layed my first strip of deadener. Everything else was layed from that center section. I wish I could say it was all in the master plan but I really just got lucky.
And no I didn't take the seats out. In restrospect, it would have been so much easier. Can anyone say cramps after being crammed in that back for 6 hours straight.
Last edited by Langlowe; Dec 13, 2010 at 09:02 PM.

Member
Joined: Jul 2010
Posts: 54
Likes: 0
Awesome! This might be a stupid question but how did you get your seats to fold down? Is there enough space for the amps behind the rear seats? How about when the seats are folded up? I know, well at least on mine, when I fold the rear seats up, the space behind them gets much thinner.
-Cesar
-Cesar
Thread Starter
|
Senior Member
Joined: Oct 2010
Posts: 327
Likes: 1
From: Austin, Tx
Awesome! This might be a stupid question but how did you get your seats to fold down? Is there enough space for the amps behind the rear seats? How about when the seats are folded up? I know, well at least on mine, when I fold the rear seats up, the space behind them gets much thinner.
-Cesar
-Cesar
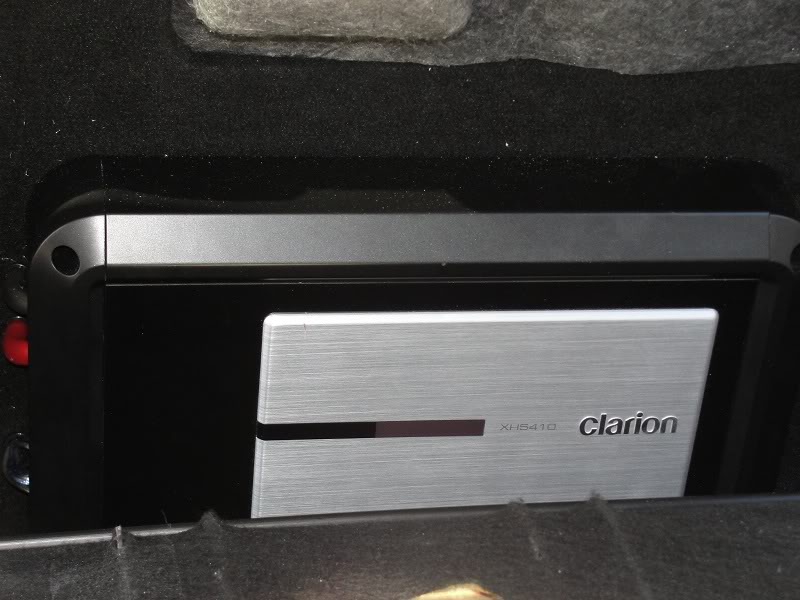
Now the amps are a different story. While there is plenty of room for the amps with the seat in the normal position I can no longer raise the seat bottom all the way up. This really isn't a big deal to me because I still have at least 3 more years with at least 1 child car seat in back.
I can get the seat up about 85% of the way up and then I can pop the release to the back. Then everything folds down as it should. That Clarion amp is almost 3" thick. When I had the small loaner 2 channel I could force the seat up.
I am sure that I could raise the amps up a little and do a little engineering to the amp rack and get the seat to raise up as it should but I am not that motivated at this time.
Thread Starter
|
Senior Member
Joined: Oct 2010
Posts: 327
Likes: 1
From: Austin, Tx
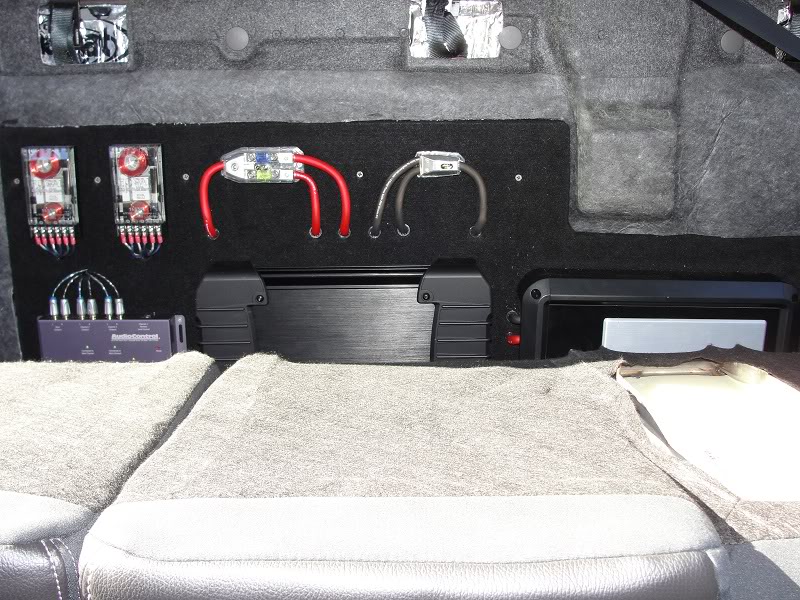
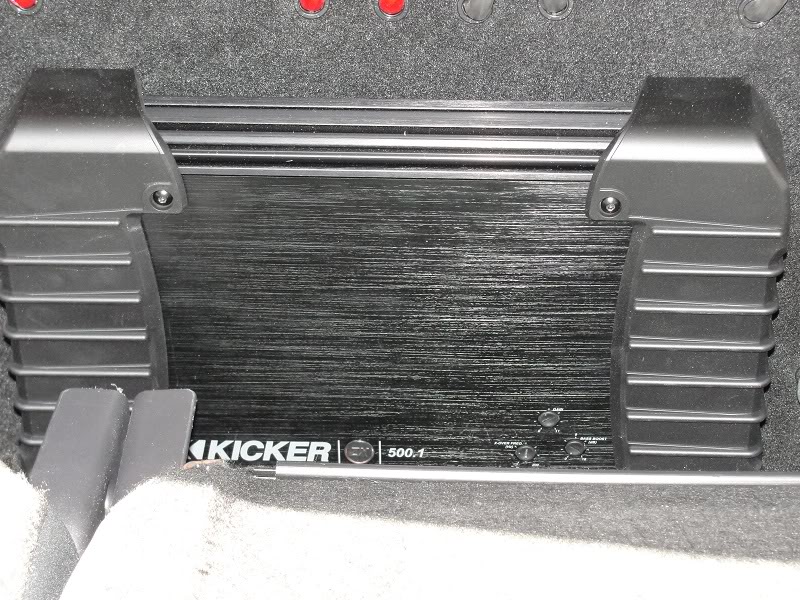
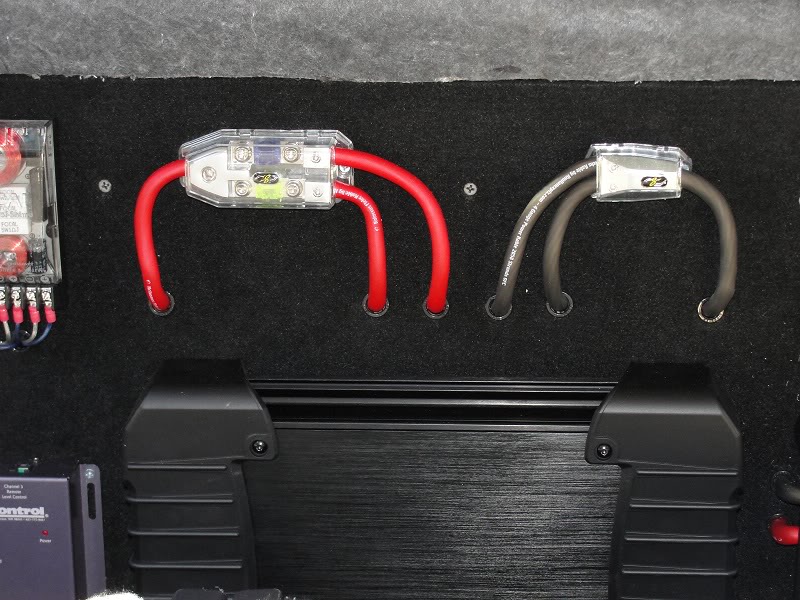
Still haven't replaced the common ground 4ga and but did add some optional end caps to the Kicker 500.1. Not sure if I like the end caps but they are on for now. Any opinions on them?
I am currently in conversation with mSaLL150 and Stormsearch on possibly replacing the single ID10D4 sub and Kicker amp with dual SI BM MKIII and a Sundown Audio SAX-1200D.
Other than the ground I still two things on my list to do when winter is over.
Deaden the doors and weatherproof the MDF speaker rings.
Took a video and a few more pics.
http://www.youtube.com/watch?v=UYMHnfeEBHw
Thread Starter
|
Senior Member
Joined: Oct 2010
Posts: 327
Likes: 1
From: Austin, Tx
I mounted my ground to the rear seat belt shoulder assembly that mounts to the back wall. There is a large T50 Torx bolt that hold the thing in place and that is the bolt I used. I did have to enlarge the diameter of the ring connector I was using.
I did not ohm test the location but I don't have any type of engine noice or static so I figure it is good.
Last edited by Langlowe; Dec 17, 2010 at 09:21 PM.


Thread Starter
|
Senior Member
Joined: Oct 2010
Posts: 327
Likes: 1
From: Austin, Tx
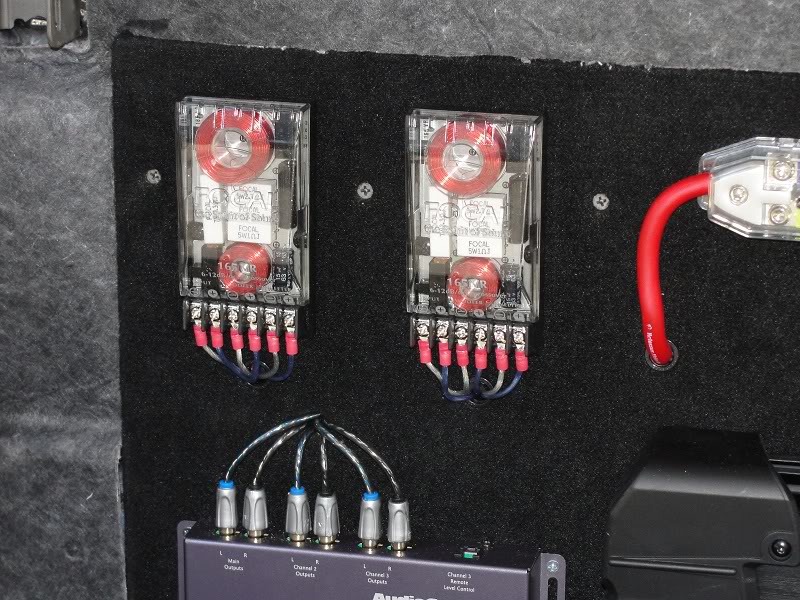
What I did was physically remove the 4 wires that connected between the two black bluetooth connectors. A good tug and the wire and pin just came right out. Then just connected those two black connectors together.
The other 8 wires are the speaker leads and that is what you splice into.
Here the link to the picture used in brn2ryd install.

Thread Starter
|
Senior Member
Joined: Oct 2010
Posts: 327
Likes: 1
From: Austin, Tx
Update to this build.
Just for kicks I went ahead and bought two SI BM MKIII subs this week. Again thank you mSaLL and Storm.
Now on the finding another sub amp that is not to big, not to expensive, but not to cheap, and has just the right power.
Will update more as things start to arrive and I start the box build. That is the one thing I am not looking forward to. I am way to **** and I don't have a table saw.

Technical Article Contributor
Joined: Aug 2006
Posts: 7,862
Likes: 0
From: Northern California
Heh, I used just a jigsaw and skillsaw to put my box together...hence why it looks horrible and is just slapped together. Once I get a chance to get up to the ranch for a few days I can whip out the table saw and build a nice looking box. :o


Junior Member
Joined: Apr 2009
Posts: 7
Likes: 0
I had no issues after using that harness. It was probably the easiest thing of the whole install other than taking off the doors.
What I did was physically remove the 4 wires that connected between the two black bluetooth connectors. A good tug and the wire and pin just came right out. Then just connected those two black connectors together.
The other 8 wires are the speaker leads and that is what you splice into.
Here the link to the picture used in brn2ryd install.
Thanks for sharing all of your information about your install. Very Helpful.
I'm just not clear, I see you remove the 4 wires connecting the 2 black connectors.
Then you connect them to eachother?
Or do you cut them both off?
I'm just not exactly sure, I have one ordered but Im assuming it wont have this information with it. if you could draw a little sketch or show a link to someone who has a picture of it cut. That would be awesome.
Great install, looks so nice. Especially the amps!

Senior Member
Joined: Jun 2009
Posts: 107
Likes: 0
From: Dillonvale, Ohio
Thanks for sharing all of your information about your install. Very Helpful.
I'm just not clear, I see you remove the 4 wires connecting the 2 black connectors.
Then you connect them to eachother?
Or do you cut them both off?
I'm just not exactly sure, I have one ordered but Im assuming it wont have this information with it. if you could draw a little sketch or show a link to someone who has a picture of it cut. That would be awesome.
Great install, looks so nice. Especially the amps!
Yea, I was wondering about this too. I was gonna just splice wires without a harness because I don't wanna lose steering wheel controls, but if this harness can be modified to allow that, I'm interested. Just want some clearer instructions. Thanks.