How-To: Big 3 Upgrade (Extremely Pic-Heavy)
#61
 06-09-2010, 07:18 PM


No biggie. I'm working on getting them back but some will have to be retaken and others will not be coming back (process of crimping/soldering the wires). I had them stored on an external flash drive and my habit is to clear that out every so often. Unfortunately I forgot I had the pictures stored on my Flickr account....so when I cleared it out the pictures went poof. 
#62
06-10-2010, 06:39 AM

Senior Member
Ok, I did a bit more wire tracing and here is how the grounding is handled on the 2009s, which sounds like it is similar, if not equal to earlier years,
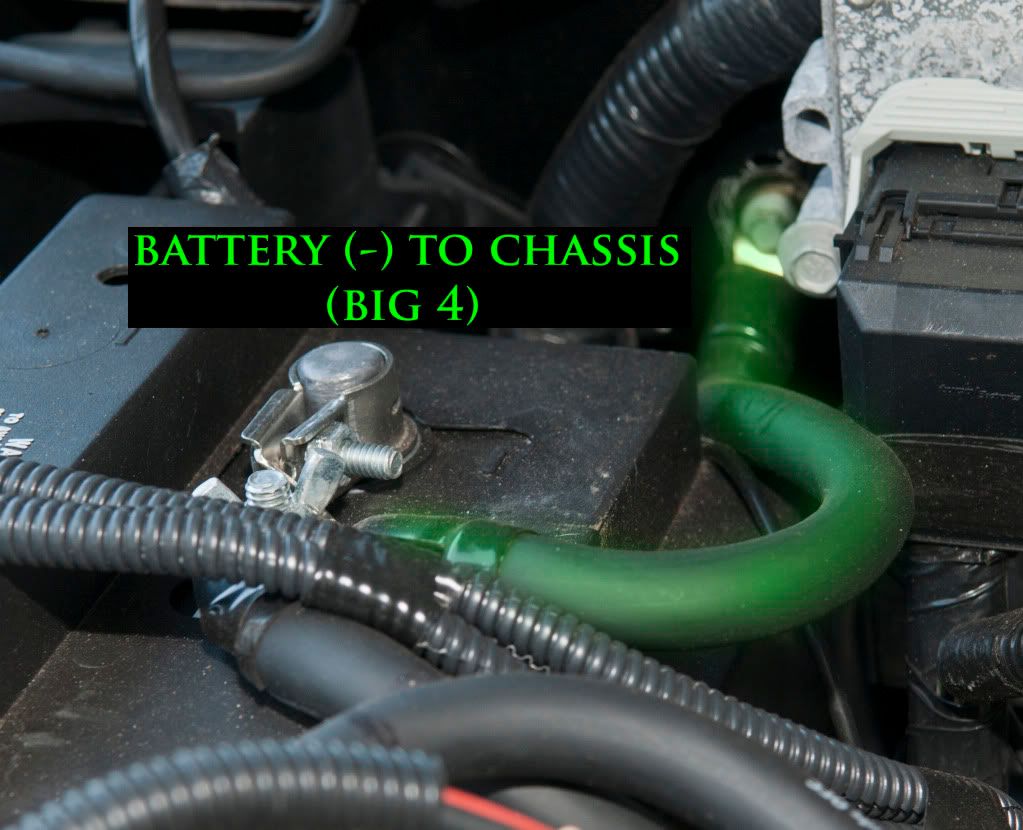
Negative Battery Terminal is grounded to the chassis via a short run to sheet metal under hood
Negative Battery Terminal is connected to engine block via a bolt on starter underneath the truck.
Bolt on starter has a second wire that grounds to the frame underneath the passenger side front wheel well.
Chassis is grounded to frame via a non-insulated wire braid just behind front passenger wheel.
So, with that detailed out, here is what I'm thinking about doing is keeping all factory wiring and running 1/0 along side it with one exception: Instead of running 1/0 from negative terminal to starter bolt and then 1/0 from starter bolt to frame, I'm thinking of running 1/0 from negative terminal to starter bolt and then 1/0 from negative terminal to frame. The reason being is that it's pretty crowded down there and I don't think I can squeeze two runs of 1/0 to the starter bolt. Thoughts?
But I still don't understand since the frame is right next to the starter motor, they could have made a much shorter run from there???
#63
06-27-2010, 06:47 PM

Senior Member
Join Date: Mar 2001
Location: Tallahassee, FL
Posts: 479
Likes: 0
Received 0 Likes
on
0 Posts
Big 3 Questions
Hey guys, not seeing the pictures has hindered me. Here is what I have done today. 1/0 ga power (fused 250amp) to alternator, negative post to frame, starter ground to frame. Is this correct? I was planning to go negative post to chassis under the hood as well but haven't done that yet. Truck is reading a constant 14.29 volts.
#64
07-19-2010, 06:06 PM
#65
07-19-2010, 06:50 PM
Senior Member

#66
07-19-2010, 09:28 PM

Ok, I did a bit more wire tracing and here is how the grounding is handled on the 2009s, which sounds like it is similar, if not equal to earlier years,
Negative Battery Terminal is grounded to the chassis via a short run to sheet metal under hood
Negative Battery Terminal is connected to engine block via a bolt on starter underneath the truck.
Bolt on starter has a second wire that grounds to the frame underneath the passenger side front wheel well.
Chassis is grounded to frame via a non-insulated wire braid just behind front passenger wheel.
So, with that detailed out, here is what I'm thinking about doing is keeping all factory wiring and running 1/0 along side it with one exception: Instead of running 1/0 from negative terminal to starter bolt and then 1/0 from starter bolt to frame, I'm thinking of running 1/0 from negative terminal to starter bolt and then 1/0 from negative terminal to frame. The reason being is that it's pretty crowded down there and I don't think I can squeeze two runs of 1/0 to the starter bolt. Thoughts?
Just keep in mind, your ground is going to travel the shortest distance with the least resistance no matter what your do.
Absolute ground is your alternate housing. That bolt on the starter grounds everything from the tranny back as-well.
#67
07-21-2010, 09:36 AM
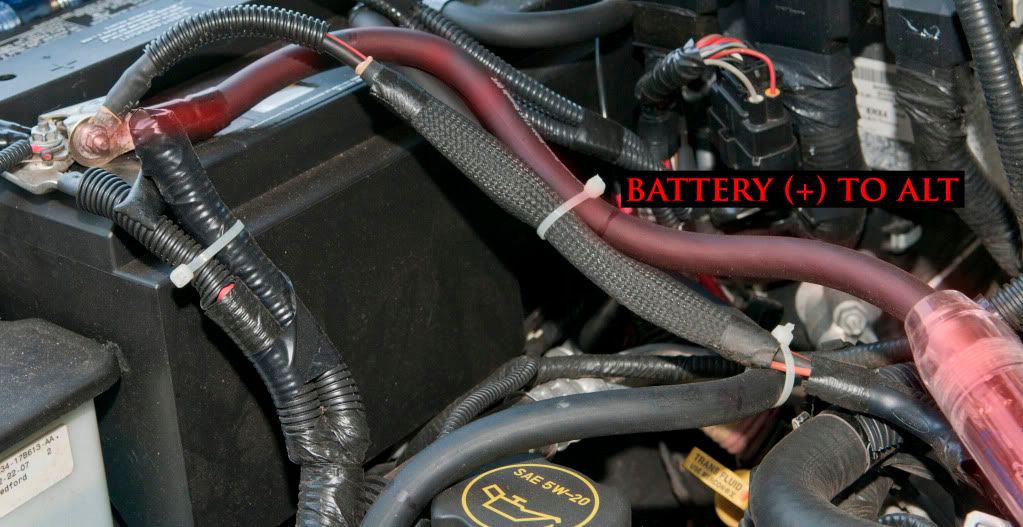
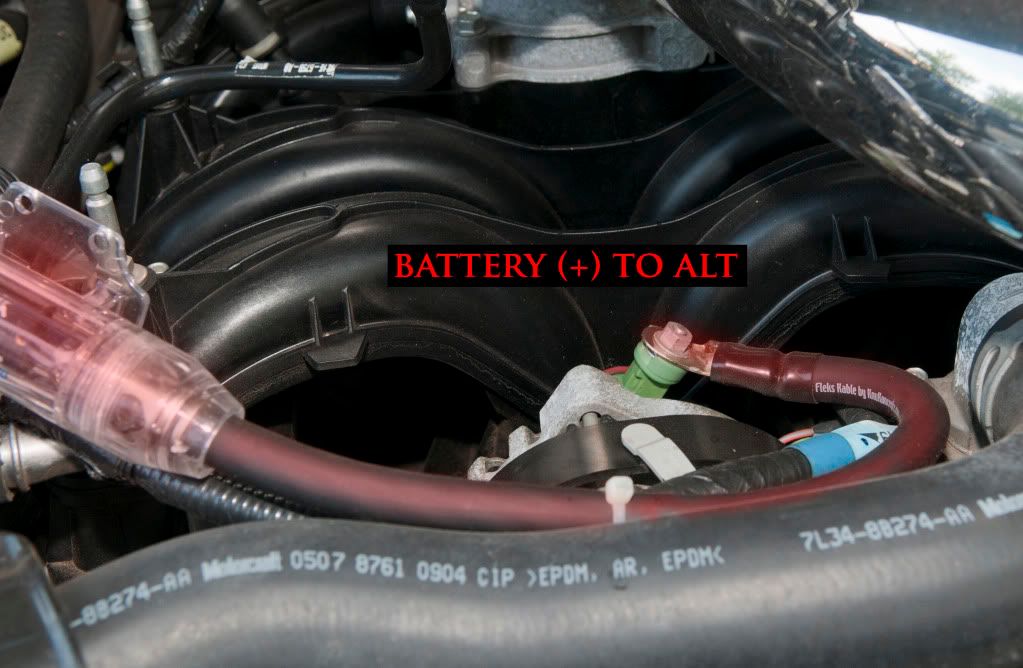
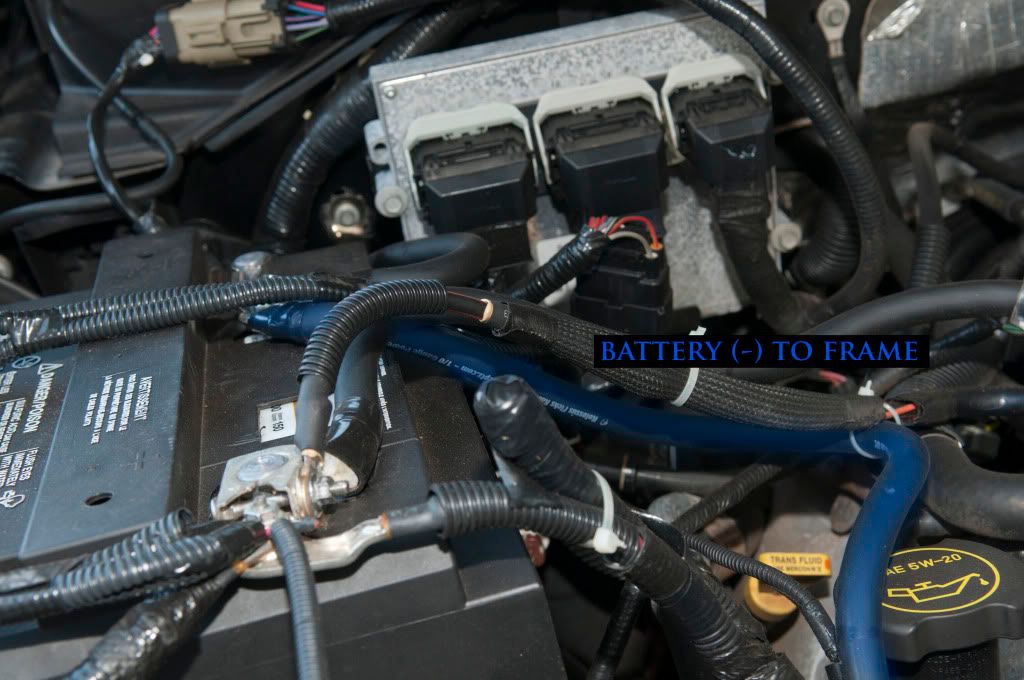
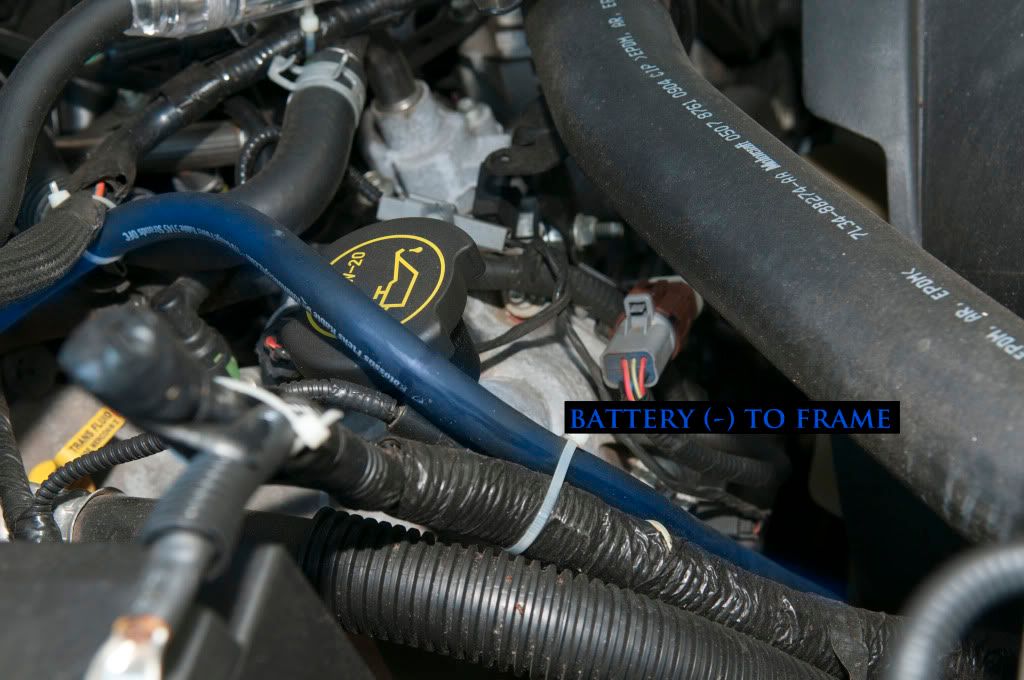
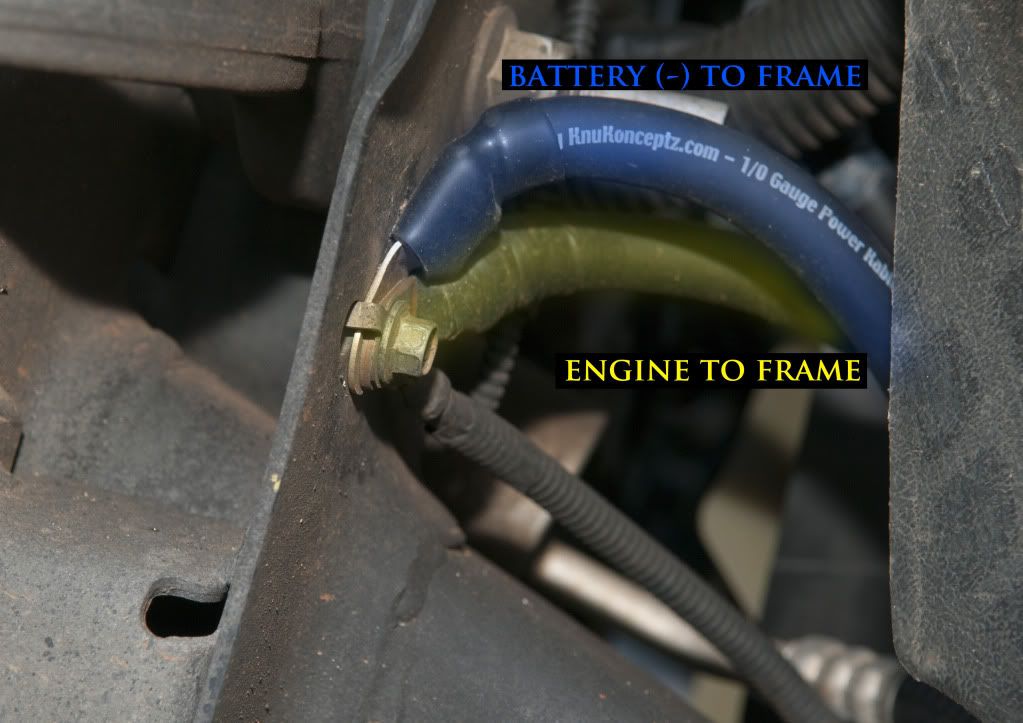
Here are the new pics. Not as in-depth as before but hopefully they are enough to help. The pictures should be self-explanatory when it comes to cable locations, but let me know if you have any questions. I'll repeat what I said in the original post: this isn't a set-in-stone way....it's the way I did it.


#68
07-23-2010, 11:14 PM
Senior Member
Join Date: Mar 2001
Location: Tallahassee, FL
Posts: 479
Likes: 0
Received 0 Likes
on
0 Posts
#69
07-25-2010, 01:11 AM
I'll go check for you tomorrow. There are several good location for the engine connection. Just find a large bolt that is holding an engine component in place by the casing/housing of the component.
#70
07-25-2010, 03:43 AM


#74
04-29-2011, 03:15 PM

Junior Member
#75
04-29-2011, 06:16 PM
Senior Member