

Got some new gear for the L


Senior Member
Joined: Jun 2006
Posts: 405
Likes: 0
From: DelrayBeach
Originally Posted by SWThomas
I don't mind at all.
When I replace just the filter I lose about a quart of fluid. That's easy enough. I just pour whatever I can get into the filter before I screw it on and then I dump the rest of the quart down the dip-stick. My level is always dead on when I do that. Since I'll be removing the lines also, this means that the cooler is going to drain all the fluid it's holding. My plan is to remove one of the lines from the cooler and catch whatever fluid comes out in a bottle of some sort. Then I'll remove the other line and catch any fluid that may come out of that side. I'll do this first, to keep the fluid from draining all over behind my bumper and second, to gauge how much fluid came out. That way I'll know how much I have to pour in over what I already have to pour in for the filter change. Probably about 2 1/2 quarts. I'm going to post a How-To when I do this in a couple days. I'll be sure I mention this in that thread...
When I replace just the filter I lose about a quart of fluid. That's easy enough. I just pour whatever I can get into the filter before I screw it on and then I dump the rest of the quart down the dip-stick. My level is always dead on when I do that. Since I'll be removing the lines also, this means that the cooler is going to drain all the fluid it's holding. My plan is to remove one of the lines from the cooler and catch whatever fluid comes out in a bottle of some sort. Then I'll remove the other line and catch any fluid that may come out of that side. I'll do this first, to keep the fluid from draining all over behind my bumper and second, to gauge how much fluid came out. That way I'll know how much I have to pour in over what I already have to pour in for the filter change. Probably about 2 1/2 quarts. I'm going to post a How-To when I do this in a couple days. I'll be sure I mention this in that thread...
awsome ! keep us posted !!!

Global Moderator &
Senior Member
Senior Member

Joined: Aug 2005
Posts: 21,337
Likes: 158
From: DFW
Originally Posted by Rob_00Lightning
WOO HOO we have the same rug
hehehehe
hehehehe

Congrats on the purchases. Id be a little bit worried about having a huge box that said NOS express all over it sit up at the office... you never know there are some greedy people out there.
-Patrick

Thread Starter
|
Technical Article Contributor
Joined: Jan 2006
Posts: 1,292
Likes: 0
From: Port Royal, SC
Got some more stuff today...
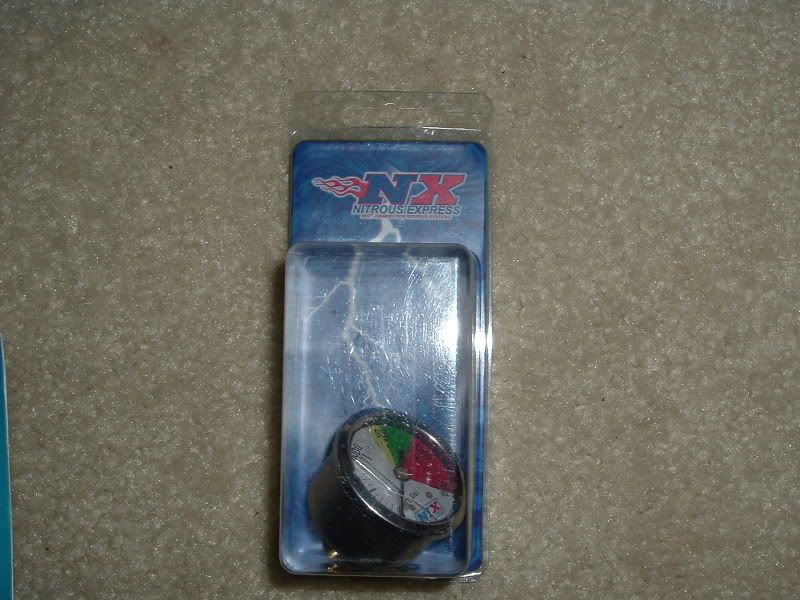
Pressure gauge for the bottle...
Replacement filter element for my Aeromotive filter...

Filter Mount. This is the one with the 1/2" NPT inlet and outlet since the 3/8" one was backordered...


Pressure gauge for the bottle...
Replacement filter element for my Aeromotive filter...
Filter Mount. This is the one with the 1/2" NPT inlet and outlet since the 3/8" one was backordered...
Thread Starter
|
Technical Article Contributor
Joined: Jan 2006
Posts: 1,292
Likes: 0
From: Port Royal, SC
Russell fittings to adapt the filter mount to -6AN lines...

Thermo-Flex tubing to use on any wires for the nitrous kit that come close to heat...

And a new adjustable AN wrench because my last one got kinda chewed up doing the Aeromotive install...

Thermo-Flex tubing to use on any wires for the nitrous kit that come close to heat...
And a new adjustable AN wrench because my last one got kinda chewed up doing the Aeromotive install...

Senior Member
Joined: Sep 2003
Posts: 2,454
Likes: 0
From: NY
looks like you are going to have some fun.
rookie question. how do you connect the stainless line to the fittings. I just got some of those for my boat, from the crossover to the thermo housing and have no clue what to do with them.
Thanks
rookie question. how do you connect the stainless line to the fittings. I just got some of those for my boat, from the crossover to the thermo housing and have no clue what to do with them.
Thanks
Thread Starter
|
Technical Article Contributor
Joined: Jan 2006
Posts: 1,292
Likes: 0
From: Port Royal, SC
Originally Posted by halflife
looks like you are going to have some fun.
rookie question. how do you connect the stainless line to the fittings. I just got some of those for my boat, from the crossover to the thermo housing and have no clue what to do with them.
Thanks
rookie question. how do you connect the stainless line to the fittings. I just got some of those for my boat, from the crossover to the thermo housing and have no clue what to do with them.
Thanks
Thread Starter
|
Technical Article Contributor
Joined: Jan 2006
Posts: 1,292
Likes: 0
From: Port Royal, SC
I took some pics for you to help better explain it.
First, you have the fitting. In this case it's a straight fitting, but you can also have 90 & 45 degree fittings...

Take the fitting apart by unscrewing the male part from the female part...

Then apply the male part to the hose as shown here. It will take some work, but you want the hose to seat all the way into the fitting until you can't push it in anymore. Some twisting of the fitting and hose will help...

Then screw the male part of the fitting into the female part and the hose. A little WD-40 sprayed on the inside of the hose and the threads of the fitting will make it easier. While doing this keep an eye on the hose to ensure it doesn't get pushed back out when you're screwing the fittings together. You can mark the hose with some tape...

Keep tightening the fittings together until they are completely together and you're done. Also, make sure you blow the hose out with some compressed air or wash it out with some clean solvent before you start.
Let me know if you need any more help.
Edit: I forgot to mention that you'll need AN wrenches to do this or you'll scratch up the fittings pretty bad.
First, you have the fitting. In this case it's a straight fitting, but you can also have 90 & 45 degree fittings...
Take the fitting apart by unscrewing the male part from the female part...
Then apply the male part to the hose as shown here. It will take some work, but you want the hose to seat all the way into the fitting until you can't push it in anymore. Some twisting of the fitting and hose will help...
Then screw the male part of the fitting into the female part and the hose. A little WD-40 sprayed on the inside of the hose and the threads of the fitting will make it easier. While doing this keep an eye on the hose to ensure it doesn't get pushed back out when you're screwing the fittings together. You can mark the hose with some tape...
Keep tightening the fittings together until they are completely together and you're done. Also, make sure you blow the hose out with some compressed air or wash it out with some clean solvent before you start.
Let me know if you need any more help.
Edit: I forgot to mention that you'll need AN wrenches to do this or you'll scratch up the fittings pretty bad.
Last edited by SWThomas; Jun 20, 2007 at 08:39 PM.

Thread Starter
|
Technical Article Contributor
Joined: Jan 2006
Posts: 1,292
Likes: 0
From: Port Royal, SC
Originally Posted by Black02SVTL
How do you cut the lines to length?
http://store.summitracing.com/partde...5&autoview=sku
It's a lot easier and it cuts perfect.
Senior Member
Joined: Sep 2003
Posts: 2,454
Likes: 0
From: NY
Originally Posted by SWThomas
Some people use a vise and a hack-saw. I use one of these...
http://store.summitracing.com/partde...5&autoview=sku
It's a lot easier and it cuts perfect.
http://store.summitracing.com/partde...5&autoview=sku
It's a lot easier and it cuts perfect.
SWThomas, I appreciate the step by step!!! off to get me some AN wrenches.

Senior Member
Joined: Feb 2007
Posts: 910
Likes: 0
From: Selden, NY
Originally Posted by Patman03SprCrw
make that two of us
-Patrick
-Patrick

My god these frigging things melt easy, i'm running out of things to move to hide them all

Thomas you are buying some niiiiiiiiiiiiiiiiice stuff there my friend
