


09+ Fog Light Mod??


Thread Starter
|
Senior Member

Joined: Aug 2004
Posts: 254
Likes: 0
From: New Jersey
09+ Fog Light Mod??
Is this has been answered already, I apologize. I tried searching and did not have any luck.
Is there a Fog light mod for the 09+ f150's to be able to turn fogs on with parking and stay on with high beams??
I did it to my 01 f150, thought it would be nice to do the same to my new truck.
Thanks.
Is there a Fog light mod for the 09+ f150's to be able to turn fogs on with parking and stay on with high beams??
I did it to my 01 f150, thought it would be nice to do the same to my new truck.
Thanks.

Technical Article Contributor
Joined: Apr 2009
Posts: 10,697
Likes: 14
From: In the fast lane from LA to Tokyo...

Junior Member
Joined: Oct 2011
Posts: 6
Likes: 0
Tools and materials required:
Lets get started!
Remove the passenger side headlight by way of the three 10mm bolts, two on the top and one on the side of the headlight, behind the rubber flap. There is a plastic screw you will have to remove with a phillips screwdriver.
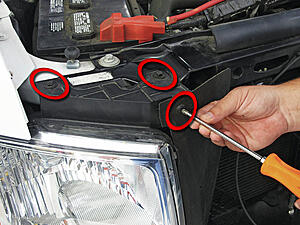
With the bolts removed, pull firmly straight outwards on the headlight and it will unclip from the rad support.
Disconnect the three bulbs and set the headlight aside.
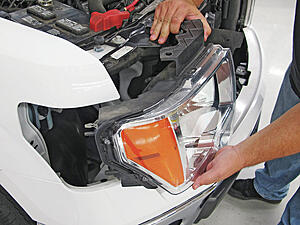
The plug that goes into the bulb is an H13, and we need to feed off of the positive wire for the high beams. This is what tells our relay to turn on the fogs.
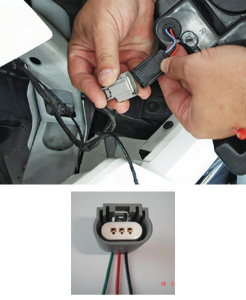
When looking at the plug with the clip part up, the wire on the left should be your high beam positive. (Test light here to verify)
Take your relay and look at the pins on the bottom. We have 4 wires to connect to make this mod complete.
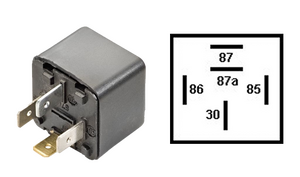
RELAY PINS
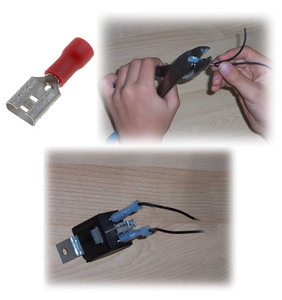
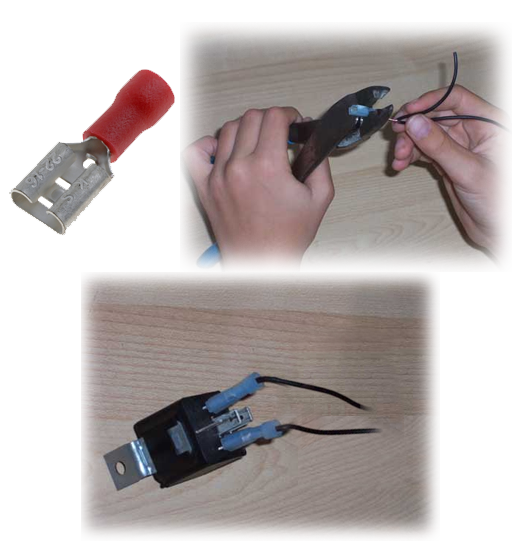
For connecting wires to the relay, crimp on spade type connects and then slip them onto the correct relay pin.
For pin 86
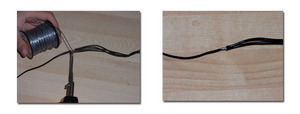
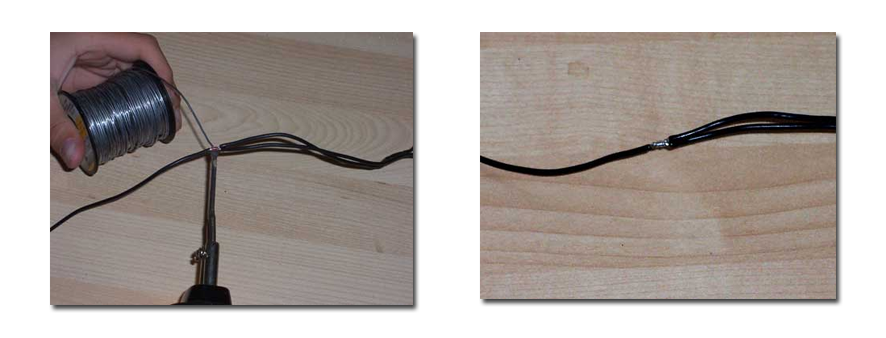
Cut the tape around the three wires on the H13 plug and follow that high beam wire back a few inches. Shave a half inch off coating off the wire, and solder a lead to this wire. Tape it up and attach the other end to the relay.
For pin 85
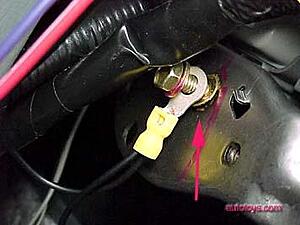
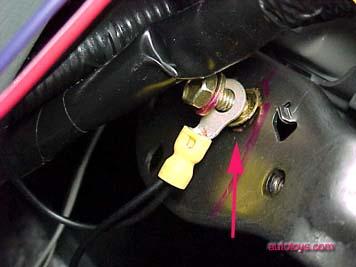
Simply remove a bolt that's anchored in metal, or selftap a screw into the frame and connect the wire with a ring terminal.
For pin 30
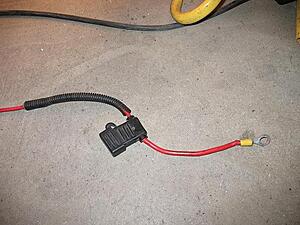
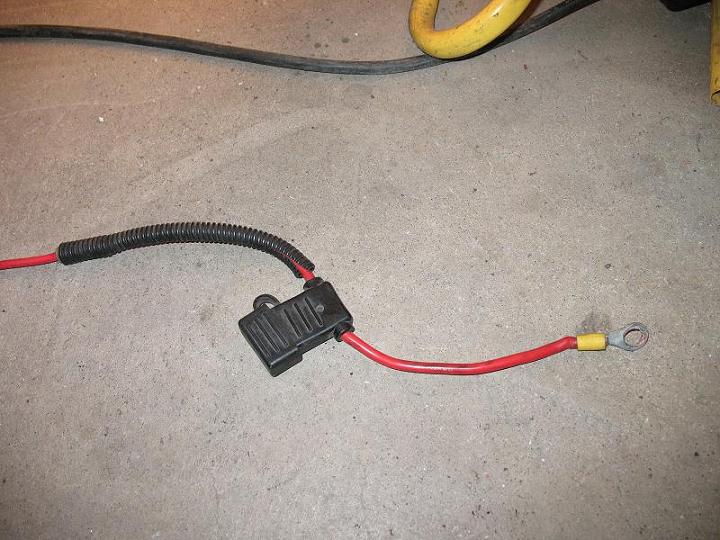
Crimp a large ring terminal to a fuse holder. The other side of the fuse holder gets connected to pin 30 of our relay. A 20amp fuse is plenty.
For pin 87
Look down from where the headlight sits and you have direct access to the foglight wires. Cut the tape around the wires and shave/solder a lead to the colored wire leading to the foglight bulb. The other end of this wire goes back to the relay.
That's it for connections! Four little wires, and the relay is now ready to power the foglights when the highbeams are active.
I suggest taping up the wires, and of course looming everything and making it pretty. Take pride in your work. Mount the relay to the frame with a self tapping screw and put the headlights back in and test. Enjoy the light.
For those with projectors, simply add another relay doing all the same steps, but instead of hooking pin 87 to the foglight wire, hook it to the low beam wire to keep them on as well.
Thanks for reading
- Ratchet
- 10mm socket
- Phillips Screwdriver
- Wire cutters/strippers
- Electrical Tape
- Test light (Optional, but handy)
- Soldering torch (You can use electrical crimps but I recommend soldering)
- 12v Relay
- Wire
- Fuse Holder and fuse
- Electrical crimp ends
Lets get started!
Remove the passenger side headlight by way of the three 10mm bolts, two on the top and one on the side of the headlight, behind the rubber flap. There is a plastic screw you will have to remove with a phillips screwdriver.
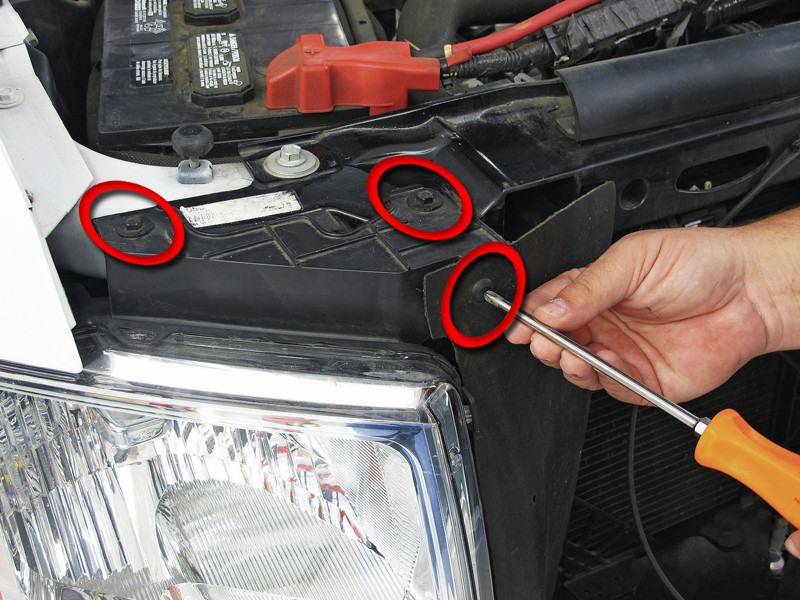
With the bolts removed, pull firmly straight outwards on the headlight and it will unclip from the rad support.
Disconnect the three bulbs and set the headlight aside.
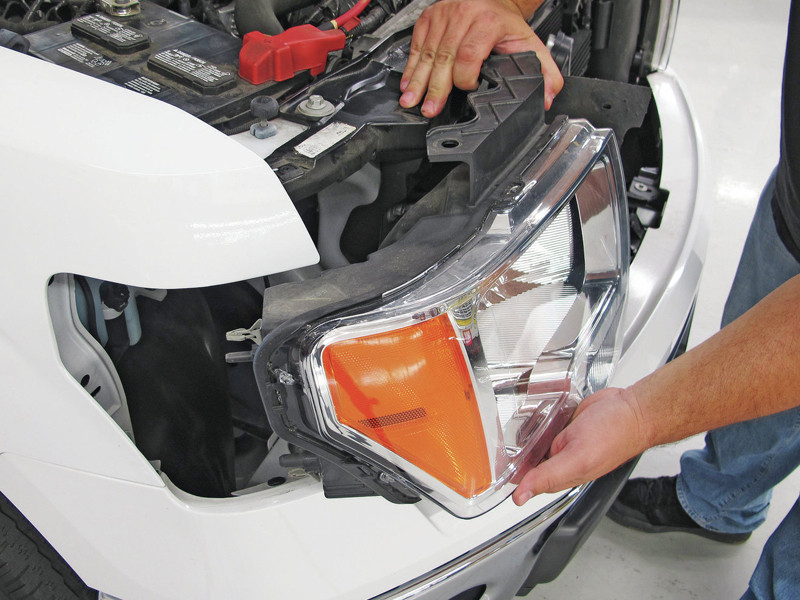
The plug that goes into the bulb is an H13, and we need to feed off of the positive wire for the high beams. This is what tells our relay to turn on the fogs.
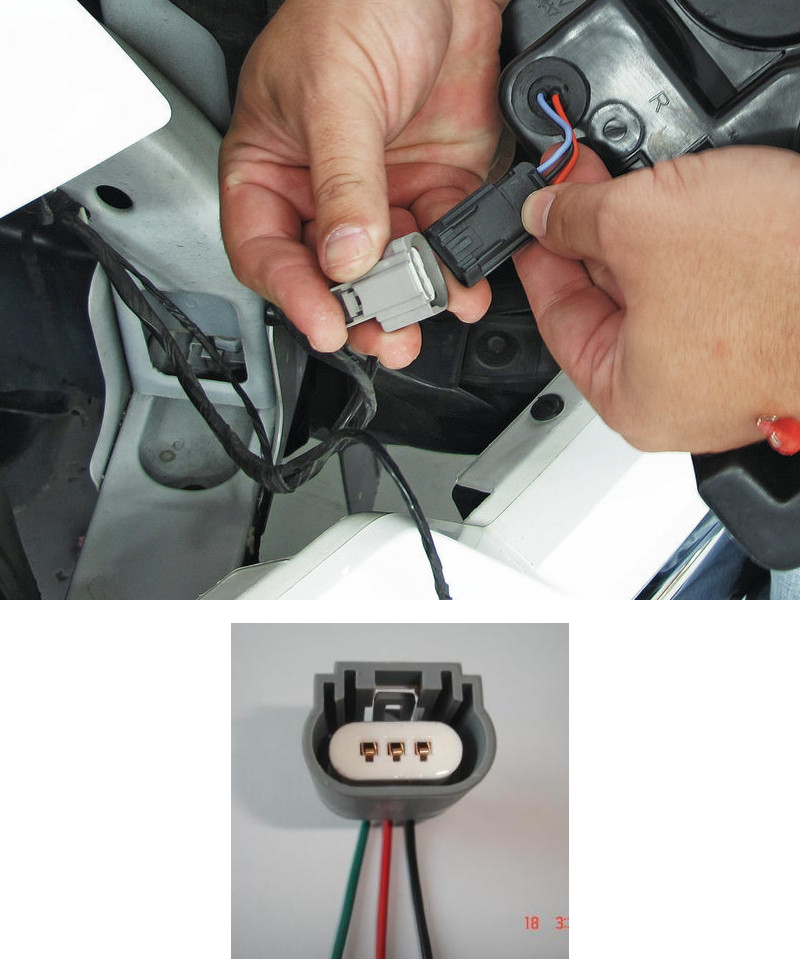
When looking at the plug with the clip part up, the wire on the left should be your high beam positive. (Test light here to verify)
Take your relay and look at the pins on the bottom. We have 4 wires to connect to make this mod complete.
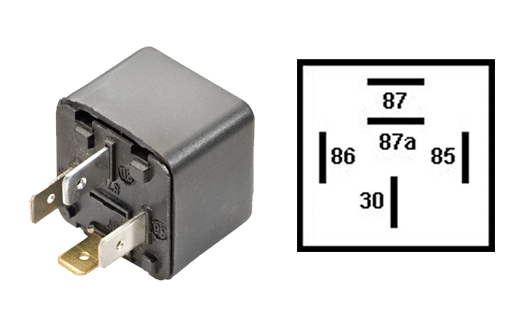
RELAY PINS
- 86 - High beam positive
- 85 - Ground
- 87 - Fog Light positive
- 30 - Battery positive
For connecting wires to the relay, crimp on spade type connects and then slip them onto the correct relay pin.
For pin 86
Cut the tape around the three wires on the H13 plug and follow that high beam wire back a few inches. Shave a half inch off coating off the wire, and solder a lead to this wire. Tape it up and attach the other end to the relay.
For pin 85
Simply remove a bolt that's anchored in metal, or selftap a screw into the frame and connect the wire with a ring terminal.
For pin 30
Crimp a large ring terminal to a fuse holder. The other side of the fuse holder gets connected to pin 30 of our relay. A 20amp fuse is plenty.
For pin 87
Look down from where the headlight sits and you have direct access to the foglight wires. Cut the tape around the wires and shave/solder a lead to the colored wire leading to the foglight bulb. The other end of this wire goes back to the relay.
That's it for connections! Four little wires, and the relay is now ready to power the foglights when the highbeams are active.
I suggest taping up the wires, and of course looming everything and making it pretty. Take pride in your work. Mount the relay to the frame with a self tapping screw and put the headlights back in and test. Enjoy the light.
For those with projectors, simply add another relay doing all the same steps, but instead of hooking pin 87 to the foglight wire, hook it to the low beam wire to keep them on as well.
Thanks for reading


