
Center Console Sub Enclosure Build


Thread Starter
|
Technical Article Contributor
Joined: Mar 2008
Posts: 2,268
Likes: 2
From: Rural NE
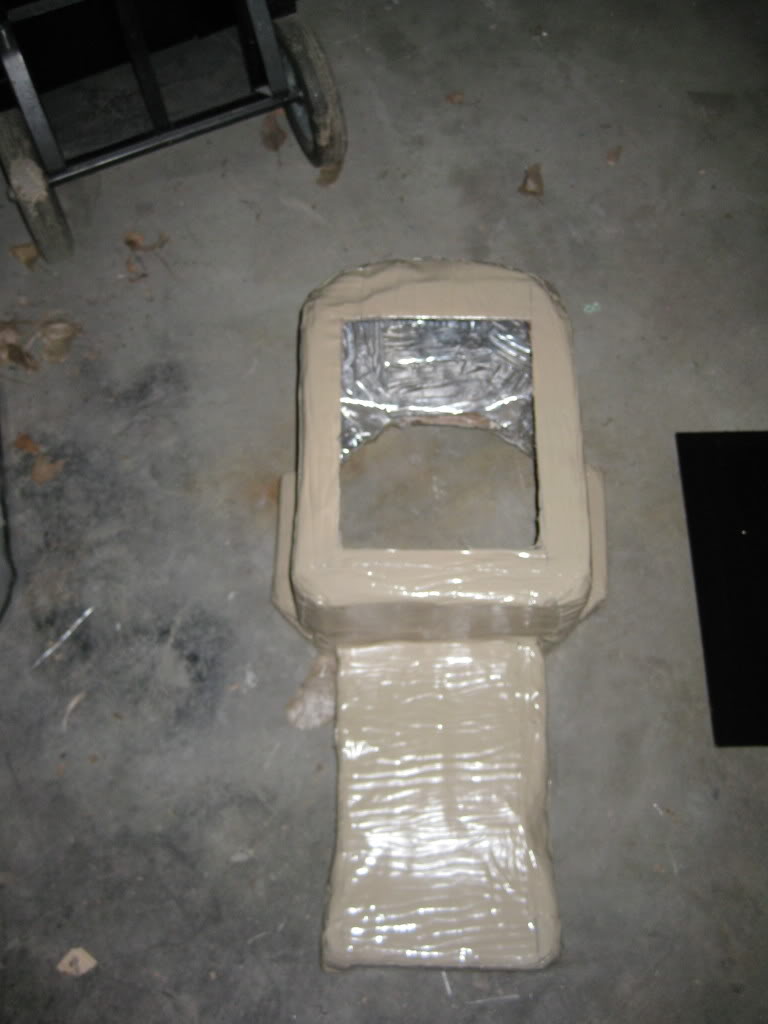
Well I overlapped each strip, I guess I can always add big sheets over it. Why is it better to do big sheets?
Thread Starter
|
Technical Article Contributor
Joined: Mar 2008
Posts: 2,268
Likes: 2
From: Rural NE
Well I am hoping to test fit the sub this evening and get it prepped for paint. I will be painting it tomorrow evening. So I should have some more pictures soon for you guys. I want to have the system powered up by the end of the weekend, so hopefully all goes well and I can manage to get it all done. I will take more pics once I get the thing prepped for paint no point in showing almost the same pics. I am still waiting on the contact switches so I will wait to add the leds at a latter time. Thanks to everyone who responded with the sound dampener tips, I am sure it will help others who are looking into doing this themselves.
Thread Starter
|
Technical Article Contributor
Joined: Mar 2008
Posts: 2,268
Likes: 2
From: Rural NE
Ok guys I know I have let this thread die down a little bit, due to focusing on the build itself. Well I have some good news and some bad news!
The good news is I finished it last night and powered this thing up and all I can say is WOW! This sub blends perfectly with the music and you can not localize the driver at all. I already have had three people think that the mid basses were putting out all the bass
The bad news is that I forgot the my camera's link cable at work so I can not upload pictures until tomorrow. There are a few things I would like to maybe expand upon later on but for now I can say this build is complete!
Thanks for all your help, and input along the way guys you truely helped me install a first class sq setup!
Last edited by Bluejay; Apr 28, 2009 at 12:09 PM.
Thread Starter
|
Technical Article Contributor
Joined: Mar 2008
Posts: 2,268
Likes: 2
From: Rural NE
Day: 14
Today I decided I would put everything together to make sure it all fit. I got everything test fitted in the garage and moved it into the truck.

Side views of what will be visible:


Today I decided I would put everything together to make sure it all fit. I got everything test fitted in the garage and moved it into the truck.
Side views of what will be visible:
Thread Starter
|
Technical Article Contributor
Joined: Mar 2008
Posts: 2,268
Likes: 2
From: Rural NE
It all checked out so I disassembled everything and set out to paint the box. Instead of sanding it silky smooth and then painting it, I decided I would rough it up and apply sound dampener inside and outside the box instead.
I had a little bit of Raamatt leftover from the back wall so I used that up. I also got the rear air delete cap attached as well.


Painting:


As a side note the paint stuck really well to the sound dampener.
I had a little bit of Raamatt leftover from the back wall so I used that up. I also got the rear air delete cap attached as well.
Painting:
As a side note the paint stuck really well to the sound dampener.
Thread Starter
|
Technical Article Contributor
Joined: Mar 2008
Posts: 2,268
Likes: 2
From: Rural NE
Day: 15
Now that the paint has dried, I glued and screwed the plexiglass to the top of the box.
While that was drying I laid out the top console pieces and packed them with non hardening modeling clay to help reduce felt vibrations in the console. I used only about 10 lbs in the console, I will probably add more at a later date. I found that instead of working the modeling clay until it got soft that if you soak it in HOT tap water for about 30 min it will become a lot more workable and is a lot easier on the hands. I then packed the clay around the mounting base for the DIYMA to make a good seal, and help dampen the box from further vibrations.


Packing clay around the console:


Now that the paint has dried, I glued and screwed the plexiglass to the top of the box.
While that was drying I laid out the top console pieces and packed them with non hardening modeling clay to help reduce felt vibrations in the console. I used only about 10 lbs in the console, I will probably add more at a later date. I found that instead of working the modeling clay until it got soft that if you soak it in HOT tap water for about 30 min it will become a lot more workable and is a lot easier on the hands. I then packed the clay around the mounting base for the DIYMA to make a good seal, and help dampen the box from further vibrations.
Packing clay around the console:
Thread Starter
|
Technical Article Contributor
Joined: Mar 2008
Posts: 2,268
Likes: 2
From: Rural NE
Once the glue was dry I started to assemble everything for the final time. I bolted it all back together added one more bracket to the rear of the box so I could bolt it down to the floor.


I dropped the DIYMA into its final resting place and tightened down the screws. I moved it out to the truck put it into place, soldered the connections together, and finally powered up the system………..


I dropped the DIYMA into its final resting place and tightened down the screws. I moved it out to the truck put it into place, soldered the connections together, and finally powered up the system………..
Thread Starter
|
Technical Article Contributor
Joined: Mar 2008
Posts: 2,268
Likes: 2
From: Rural NE
And all I can say is this sub is by far the most translucent sub in existence! I am simply amazed at how well this thing blends and how accurate this sub is. It simply does not get better for a sq sub. (If you are local and want to hear it just let me know I will be more then happy to meet up with you)
And since I was bored and decided my D3 would need a good wallpaper to match up with the system I made it a new background:

Well that is all I have hopefully it inspired some of you to do something that may be outside your comfort level. I learned a lot through out the build of this and now am surrounded by complete musical bliss when I drive.
Final build specs are:
JL 500/1 v1 pushing a single DIYMA R12 in
a custom console enclosure with .5 ft^3
JL 300/4 v1 bridged pushing Diamond Audio Hex 6.0 speakers
Using the 5.0 crossovers with the silk tweets
KnuKoncpetz install accessories
Tech Flexed all wires
Pioneer Avic D3 dvd/navi hu
The big 4 re wire
Raamatt sound dampener.
And since I was bored and decided my D3 would need a good wallpaper to match up with the system I made it a new background:
Well that is all I have hopefully it inspired some of you to do something that may be outside your comfort level. I learned a lot through out the build of this and now am surrounded by complete musical bliss when I drive.
Final build specs are:
JL 500/1 v1 pushing a single DIYMA R12 in
a custom console enclosure with .5 ft^3
JL 300/4 v1 bridged pushing Diamond Audio Hex 6.0 speakers
Using the 5.0 crossovers with the silk tweets
KnuKoncpetz install accessories
Tech Flexed all wires
Pioneer Avic D3 dvd/navi hu
The big 4 re wire
Raamatt sound dampener.


Thread Starter
|
Technical Article Contributor
Joined: Mar 2008
Posts: 2,268
Likes: 2
From: Rural NE
Thanks, and yes it does sound a lot better then the build looks.


