Nightshade taillights w/ many pics
#1
 10-19-2007, 12:13 PM


Join Date: Dec 2006
Location: Orlando,FL
Posts: 248
Likes: 0
Received 0 Likes
on
0 Posts

#2
10-19-2007, 12:14 PM
Join Date: Dec 2006
Location: Orlando,FL
Posts: 248
Likes: 0
Received 0 Likes
on
0 Posts
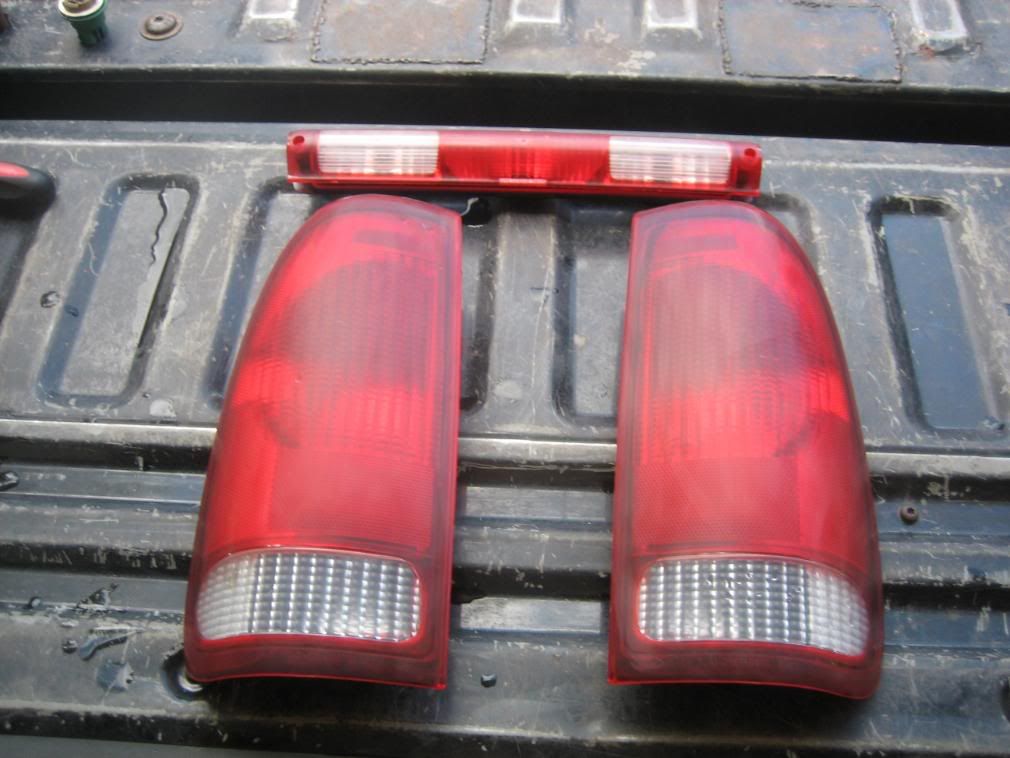
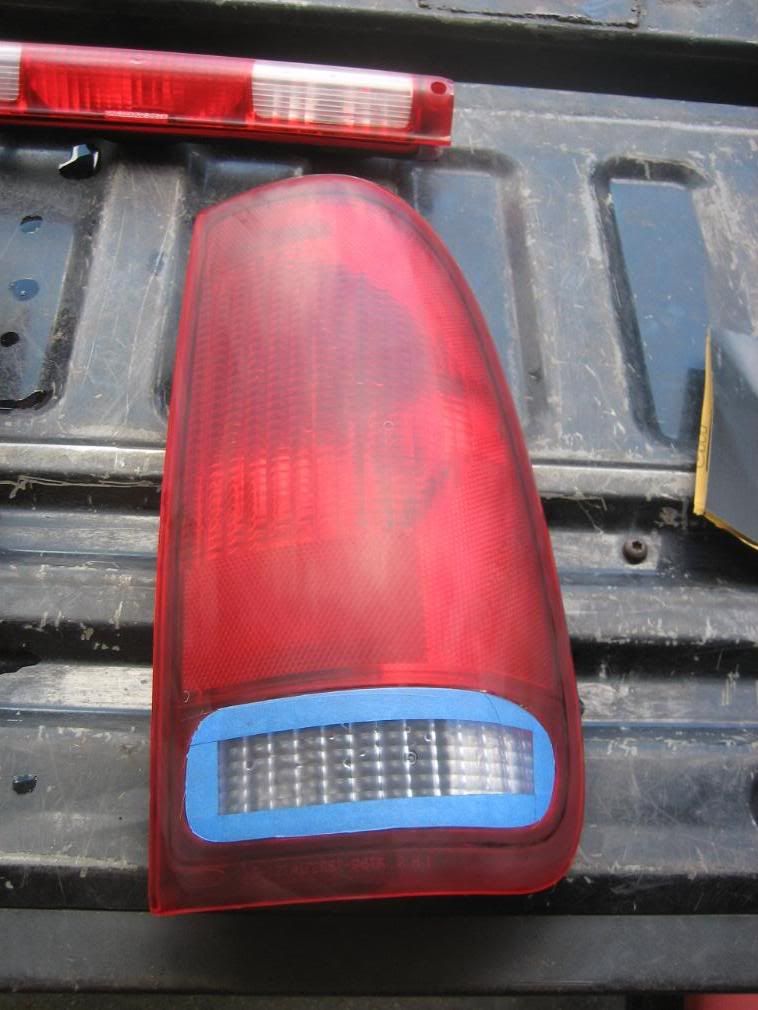
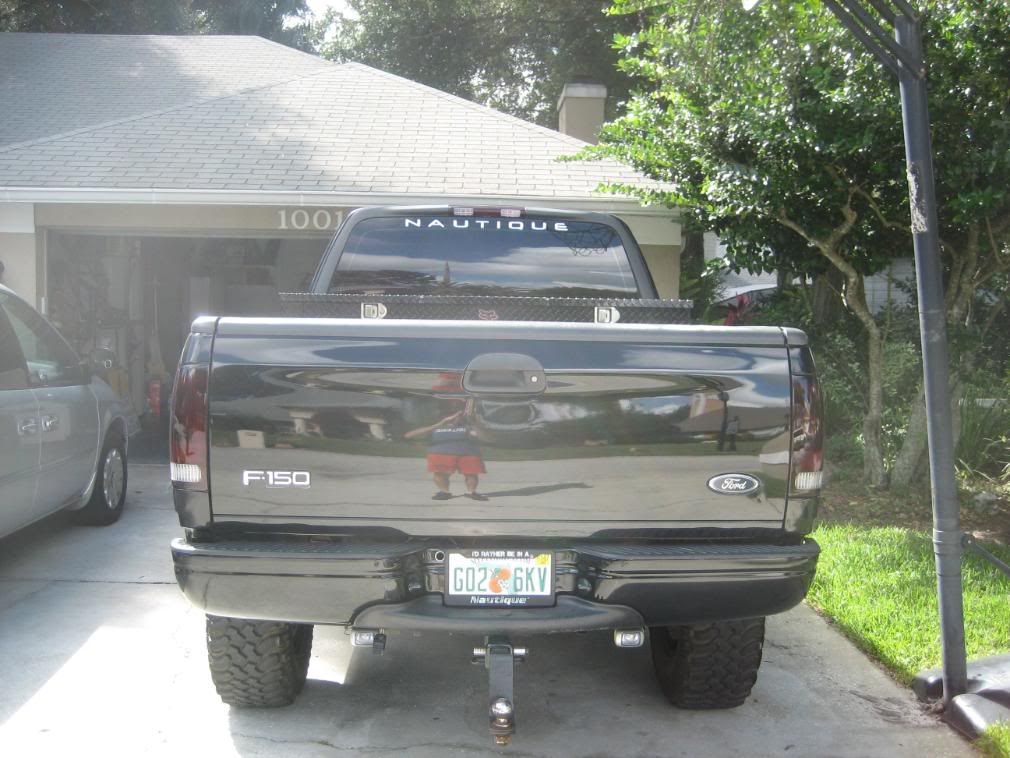
I started by removing the taillights. There are 2 screws on the inside of the tailgate. If I remember correctly I removed them with a 1/4" socket. After the screws are removed you have to pull pretty hard on the light assembly to pull it out of these holders. (I don't really know how to describe them, but it takes some force to get them out.) Pull away from the center of the truck and the tailgate.
The 3rd brake light is held in by 2 phillips head screws.
I wet sand each taillight with 2000 grit sand paper. The 2nd picture shows some scratches on the light. Wet sanding the light remove the scratches and made it really smooth.
After wet sanding
I taped over the white section of the taillight. You don't have to do this, but I still wanted my reverse lights at night to shine through with out any hinderance.
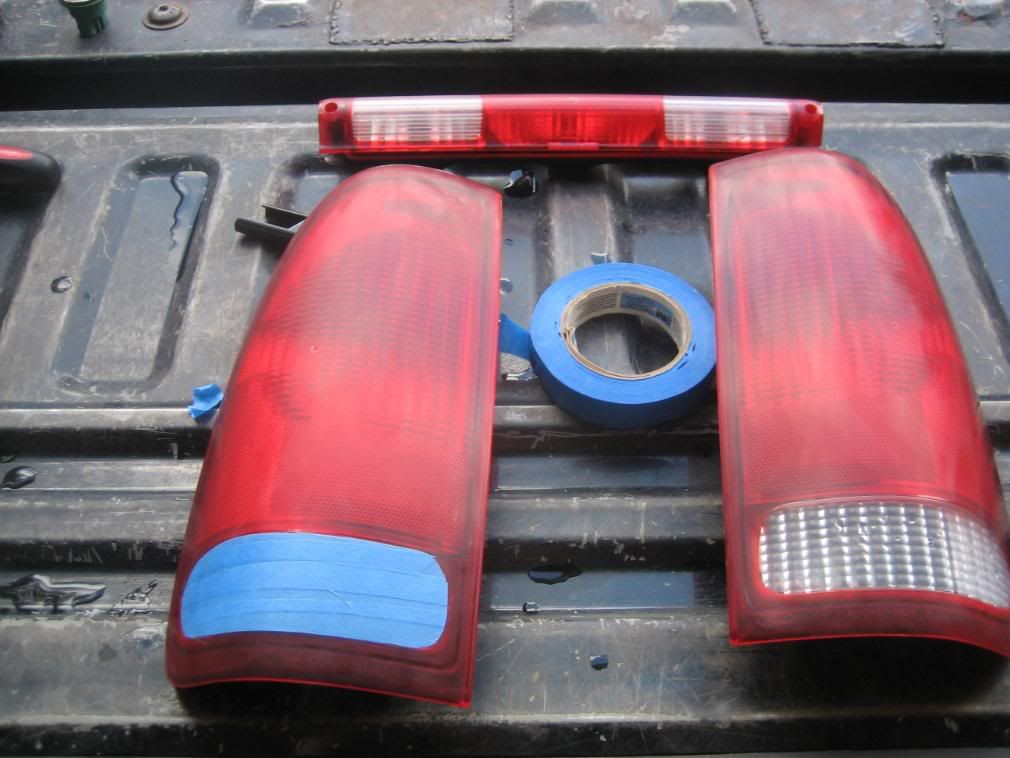
I found after doing the first light that it is easier to tape off the edges and then do the middle. There is a small valley that you can follow with a razor blade or exacto knife. I used a razor blade but wished I had an exacto knife. An exacto knife would've made it easier to follow the curves.
The 3rd brake light is held in by 2 phillips head screws.
I wet sand each taillight with 2000 grit sand paper. The 2nd picture shows some scratches on the light. Wet sanding the light remove the scratches and made it really smooth.
After wet sanding
I taped over the white section of the taillight. You don't have to do this, but I still wanted my reverse lights at night to shine through with out any hinderance.
I found after doing the first light that it is easier to tape off the edges and then do the middle. There is a small valley that you can follow with a razor blade or exacto knife. I used a razor blade but wished I had an exacto knife. An exacto knife would've made it easier to follow the curves.
#3
10-19-2007, 12:15 PM
Join Date: Dec 2006
Location: Orlando,FL
Posts: 248
Likes: 0
Received 0 Likes
on
0 Posts
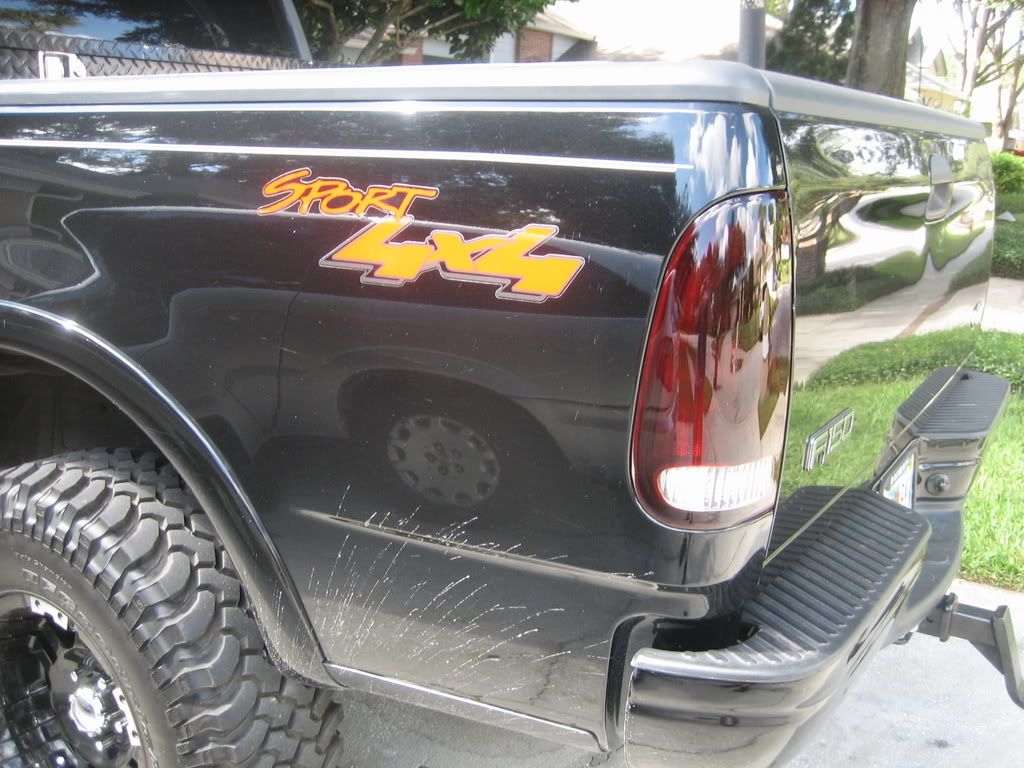
I then sprayed the VHT Nightshade in up and down movements. Because the lights are curved, if you go side to side you will be closer on one side of the light than the other while you spray. Going up and down keeps a constant 6-8" of spray.
1st coat.
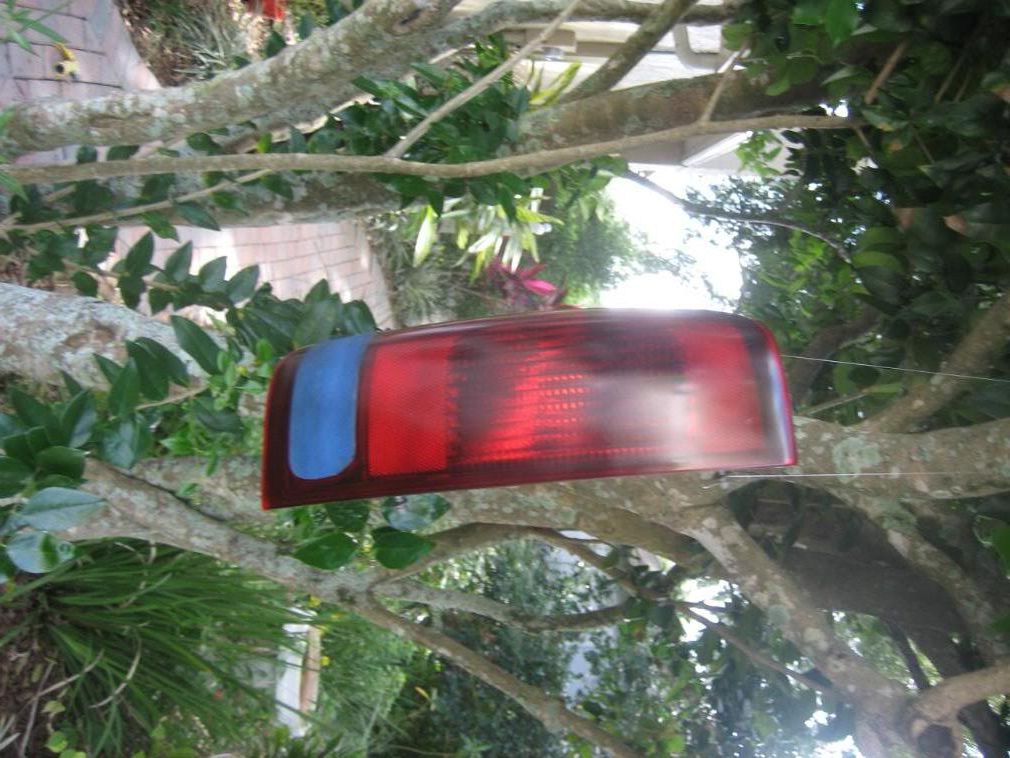
I think 3rd coat.
I did 4 coats total. You can do more, and with each coat it gets darker. Because my truck is black, I figure that putting the lights up to the black truck will make them look darker. I also didn't want to completely black my lights out.
After the 4 coats I wet sanded them 1 more time with 2000 grit sand paper. A local body shop was kind enough to spray my lights with clear for free. Hopefully you can find a shop this nice, but if not I would still recommend a professional clear coating them for you. I've read other posts were guys tried to clear coat them with spray can clear and they ended up with milky spots.
1st coat.
I think 3rd coat.
I did 4 coats total. You can do more, and with each coat it gets darker. Because my truck is black, I figure that putting the lights up to the black truck will make them look darker. I also didn't want to completely black my lights out.
After the 4 coats I wet sanded them 1 more time with 2000 grit sand paper. A local body shop was kind enough to spray my lights with clear for free. Hopefully you can find a shop this nice, but if not I would still recommend a professional clear coating them for you. I've read other posts were guys tried to clear coat them with spray can clear and they ended up with milky spots.
#4
10-19-2007, 12:16 PM
Join Date: Dec 2006
Location: Orlando,FL
Posts: 248
Likes: 0
Received 0 Likes
on
0 Posts


#7
10-19-2007, 12:53 PM

Senior Member
Join Date: Jun 2006
Location: Huntsville/Cypress, TX
Posts: 2,970
Likes: 0
Received 0 Likes
on
0 Posts
Trending Topics
#9
10-19-2007, 02:46 PM
Join Date: Dec 2006
Location: Orlando,FL
Posts: 248
Likes: 0
Received 0 Likes
on
0 Posts
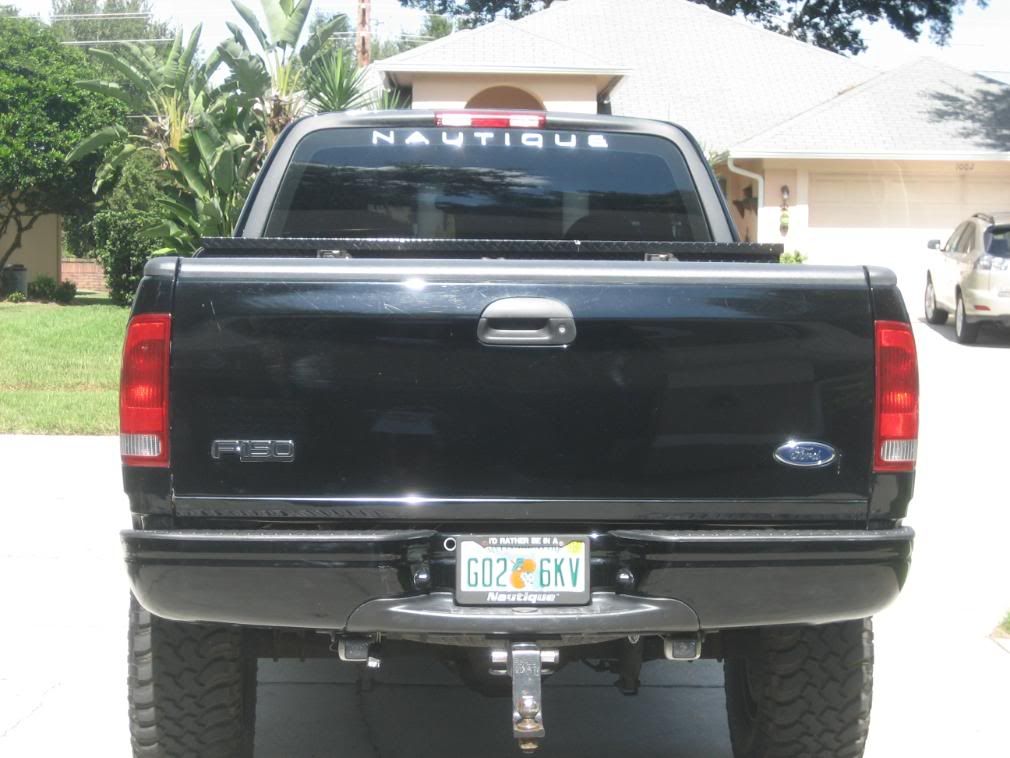
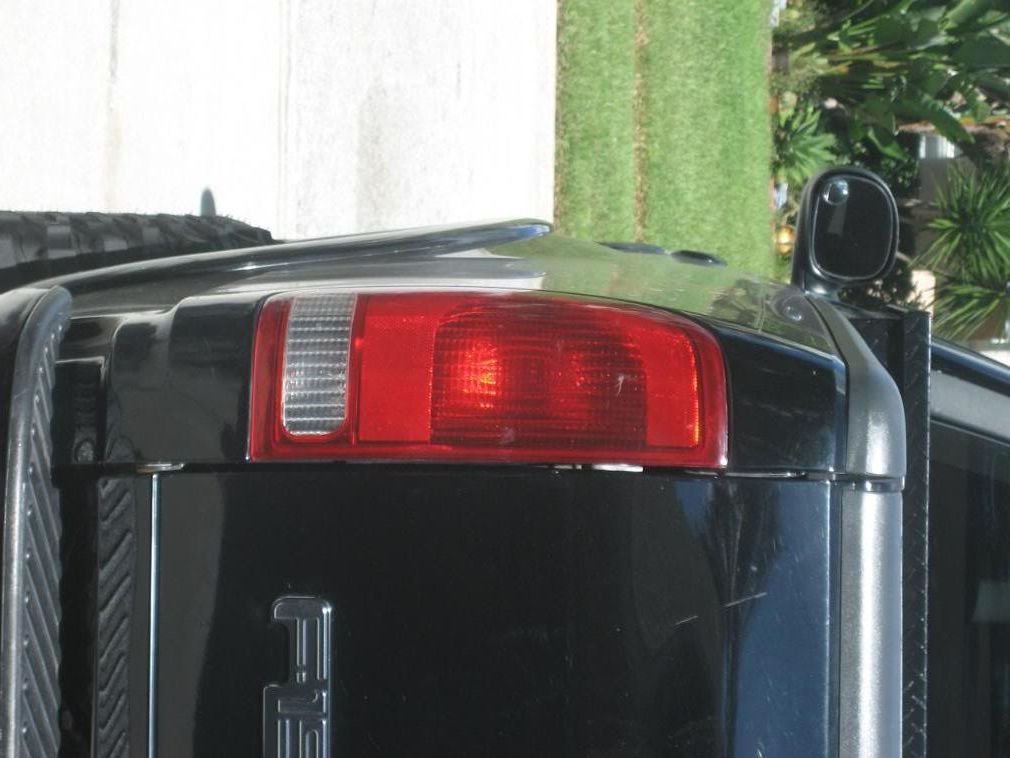
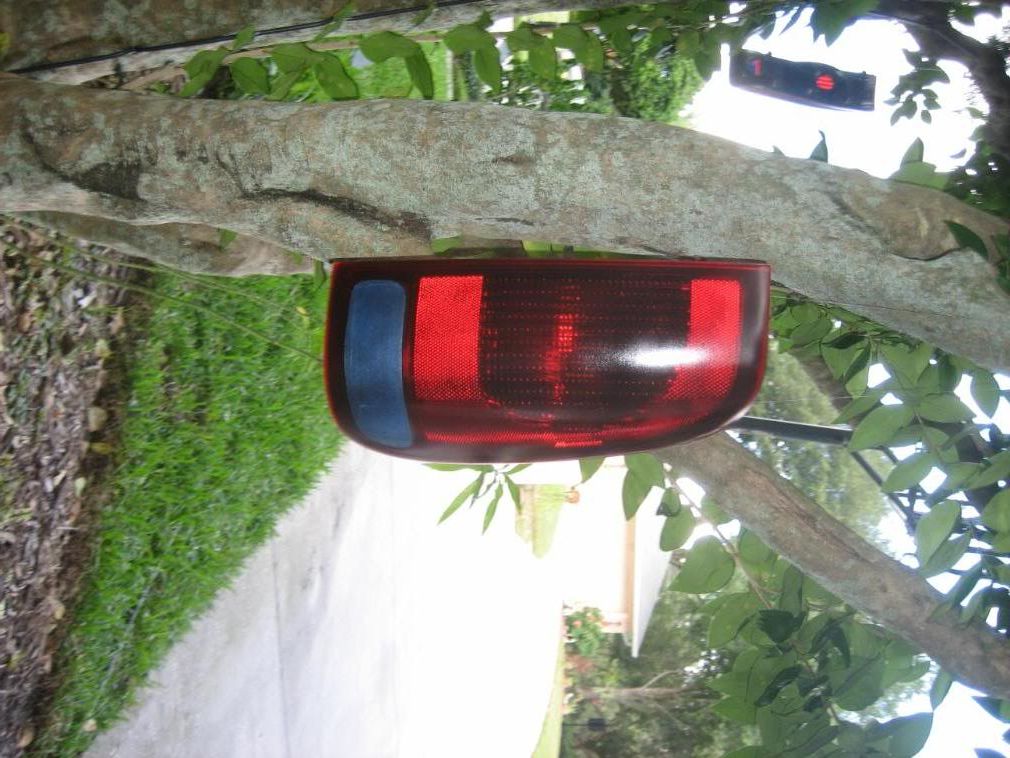
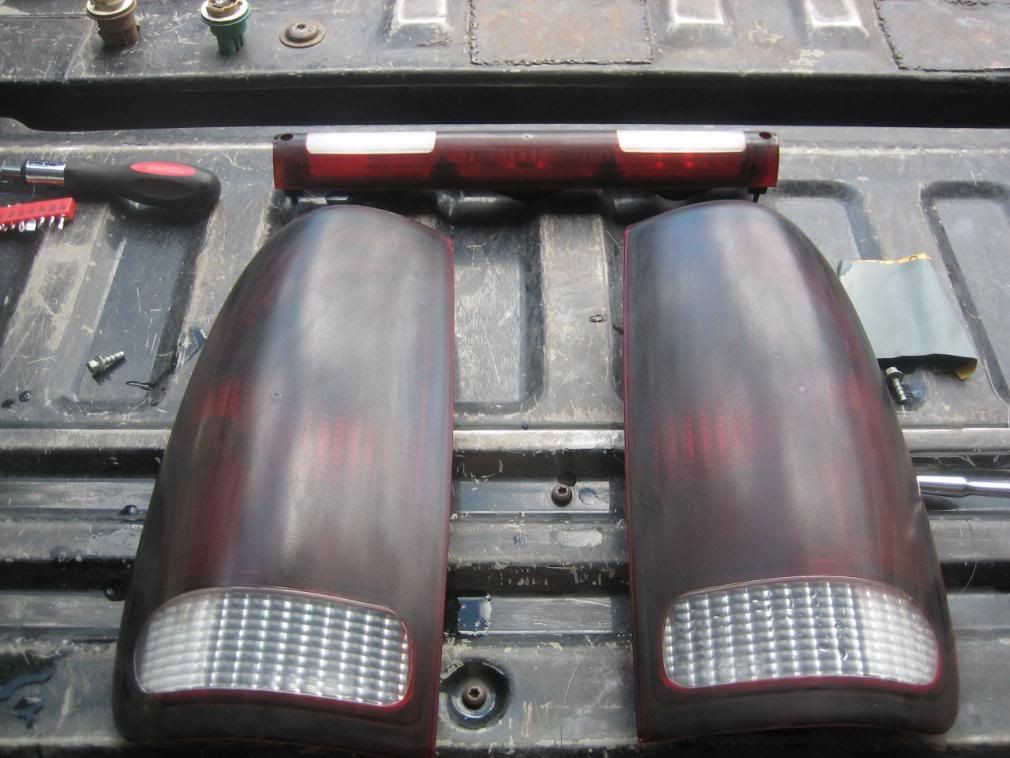
I am very very pleased with how it turned out. They look like $150 aftermarket lights.
The lights look more like a black cherry color. The original red kinda comes through the black nightshade. Had I put more coats of Nightshade they would've been black, but then they wouldn't have been as transparent. With only the 4 coats you can still see the inner parts of the light, which is just what I wanted.
The lights look more like a black cherry color. The original red kinda comes through the black nightshade. Had I put more coats of Nightshade they would've been black, but then they wouldn't have been as transparent. With only the 4 coats you can still see the inner parts of the light, which is just what I wanted.
#10
10-19-2007, 06:07 PM

Senior Member
Join Date: Feb 2007
Location: Native New Yorker
Posts: 3,329
Likes: 0
Received 0 Likes
on
0 Posts

#11
10-20-2007, 04:30 AM

Senior Member
Join Date: May 2006
Location: palm springs
Posts: 239
Likes: 0
Received 0 Likes
on
0 Posts


#13
10-20-2007, 12:53 PM

#14
10-21-2007, 08:30 AM
Senior Member
Originally Posted by acm8705
I saw your post about doing this which inspired me to do mine, but you didn't explain how to do it.

Yours turned out really good acm, I think F150 2 EnVy's are a little too dark.
- NCSU
#15
10-22-2007, 07:04 PM

Senior Member
Join Date: Aug 2005
Location: Texas
Posts: 529
Likes: 0
Received 0 Likes
on
0 Posts
Originally Posted by NCSU_05_FX4
That's because he wants to sell them on eBay. No profit to be made by simply telling others how to do it themselves!
Yours turned out really good acm, I think F150 2 EnVy's are a little too dark.
- NCSU
Yours turned out really good acm, I think F150 2 EnVy's are a little too dark.
- NCSU