How to: 04-08 OEM headlights FX-R Projector HID retrofit.
#226
 06-17-2011, 11:15 PM


Senior Member
Join Date: Dec 2009
Location: New Port Richey, Florida
Posts: 231
Likes: 0
Received 0 Likes
on
0 Posts
Sorry I didn't specify, The saleen I saw was a mustang, I was just refering to stock projectors in general, not specifically on f150s. Only vehicles I know of with projectors are high end luxury vehicles and new camaros.
#227
02-16-2012, 03:45 PM

") on the Left which looks week Diffused and scattered in Comparrison to the Projector on the Right with the BRIGHT White Light
on the Left which looks week Diffused and scattered in Comparrison to the Projector on the Right with the BRIGHT White Light
#228
02-18-2012, 10:21 AM

Senior Member
Join Date: Jul 2008
Location: Fargo, ND
Posts: 180
Likes: 0
Received 0 Likes
on
0 Posts
Few questions for you...... in the second picture down those mods to the shroud are done on the inside of the shroud and the last two are done on the outside correct? I know that sounds like a dumb question but i'm just starting to do research into this and don't have the items in front of me to try and see how they fit. Second question is fitting these in to the OEM reflector bowl did you do the same amount of cutting as required for the shrouds that the OP used or does it require you to cut a bigger hole to get them to fit closer to the bowl? By chance do you have a picture of the black rings you supper glued in to the shroud?
ok got my pics up last night.
EDIT
But here are some pics of what to do to mount the apollo shrouds.
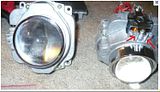
First and foremost, you have to grind/sand/cut down the two small nibs that are on the bottom of the FXR near the screw for the hi/lo/ solenoid.
(borrowed pic from the web)
Take these all the way down to the flat area where the screw mounts.
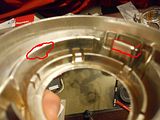
The shrouds have to be trimmed just a bit.
The red indicates what will be removed in this pic. Both small "vents" on either side will be cut and the bottom will need to be cut as shown.
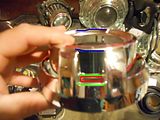
When you do the two sides, trim enough so that when you hold the shroud level (the two blue lines are lined up) the inner cup (red) is cut even with the top of the outer cup (green)
This is a basic shape of the cut on the bottom. Once you do the two vents youll have to trim this a bit at a time to get perfect around the screw and peg area we trimmed before on the FXR.
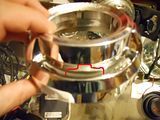
I actually took the screw out (see projector pic above) and kept test fitting till the shroud sat perfect on the lense and there was about 1/16 gap all around the cut. Once its trimmed, simply make a very very tiny fingernail shape notch on the outer ring where the screw hits.
That should get your apollos fitting nicely. Remember, take the black rings, and superglue them to the shrouds and let them sit BEFORE putting the headlight all together. As a matter of fact, do it before modifying the shroud.
EDIT
But here are some pics of what to do to mount the apollo shrouds.
First and foremost, you have to grind/sand/cut down the two small nibs that are on the bottom of the FXR near the screw for the hi/lo/ solenoid.
(borrowed pic from the web)
Take these all the way down to the flat area where the screw mounts.

The shrouds have to be trimmed just a bit.
The red indicates what will be removed in this pic. Both small "vents" on either side will be cut and the bottom will need to be cut as shown.

When you do the two sides, trim enough so that when you hold the shroud level (the two blue lines are lined up) the inner cup (red) is cut even with the top of the outer cup (green)

This is a basic shape of the cut on the bottom. Once you do the two vents youll have to trim this a bit at a time to get perfect around the screw and peg area we trimmed before on the FXR.
I actually took the screw out (see projector pic above) and kept test fitting till the shroud sat perfect on the lense and there was about 1/16 gap all around the cut. Once its trimmed, simply make a very very tiny fingernail shape notch on the outer ring where the screw hits.
That should get your apollos fitting nicely. Remember, take the black rings, and superglue them to the shrouds and let them sit BEFORE putting the headlight all together. As a matter of fact, do it before modifying the shroud.
#229
02-18-2012, 04:22 PM
Senior Member
Join Date: Jul 2008
Location: Fargo, ND
Posts: 180
Likes: 0
Received 0 Likes
on
0 Posts
I was just thinking about is for your left to right adjustments could u do some thing like run the screws through the holes in that u make I'm the oem bowl and rather than make the hole small enough to thread the bolts through make it bigger by a hair and then once u get the lights good and straight put some nuts on the back of each bolt and then put thread locker on each one?
#230
02-20-2012, 06:31 PM


Join Date: Sep 2009
Location: Bluffton, SC
Posts: 2,178
Likes: 0
Received 0 Likes
on
0 Posts
Well got the mounting situation fixed.
Now I have another troubleshooting hurdle. The lights only stay on when the brights are on. Is it the solenoid? I switched the wiring around on the solenoid (wires coming out of the projector) and still didn't get it right. Could it be the other one that is doing it?
Here are some shots. The passenger side one are the ones on bright, from what I can tell.
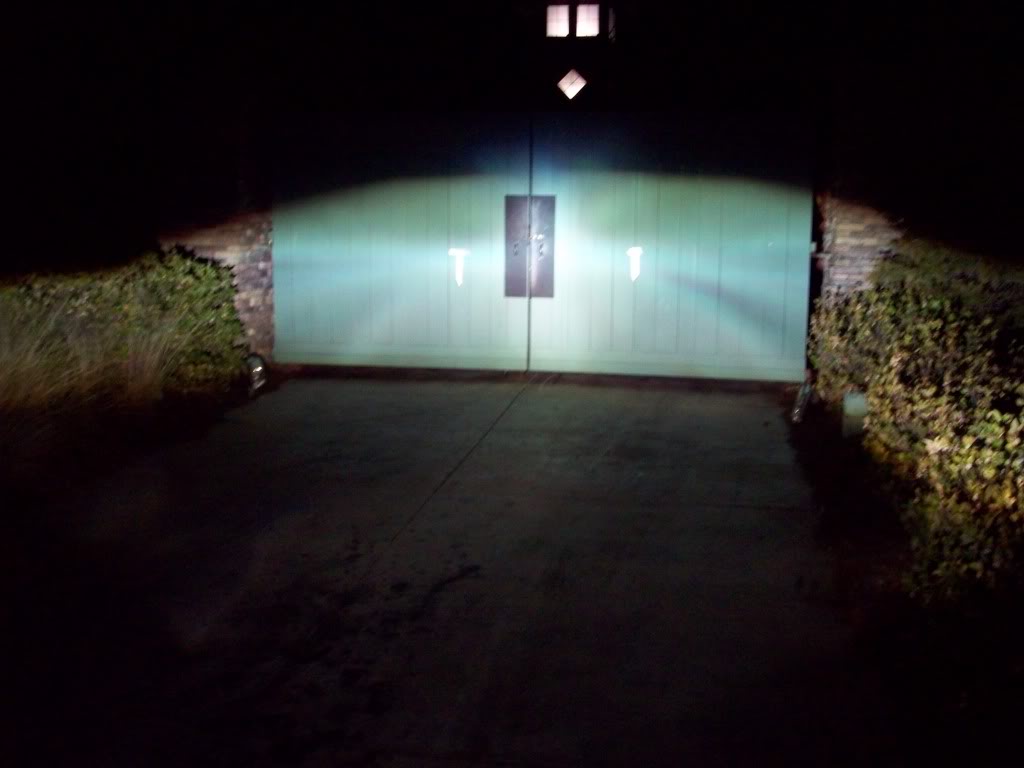
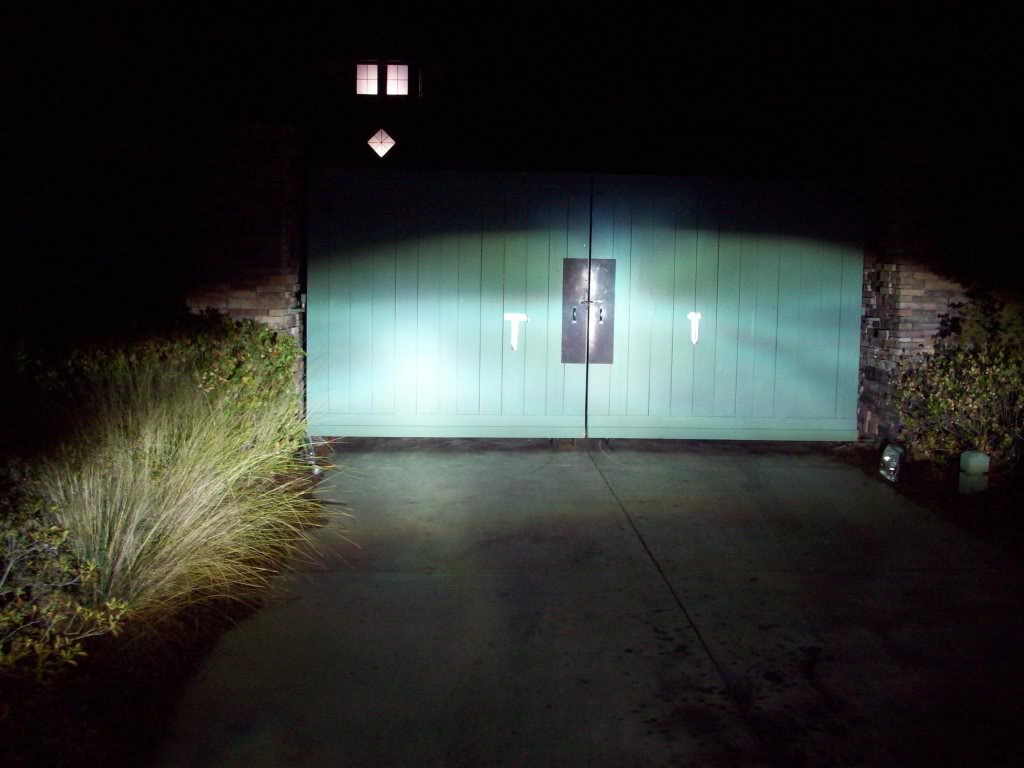
Just driverside
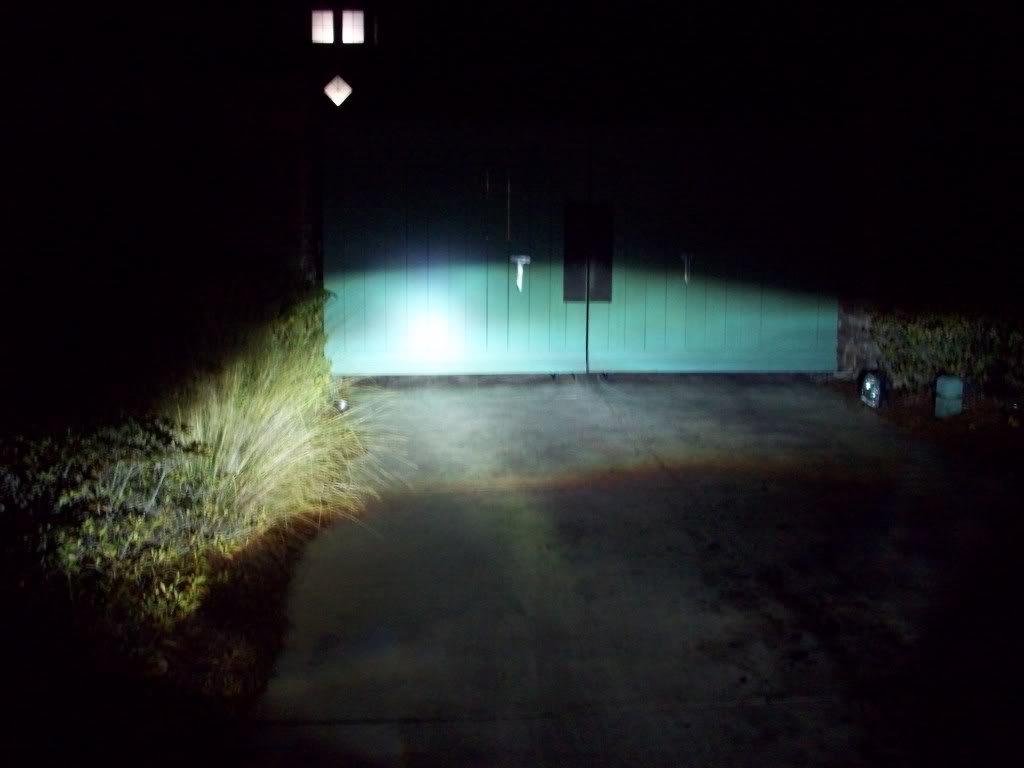
BTW I'm in the process of aiming and aligning them so that is why they look off. I'm trying to finish it up tonight. Some quick advice would be much appreciated
Thanks!
Now I have another troubleshooting hurdle. The lights only stay on when the brights are on. Is it the solenoid? I switched the wiring around on the solenoid (wires coming out of the projector) and still didn't get it right. Could it be the other one that is doing it?
Here are some shots. The passenger side one are the ones on bright, from what I can tell.
Just driverside
BTW I'm in the process of aiming and aligning them so that is why they look off. I'm trying to finish it up tonight. Some quick advice would be much appreciated
Thanks!
#231
03-14-2012, 10:31 AM

Can this be done in a weekend? I don't really want to but the extra set of lights and have read this over and over again lol.
So do you think I could bang this out on a weekend?
I was also thinking I could PNP the HID's one weekend so they are set up then do the retrofit the next how would that go?
So do you think I could bang this out on a weekend?
I was also thinking I could PNP the HID's one weekend so they are set up then do the retrofit the next how would that go?
#232
03-14-2012, 10:38 AM

Can this be done in a weekend? I don't really want to but the extra set of lights and have read this over and over again lol.
So do you think I could bang this out on a weekend?
I was also thinking I could PNP the HID's one weekend so they are set up then do the retrofit the next how would that go?
So do you think I could bang this out on a weekend?
I was also thinking I could PNP the HID's one weekend so they are set up then do the retrofit the next how would that go?
]So do you think I could bang this out on a weekend?
'Reading' is not the same as 'doing', lol - for yer first time, don't rush. Take yer bicycle to school/work, lol.
BTW - Just fergit the PnP idear - anything you do to 'set up' ( WTF is there to 'set up' ? lol) with them is gonna be absolutely useless to you.
Last edited by MGDfan; 03-14-2012 at 10:42 AM.
#233
03-14-2012, 10:47 AM
So do you think I could bang this out on a weekend?
Yep - But - depending on the products used and yer climate, cure/dry times may require a bit longer.
Just fergit the PnP idear - anything yo do to 'set up' ( BTW - WTF is there to 'set up' ? lol) with them is gonna be absolutely useless to you.
Yep - But - depending on the products used and yer climate, cure/dry times may require a bit longer.
Just fergit the PnP idear - anything yo do to 'set up' ( BTW - WTF is there to 'set up' ? lol) with them is gonna be absolutely useless to you.
Is the Bi-xenon FX-R Stage III Kit from TRFS.com the way to go still? http://www.theretrofitsource.com/pro...eed27988a34979
And should I go with the 50 watt? Or is the 35 watt plenty
I was just thinking there was wiring for the ballast so if that took a lot of time I could do it the week before. Guess its not that hard haha
Great point on the cure times for the sealant

#234
03-14-2012, 10:52 AM
Awesome
Is the Bi-xenon FX-R Stage III Kit from TRFS.com the way to go still? http://www.theretrofitsource.com/pro...eed27988a34979
And should I go with the 50 watt? Or is the 35 watt plenty
I was just thinking there was wiring for the ballast so if that took a lot of time I could do it the week before. Guess its not that hard haha
Great point on the cure times for the sealant
IMHO for 99% of folks, 35w is plenty. Go 4300K for best output.
Yp - sealent, any painting, etc .. you do not want ougassing inside the housings - tends to fog thangs up, lol.
Good luck!!!

#235
03-15-2012, 12:19 AM


Join Date: Apr 2009
Location: ED, AB, Canada
Posts: 566
Likes: 0
Received 0 Likes
on
0 Posts
I agree with the above statements, except I like 5000K better. 35W is lots compared to what you're running now. If you follow the first cut in the picture then sand to fit the projector you will save a lot of time. Finish in a weekend? Depends on what you want done. Painting headlights, halos, hours you put in? I personally would do a cure time of 24 hours. So you will have a lot of work before then. I've seen headlights go for as low as
$40.00 for the pair in the local buy and sell. You can also wire up your harness and ballasts just don't hook them up to the factory headlight plug until your ready to.
$40.00 for the pair in the local buy and sell. You can also wire up your harness and ballasts just don't hook them up to the factory headlight plug until your ready to.
#236
03-18-2012, 02:54 PM
Senior Member
Join Date: Jul 2008
Location: Fargo, ND
Posts: 180
Likes: 0
Received 0 Likes
on
0 Posts
#237
03-19-2012, 10:18 AM
I agree with the above statements, except I like 5000K better. 35W is lots compared to what you're running now. If you follow the first cut in the picture then sand to fit the projector you will save a lot of time. Finish in a weekend? Depends on what you want done. Painting headlights, halos, hours you put in? I personally would do a cure time of 24 hours. So you will have a lot of work before then. I've seen headlights go for as low as
$40.00 for the pair in the local buy and sell. You can also wire up your harness and ballasts just don't hook them up to the factory headlight plug until your ready to.
$40.00 for the pair in the local buy and sell. You can also wire up your harness and ballasts just don't hook them up to the factory headlight plug until your ready to.
Yea I would say a day is appropriate for curing time while being compressed together

#239
08-22-2012, 10:52 PM

For others wanting to do a bit of extra reading heres a link to my thread where I did pretty much the same install, just different shrouds.
Link to HID retrofit
Link to HID retrofit
#240
05-09-2014, 08:17 PM
