Tan leather shifter cover installed
#1
 11-16-2006, 07:44 PM

Tan leather shifter cover installed
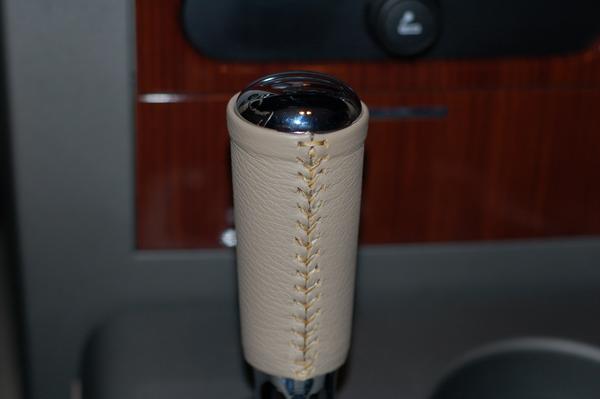
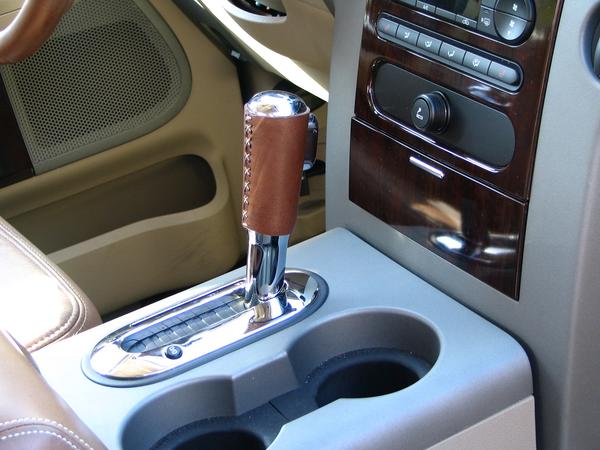
I wanted everyone to see the tan leather cover with the stitching laced to match the steering wheel cover. I stitched it underneath then back over, which is the way my leather steering wheel cover is.
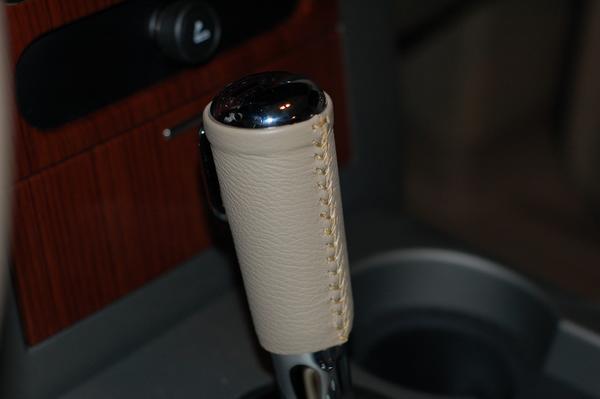
The tan one that I received had the top part rolled over but not the bottom. I actually like it fine this way so I am just going to leave it. The color and texture of the leather match my interior perfectly!
Please keep this thread on topic.
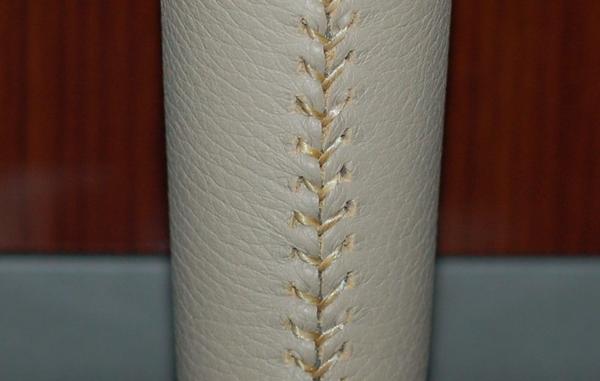
Here is a close-up of the stitching. You gotta love the Nikon D50!
The tan one that I received had the top part rolled over but not the bottom. I actually like it fine this way so I am just going to leave it. The color and texture of the leather match my interior perfectly!
Please keep this thread on topic.
Here is a close-up of the stitching. You gotta love the Nikon D50!
Last edited by BlueFlareside; 11-16-2006 at 10:22 PM.
#2
11-16-2006, 07:57 PM

Senior Member
Join Date: Dec 2005
Location: Braselton, Georgia
Posts: 4,176
Likes: 0
Received 0 Likes
on
0 Posts

#4
11-16-2006, 08:02 PM

Senior Member
Join Date: Aug 2003
Location: mississippi
Posts: 820
Likes: 0
Received 0 Likes
on
0 Posts
#5
11-16-2006, 08:07 PM

#6
11-16-2006, 08:12 PM
Originally Posted by whitecrystal1
Nice job I like the way you stitched yours. How hard was it to keep it tight doing it like that?
I like the way you stitched yours. How hard was it to keep it tight doing it like that?When I got to the bottom I ran it down into the last hole on each side and then went over and down into the opposite hole. I then tied a triple knot from underneath and cut off the excess.
I guess those sewing lessons my mom gave me paid off. She used to be a sewing instructor.
Last edited by BlueFlareside; 11-16-2006 at 08:15 PM.
#7
11-16-2006, 08:40 PM

Trending Topics
#8
11-16-2006, 08:44 PM

#10
11-16-2006, 08:55 PM

Senior Member
Join Date: Jun 2001
Location: Knoxville, TN.
Posts: 1,160
Likes: 0
Received 0 Likes
on
0 Posts

#11
11-16-2006, 09:03 PM
#13
11-16-2006, 09:07 PM
Originally Posted by BlueFlareside
Thanks! And thank you for arranging the group buy!!
Thanks for the kudos. I think it's a nice upgrade; especially for those who didn't want to go down the LT ****er pathway.
I had pressed Eddie to make these several months ago. Whitecrystal1 actually convinced him to make them. All in all, I think they turned out very nice all the way across the board.
This mod isn't for everyone - no doubt. Everyone has opinions about how they want their truck to look but, for me, this is a nice little touch that makes a difference in look. In my opinion, it's these subtle touches that set certain trucks apart from the others.
#14
11-16-2006, 09:11 PM
Senior Member
Join Date: Aug 2003
Location: mississippi
Posts: 820
Likes: 0
Received 0 Likes
on
0 Posts
