

5.4L 2V Intake Manifold (2001)


Thread Starter
|
Senior Member


Joined: Apr 2018
Posts: 818
Likes: 35
From: NorCal
ugh...... more issues.... had to order some more bolts.......
will update as I make some progress
also, I think I am going to cut the long hose that I am using as sheathing. If I understand you guys correctly, it is only in danger of rubbing the sharp edge right at the front of the galley right? if so I will trim that piece shorter to just cover that area
will update as I make some progress
also, I think I am going to cut the long hose that I am using as sheathing. If I understand you guys correctly, it is only in danger of rubbing the sharp edge right at the front of the galley right? if so I will trim that piece shorter to just cover that area

Senior Member
Joined: Mar 2015
Posts: 387
Likes: 30
From: here
100% correct.....just to prevent chaffing the ACTUAL heater hose. Would also recommend using a piece on the OTHER hose...toward rear where you hose clamp the nipple in line. Also note to loosely zip tie hose together so they are not flopping around ...against each other
Thread Starter
|
Senior Member
Joined: Apr 2018
Posts: 818
Likes: 35
From: NorCal
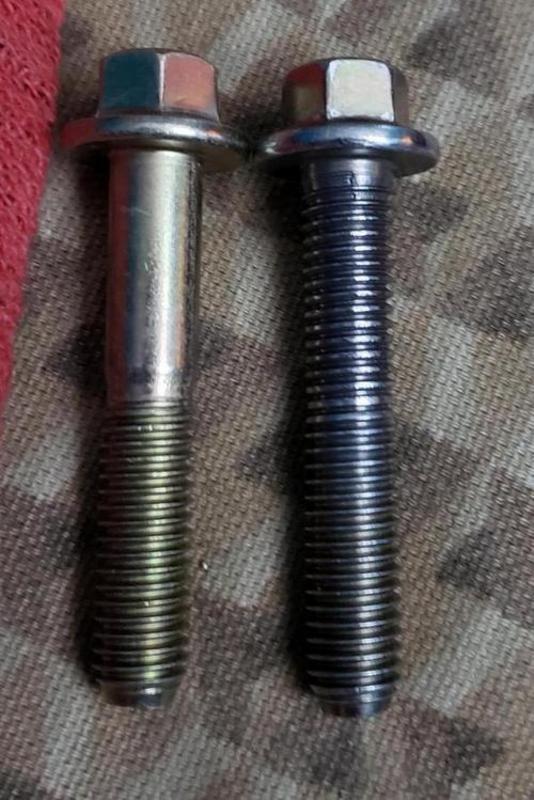
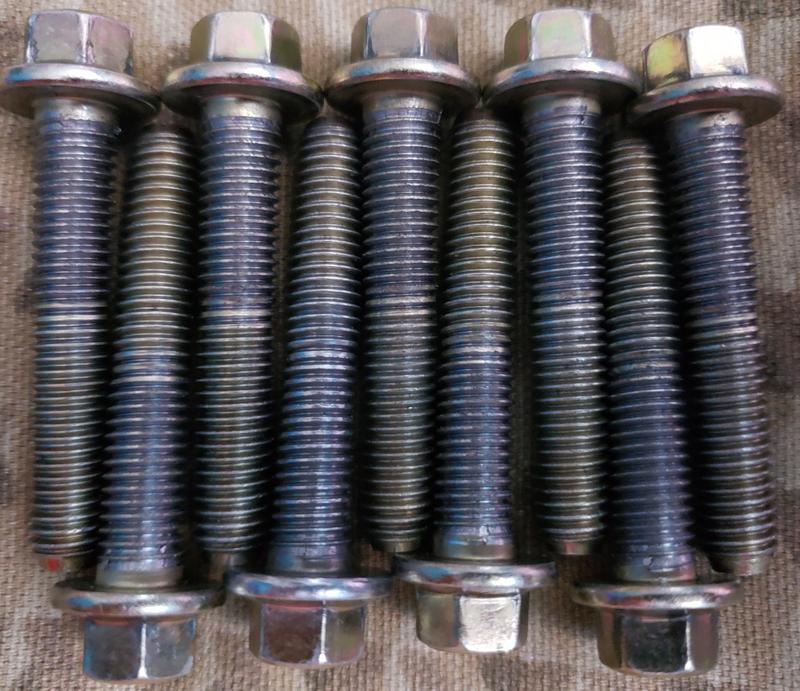
so........ getting there..... got the new bolts, the front right bolt is still too long and will need to be cut. the rest of the bolts are the correct length. HOWEVER, they are partial thread, so I am making them full thread....
the main 8 will be 45mm long. the OEM water neck bolts fit fine with no issues, and the front most shorter bolt on the passenger side will be back measured and cut down.
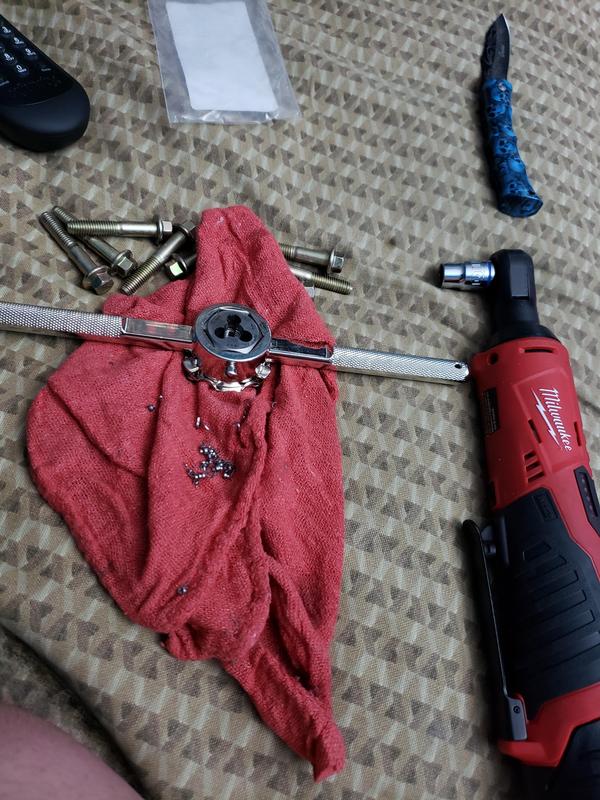
here is where I am @ so far, and a pic of my custom thread cutting tool, haha
the main 8 will be 45mm long. the OEM water neck bolts fit fine with no issues, and the front most shorter bolt on the passenger side will be back measured and cut down.
here is where I am @ so far, and a pic of my custom thread cutting tool, haha
Thread Starter
|
Senior Member
Joined: Apr 2018
Posts: 818
Likes: 35
From: NorCal
posting before I head downstairs, is the torque values in the manual correct for the manifold to the heads?
looks like 19 inch pounds on the first step and them 89 inch pounds for the second step? the same as the smaller bolts I did to combine the upper and lower manifold pieces?
I know that is what the book says, but I also know from the auto world, that sometimes the book is not correct
EDIT: so i found a spec later on in the manual that says 18"lbs and then 18 foot pounds..... got it.... putting in the coil packs, snapped a bolt.... joy..... going to get anotehr right now.... at least i got it out... ugh....

Thread Starter
|
Senior Member
Joined: Apr 2018
Posts: 818
Likes: 35
From: NorCal
OH SNAP!!!!!! NO LEAKS SEEN ASOF RIGHT NOW!!!!
Drove it to the store and back, and filled up the gas tank after tossing in a 20 oz can of seafoam into the tank
!!!!!!!!!!!!!!!!!!!!!!!!!!!!!!!!!!!!!!!!!!!!!!!!!! !!!!!!!!!!!!!!!!!!!!!!!!!!!!!!!!!!!!!!!!!!!!!
https://i.imgur.com/mZNKVN4.mp4
Drove it to the store and back, and filled up the gas tank after tossing in a 20 oz can of seafoam into the tank
!!!!!!!!!!!!!!!!!!!!!!!!!!!!!!!!!!!!!!!!!!!!!!!!!! !!!!!!!!!!!!!!!!!!!!!!!!!!!!!!!!!!!!!!!!!!!!!
https://i.imgur.com/mZNKVN4.mp4
Last edited by jimbo74; Jun 24, 2019 at 12:03 AM.


