


Amp Rack and Dual 10" Alpine R install


Thread Starter
|
Technical Article Contributor
Joined: Mar 2012
Posts: 154
Likes: 0
Amp Rack and Dual 10" Alpine R install
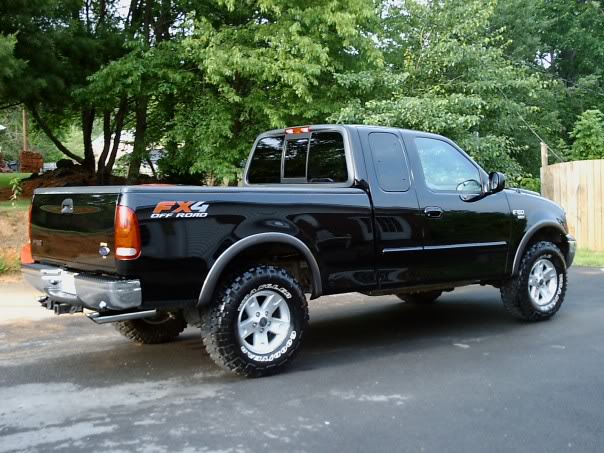
Heres are some audio ideas for you guys. I got bored tonight and wanted to post all my "how to's" and Custom installs
Audio upgrades
Big 3(All 1 ga. mining wire) (350 amp fused wire to amp d-block)
All amp wires and dblocks (1ga mining wire)-250amp fuse and 100 amp fuse
HU- Alpine CDA 7894, KCA 420i, C701 Processor
Front- 6.5 Focal K2 Powers
Rear- 6x8 Alpine R's
Subs- 2x Full size 10" Type R's
Amps- Focal FFP 4100(95x4 at 4)
Amp - Rockford Power Series T1500-1bdCP (1932 rms at 1)
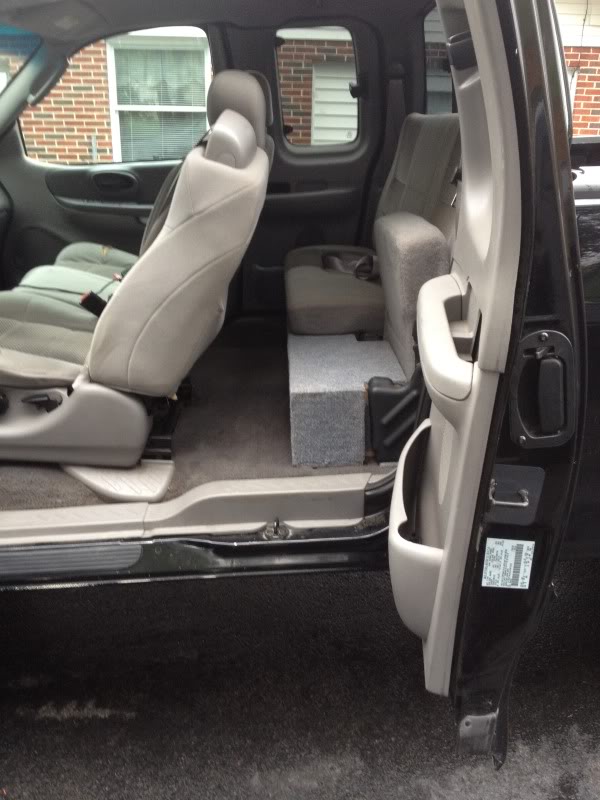
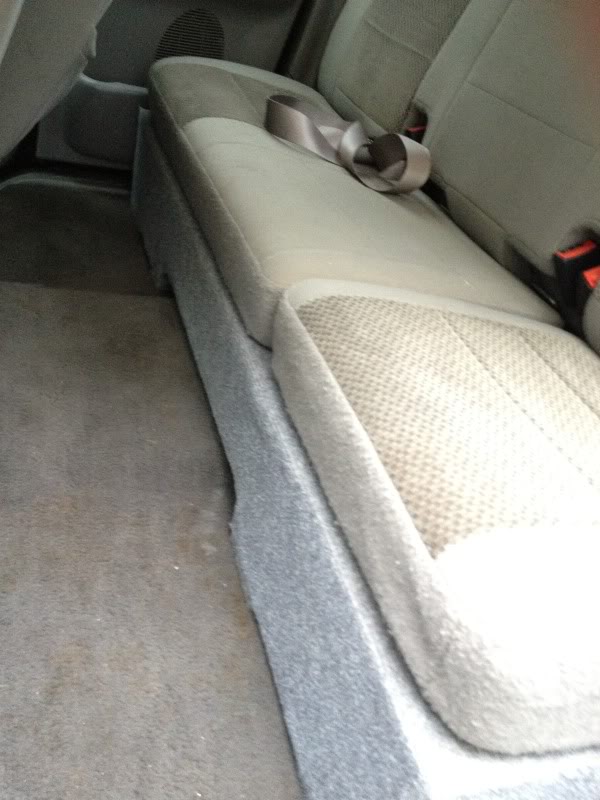
Custom Enclosed Under seat box - 2 Type R's with approx .74ft^3 per sub
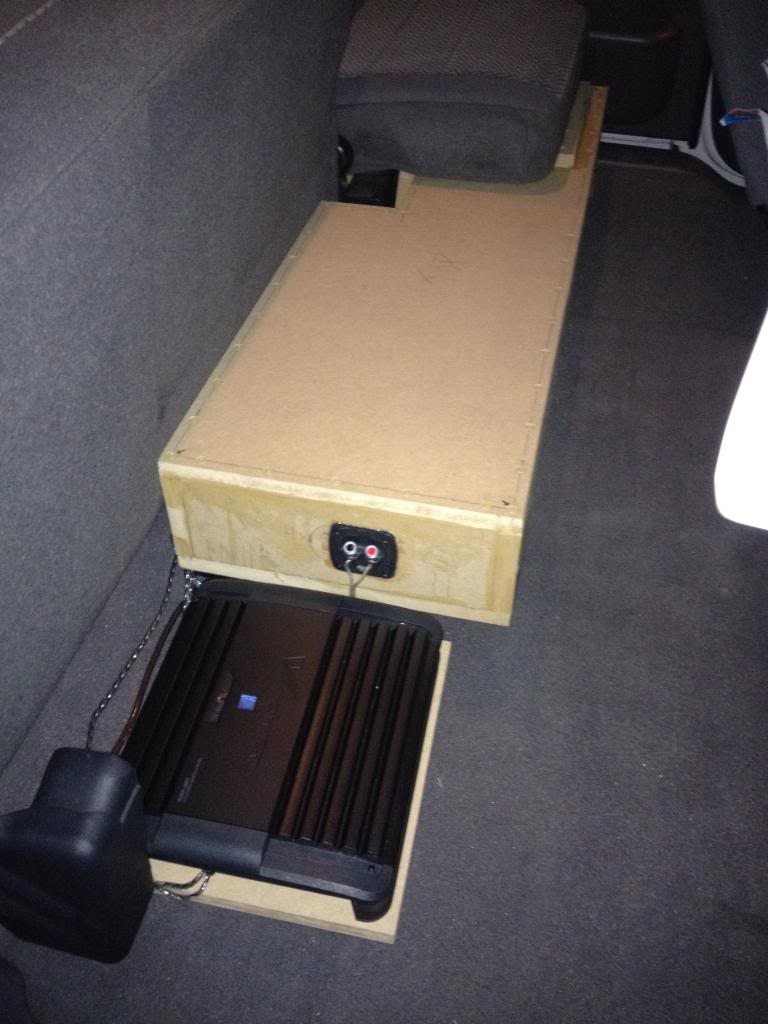
Custom Amp Rack
Custom Rear seat(refabbed)
Here is what I am working on
Headunit and Options
Alpine CDA 7894 (AMAZING SQ and Options) also the green matches the 03's factory lighting. 3 -4V preouts


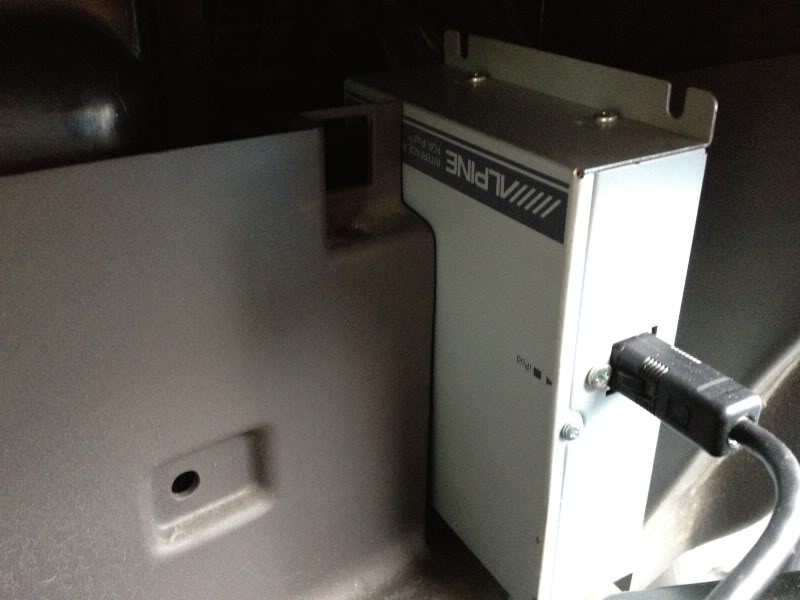
KCA 420 for Iphone's and Ipods
For the Box
Start of the design.

Here's when I finished the frame and internals of the two 10" type R's box

Notice the down firing spec. By going that route I had about 5.875 top mounting depth.

Also note how I countersinked them about 1/4 ito the MDF to help with some depth

Audio upgrades
Big 3(All 1 ga. mining wire) (350 amp fused wire to amp d-block)
All amp wires and dblocks (1ga mining wire)-250amp fuse and 100 amp fuse
HU- Alpine CDA 7894, KCA 420i, C701 Processor
Front- 6.5 Focal K2 Powers
Rear- 6x8 Alpine R's
Subs- 2x Full size 10" Type R's
Amps- Focal FFP 4100(95x4 at 4)
Amp - Rockford Power Series T1500-1bdCP (1932 rms at 1)
Custom Enclosed Under seat box - 2 Type R's with approx .74ft^3 per sub
Custom Amp Rack
Custom Rear seat(refabbed)
Here is what I am working on
Headunit and Options
Alpine CDA 7894 (AMAZING SQ and Options) also the green matches the 03's factory lighting. 3 -4V preouts
KCA 420 for Iphone's and Ipods
For the Box
Start of the design.
Here's when I finished the frame and internals of the two 10" type R's box
Notice the down firing spec. By going that route I had about 5.875 top mounting depth.
Also note how I countersinked them about 1/4 ito the MDF to help with some depth
Thread Starter
|
Technical Article Contributor
Joined: Mar 2012
Posts: 154
Likes: 0
I used an old Type R I blew as a guide to go by. Also helped out with making the proper baffle
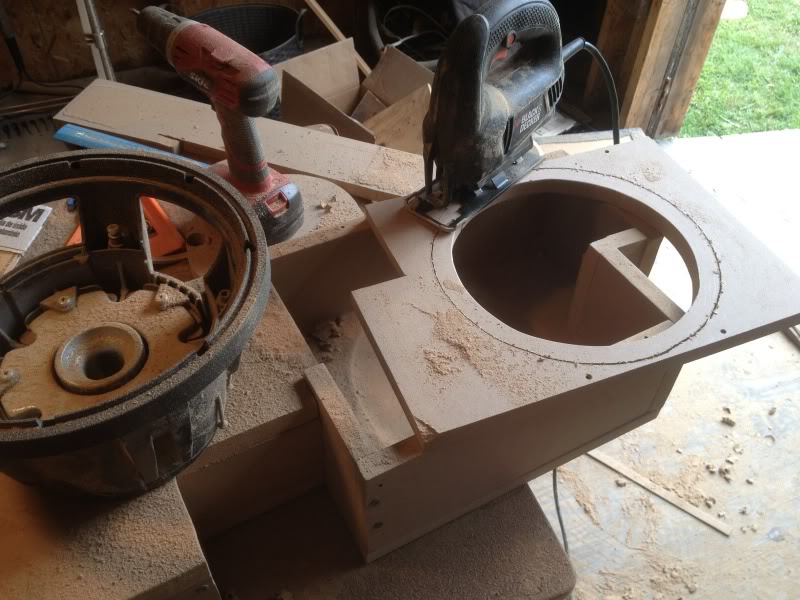
Heres the double baffle which will serve as a mounting place for the legs to lift the box to give room for excursion of about 20mm.
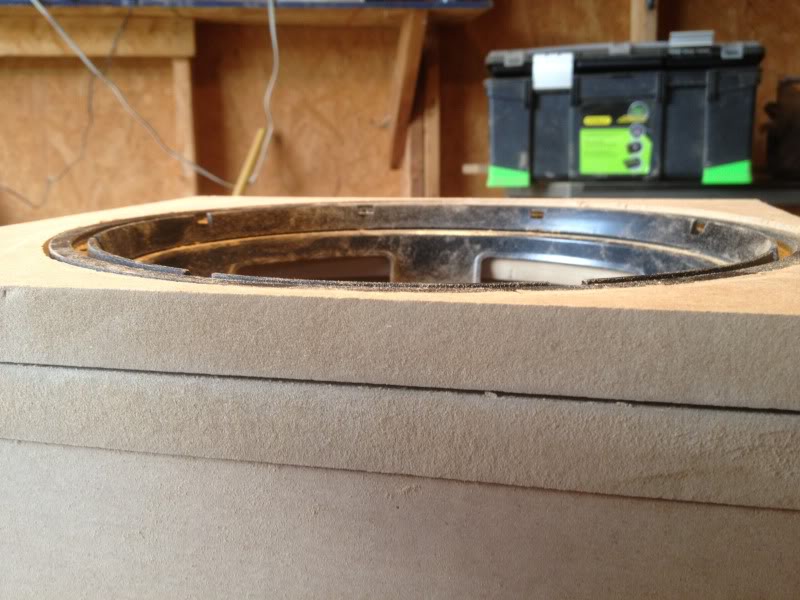
Heres the ("legs") on top of the baffle to give room for the Xmax
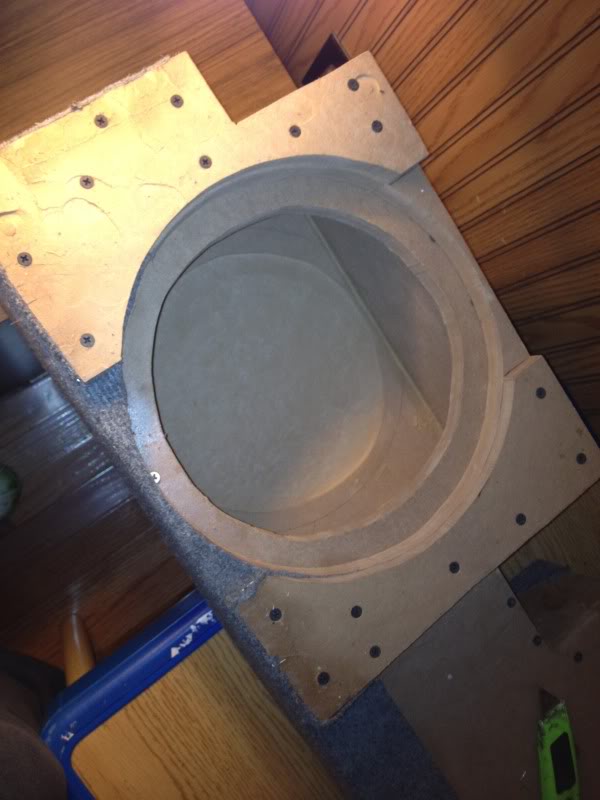
With carpet on it fitting into the back seat slots.
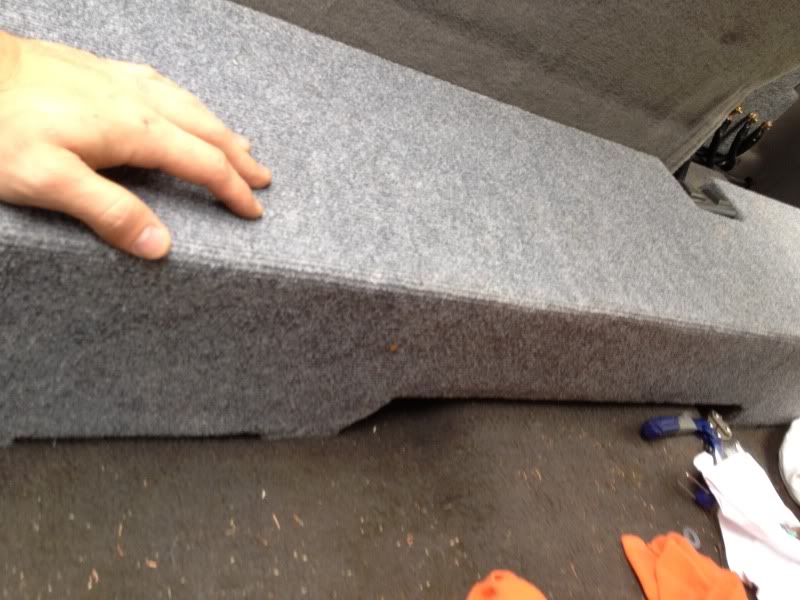
Legs holding it up to breathe and not hit the floor
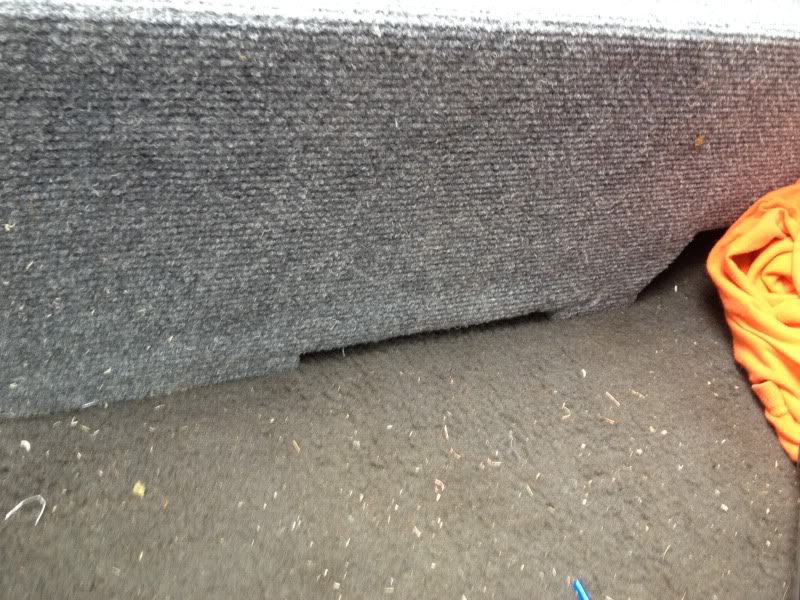
Notice how flush it is to the rear seat(11.25inches)

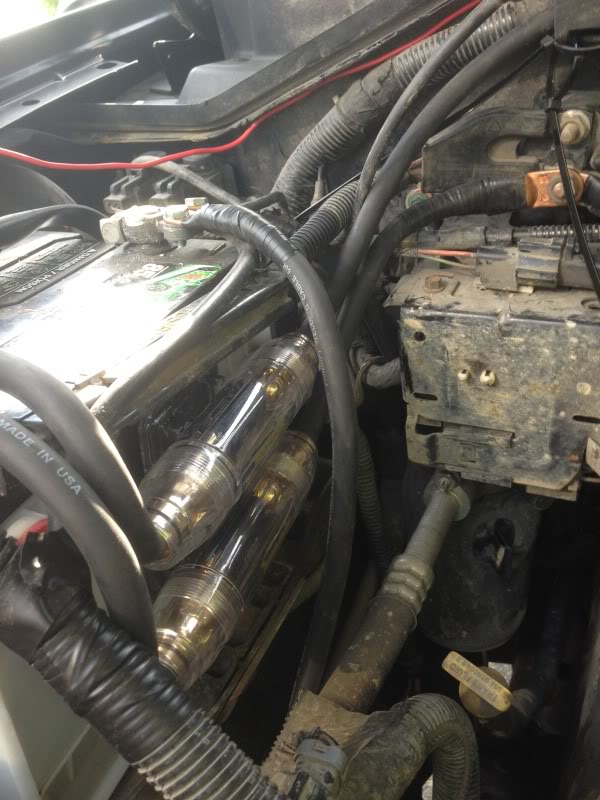
Next I upgrades the "big 3" with 1ga mining wire. Then ran the same wire to my dist block for the amps.
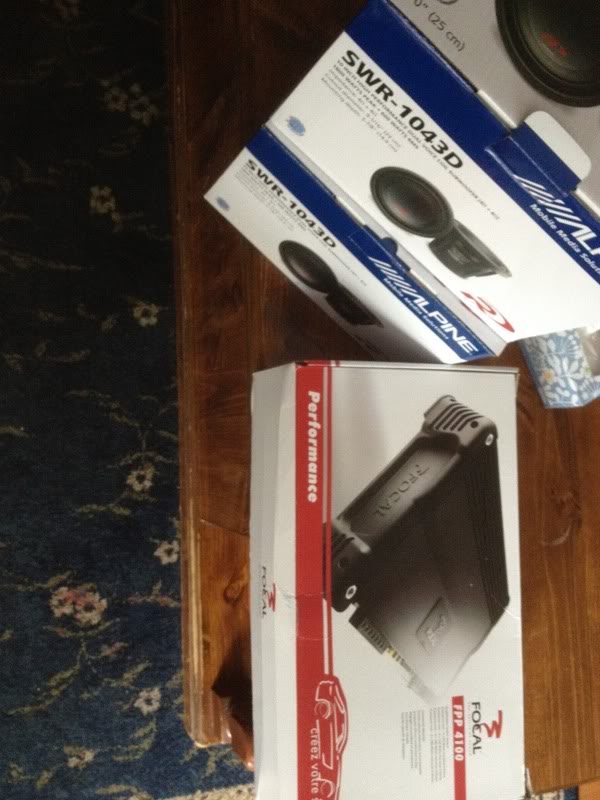
Now for the back seat amp rack since I got these in:
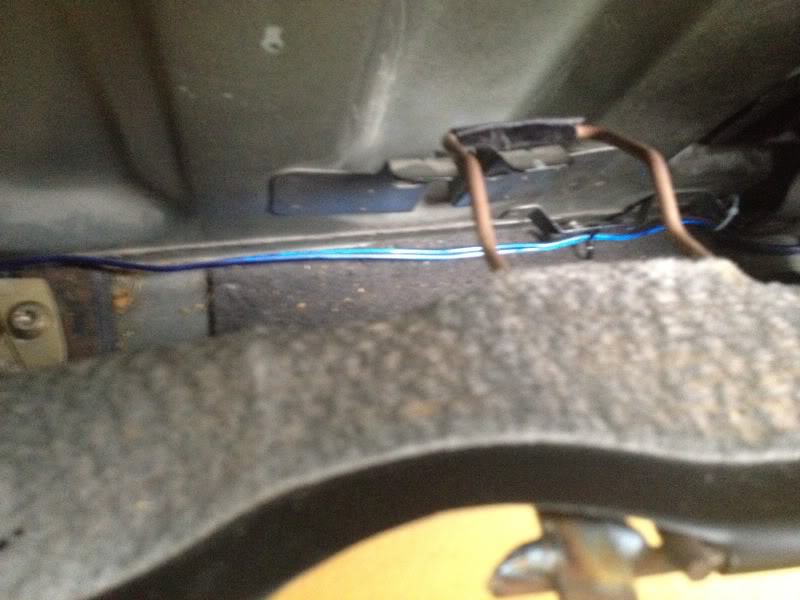
Notice the two brackets holding the back seat to the cabin. I had to refab this part to make room for the amp rack. Heres a shot of what I am talking about
Heres the double baffle which will serve as a mounting place for the legs to lift the box to give room for excursion of about 20mm.
Heres the ("legs") on top of the baffle to give room for the Xmax
With carpet on it fitting into the back seat slots.
Legs holding it up to breathe and not hit the floor
Notice how flush it is to the rear seat(11.25inches)
Next I upgrades the "big 3" with 1ga mining wire. Then ran the same wire to my dist block for the amps.
Now for the back seat amp rack since I got these in:
Notice the two brackets holding the back seat to the cabin. I had to refab this part to make room for the amp rack. Heres a shot of what I am talking about
Thread Starter
|
Technical Article Contributor
Joined: Mar 2012
Posts: 154
Likes: 0
After tons and tons of measurements I decided to try to fit my two Rockford Amps behind the seat. Please not these amps are only 2.25" tall and not many amps are compatible for this installation. (especially ones with bad heat sink designs)
I looked over my truck a 100% times for good placement of these and the only two locations I found were under the seats(front) or behind the rear back rest. For the true hide-a-way look I decided to use the behind the rear back rest location. The amps I used for the install are Rockford Fosgate Power Series T600, and T1500.
Here are some issues you will have to over come. The first is the slide mounting bracket for holding the seat back.

Their are two of these, one on each side of the truck. Approx ~34inches apart. So I knew my two amplifiers dimensions 15in and 13in. and saw I could manage to squeeze them in.
The next problem was all the steel wire caging that supported the seat /foam.
Since the amps will be fitting in between the mounting brackets, all I needed to do was clear out some of the steel caging from the middle and resupport the mounting bracket piece for a safe solid reinstall. So I pulled out the dremel/recip saw and a welder for the next step.
This is the piece i cut out.

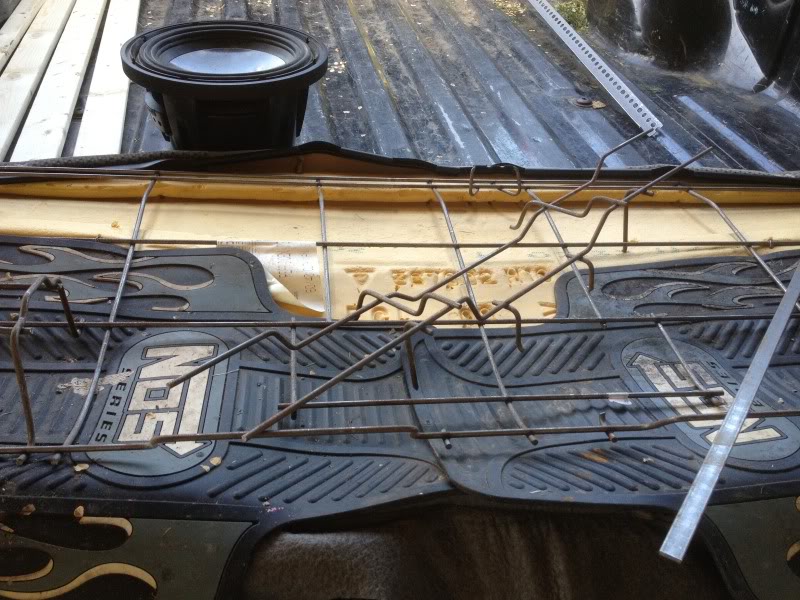
BEFORE WELDING TAKE THE FOAM OFF THE STEEL AND PUT SOMETHIGN THAT WONT BURN UNDER IT!!
I used a mig welder and some .5inch strips of steel. See pics for placement(you want the supports as close to the mounting brackets as possible to give room for the amps).


With all this done we have the following space. width-34in, depth ~11-12in, width- ~3in.

I looked over my truck a 100% times for good placement of these and the only two locations I found were under the seats(front) or behind the rear back rest. For the true hide-a-way look I decided to use the behind the rear back rest location. The amps I used for the install are Rockford Fosgate Power Series T600, and T1500.
Here are some issues you will have to over come. The first is the slide mounting bracket for holding the seat back.
Their are two of these, one on each side of the truck. Approx ~34inches apart. So I knew my two amplifiers dimensions 15in and 13in. and saw I could manage to squeeze them in.
The next problem was all the steel wire caging that supported the seat /foam.
Since the amps will be fitting in between the mounting brackets, all I needed to do was clear out some of the steel caging from the middle and resupport the mounting bracket piece for a safe solid reinstall. So I pulled out the dremel/recip saw and a welder for the next step.
This is the piece i cut out.
BEFORE WELDING TAKE THE FOAM OFF THE STEEL AND PUT SOMETHIGN THAT WONT BURN UNDER IT!!
I used a mig welder and some .5inch strips of steel. See pics for placement(you want the supports as close to the mounting brackets as possible to give room for the amps).
With all this done we have the following space. width-34in, depth ~11-12in, width- ~3in.
Thread Starter
|
Technical Article Contributor
Joined: Mar 2012
Posts: 154
Likes: 0
Now to the welding and bracing part for the back seat frame.
Obviously this requires a welder, heres the one I used.
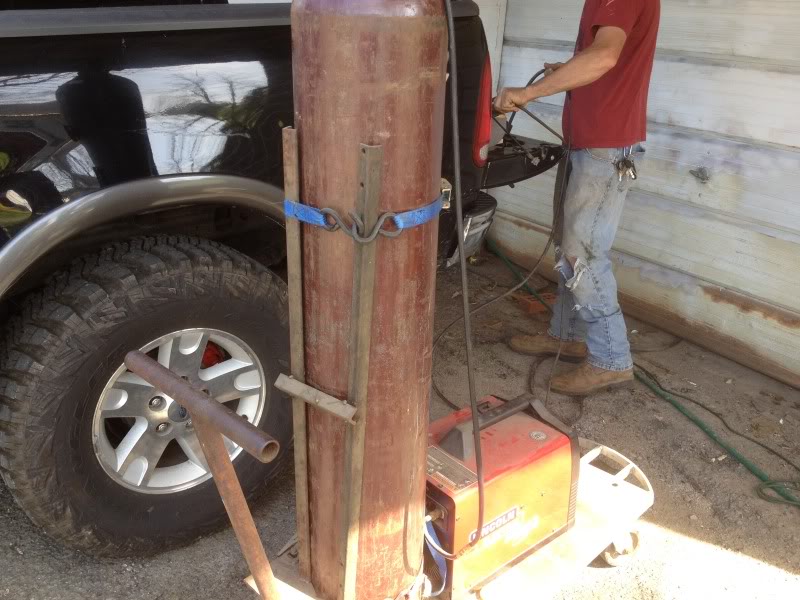
I had to cut some of the old framing for the back seat off to make room for two 15inch wide amps. Once I cut the excess of I re-welded some steel rods for support(two places where the back seat is held to the cab)


Once I made room it was time to fab the MDF amp itself.
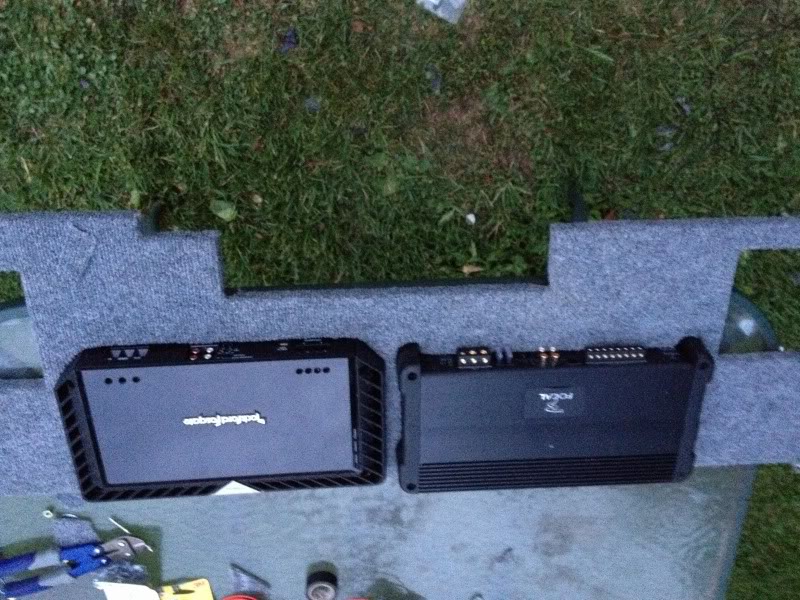
Here is a few shots of the amps being couternsinked into the MDF to leave room for the seats



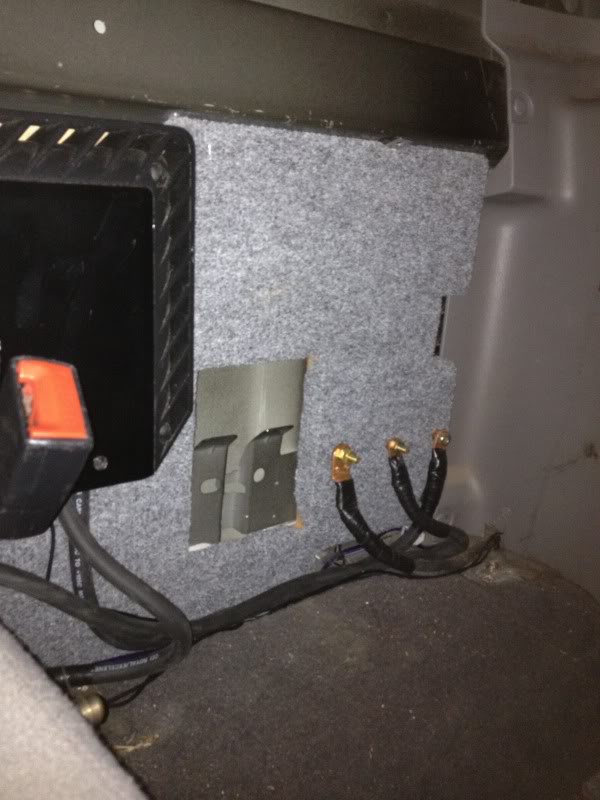
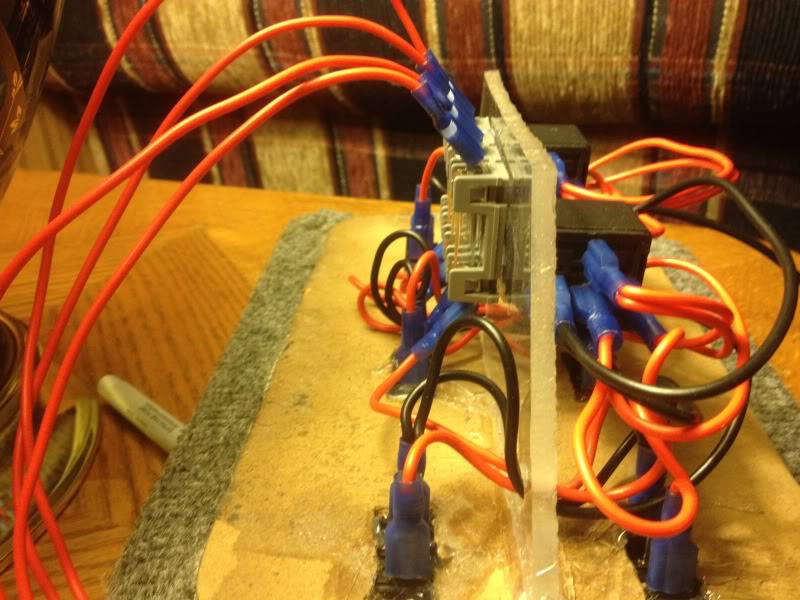
I also used the amp rack to hold some bolts for a distribution block. I hate paying crazy amounts for stupid fuse blocks and dblocks when you can make one this simple. I used a copper bar on the rear countersinked(covered with plexiglass) to attach a 250, and 100 amp fuses. This was all done with 1ga mining wire.
Obviously this requires a welder, heres the one I used.
I had to cut some of the old framing for the back seat off to make room for two 15inch wide amps. Once I cut the excess of I re-welded some steel rods for support(two places where the back seat is held to the cab)
Once I made room it was time to fab the MDF amp itself.
Here is a few shots of the amps being couternsinked into the MDF to leave room for the seats
I also used the amp rack to hold some bolts for a distribution block. I hate paying crazy amounts for stupid fuse blocks and dblocks when you can make one this simple. I used a copper bar on the rear countersinked(covered with plexiglass) to attach a 250, and 100 amp fuses. This was all done with 1ga mining wire.
Thread Starter
|
Technical Article Contributor
Joined: Mar 2012
Posts: 154
Likes: 0
Heres a few shots with the amps in place
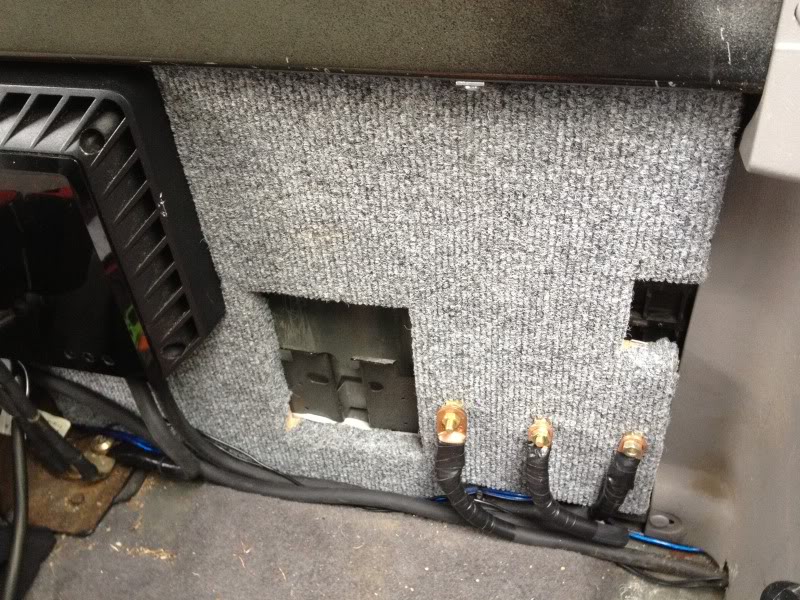
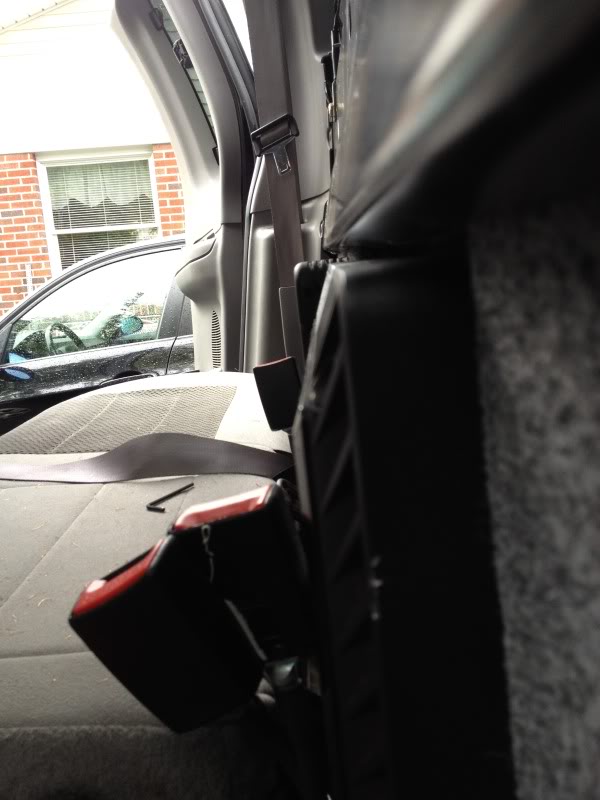
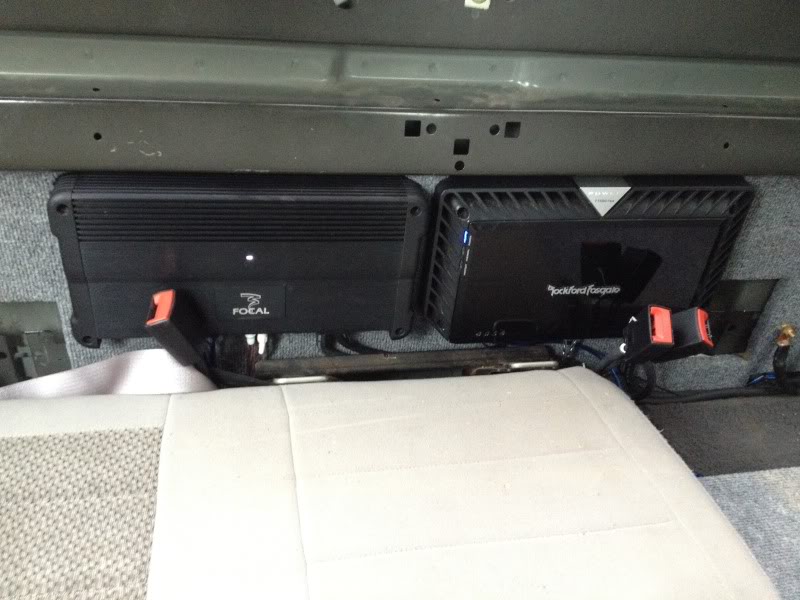
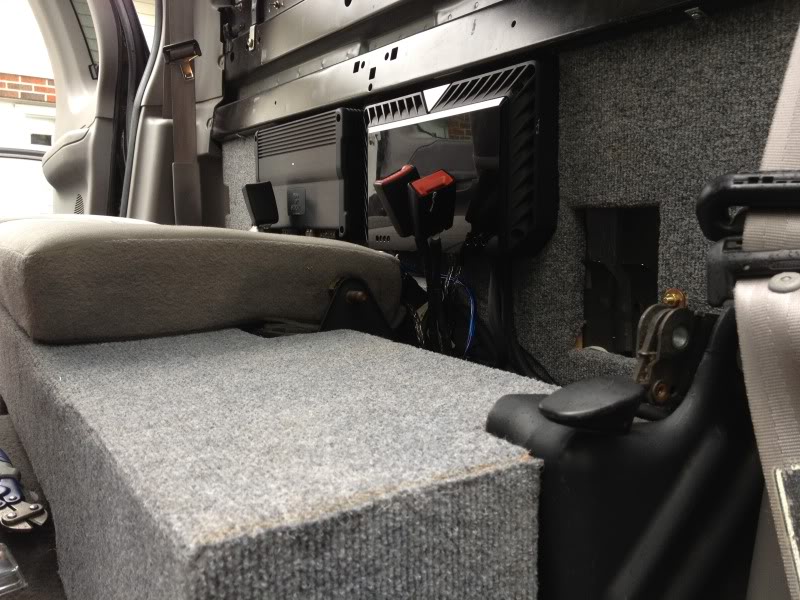

I didnt have much room to work with

Made a built in slot to hold relays, and fuses for; Fans, Heatsink Fans, and a better Remote signal(this has a sliding place for a piece of plexiglass)

More relays and switches hid to run 30amp for lights and 4" Vent fans.
I used L brackets to mount it to the stabilizing bar for the cab
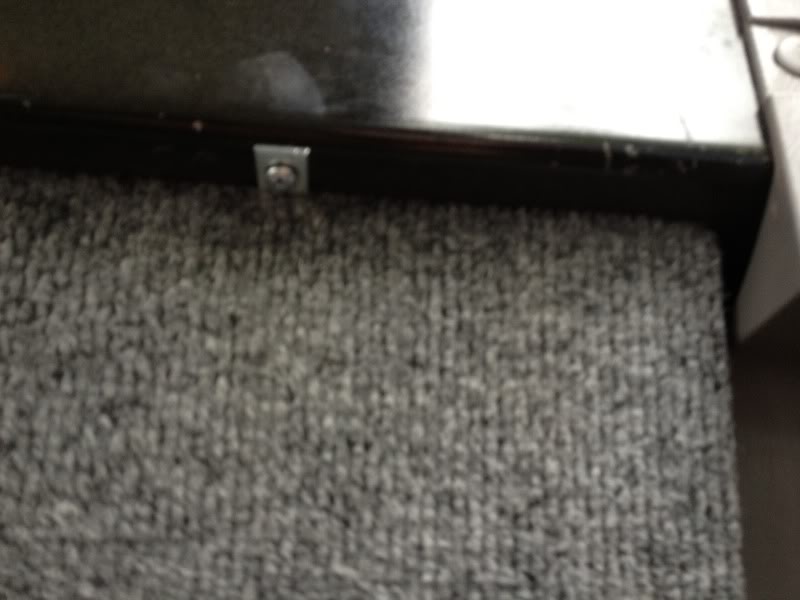
I didnt have much room to work with
Made a built in slot to hold relays, and fuses for; Fans, Heatsink Fans, and a better Remote signal(this has a sliding place for a piece of plexiglass)
More relays and switches hid to run 30amp for lights and 4" Vent fans.
I used L brackets to mount it to the stabilizing bar for the cab

Thread Starter
|
Technical Article Contributor
Joined: Mar 2012
Posts: 154
Likes: 0

Trending Topics


Thread Starter
|
Technical Article Contributor
Joined: Mar 2012
Posts: 154
Likes: 0
Haha when you are a teacher, you have lots of free time in the summer. I uploaded a couple of my how-to's I did over summer on here. Feel free to check out the others
Gun Rack Build
Starter Upgrade
Extra Battery
Full Audio
And Temp/Compass Fix
Gun Rack Build
Starter Upgrade
Extra Battery
Full Audio
And Temp/Compass Fix


Thread Starter
|
Technical Article Contributor
Joined: Mar 2012
Posts: 154
Likes: 0
Looks good, I use to have the same amp MRP 500 mono in my old car.
