'02 Screw HID project upgrade
#16
 08-16-2010, 10:27 AM


Senior Member
Join Date: Nov 2004
Location: Knoxville, Tn
Posts: 653
Likes: 0
Received 0 Likes
on
0 Posts
It's possible... i simply figured it was more possible i was stumped by the incredibly easy... The box did say it was a 9007 kit.. but i realize things can be swapped around prior to shipping. I will try and call them today, see if can speak to a tech..It's just frustrating to have them and not be able to install them..
#17
08-16-2010, 10:32 AM

Join Date: Jul 2007
Location: North Port, FL
Posts: 175
Likes: 0
Received 0 Likes
on
0 Posts
#18
08-16-2010, 06:10 PM
Join Date: Jul 2007
Location: North Port, FL
Posts: 175
Likes: 0
Received 0 Likes
on
0 Posts
Guess what guys!!! IT HAS ARRIVED! I inquired last thursday night about why i had gotten tracking info 4 days earlier and wondered what the delay was. Well, matt @TRS was very honest and said he had no idea why it was delayed and had no good reason to answer my question. Well, that was a surprising answer and the fact he offered to refund the shipping cost or re-imburse me for any inconvienance, which there wasn't any..
Anyways, Back to the work.
Tools needed:
Dremel tool or other rotary tool.
Fiber-cut off wheel
1/2" Sanding drum
1/4" sanding drum
1/8" or 3/16" rotary file
Flat "miniature" hand file
Clear silicon
Shop Vac (sanding the buckets is DUSTY!)
8- 4mm x 30mm socket head bolts
6- 4mm lock nuts
14- 4mm flat washers
4mm tap and drill bit
#10 drill bit
Power drill
some other stuff to install the ballasts and wiring harness... will update when i figure it all out.
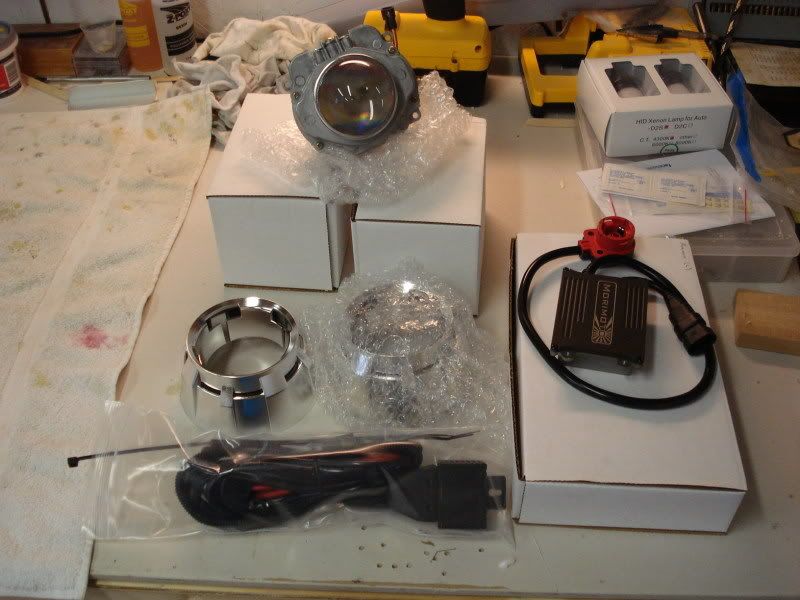
Here's a photo of all the "stuff" included in the kit. 2- FX-R projectors w/ pigtails for the bi-xenon part of the cut-off sheild. 2- ballasts w/ mounts (i got the 20" long pigtail ones), 2- shrouds, 2- 4300K bulbs, and a wiring harness.
And on with the steps...
1. Pre-heat the oven to 260 degrees. Remove the bulbs, bulb holders, etc. Once pre-heated stick your headlight on a cooking sheet (covered with aluminum foil) into the oven with it centered between the 2 heating elements.
2. Set the timer for 8 minutes (I originally tried, 6 and it wasn't long enough). And cookie sheet and headlight in the oven.
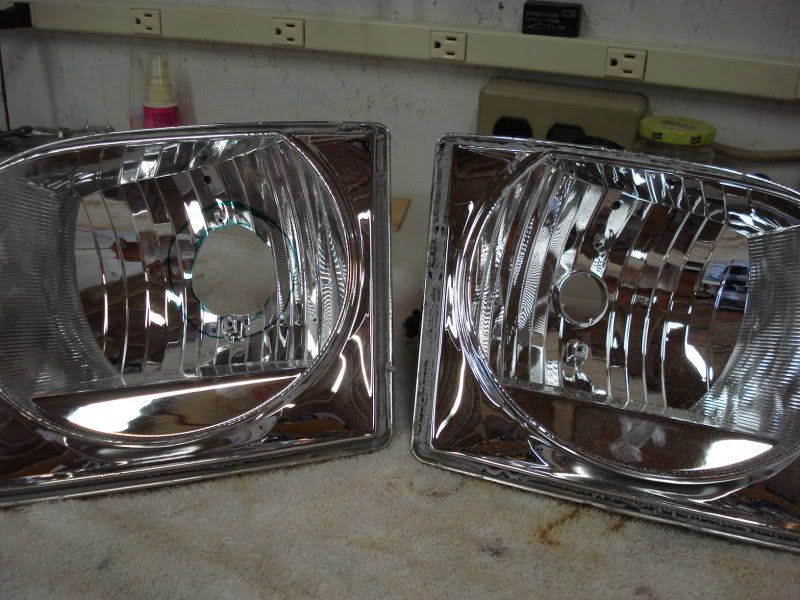
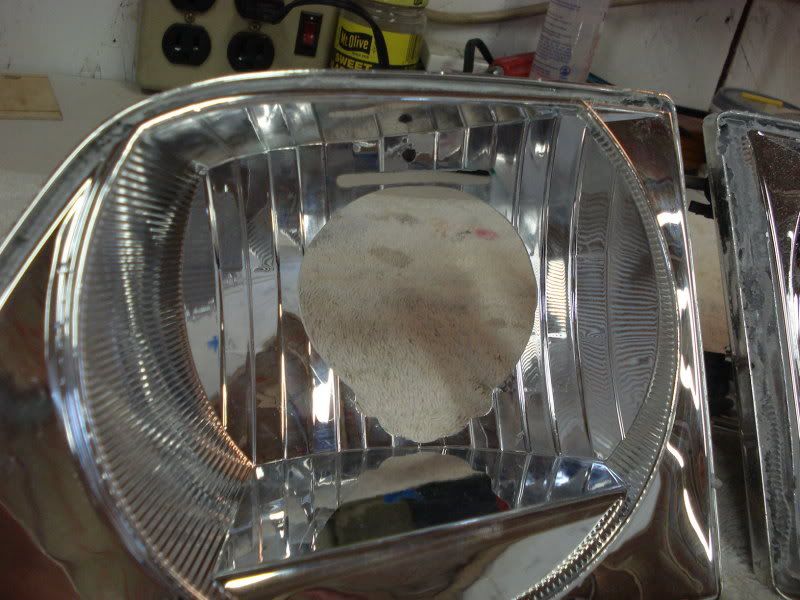
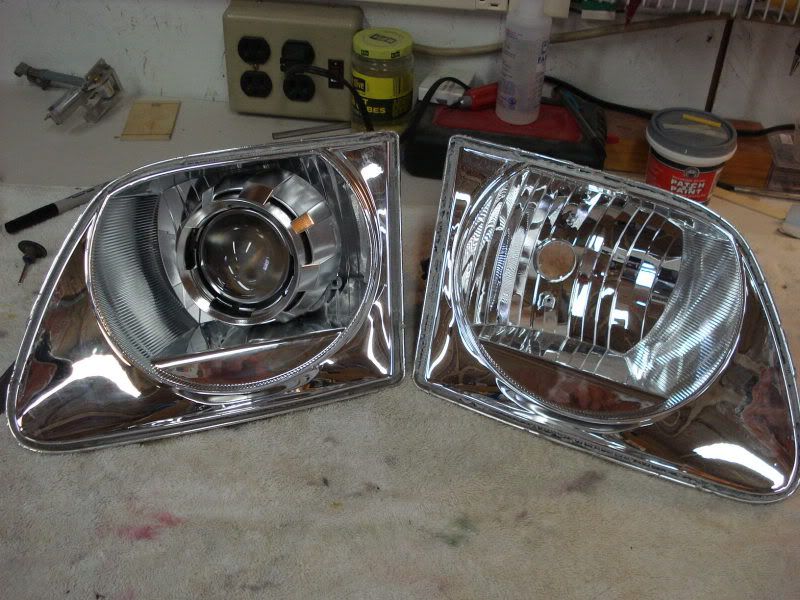
3. Pull the headlight out and using a flat-headed screw driver pry the clear lense off of the headlight bucket.
4. Do the same thing for the other headlight. When done, you should have something that looks like this:

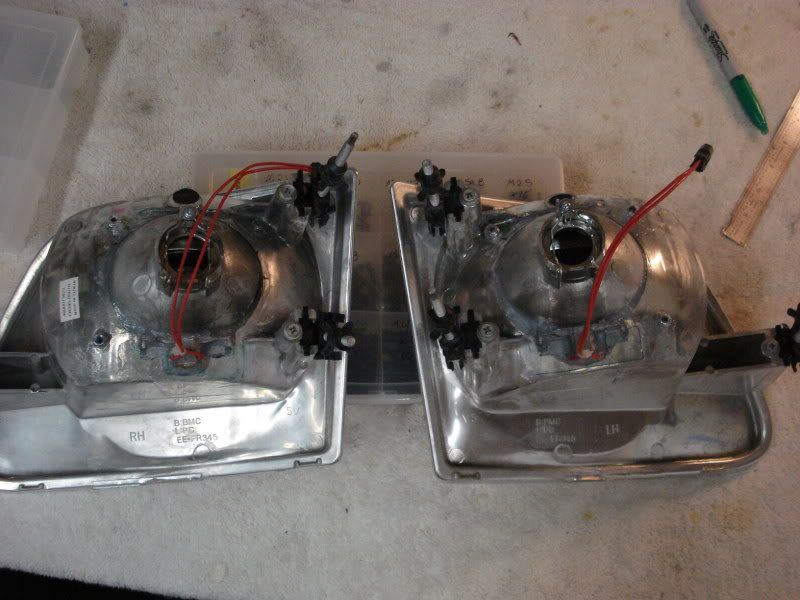
5. Now remove the 2 halogen bulb reflectors from the headlight buckets. these Were screwed in on this particular L headlight set, so yours may differ.
[IMG]http://img.photobucket.com/albums/v433/Flamed04R6/F150%20HID%20retrofit
/DSC01983.jpg[/IMG]

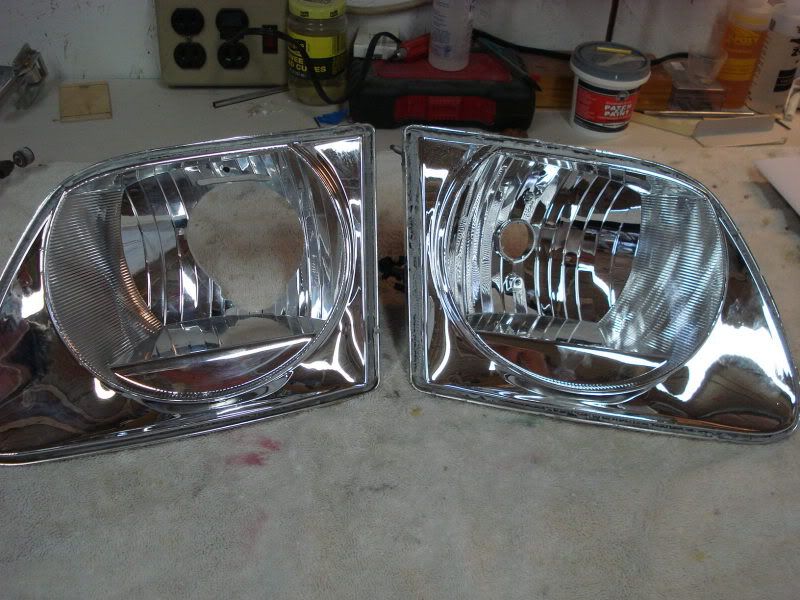
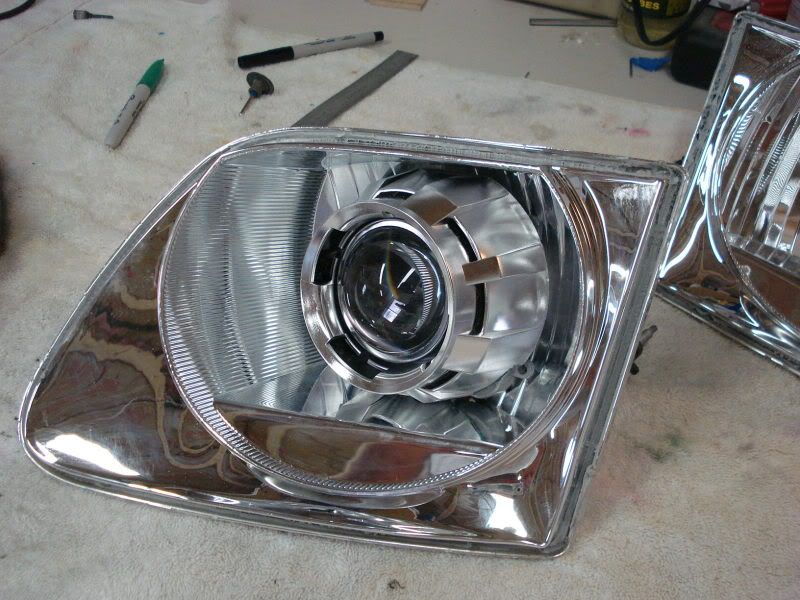
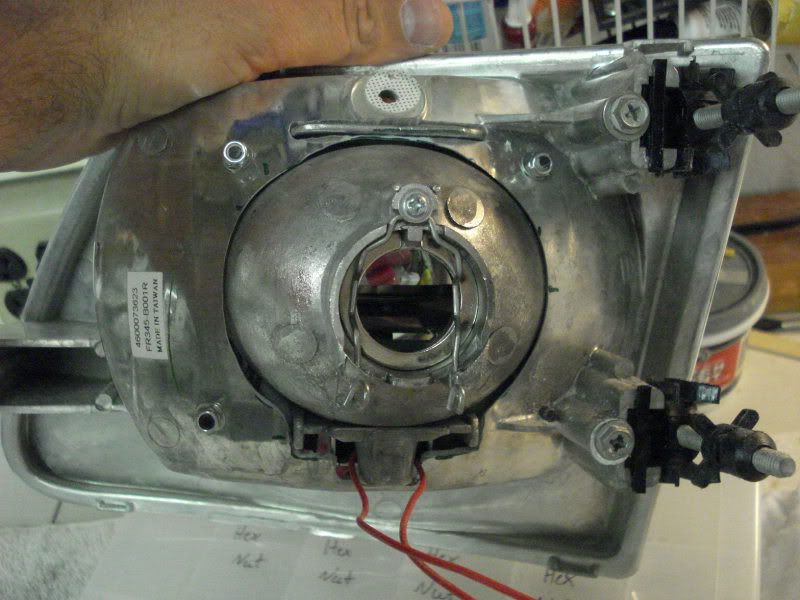
6. Now put the projector inside the headlight bucket with the bulb mounting area's inline with each other. This will tell you where you need to trim the bucket for the projector housing to stick out the back. My initial trim line was just bit enough for the bulb socket of the projector to fit through. Once the bucket was cutout to that trim line, you'll end up with something like this:
7. Now just keep adjusting the headlight bucket until the projector fits in the headlight housing. It took about an hour of trimming in small increments to get the entire projector to fit exactly how i wanted to.


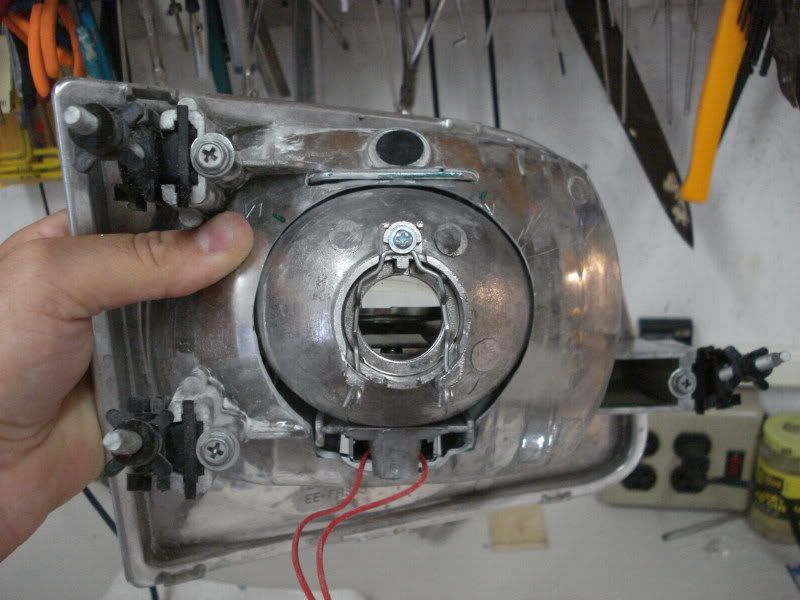

You'll see in the above pictures that their is a flange along the top of the projector that fits through a slot in the headlight bucket. the reason for this slot, and not just removing the flange, was so that the entire projector would be supported by the headlight bucket instead of by the 4 mounting bolts. The way it is now, the mounting lugs on the projector butt up against the inside of the headlight bucket, so the mounting bolts will be very very short.
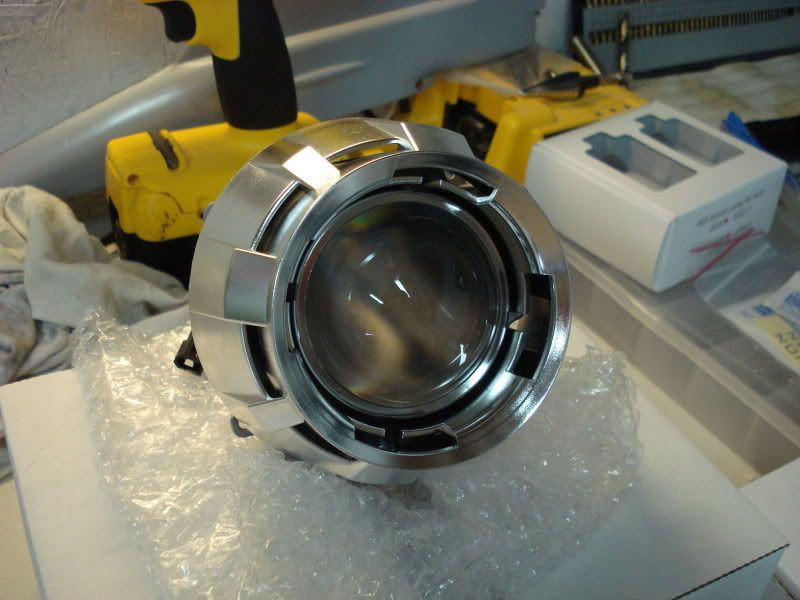
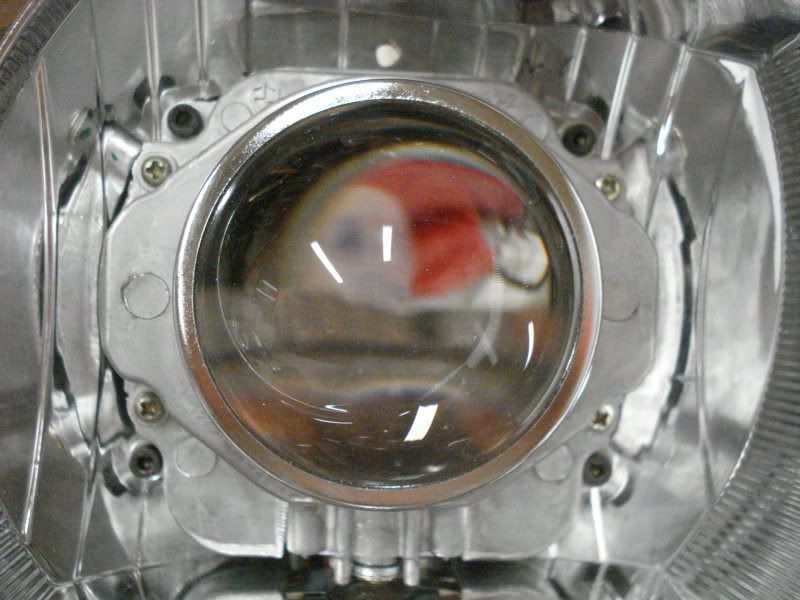
8. After test fitting the shrouds over the projectors, it was found that they were about 1/4" to long which was keeping the headlight lense from fitting (figures). Sooo to fix this, the inside of the shroud (the part that butts up against the projector glass mount) was trimmed .250" shorted. Hopefully you will be able to see that in this next picture.
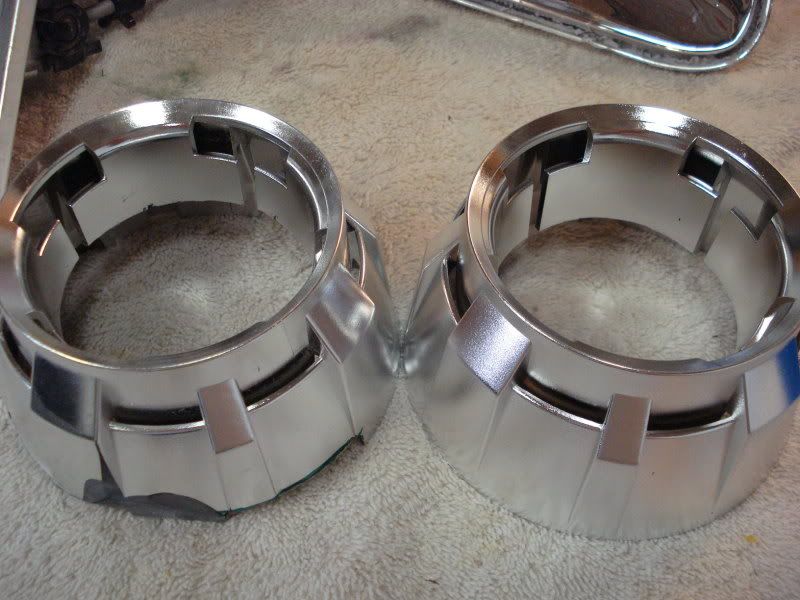
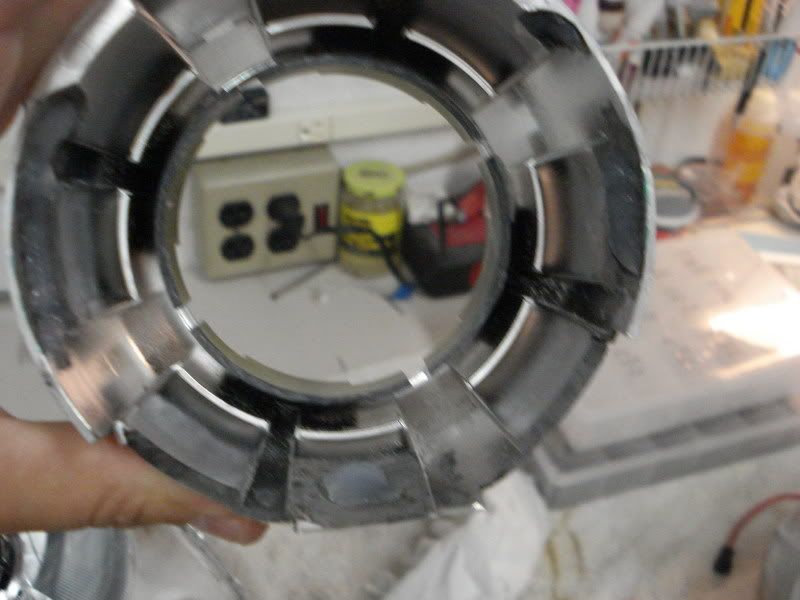
9. Then the Inside of the shrouds were modified so they would slide back over the entire project the 1/4". This included sanding the inside of the projector to fit around the sides, and then trimming the bottom of the shroud so it would fit around the mounting flange for the bi-xenon solenoid.
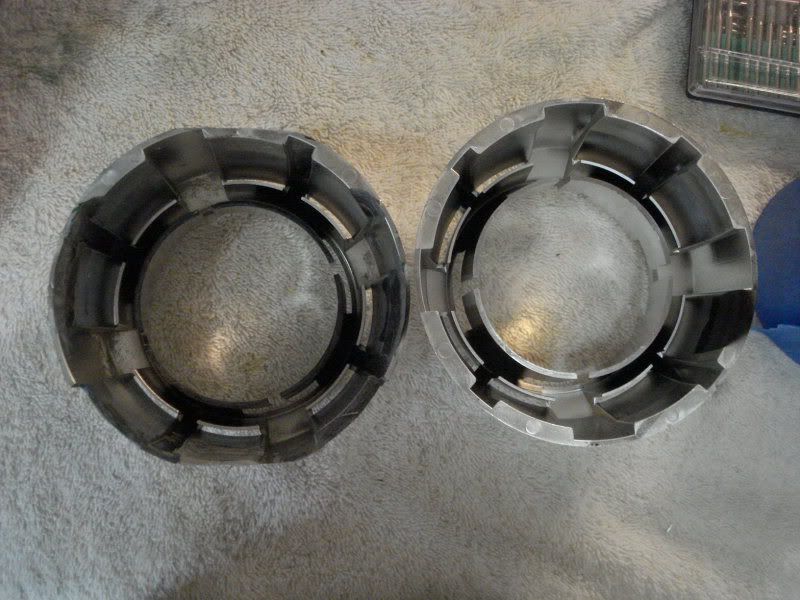
10. The top and bottom of the shroud then had a "flat" spot sanded at the 12 and 6 o'clock positions so they would clear the top and bottom of the headlight bucket. (sorry, no picture just yet).
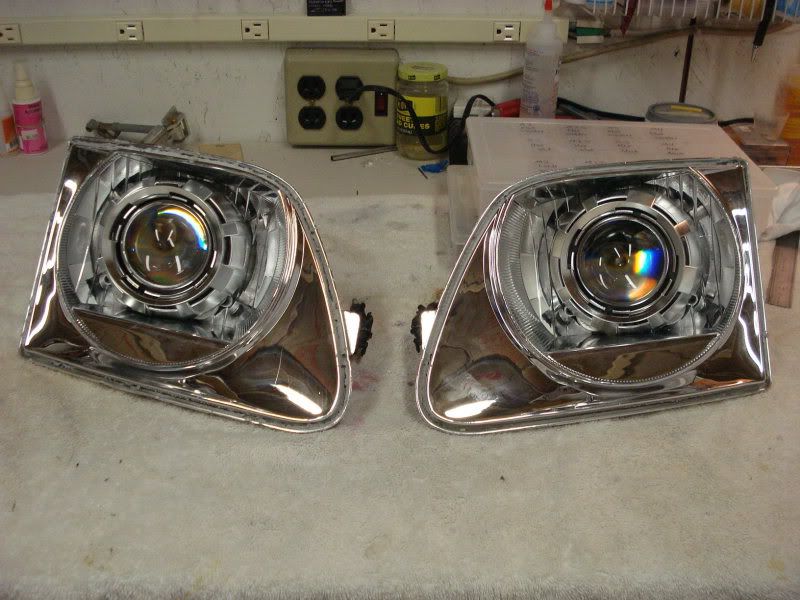
11. With all that done (took about 2 hours) the projector is ready to have its mounting holes drilled in the headlight, the projector mounted and the back of the bucket and projector sealed. Basically, this headlight is 90% complete.
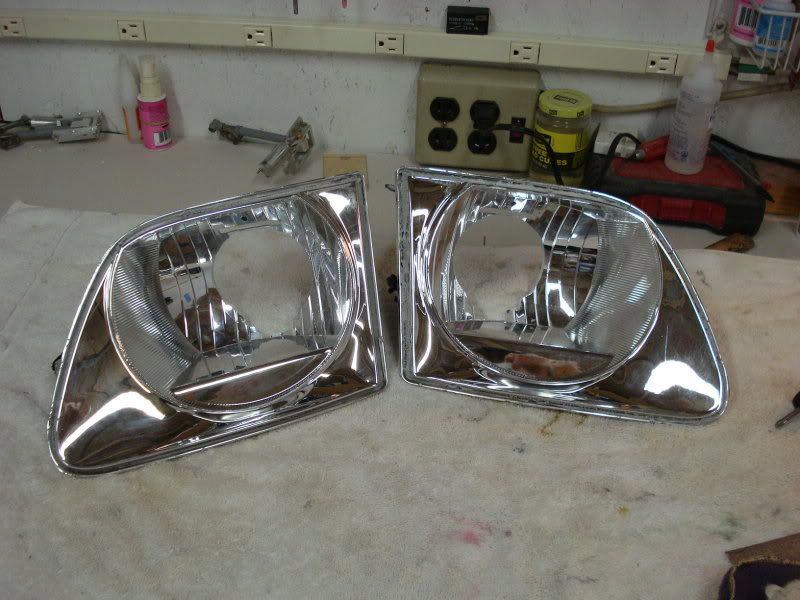
So, here's what the before and after looks like:

12. repeat the Above for the other headlight bucket.. when done, this is what you'll get:
13. With both buckets done, take the projector, put it in position and drill the 4 mounting holes. The lower outside mounting bolt will have to be TAPPED as one of the headlight mounting stand-off's is in the way. I personally used 4mm x 30mm bolts. After drilling the holes, remove the projector, clean the headlight bucket. You may have to remove the back part of the projector as well, as plastic junk got inside mine, so i had to clean it out. So to keep from having to do this to Both projectors, use the same projector to drill the holes in both headlight buckets, then clean the inside of the projector out. When done, you'll have something like this:
14. Now using your hardware, put a bolt w/ a washer through the projector and headlight housing. Then use another washer and lock-nut on the backside. Do this for the top 2 and bottom inside bolt. As mentioned earlier, the bottom outside bolt (looking at the front of the headlight) will have to be tapped. when installing that bolt and washer, use a drop of CA glue to act as lock-tite for the bolt.
15. Now its time to mount your shrouds. Some guys use JB weld, some use silicon.. No real consensus, just personal preference. I've been researching this alot over the past year, and it seems some guys had issues with the JB weld cracking due to the heat and vibrations.. So my choice.. Clear silicon... Sooo.. what i did, was put 3 big Dollops on the inside of the shrouds where the material was removed for it to fit over the projectors. Then the shrouds were pushed in-place on the projector.
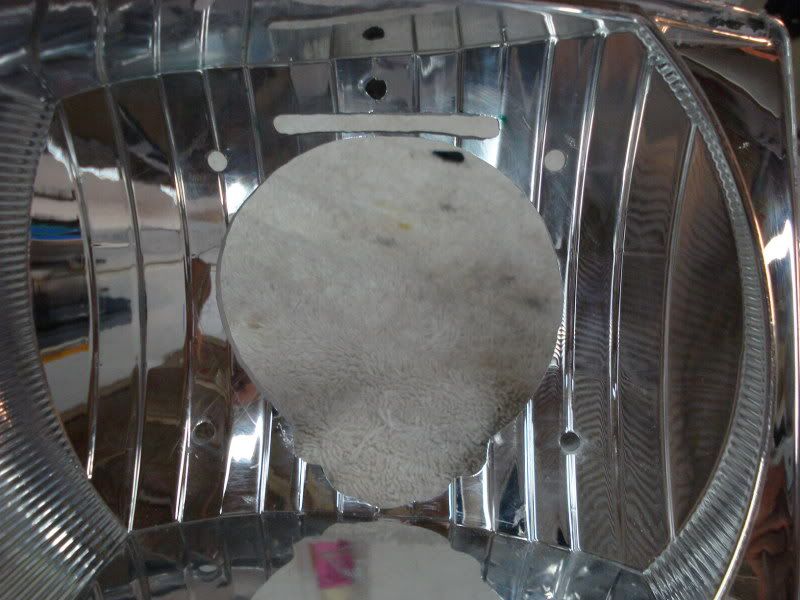
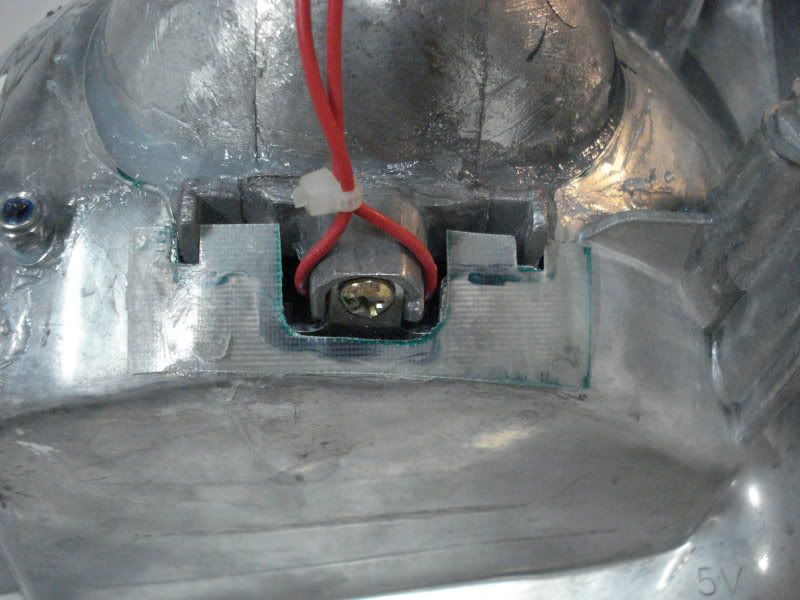
16. In regards to sealing the headlight, i have seen alot of DIY retrofits where the entire back of the headlight was hacked up and never sealed. I personally was not going to do that, hence the reason for having the projector fit into the headlight bucket very closely. So first thing first, was to fabricate some plates to fill in the area around the headlight bucket and the hi-beam solenoid. Using some stuff i use on my RC jets, I took a piece of .015" poly-ply (G-10 fiberglass sheet). I then cut and trimmed the sheet to fit around the solenoid.
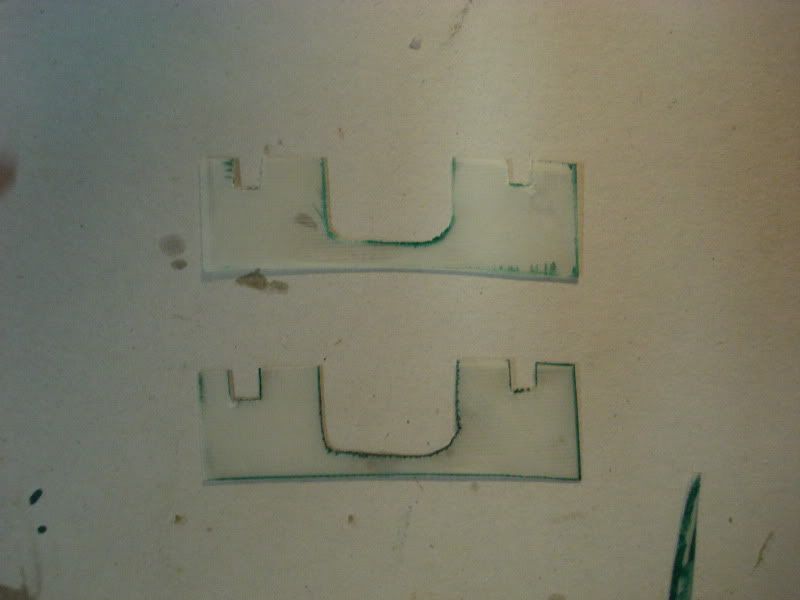
17. I then CA glued the G-10 panel to the headlight bucket.
Direct link to next post w/ "work" in it:
https://www.f150online.com/forums/4311745-post23.html
Anyways, Back to the work.
Tools needed:
Dremel tool or other rotary tool.
Fiber-cut off wheel
1/2" Sanding drum
1/4" sanding drum
1/8" or 3/16" rotary file
Flat "miniature" hand file
Clear silicon
Shop Vac (sanding the buckets is DUSTY!)
8- 4mm x 30mm socket head bolts
6- 4mm lock nuts
14- 4mm flat washers
4mm tap and drill bit
#10 drill bit
Power drill
some other stuff to install the ballasts and wiring harness... will update when i figure it all out.
Here's a photo of all the "stuff" included in the kit. 2- FX-R projectors w/ pigtails for the bi-xenon part of the cut-off sheild. 2- ballasts w/ mounts (i got the 20" long pigtail ones), 2- shrouds, 2- 4300K bulbs, and a wiring harness.
And on with the steps...
1. Pre-heat the oven to 260 degrees. Remove the bulbs, bulb holders, etc. Once pre-heated stick your headlight on a cooking sheet (covered with aluminum foil) into the oven with it centered between the 2 heating elements.
2. Set the timer for 8 minutes (I originally tried, 6 and it wasn't long enough). And cookie sheet and headlight in the oven.
3. Pull the headlight out and using a flat-headed screw driver pry the clear lense off of the headlight bucket.
4. Do the same thing for the other headlight. When done, you should have something that looks like this:
5. Now remove the 2 halogen bulb reflectors from the headlight buckets. these Were screwed in on this particular L headlight set, so yours may differ.
[IMG]http://img.photobucket.com/albums/v433/Flamed04R6/F150%20HID%20retrofit
/DSC01983.jpg[/IMG]
6. Now put the projector inside the headlight bucket with the bulb mounting area's inline with each other. This will tell you where you need to trim the bucket for the projector housing to stick out the back. My initial trim line was just bit enough for the bulb socket of the projector to fit through. Once the bucket was cutout to that trim line, you'll end up with something like this:
7. Now just keep adjusting the headlight bucket until the projector fits in the headlight housing. It took about an hour of trimming in small increments to get the entire projector to fit exactly how i wanted to.
You'll see in the above pictures that their is a flange along the top of the projector that fits through a slot in the headlight bucket. the reason for this slot, and not just removing the flange, was so that the entire projector would be supported by the headlight bucket instead of by the 4 mounting bolts. The way it is now, the mounting lugs on the projector butt up against the inside of the headlight bucket, so the mounting bolts will be very very short.
8. After test fitting the shrouds over the projectors, it was found that they were about 1/4" to long which was keeping the headlight lense from fitting (figures). Sooo to fix this, the inside of the shroud (the part that butts up against the projector glass mount) was trimmed .250" shorted. Hopefully you will be able to see that in this next picture.
9. Then the Inside of the shrouds were modified so they would slide back over the entire project the 1/4". This included sanding the inside of the projector to fit around the sides, and then trimming the bottom of the shroud so it would fit around the mounting flange for the bi-xenon solenoid.
10. The top and bottom of the shroud then had a "flat" spot sanded at the 12 and 6 o'clock positions so they would clear the top and bottom of the headlight bucket. (sorry, no picture just yet).
11. With all that done (took about 2 hours) the projector is ready to have its mounting holes drilled in the headlight, the projector mounted and the back of the bucket and projector sealed. Basically, this headlight is 90% complete.
So, here's what the before and after looks like:
12. repeat the Above for the other headlight bucket.. when done, this is what you'll get:
13. With both buckets done, take the projector, put it in position and drill the 4 mounting holes. The lower outside mounting bolt will have to be TAPPED as one of the headlight mounting stand-off's is in the way. I personally used 4mm x 30mm bolts. After drilling the holes, remove the projector, clean the headlight bucket. You may have to remove the back part of the projector as well, as plastic junk got inside mine, so i had to clean it out. So to keep from having to do this to Both projectors, use the same projector to drill the holes in both headlight buckets, then clean the inside of the projector out. When done, you'll have something like this:
14. Now using your hardware, put a bolt w/ a washer through the projector and headlight housing. Then use another washer and lock-nut on the backside. Do this for the top 2 and bottom inside bolt. As mentioned earlier, the bottom outside bolt (looking at the front of the headlight) will have to be tapped. when installing that bolt and washer, use a drop of CA glue to act as lock-tite for the bolt.
15. Now its time to mount your shrouds. Some guys use JB weld, some use silicon.. No real consensus, just personal preference. I've been researching this alot over the past year, and it seems some guys had issues with the JB weld cracking due to the heat and vibrations.. So my choice.. Clear silicon... Sooo.. what i did, was put 3 big Dollops on the inside of the shrouds where the material was removed for it to fit over the projectors. Then the shrouds were pushed in-place on the projector.
16. In regards to sealing the headlight, i have seen alot of DIY retrofits where the entire back of the headlight was hacked up and never sealed. I personally was not going to do that, hence the reason for having the projector fit into the headlight bucket very closely. So first thing first, was to fabricate some plates to fill in the area around the headlight bucket and the hi-beam solenoid. Using some stuff i use on my RC jets, I took a piece of .015" poly-ply (G-10 fiberglass sheet). I then cut and trimmed the sheet to fit around the solenoid.
17. I then CA glued the G-10 panel to the headlight bucket.
Direct link to next post w/ "work" in it:
https://www.f150online.com/forums/4311745-post23.html
Last edited by Thomas_W; 08-16-2010 at 09:24 PM. Reason: Added content

#20
08-16-2010, 07:29 PM
Join Date: Jul 2007
Location: North Port, FL
Posts: 175
Likes: 0
Received 0 Likes
on
0 Posts
#21
08-16-2010, 07:56 PM

Senior Member
Join Date: Mar 2008
Location: Mesquite
Posts: 2,077
Likes: 0
Received 0 Likes
on
0 Posts
How are you attaching them to the housing? Are you sealing the back where they come together? What did you cut the hole with? Dremel tool? Are you leaving them chrome, black, or ptm?
Looks good!
Nevermind, missed all the text the first time through. lmao!! Good work!
Looks good!
Nevermind, missed all the text the first time through. lmao!! Good work!
Last edited by Blue150; 08-16-2010 at 08:01 PM.
#22
08-16-2010, 08:58 PM
Join Date: Jul 2007
Location: North Port, FL
Posts: 175
Likes: 0
Received 0 Likes
on
0 Posts
#23
08-16-2010, 09:17 PM
Join Date: Jul 2007
Location: North Port, FL
Posts: 175
Likes: 0
Received 0 Likes
on
0 Posts
18. Then i took the clear Kitchen/bathroom silicon and put it around all of the open areas between the headlight bucket and projector. I also used a popsickle stick to put the silicon around the projector mounting bolts.
Now the headlights are essentially DONE except for re-installing the lenses which i will do first thing tomorrow. Then i'll start installing them into the truck
Projectors completely installed:

19. Now that the headlights have set over-night and allowed the silicon to cure. Pre-heat the oven to 260* again. Place the headlight in the oven with the lenses in place. Set the timer for 6 minutes. Once the timer has gone off, pull the headlight out, push the lense in all the way and take some silicon cushion clamps to hold the lense in place. Do the same for the other headlight.
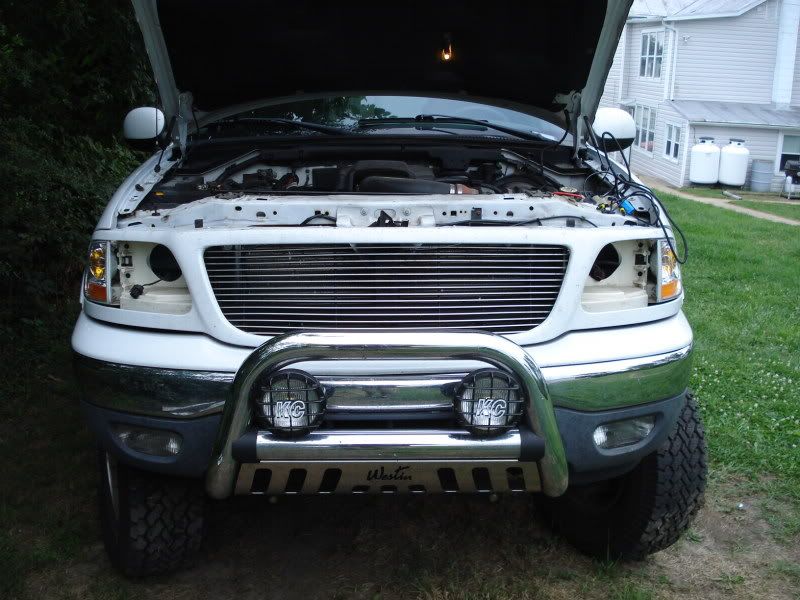
20. Now while the headlight and lenses cool off, go outside and remove your stock headlights, corner lights and the plastic radiator shroud.

21. With all that removed, take the included wiring harness and lay it out on the radiator support to get an idea of how you are going to route the wiring harness. I put the relay on the passenger side, with the long wire routed to the driver side on the front side of the radiator support.
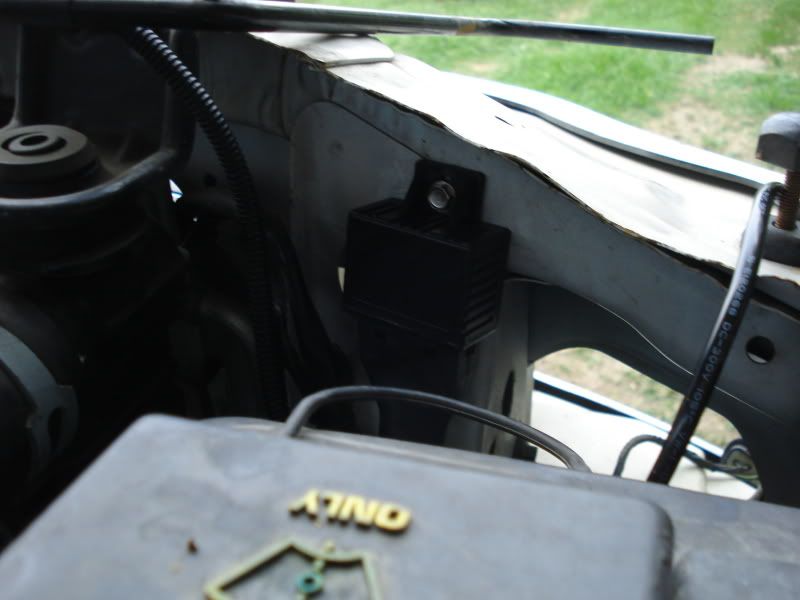
22. Now that you have all that figured out, first thing to do is find a good place to mount the HID relay. I mounted on mine on the vertical steel structure between the radiator, and where the headlight bulb hole is.
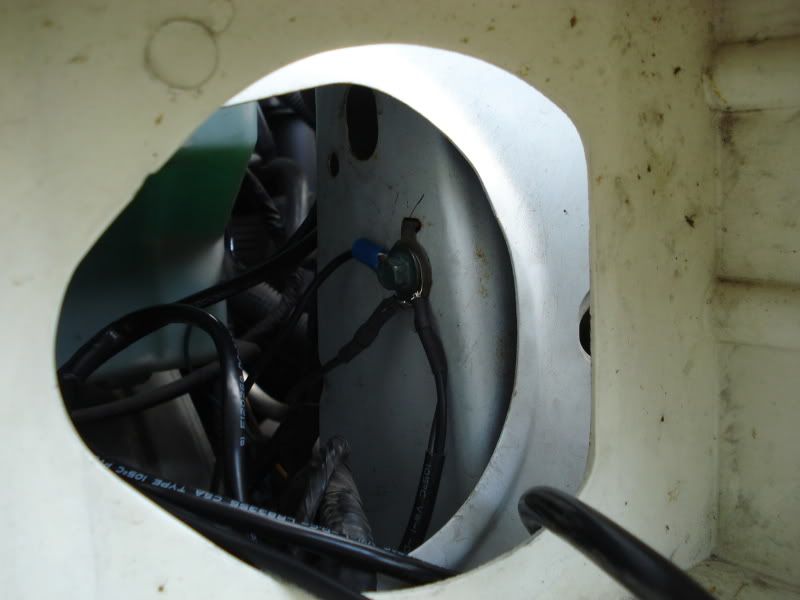
23. Then take the Ground wire from the short HID ballast harness from the relay and attach it to a ground point. The ground point i used was right at the headlight opening in the body. One thing i learned long ago, is it is best to use a factory ground point as it eliminates alot of issues.
24. With the wire to the driver side securely mounted, take the ground wire on that side and attach it to the ground point on that side of the truck. Again, i used the ground point behind the headlight.

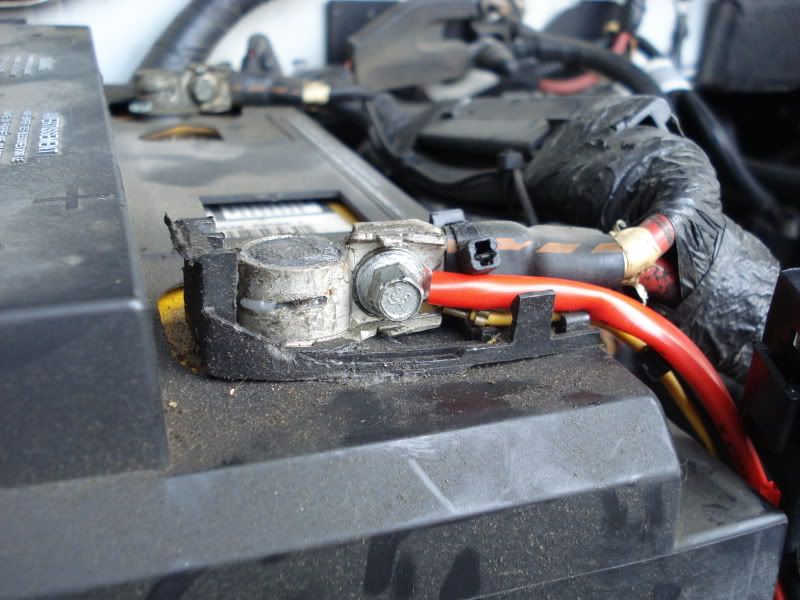
25. Now with both ground wires attach, remove the fuse from the fuse holder and attach the positive wire to the battery terminal. To do this, i adjusted the tab on the battery clamp so the clamp bolt could be removed completely. I then put the positive battery lead on the bolt and re-installed the bolt to the terminal and tightened it back now. The fuse can then be re-installed. I also folded the wires back over themselves, so the fuse holder is right beside the battery.
26. Now you can mount your ballasts. I got the ballasts with the 20" leads and its a good thing i did. Their aren't alot of places to put the ballasts that will still reach the main wiring harness. I ended up mounting the ballasts vertically on the sides of the grill support infront of the radiator support. Connect the power connector from the ballast to the main wiring harness, and route the bulb connector through the hole in the headlight support. Pictures work better than words here.


27. Now to get the headlights into the truck, a little bit of trimming was needed on the headlight mounting panels. Basically this involved trimming the outside edges of the headlight support so the reflector would clear. This is what the support looked like after the trimming, about a 1/4" of material was removed all together.


28. Now remove the bulbs from their shipping container, clean them with the included alcohol swabs and install them into the reflectors. the holder clips are pretty difficult to get in their hook slots, so just go easy with them.

29. Now hook up the small 2 wire connector from the solenoid to the main HID harness, and then install the bulb connector to the bulb. Now you can install the headlights into the truck. And then re-install the corner lights and the plastic radiator support cover.
you are now DONE and if everything worked correctly, your headlights SHOULD work. Well, mine work 99% I only say that b/c for some odd reason, my Hi-beams are the Low-beams and the Low-beams are the High-beams... I think they may have wired the 9007 headlight connector incorrectly, but not sure and its just a minor inconvenience, so i'll take a look at the wiring diagram and see what it says.
here's some shots of the finished headlights installed:
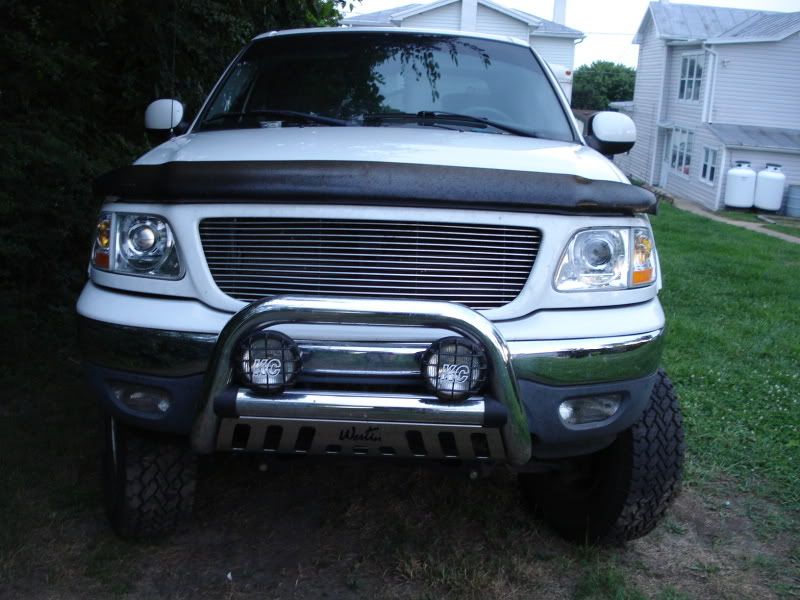
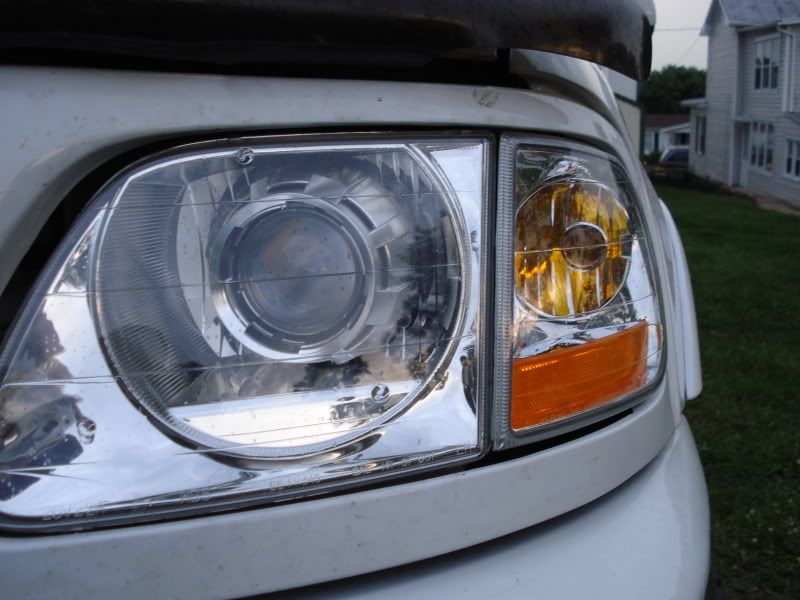
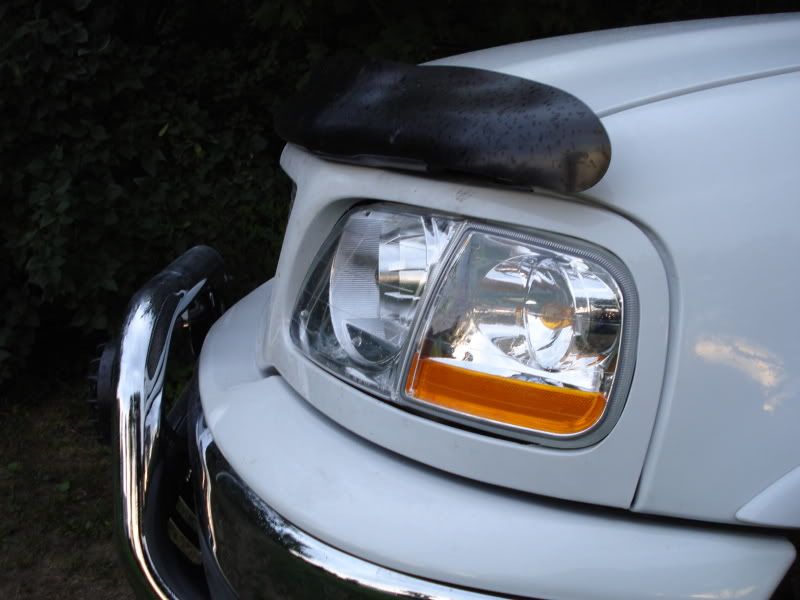
Daylight shots of the lights on:
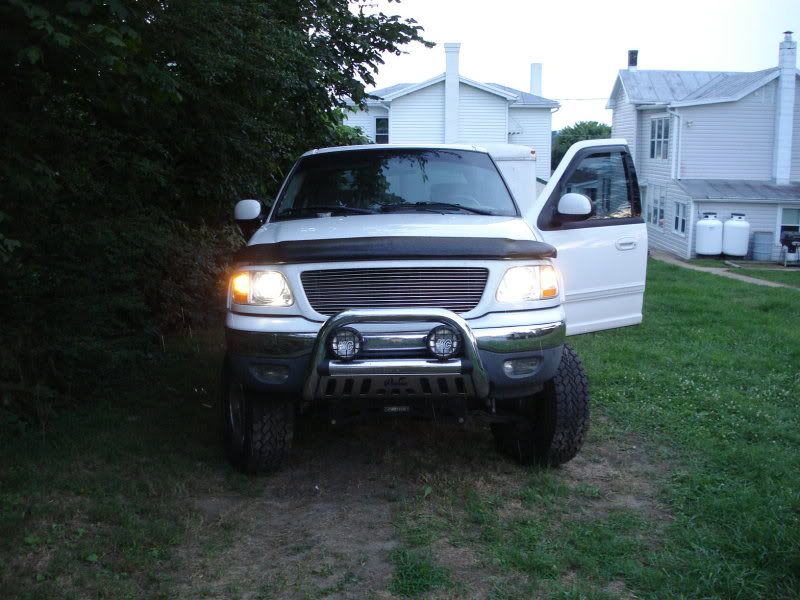
Low-beams:
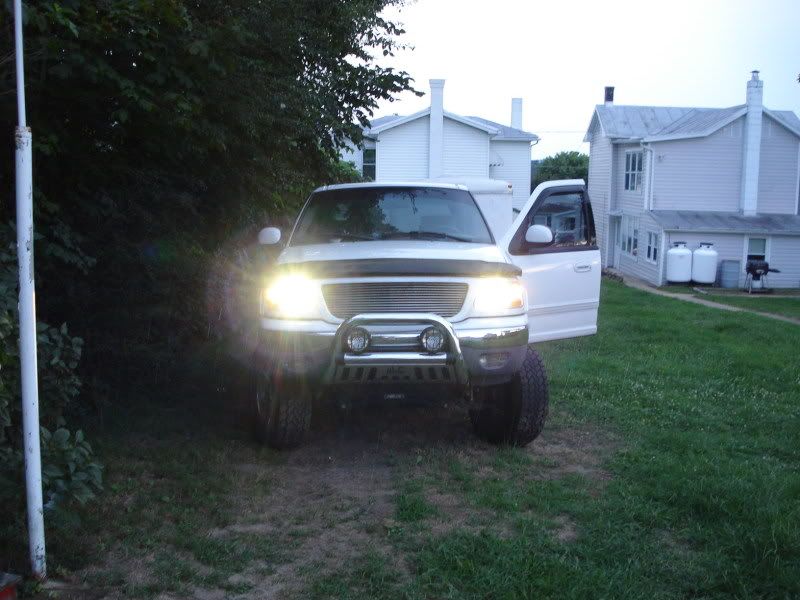
High-beams:
Over-all time for the entire retrofit and install is 7 hours. Even during 7:30pm daylight/twi-light, the HID's illuminate my garage that was 50 Feet away enough to where you barely see the cut-off line on the wall. I'll get some better pictures of the headlights on here in an hour or so and post up with the before shots of the headlights with the silver-stars in the factory headlights.
Now the headlights are essentially DONE except for re-installing the lenses which i will do first thing tomorrow. Then i'll start installing them into the truck
Projectors completely installed:
19. Now that the headlights have set over-night and allowed the silicon to cure. Pre-heat the oven to 260* again. Place the headlight in the oven with the lenses in place. Set the timer for 6 minutes. Once the timer has gone off, pull the headlight out, push the lense in all the way and take some silicon cushion clamps to hold the lense in place. Do the same for the other headlight.
20. Now while the headlight and lenses cool off, go outside and remove your stock headlights, corner lights and the plastic radiator shroud.
21. With all that removed, take the included wiring harness and lay it out on the radiator support to get an idea of how you are going to route the wiring harness. I put the relay on the passenger side, with the long wire routed to the driver side on the front side of the radiator support.
22. Now that you have all that figured out, first thing to do is find a good place to mount the HID relay. I mounted on mine on the vertical steel structure between the radiator, and where the headlight bulb hole is.
23. Then take the Ground wire from the short HID ballast harness from the relay and attach it to a ground point. The ground point i used was right at the headlight opening in the body. One thing i learned long ago, is it is best to use a factory ground point as it eliminates alot of issues.
24. With the wire to the driver side securely mounted, take the ground wire on that side and attach it to the ground point on that side of the truck. Again, i used the ground point behind the headlight.
25. Now with both ground wires attach, remove the fuse from the fuse holder and attach the positive wire to the battery terminal. To do this, i adjusted the tab on the battery clamp so the clamp bolt could be removed completely. I then put the positive battery lead on the bolt and re-installed the bolt to the terminal and tightened it back now. The fuse can then be re-installed. I also folded the wires back over themselves, so the fuse holder is right beside the battery.
26. Now you can mount your ballasts. I got the ballasts with the 20" leads and its a good thing i did. Their aren't alot of places to put the ballasts that will still reach the main wiring harness. I ended up mounting the ballasts vertically on the sides of the grill support infront of the radiator support. Connect the power connector from the ballast to the main wiring harness, and route the bulb connector through the hole in the headlight support. Pictures work better than words here.
27. Now to get the headlights into the truck, a little bit of trimming was needed on the headlight mounting panels. Basically this involved trimming the outside edges of the headlight support so the reflector would clear. This is what the support looked like after the trimming, about a 1/4" of material was removed all together.
28. Now remove the bulbs from their shipping container, clean them with the included alcohol swabs and install them into the reflectors. the holder clips are pretty difficult to get in their hook slots, so just go easy with them.
29. Now hook up the small 2 wire connector from the solenoid to the main HID harness, and then install the bulb connector to the bulb. Now you can install the headlights into the truck. And then re-install the corner lights and the plastic radiator support cover.
you are now DONE and if everything worked correctly, your headlights SHOULD work. Well, mine work 99% I only say that b/c for some odd reason, my Hi-beams are the Low-beams and the Low-beams are the High-beams... I think they may have wired the 9007 headlight connector incorrectly, but not sure and its just a minor inconvenience, so i'll take a look at the wiring diagram and see what it says.
here's some shots of the finished headlights installed:
Daylight shots of the lights on:
Low-beams:
High-beams:
Over-all time for the entire retrofit and install is 7 hours. Even during 7:30pm daylight/twi-light, the HID's illuminate my garage that was 50 Feet away enough to where you barely see the cut-off line on the wall. I'll get some better pictures of the headlights on here in an hour or so and post up with the before shots of the headlights with the silver-stars in the factory headlights.
Last edited by Thomas_W; 08-17-2010 at 08:08 PM. Reason: Added content
#24
08-16-2010, 09:27 PM

Senior Member
Join Date: Jul 2004
Location: New Orleans,La
Posts: 194
Likes: 0
Received 0 Likes
on
0 Posts
#25
08-16-2010, 09:31 PM
Join Date: Jul 2007
Location: North Port, FL
Posts: 175
Likes: 0
Received 0 Likes
on
0 Posts
Yeaa.. not to bad for about 4 1/2 hours of work so far
 I might have to start offering retrofit services to bring in some spare case I do know the wife's car is getting done next, especially if the light-output is as nice as i hope its going to be


#27
08-16-2010, 10:07 PM

#28
08-16-2010, 11:04 PM

Senior Member
#29
08-16-2010, 11:15 PM

#30
08-16-2010, 11:16 PM
Join Date: Jul 2007
Location: North Port, FL
Posts: 175
Likes: 0
Received 0 Likes
on
0 Posts