
Spark Plug Change on 2004-Early 2008 5.4 3V


Thread Starter
|
Technical Article Contributor
Joined: Aug 2007
Posts: 101
Likes: 0
From: Centex
Spark Plug Change on 2004-Early 2008 5.4 3V
Bear with me, as I try to describe my exprerience with the plug change. I am not a professional, or claim to be, this is just how I did it, and it worked.
Here we go. 1st, I own a 2004 F-150 Screw Lariat 5.4l 3V. I have 108,000 miles on the truck. I knew that it was time to do the dreaded plug change after hitting 100k. So I researched online, mostly here on this site for probably 3 weeks straight before getting the courage to jump into this project.
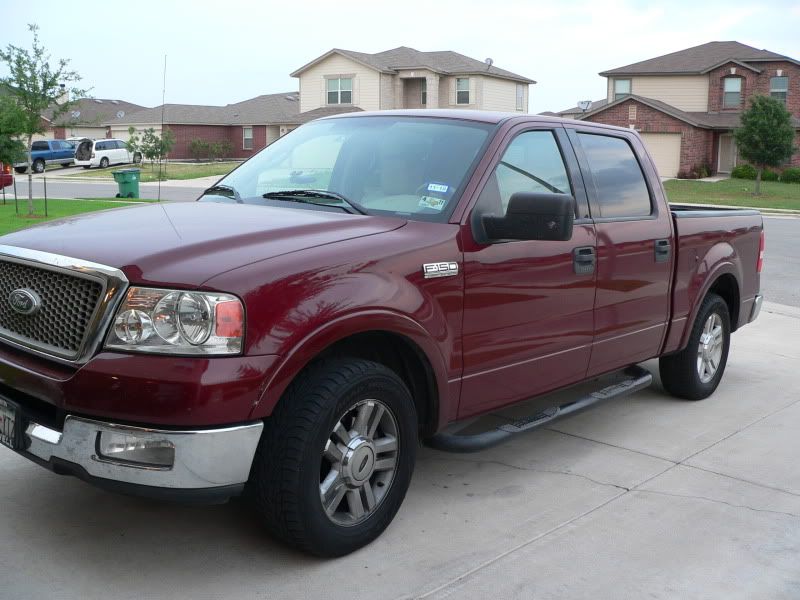
This is the truck
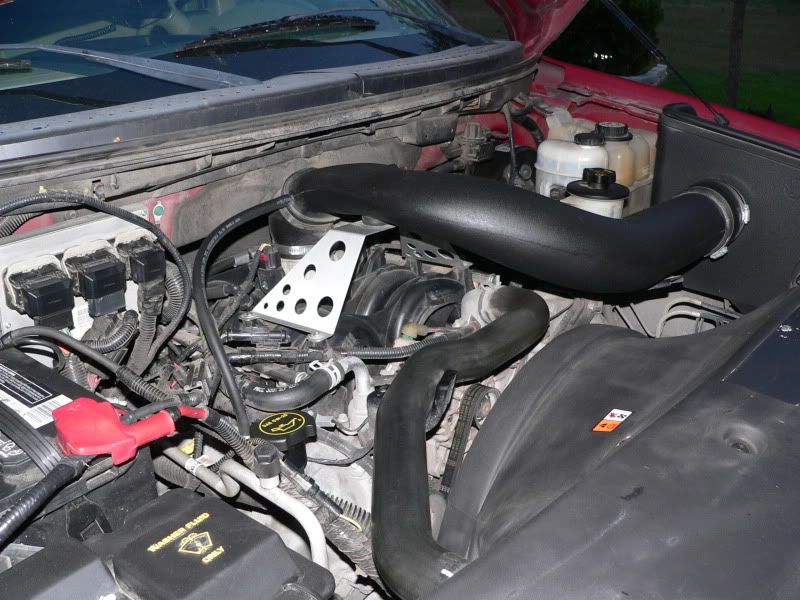
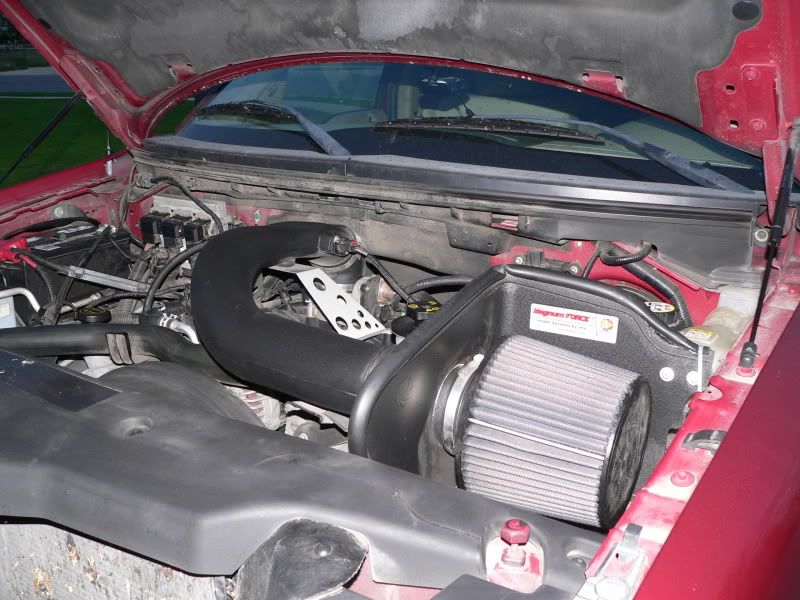
Here is my engine bay. I did have to remove the computer and it's mounting plate to reach the plug on the passenger side near the firewall.
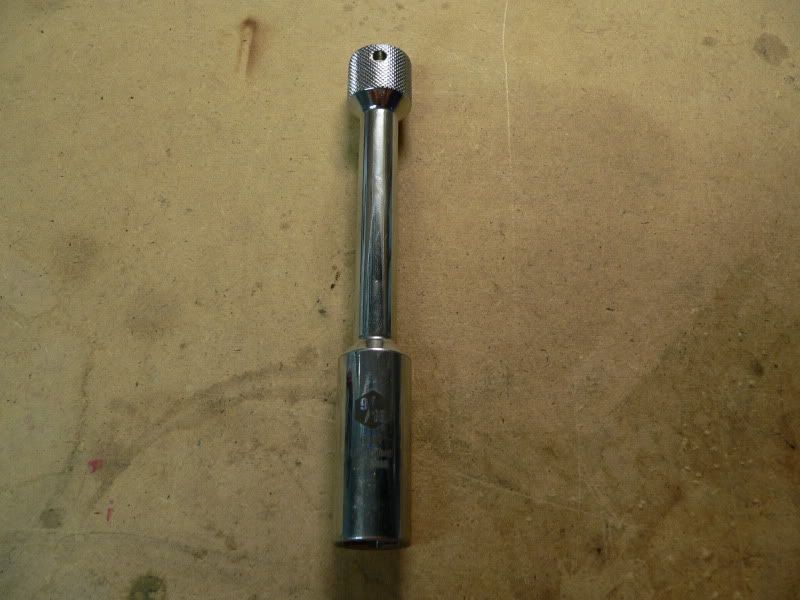
I purchased this tool online. This is the 9/16 plug socket with rubber grip inside. I do believe that this tool is absolutely needed to even start the job, rather than a standard 9/16 socket. I had to use one universal swivel (on top of plug socket) and 12 inches of extensions to reach both passenger and driver side plugs at the firewall.
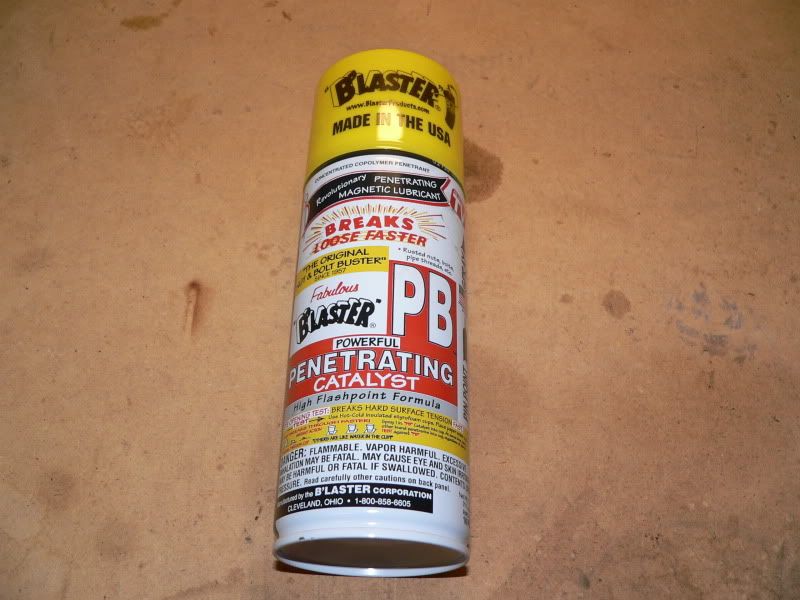
I read all the tsb reports, in fact the tsb changed I believe during my research because the 1st one that I read said to use Kroil, and the new released tsb said to use some sort of carb cleaner. Anyways, I had ordered Kroil penetrating oil from an online company along with the recommended antisieze, and they did not make it in time. The antisieze was put on backorder so nothing came. I had read about some other penetrating oils, and PB Blaster kept coming up in conversations with various forums posts. So I went to Autozone, picked up some of this penetrating oil and some qualified antisieze.
I did get the motor to where it was warm to the touch, not hot, and proceeded to pull all the COP's, and break the original plugs about 1/4 turn out. I used the PB Blaster and filled the plug well just to the top of the 9/16 nut, and let the blaster work overnight. I figured, if I am going to break any plugs, it is going to happen whether the engine is warm or not.
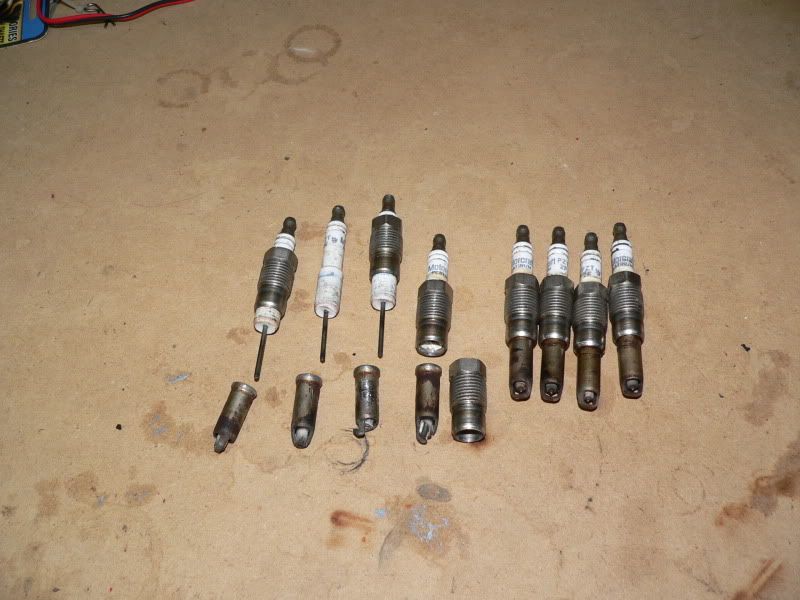
Well I broke 4 of the plugs. I started on the passenger side near the front and worked my way back to the firewall and the same for the drivers side. Passenger side, 1st plug broke. I tell you what, when that happened, it was 7:30 a.m. on this past Saturday, I seriously started to tell myself, "this is the first plug out of eight, and it broke, what am I in for. Should I have taken this to the dealer and let them handle this?" Well I decided, that I have to atleast try one more. So I did. Believe it or not, the other three came out perfect, and they did make some serious noise on the way out. In fact, I figured out that the plugs that did not make noise were the ones that had broken on the way out. Drivers side plugs, first one closest to the front broke, 2nd came out fine, and the back two broke.
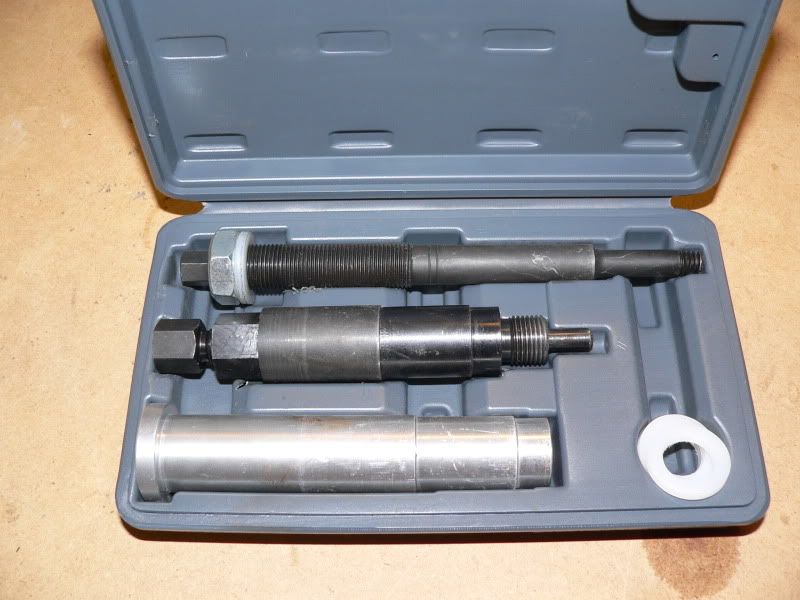
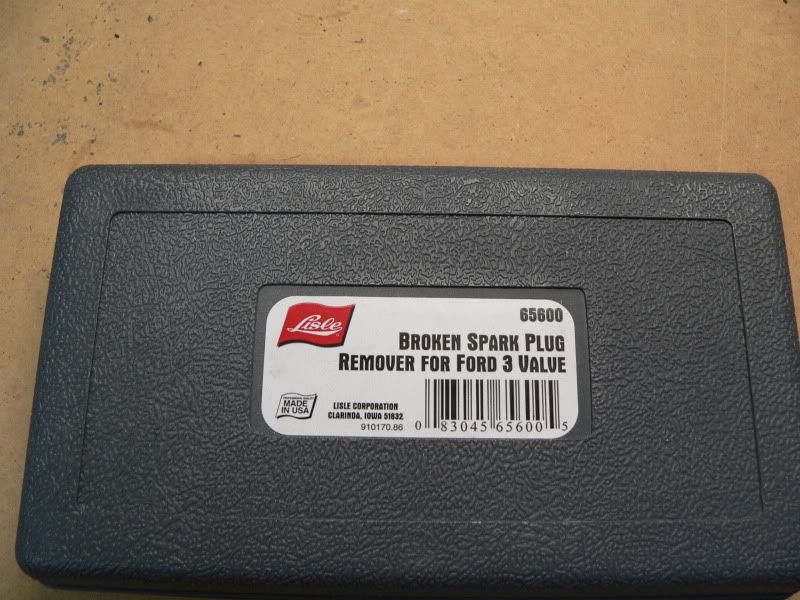
Here is the Lisle plug removal tool. It arrived Thursday, late in the evening. This is the only part of the job, if it had not arrived I would not have started this project. This tool was a lifesaver. The directions were easy to follow. I only had one problem with the tool. Once I got the first broken plug tip out from the head, I could not get the broken piece off the tool. I had a really crappy set of vise grips, they did not work worth a darn. I did have to buy a descent set of vise grips, and I used a 7/16 open end box wrench to get the broken tip off the extractor tool.
Some of the other tools used that I do not have pics of, are:
Air compressor with an air gun that had a telescoping tip
I had to buy a set of long reach needle nose pliers.
Extendable magnet (.250 tip)
Extendable mirror with flashlight
Once I finished the plug change and assembled the computer back together, I proceeded to fire the motor up, and check for anything out of the norm. Everythng seemed to be fine. What a big relief that was. Total time to do the job took me 8 hrs. It really did feel good though to tackle something like this, that almost has like a legacy around it. Anyways I got to know my truck alot more and that was pretty much one of the reasons I did it myself, well that and the fact the dealer wanted to rape me.
I spent around $220 for parts and removal tool, to do this job.
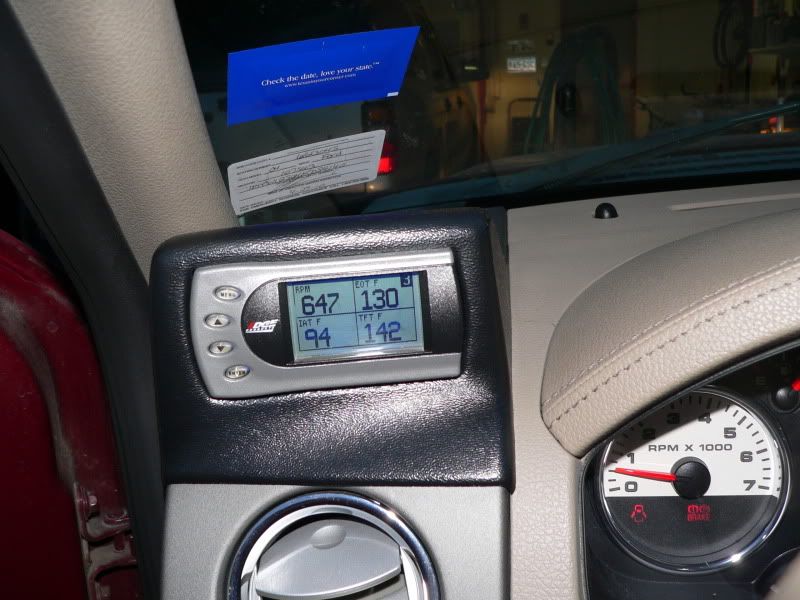
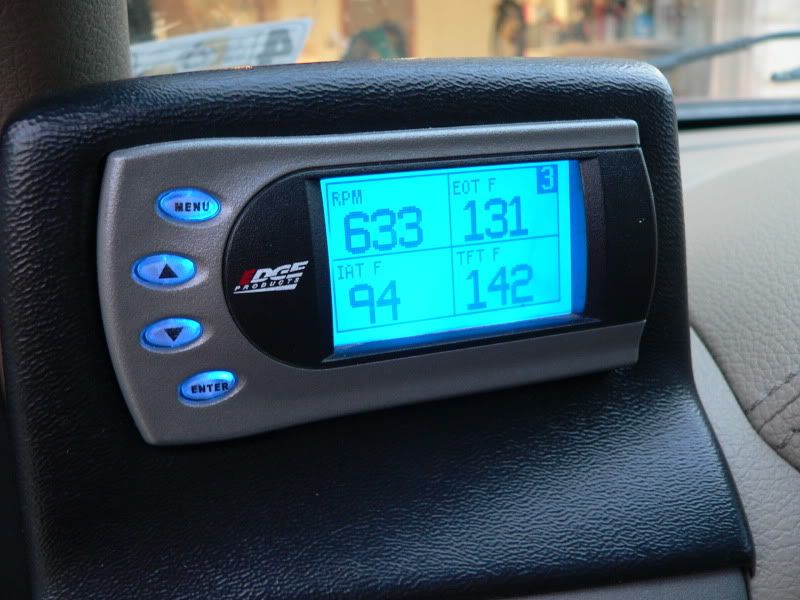
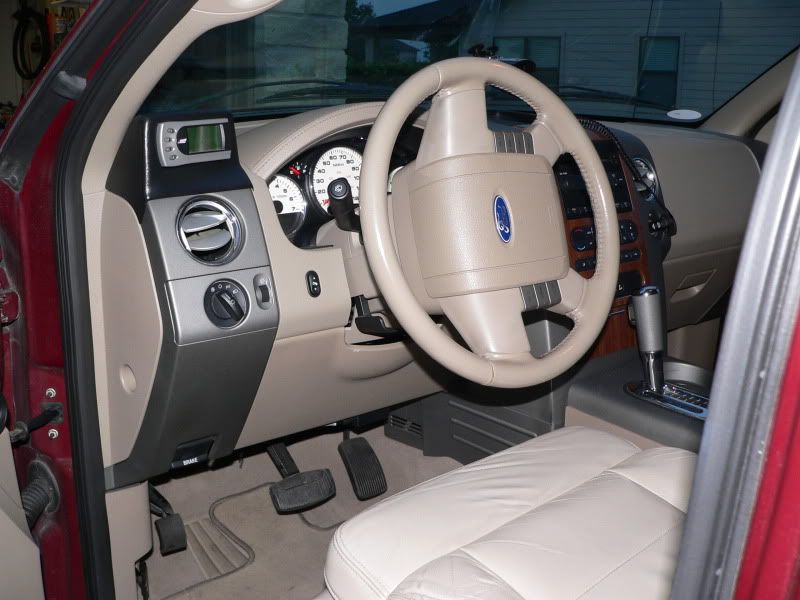
Here are some more pics of the truck.
Current mods:
AFE CAI
Edge Evolution- Stage 3 setup
3" Catback Exhaust- Flowmaster 50 Series (si-so) Dumped
2" Drop Shackles
Mods I want to do but don't have the money (yet)
E-fans
4.10's in the rear
Underdrive Pulleys
3/5 Drop with 20's
Here we go. 1st, I own a 2004 F-150 Screw Lariat 5.4l 3V. I have 108,000 miles on the truck. I knew that it was time to do the dreaded plug change after hitting 100k. So I researched online, mostly here on this site for probably 3 weeks straight before getting the courage to jump into this project.
This is the truck
Here is my engine bay. I did have to remove the computer and it's mounting plate to reach the plug on the passenger side near the firewall.
I purchased this tool online. This is the 9/16 plug socket with rubber grip inside. I do believe that this tool is absolutely needed to even start the job, rather than a standard 9/16 socket. I had to use one universal swivel (on top of plug socket) and 12 inches of extensions to reach both passenger and driver side plugs at the firewall.
I read all the tsb reports, in fact the tsb changed I believe during my research because the 1st one that I read said to use Kroil, and the new released tsb said to use some sort of carb cleaner. Anyways, I had ordered Kroil penetrating oil from an online company along with the recommended antisieze, and they did not make it in time. The antisieze was put on backorder so nothing came. I had read about some other penetrating oils, and PB Blaster kept coming up in conversations with various forums posts. So I went to Autozone, picked up some of this penetrating oil and some qualified antisieze.
I did get the motor to where it was warm to the touch, not hot, and proceeded to pull all the COP's, and break the original plugs about 1/4 turn out. I used the PB Blaster and filled the plug well just to the top of the 9/16 nut, and let the blaster work overnight. I figured, if I am going to break any plugs, it is going to happen whether the engine is warm or not.
Well I broke 4 of the plugs. I started on the passenger side near the front and worked my way back to the firewall and the same for the drivers side. Passenger side, 1st plug broke. I tell you what, when that happened, it was 7:30 a.m. on this past Saturday, I seriously started to tell myself, "this is the first plug out of eight, and it broke, what am I in for. Should I have taken this to the dealer and let them handle this?" Well I decided, that I have to atleast try one more. So I did. Believe it or not, the other three came out perfect, and they did make some serious noise on the way out. In fact, I figured out that the plugs that did not make noise were the ones that had broken on the way out. Drivers side plugs, first one closest to the front broke, 2nd came out fine, and the back two broke.
Here is the Lisle plug removal tool. It arrived Thursday, late in the evening. This is the only part of the job, if it had not arrived I would not have started this project. This tool was a lifesaver. The directions were easy to follow. I only had one problem with the tool. Once I got the first broken plug tip out from the head, I could not get the broken piece off the tool. I had a really crappy set of vise grips, they did not work worth a darn. I did have to buy a descent set of vise grips, and I used a 7/16 open end box wrench to get the broken tip off the extractor tool.
Some of the other tools used that I do not have pics of, are:
Air compressor with an air gun that had a telescoping tip
I had to buy a set of long reach needle nose pliers.
Extendable magnet (.250 tip)
Extendable mirror with flashlight
Once I finished the plug change and assembled the computer back together, I proceeded to fire the motor up, and check for anything out of the norm. Everythng seemed to be fine. What a big relief that was. Total time to do the job took me 8 hrs. It really did feel good though to tackle something like this, that almost has like a legacy around it. Anyways I got to know my truck alot more and that was pretty much one of the reasons I did it myself, well that and the fact the dealer wanted to rape me.
I spent around $220 for parts and removal tool, to do this job.
Here are some more pics of the truck.
Current mods:
AFE CAI
Edge Evolution- Stage 3 setup
3" Catback Exhaust- Flowmaster 50 Series (si-so) Dumped
2" Drop Shackles
Mods I want to do but don't have the money (yet)
E-fans
4.10's in the rear
Underdrive Pulleys
3/5 Drop with 20's

Senior Member
Joined: Jul 2007
Posts: 3,291
Likes: 0
From: Beaverton Or.
Nice looking truck. Sounds like you did a pretty good job keeping things clean and doing it right.. even though it involves breaking plugs. You got it done. Did you put antisieze on the electrode? and not the threads..
Thread Starter
|
Technical Article Contributor
Joined: Aug 2007
Posts: 101
Likes: 0
From: Centex
I did put antisieze on the electrode and not the threads, and a very light coat at that. I just made sure that all plugs had a nice thin layer, and made sure that I did not get any on the bottom (the basket handle), installed the new plugs (Autolite HT15) and snugged them up in the head.
Thank you for the comments. I just thought that I could get my experience out there and maybe help someone else. This site totally rocks.
Thank you for the comments. I just thought that I could get my experience out there and maybe help someone else. This site totally rocks.
Senior Member
Joined: Jul 2007
Posts: 3,291
Likes: 0
From: Beaverton Or.
Because thanks to this site, helps guys like this with the confidence to step up to the plug plate make it look easy. A first timer at that, he researched for 3 weeks, ordered the parts needed and completed the job. The dealer is going to break just as many plugs as you would anyways, and then charge you for it. Sounds worth the experience to me. Hell, I almost want to try a set and I don't even own a 3v, just so I can say I did.
Maxwell, I forgot to ask. Any reason you didn't use the single piece plug? Or are people even still using them.

Maxwell, I forgot to ask. Any reason you didn't use the single piece plug? Or are people even still using them.
Global Moderator &
Senior Member
Senior Member

Joined: Mar 2005
Posts: 26,080
Likes: 85
From: Burleson/Athens/Brownsboro, TX
Just a note. It may have made a difference or might not have, but the newer TSB does say use Ford carb cleaner. A carb cleaner is specifically designed to dissolve cabon and that is what is on the shank of the plug, that causes the breakage. PB Blaster may do that as well or it may be for corrosion, I just do not know.
__________________
Jim
Jim

Member
Joined: Sep 2008
Posts: 14
Likes: 0
From: MICHIGAN
Maxwell881,
- Nice work... And congratulations on getting it done..
- I have talked with many Ford Techs about this... And it is no easy task for sure.
- Good hear it is feasible to do.. Especially for the folks who prefer to do all the work themselves.
- Most I talk to about the dreaded plug change seem to thing the cause is that they are so far in the head, the amount of time they are in there, as well as carbon build-up around the plug.
- Did you happen to notice the build-up at all ??
- Some technicians I have talked with have had good results using the 3 step BG fuel service which dealers commonly do.
- That involves running BG cleaner through the fuel rails, the throttle body, and finally the additive for the gas tank.
- The running of the cleaner through the fuel rail is probably what is blasting the carbon off helping the chances of not breaking a plug.
- Having a 2008 F-150 with the 3V 5.4L I am toying with the idea of taking my plugs out early to hopefully avoid this problem.
- Curious if you noticed that specifically on the plugs that broke.
Last edited by 08-FX4; May 14, 2010 at 09:26 PM. Reason: SPELLING ERROR !!!
Thread Starter
|
Technical Article Contributor
Joined: Aug 2007
Posts: 101
Likes: 0
From: Centex
The reason I avoided the one piece plug was just a personal reason. If I am not mistaken I think that Champion makes a single piece plug, and to be honest with you, I only use Champion plugs in my lawnmower. I have always thought of them in that respect. They make great stuff for the home and garden applications, but I have always used Autolite in my vehicles and have had great success, and I did not see any reason to sway away from that opinion.
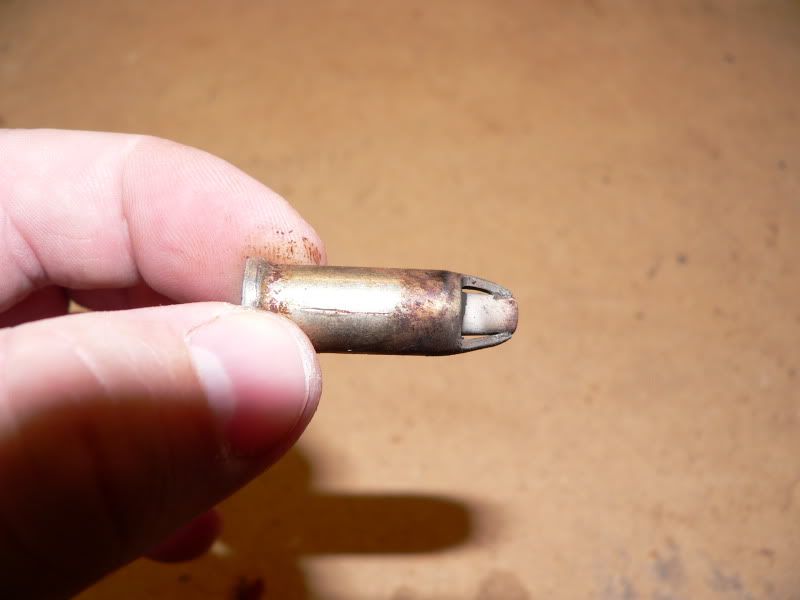
To answer 08-FX4 regarding my plugs and the amount of carbon on the electrode. I did see carbon build up, but not like I thought it was going to be. I guess I thought that the carbon build up was going to make the entire electrode black in color and I did not see that. What I saw was spots of carbon build up and actually I thought the electrodes were cleaner than expected.
To answer 08-FX4 regarding my plugs and the amount of carbon on the electrode. I did see carbon build up, but not like I thought it was going to be. I guess I thought that the carbon build up was going to make the entire electrode black in color and I did not see that. What I saw was spots of carbon build up and actually I thought the electrodes were cleaner than expected.
Trending Topics


Thread Starter
|
Technical Article Contributor
Joined: Aug 2007
Posts: 101
Likes: 0
From: Centex
The instructions that came with the Lisle Plug Removal Tool, are pretty good. I read the instructions, followed them, and had good success. The one thing that scared me was pushing the porcelin tip that was broke off inside of the stuck electrode case. My first attemp at it, took me two or three times on the same plug to get a good feel for it. But Lisle has already done alot of the work for us, the tool will only go so far, and I found that all I needed to get some left handed threads to bite was roughly 3/16-1/4 inch of space on the top of the electrode case.
Here are some pictures from one of my electrode cases. You can see about a 1/4 of porcelin has been pushed in and you can see some of the left hand threads. The other picture shows the bottom of the electrode case (the basket handle) with the porcelin pushed to the bottom. A couple of my basket handles broke.
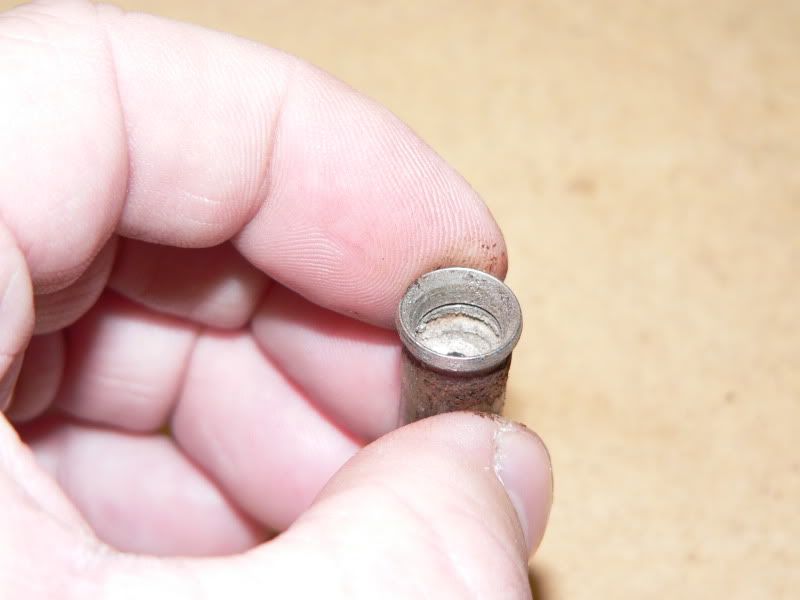
Here are some pictures from one of my electrode cases. You can see about a 1/4 of porcelin has been pushed in and you can see some of the left hand threads. The other picture shows the bottom of the electrode case (the basket handle) with the porcelin pushed to the bottom. A couple of my basket handles broke.

Global Moderator &
Senior Member
Senior Member
Joined: Mar 2005
Posts: 26,080
Likes: 85
From: Burleson/Athens/Brownsboro, TX
Hopefully not if you used the nickel anti sieze on the shank or if you went with the Champion or Brisk plug.
__________________
Jim
Jim

Senior Member
Joined: Jan 2009
Posts: 201
Likes: 0
From: Fairbanks Alaska
Nice little write up  ... may have been nice to see how you took off the computer and all, but i'm sure thats cake and well documented elsewhere.
To add another "Dumb" question... what causes this issue? Is it just the OEM plugs that ford shipped with these are junk, or the design of those long plugs mixed with excessive abuse by the engine? Its funny that these things make so much of a fuss when being taken out, but all of the rumble and shake from 100,000+ miles didn't break them. You probably didn't notice a sound from the ones that broken because the threads weren't turning, you ended up pulling just the top piece out instead, makes sense.
Thanks again.. If I end up getting that 04' FX4 this article will save me tons of time/money and headache.
... may have been nice to see how you took off the computer and all, but i'm sure thats cake and well documented elsewhere.To add another "Dumb" question... what causes this issue? Is it just the OEM plugs that ford shipped with these are junk, or the design of those long plugs mixed with excessive abuse by the engine? Its funny that these things make so much of a fuss when being taken out, but all of the rumble and shake from 100,000+ miles didn't break them. You probably didn't notice a sound from the ones that broken because the threads weren't turning, you ended up pulling just the top piece out instead, makes sense.
Thanks again.. If I end up getting that 04' FX4 this article will save me tons of time/money and headache.
Member
Joined: Sep 2008
Posts: 14
Likes: 0
From: MICHIGAN
Haemon
- The cause is mainly the carbon build-up around the lower portion of the two piece design OEM spark plug.
- In another post regarding this issue someone posted the YouTube video 'advertisement' of the Champion One-Piece design.
- Well worth the view of it.. Does a good job explaining.
- I would search for the other posts on this site.. Or go to YouTube and Search "Champion 7989" and you should find that video.
- Worth the 4 minutes to watch.
Last edited by 08-FX4; May 20, 2010 at 07:56 PM. Reason: SPELLING AGAIN !!