

Installing a Sir Michaels roll pan


Thread Starter
|
Member
Joined: Nov 2003
Posts: 94
Likes: 0
From: Suisun, CA
Installing a Sir Michaels roll pan
Well I just got my Sir Michaels roll pan about 2 days ago after 2 months of waiting the two boxes arrived. I was busy at work during the week so I decided I would knock out the install in a few hours Saturday (which was today). Well things went a little different then I predicted so here is how the install proceeded and a few tips to make your install a little easier then mine.
Ok the first thing was to remove the hitch, I figured no problem Maybe 20 minutes. Well it took over an hour. The plug was difficult to remove, then came the bolts. 1st tip is use some sort of breaker bar. Those were the tightest bolts Ive ever tried to remove. I finally gave up on the 1/2 inch socket after 4 bolts and went to long torque wrench to get leverage, made it much easier.
After taking off the tailgate it was time for the fitting of the endcaps, be sure to fit those first. you have to remove the factory ones first. Dont try to save them just use diagonal pliers and cut the plastic retainers off. Now fitting the end caps wasnt as easy as i thought. There was the bed bracing that stuck out past them a little. I used a dremel to cut off the excess, be careful not to cut to much because the lower mounting tabs for the roll pan are in the same area. After the excess was cut off the end caps were tough because of the rear bolt holes on them. After trying for along time to thread the rear bolt, I got another longer bolt with the same thread pattern, cut off the top with a hacksaw and then threaded it into the rear bolt hole. (That saved a ton of time as you will need to remove the endcaps alot for adjustment). I noticed the end caps didnt seat flush at first but I wanted to get the pan on to check it out. The fit was terrible, I wanted to like the fit but the gaps were uneven and just not right. So finally I decided the endcaps must be fitted properly even though that wasnt in the plan. To save time fitting the end caps spray the whole inside of them with black primer then put them back on and move them around. This will let you know what is hitting the end caps. I then used the dremel again this time with the sanding wheel and removed material from the end caps wherever the primer was disturbed. I did this over and over until finally the endcaps were flush.
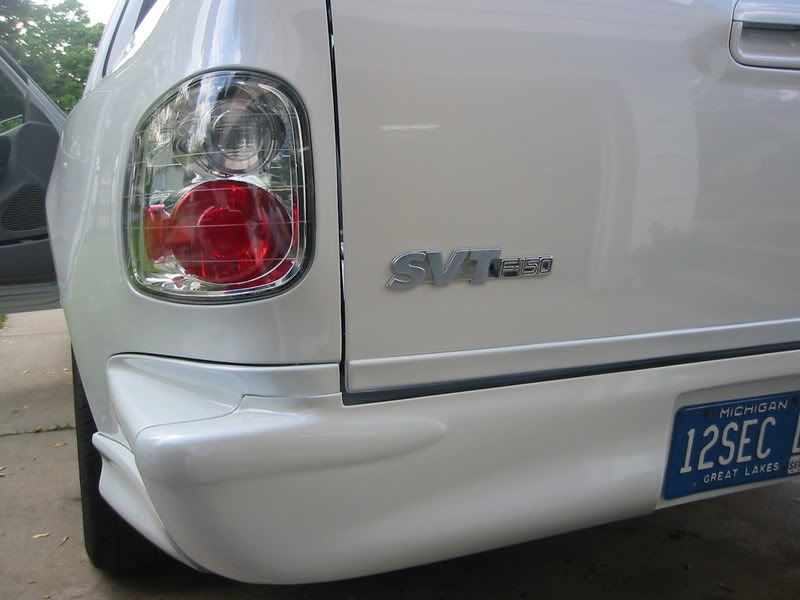
Now you can mount your roll pan, I scrapped the supplied screws for longer ones because my pan had to be shimmed out 1/4 inch. the ones supplied are way to short. Well when the pan went on and was shimmed the gap between the pan and the caps was way off so what I did was use painters tape to mark the gap I wanted, then i used a pencil to mark where I put the tape on the end cap. I removed the tape. Next I drilled holes all along the edge of the endcap because without them body filler wont stick. I cleaned and retaped the endcaps. Make sure to also tape the inside of the end cap so you can preserve the original lines of the inside of the end cap. I used a good body filler. Bondo extreme will work also, make sure you at first get the bondo in all the holes you drilled then you can just glop it on, after a few minutes carefully pull off the tape and you should have something close to perfect endcaps.
That is were i left off today, tommorrow i will put the final fitting touches on the body filler. sand and fill the license plate box. then primer and paint.
Sorry for such a long post but I sure wish someone else wrote this before my install, It would have saved hours.
Ok the first thing was to remove the hitch, I figured no problem Maybe 20 minutes. Well it took over an hour. The plug was difficult to remove, then came the bolts. 1st tip is use some sort of breaker bar. Those were the tightest bolts Ive ever tried to remove. I finally gave up on the 1/2 inch socket after 4 bolts and went to long torque wrench to get leverage, made it much easier.
After taking off the tailgate it was time for the fitting of the endcaps, be sure to fit those first. you have to remove the factory ones first. Dont try to save them just use diagonal pliers and cut the plastic retainers off. Now fitting the end caps wasnt as easy as i thought. There was the bed bracing that stuck out past them a little. I used a dremel to cut off the excess, be careful not to cut to much because the lower mounting tabs for the roll pan are in the same area. After the excess was cut off the end caps were tough because of the rear bolt holes on them. After trying for along time to thread the rear bolt, I got another longer bolt with the same thread pattern, cut off the top with a hacksaw and then threaded it into the rear bolt hole. (That saved a ton of time as you will need to remove the endcaps alot for adjustment). I noticed the end caps didnt seat flush at first but I wanted to get the pan on to check it out. The fit was terrible, I wanted to like the fit but the gaps were uneven and just not right. So finally I decided the endcaps must be fitted properly even though that wasnt in the plan. To save time fitting the end caps spray the whole inside of them with black primer then put them back on and move them around. This will let you know what is hitting the end caps. I then used the dremel again this time with the sanding wheel and removed material from the end caps wherever the primer was disturbed. I did this over and over until finally the endcaps were flush.
Now you can mount your roll pan, I scrapped the supplied screws for longer ones because my pan had to be shimmed out 1/4 inch. the ones supplied are way to short. Well when the pan went on and was shimmed the gap between the pan and the caps was way off so what I did was use painters tape to mark the gap I wanted, then i used a pencil to mark where I put the tape on the end cap. I removed the tape. Next I drilled holes all along the edge of the endcap because without them body filler wont stick. I cleaned and retaped the endcaps. Make sure to also tape the inside of the end cap so you can preserve the original lines of the inside of the end cap. I used a good body filler. Bondo extreme will work also, make sure you at first get the bondo in all the holes you drilled then you can just glop it on, after a few minutes carefully pull off the tape and you should have something close to perfect endcaps.
That is were i left off today, tommorrow i will put the final fitting touches on the body filler. sand and fill the license plate box. then primer and paint.
Sorry for such a long post but I sure wish someone else wrote this before my install, It would have saved hours.
Last edited by rav1972; May 22, 2005 at 02:33 AM.

Senior Member
Joined: Jan 2004
Posts: 902
Likes: 0
From: Tampa, FL
Man....sounds like a "Pita"! I just had my Street Scene roll pan and smooth steps installed/painted. Had a body guy do it as I heard it was a pain in the a$$. Congrats....now lets see those pics! 


Thread Starter
|
Member
Joined: Nov 2003
Posts: 94
Likes: 0
From: Suisun, CA
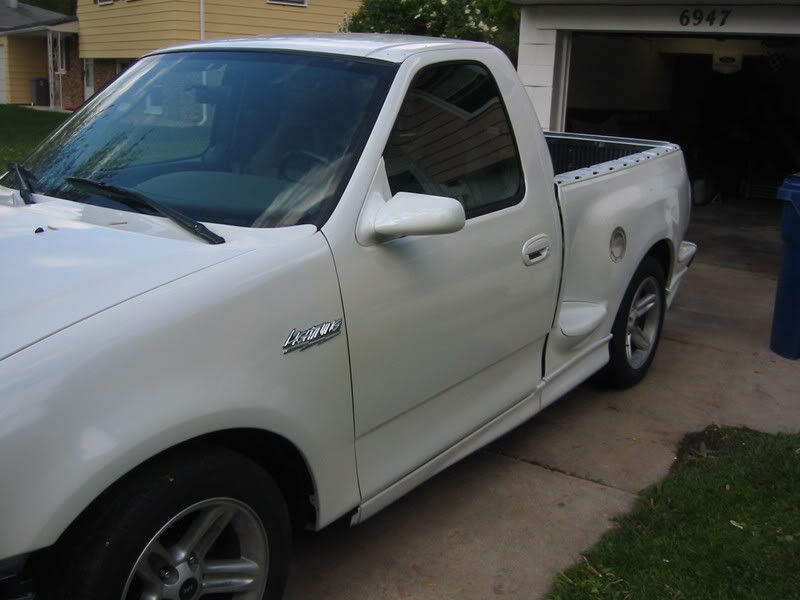
Well that street scene has a nice fit and finish. That is a CLean looking white l. I probably should have went that way, but I wanted to go with the sir michaels. Its all painted, shimed and bolted on now. I did one little thing different though. I repositioned my spare tire winch so it points right behind where my license plate is i then used a hole saw and cut a 1 1/2" hole in the top portion of the license plate holder behind the top of the license plate. So now I can still use my spare. I either need to keep a philips head screw driver in the truck or purchase a flip down license plate frame.
