


Headlight restoration - review - ADS #2 kit


Senior Member
Joined: Jan 2008
Posts: 447
Likes: 0
From: Paradise, San Diego
I looked at the Heavy duty kit because my lights are nasty looking. I was under the impression that the heavy duty kit was a Meguiars kit. My bad. So the Heavy duty kit from ADS will work fine?
Senior Member
Joined: Jan 2008
Posts: 447
Likes: 0
From: Paradise, San Diego
Yeah I saw the pics but then saw a post that said they didn't have that kit anymore or something like that. But that sounds great. Thanks for the help, I appreciate it!! Ill get the kit when I am home for spring break and post pictures.
D
D
Thread Starter
|
Senior Member


Joined: Dec 2006
Posts: 43,542
Likes: 819
From: Joplin MO
The old site had a #1 and a #2 kit, both put together by Rick. My review was for the old #2 kit. When he updated the site, both kits were gone, replaced by a single kit from Meguiars, which is a lot like the old #1 light duty kit. Now he has taken the old #2 kit and replaced the M85 with M105 and put it back on the site - thank you very much!
For this use, I don't see where you would see any difference between M85 and M105. The kit makes it very easy to get everything you need, all you have to provide is a drill, bucket of soapy water, masking tape, and rags (MF, terry, old towels, T-shirts, whatever) to wipe things down.
For this use, I don't see where you would see any difference between M85 and M105. The kit makes it very easy to get everything you need, all you have to provide is a drill, bucket of soapy water, masking tape, and rags (MF, terry, old towels, T-shirts, whatever) to wipe things down.

Senior Member
Joined: Oct 2007
Posts: 1,333
Likes: 0
From: Bethlehem, PA
I agree you probably won't see much of a difference on the headlights between 85 and 105, however, you should be left with a lot of 105 for the paint, which is why it's a better. That's what I was implying.

Senior Member
Joined: Apr 2006
Posts: 230
Likes: 0
I dont know if the OP ever got a new light for the van but what i found effective was to remove the lens and put in the oven. I did this on my bros lightning tail light. Just set the oven on warm and it will do the trick without getting too hot.

Senior Member
Joined: Oct 2003
Posts: 4,920
Likes: 5
From: Washington
i couldnt see from your photos, but was there fine scratches in the lens? my milan has one new headlight and its noticeably different than the one only 3 years older, the original has a slight haze, which actually looks like very fine scuffs.
Thread Starter
|
Senior Member
Joined: Dec 2006
Posts: 43,542
Likes: 819
From: Joplin MO
The kit does an excellent job of clearing the lenses up, but nothing can remove deep crazing.
Stay tuned - another resto job coming up soon, son in law just bought a 98 F-150 and the lights are a mess.
Stay tuned - another resto job coming up soon, son in law just bought a 98 F-150 and the lights are a mess.
Thread Starter
|
Senior Member
Joined: Dec 2006
Posts: 43,542
Likes: 819
From: Joplin MO
If it's just lightly fogged and scuffed, you should be able to do it with just PlastX. It will be a lot easier on a foam pad on a drill than by hand. Just like any detailing - least aggressive first, if it doesn't work, break out the heavy ammo. If you use the heavy ammo - wetsanding and 85 or 105, that's going to remove the UV coating and you will have to PlastX them frequently - by hand is fine just to clean them up and apply UV protection.

Senior Member
Joined: Jun 2009
Posts: 149
Likes: 0
From: College Station, TX
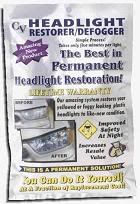
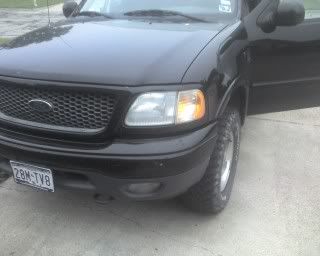
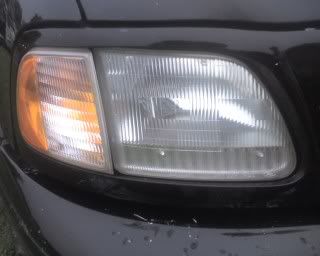
I was at Wal Mart the other day getting a bulb for my tail light and saw a kit so I went ahead and got it. Figured it couldnt hurt anything. It's a cheaper kit so I wasn't expecting a whole lot but at $16 it really did quite a good job. Came with good directions and everything needed. Here are some pics.
Kit:
Before pics:
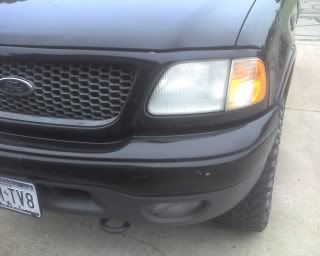
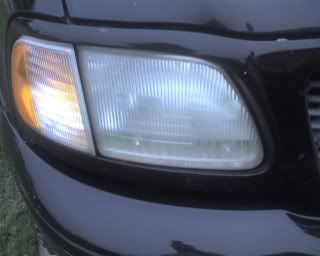
After pics:
Kit:
Before pics:
After pics:
Thread Starter
|
Senior Member
Joined: Dec 2006
Posts: 43,542
Likes: 819
From: Joplin MO
What materials came with that kit, and how is it used?
It looks to me like PlastX on a foam pad in a drill probably would have taken care of those lights - it doesn't look like they were THAT bad.
It looks to me like PlastX on a foam pad in a drill probably would have taken care of those lights - it doesn't look like they were THAT bad.
Senior Member
Joined: Jun 2009
Posts: 149
Likes: 0
From: College Station, TX
Well to be honest I did absolute zero looking into what to use. It was just a whim kind of thing. But the pictures don't do the bad that much justice. They were yellow and hazy. I know you cant tell but that's more than likely because it was a very overcast day with no sun shining. I just happened to see the kit so I picked it up. Materials wise I couldn't tell you on chemicals. Came with sand papers and some microfibers for the chemicals.