
Charging/Electrical System Big 3 Upgrade (Extremely Pic-Heavy)


Thread Starter
|
Senior Member

Joined: Aug 2008
Posts: 2,042
Likes: 1
From: Clemson, SC
Sorry for the delay guys....I've been inactive for a while. I'll go out tomorrow and shoot some pics of what I have. While it won't be as in-depth as the previous pictures, it should help out enough to get the job done.
Thread Starter
|
Senior Member
Joined: Aug 2008
Posts: 2,042
Likes: 1
From: Clemson, SC
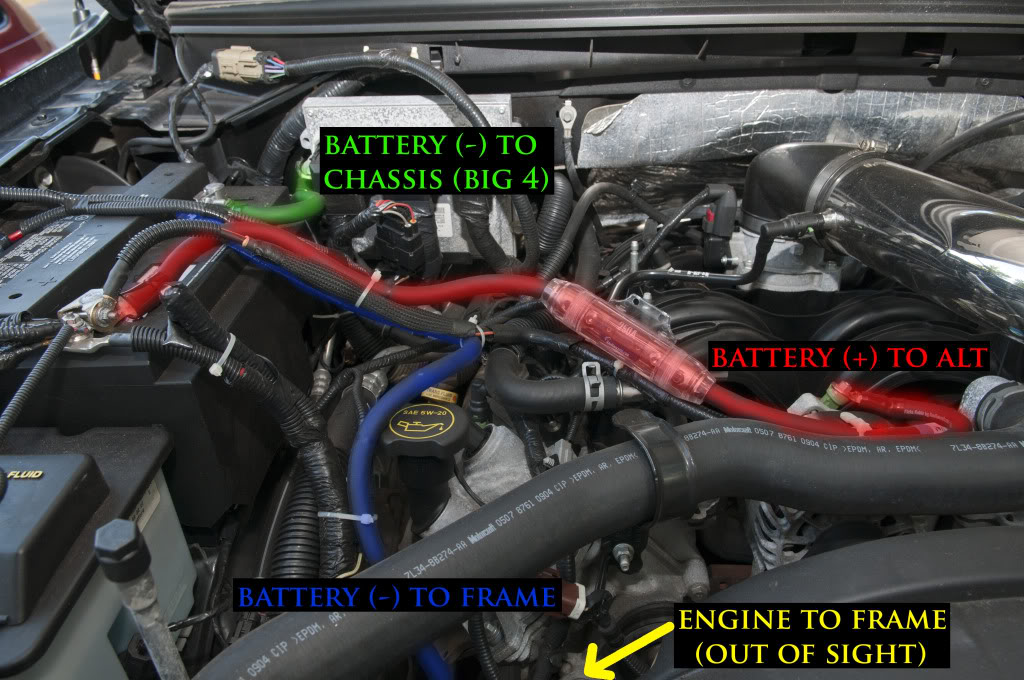
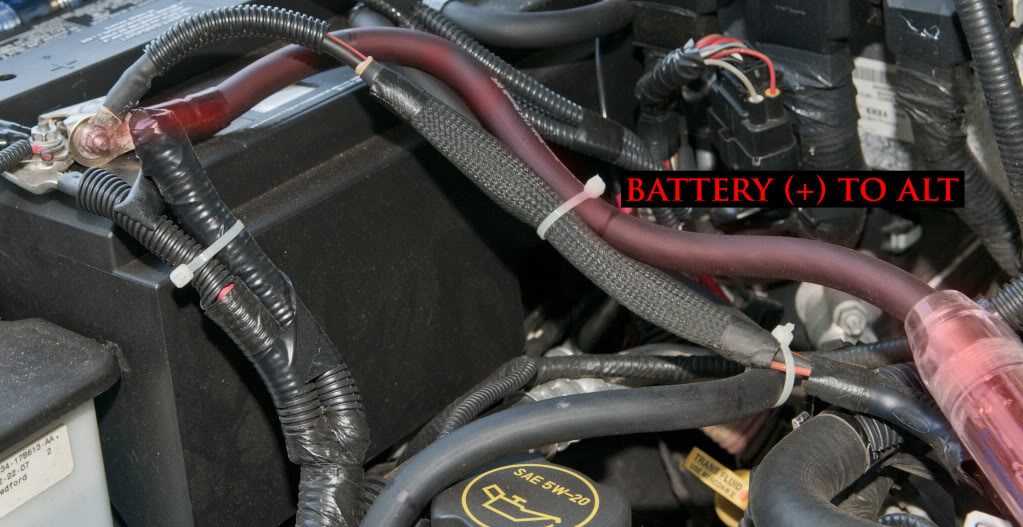
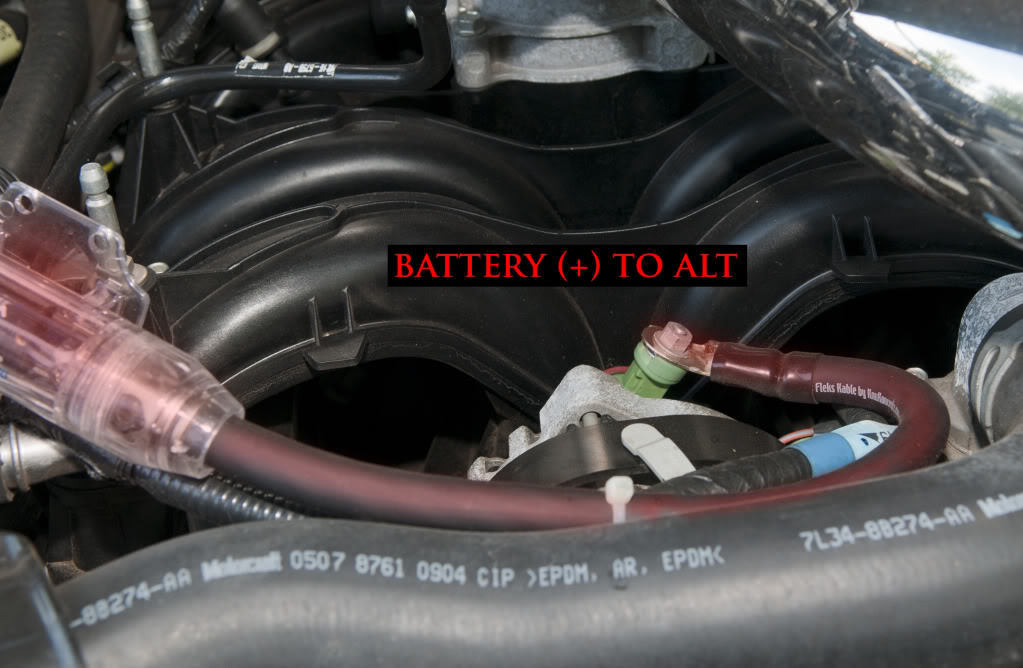
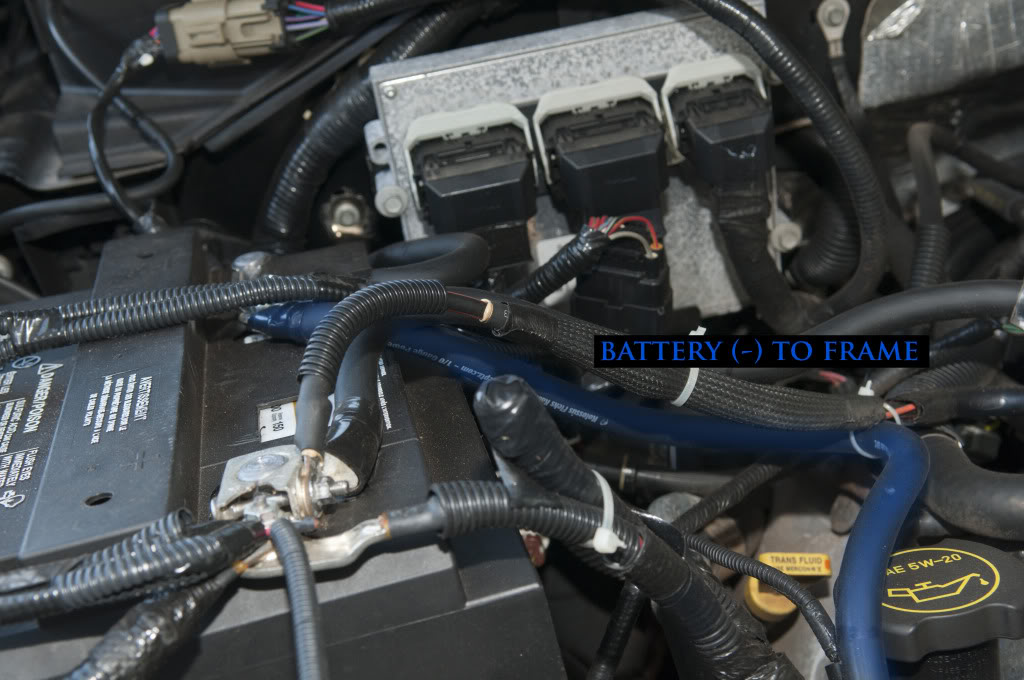
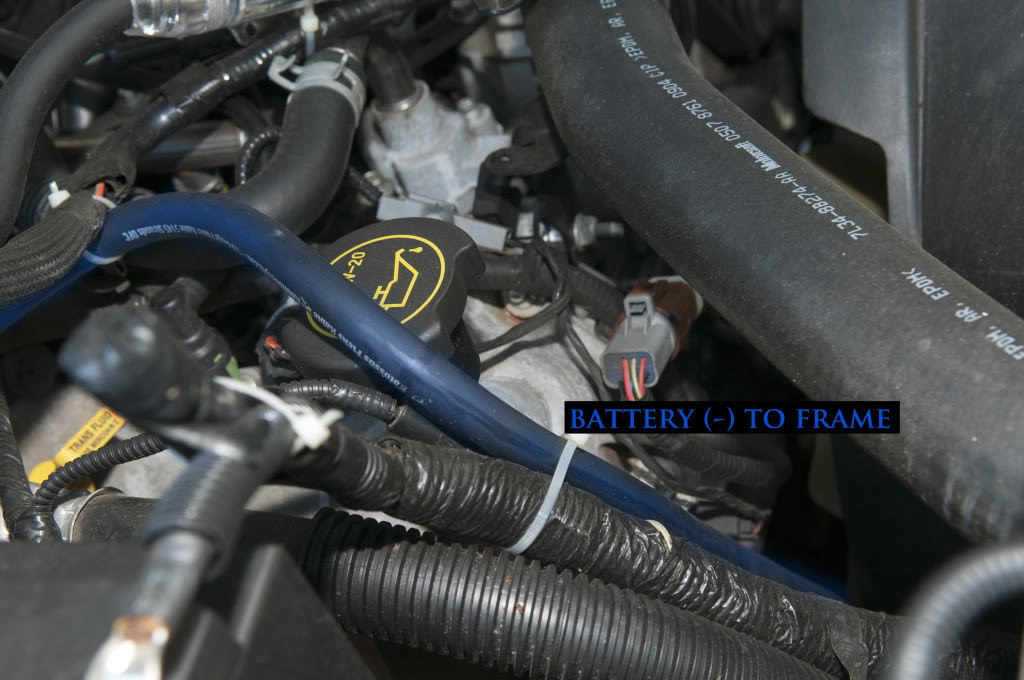
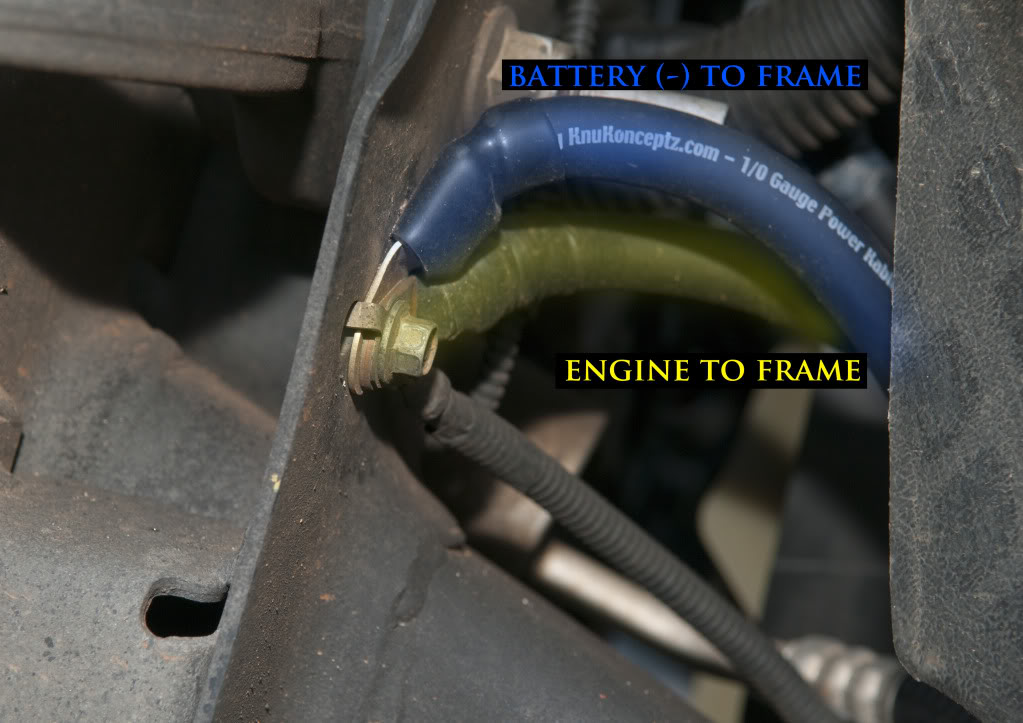
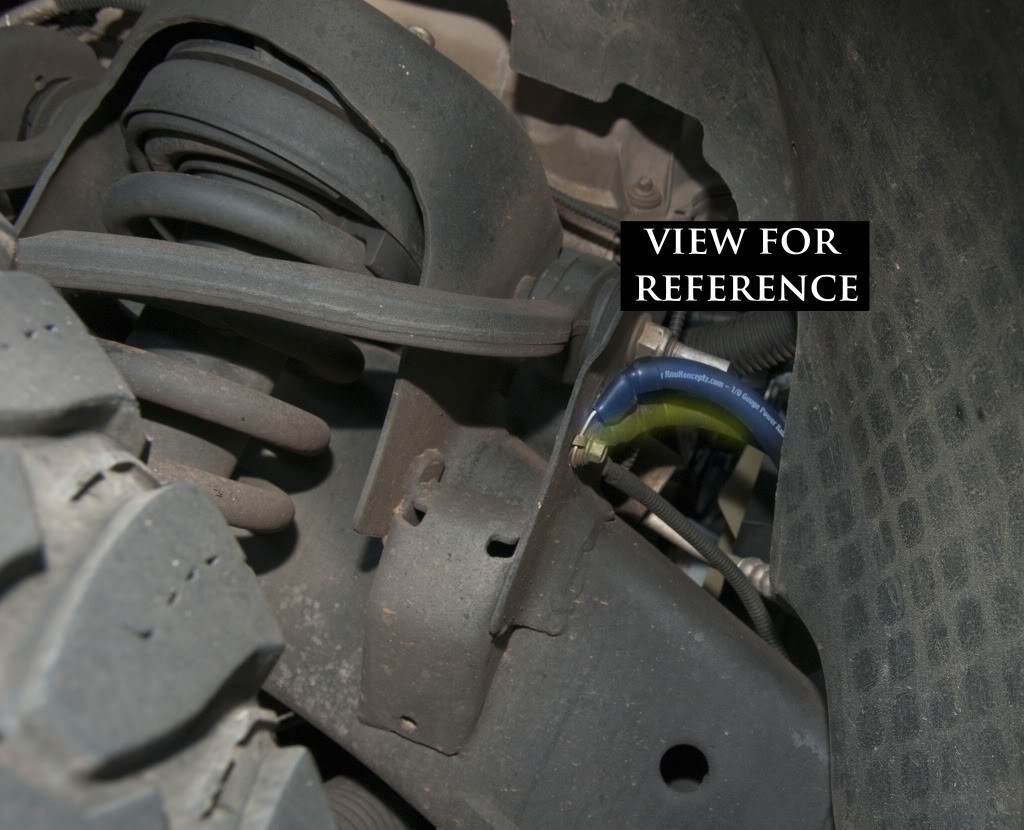
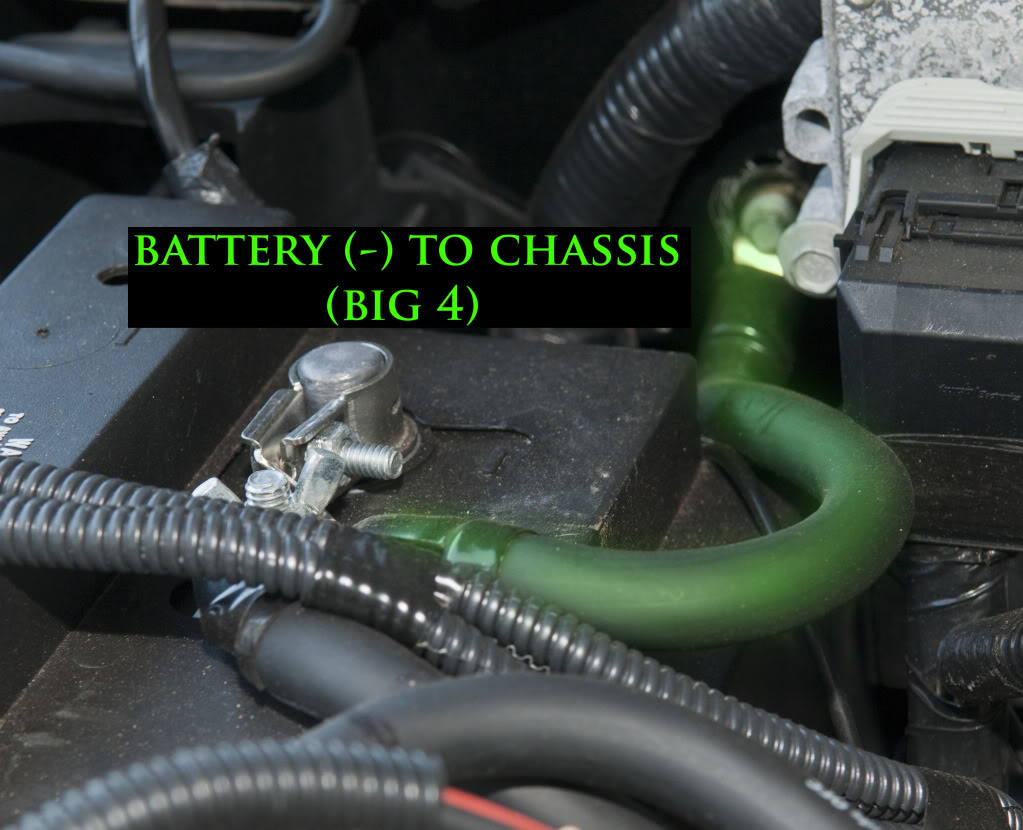
Here are the new pics. Not as in-depth as before but hopefully they are enough to help. The pictures should be self-explanatory when it comes to cable locations, but let me know if you have any questions. I'll repeat what I said in the original post: this isn't a set-in-stone way....it's the way I did it.


Technical Article Contributor
Joined: Oct 2005
Posts: 25,641
Likes: 19
From: MI
Nice, but mannn, -you need a junction box for all that lol. There must be something you can do without having to tie everything to the posts. I spliced/soldered mine before the posts. Nice pics, Great! But man, that's gottuh bug you a little at the posts ?? Don't it ?

 I tried to keep it as clean as possible working with what I had available.

Thread Starter
|
Senior Member
Joined: Aug 2008
Posts: 2,042
Likes: 1
From: Clemson, SC
For the soldering, I'd recommend finding someone who has a bench vise you can use. It makes it a lot easier in both holding the wire steady and in crimping the lugs on.
As for soldering itself, I'd suggest a roll of thick solder and a mini propane torch. With cable this size, it would take forever to use regular thin-wire solder and a little touch-based solder gun.
Pictures speak louder than words, so instead of the first picture, do the second picture. If you can find thicker solder, great.....if not, as long as you have the propane torch it will work.

When you go to solder this way, keep the flame on the backside of the lug. You want to heat up the metal of the lug and cable enough to make the solder melt and seep down between the strands of cable. It makes for a much stronger connection. Also, this comes after the crimping.
This may or may not help, too:
http://www.youtube.com/watch?v=gBDdbALcgeU
As for soldering itself, I'd suggest a roll of thick solder and a mini propane torch. With cable this size, it would take forever to use regular thin-wire solder and a little touch-based solder gun.
Pictures speak louder than words, so instead of the first picture, do the second picture. If you can find thicker solder, great.....if not, as long as you have the propane torch it will work.
When you go to solder this way, keep the flame on the backside of the lug. You want to heat up the metal of the lug and cable enough to make the solder melt and seep down between the strands of cable. It makes for a much stronger connection. Also, this comes after the crimping.
This may or may not help, too:
http://www.youtube.com/watch?v=gBDdbALcgeU
Last edited by mblouir; Aug 11, 2010 at 01:14 PM.

Junior Member
Joined: Dec 2010
Posts: 1
Likes: 0
here are the new pics. Not as in-depth as before but hopefully they are enough to help. The pictures should be self-explanatory when it comes to cable locations, but let me know if you have any questions. I'll repeat what i said in the original post: This isn't a set-in-stone way....it's the way i did it.


Also my truck grounds run towards the tranny? Am i following the correct set comming off of the battery?

Question......
This even seems like overkill to me, I know, you don't need to reiterate.
I have a chance to grab some ginormous cable from where I work. I mean, this stuff looks bigger than 1/0 AWG. Anyone think something will go wrong if the cable is too big? Pass too much current? Or is there no worries? This stuff is seriously huge, and I have a way to get terminals for my battery and such so its not a problem. I mean.....it's free, so why not.
Thanks guys
Thread Starter
|
Senior Member
Joined: Aug 2008
Posts: 2,042
Likes: 1
From: Clemson, SC
Don't take my word for it, but I don't see any problems with using bigger cable as long as it's quality. The only issue I see arising is flexibility, but our engine bays are pretty big.

Member
Joined: Oct 2010
Posts: 61
Likes: 0
Old thread I know but the last question was never answered...
It is impossible for the wire to be too big. Current flows in accordance with demand and bigger wire simply means that you lose less voltage when higher current is demanded. That means that the wiring is more efficient. More efficient wiring is whole point of this upgrade.
It is impossible for the wire to be too big. Current flows in accordance with demand and bigger wire simply means that you lose less voltage when higher current is demanded. That means that the wiring is more efficient. More efficient wiring is whole point of this upgrade.

Member
Joined: Sep 2012
Posts: 20
Likes: 0
Hi,
Can you help me to be able to see the photos in your post on the three big grounds. I am getting a empty square with no photo in the box. The instructions don't say exactly where these grounds are located at, i need to see pictures of the: (engine to chassis,) (battery to chassis) (battery to Alt. ) i check back this evening to see if you posted them to my reply.
Thanks,
Gary