
Replacing Water Pump on 5.4L 2V


Thread Starter
|
Technical Article Contributor
Joined: Mar 2012
Posts: 154
Likes: 0
Replacing Water Pump on 5.4L 2V
Replacing water-pump on 5.4L 2V.
Truck is a 2003 FX4 Supercab.
Materials Needed:
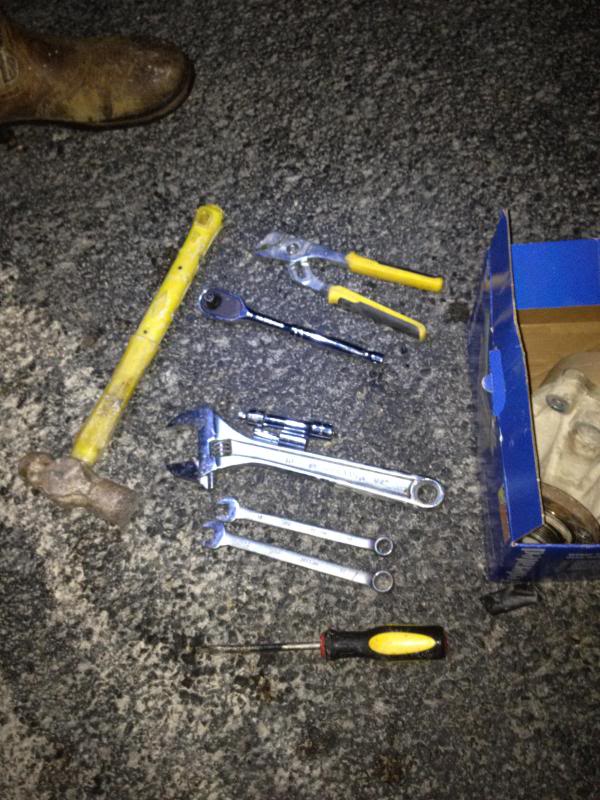
Water Pump with O-Ring
Anti Seize & Loc - Tite
Flat head screwdriver
2 - 10mm open end wrenches
8mm socket
10mm socket
Ratchet & Extensions
1/2" drive Ratchet (Use the Male end for tensioner pulley)
Channel Locks
Large Crescent/Adjustable wrench
Hammer
Rags for clean up
Access to water-hose/Antifreeze
Before you start:
*I always remove the negative battery terminal before doing any work to the truck*
Make sure the truck is cooled down quit a bit before proceeding.
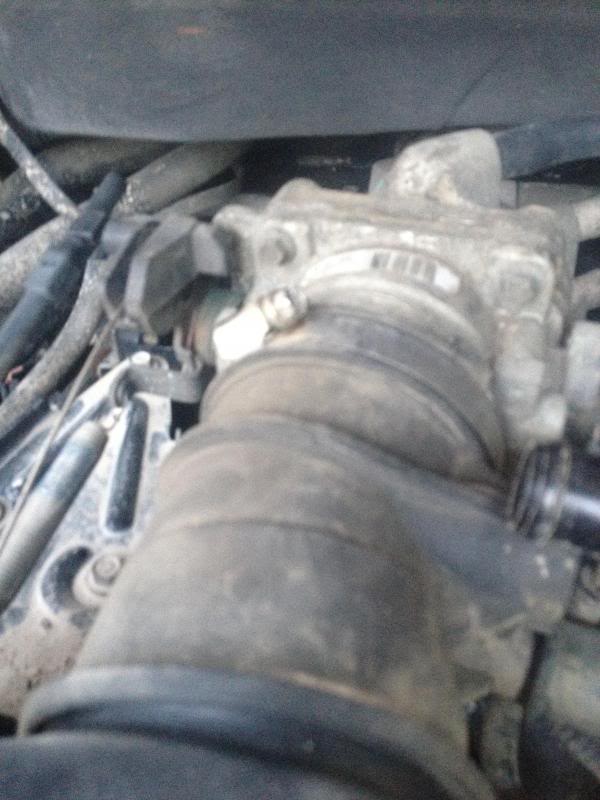
First step is to remove all 3 bolts holding your plastic 5.4 cover (over the throttle body). These are all 8mm.
Removing air intake:
Now we need to take the air intake off to have room to work.
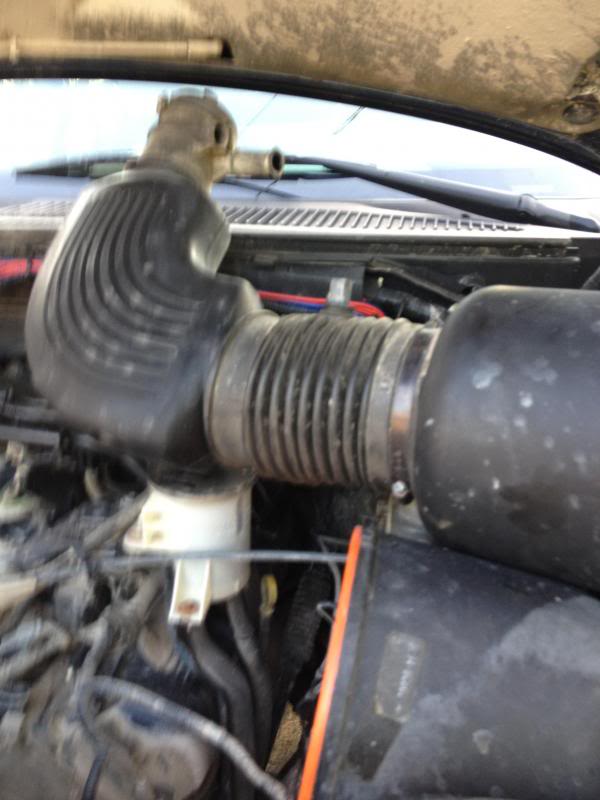
1.) Pull out the two hoses at the top of the intake.
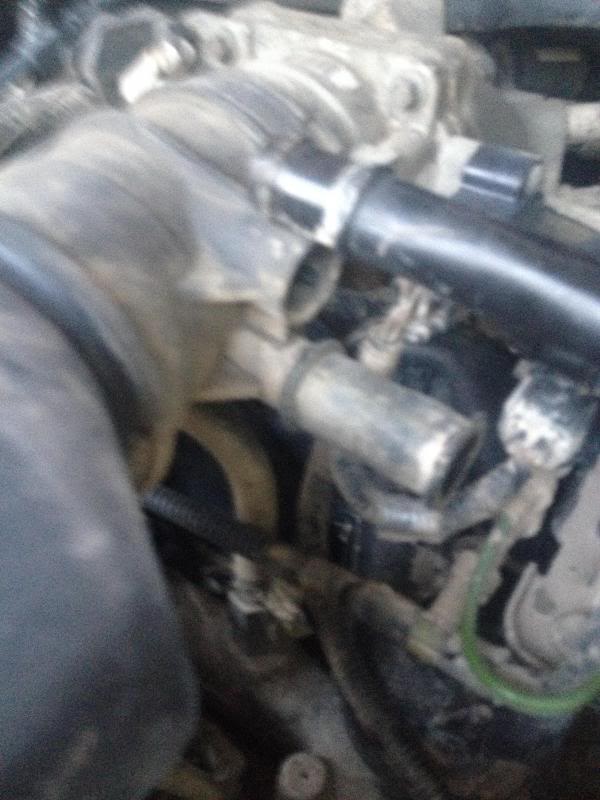
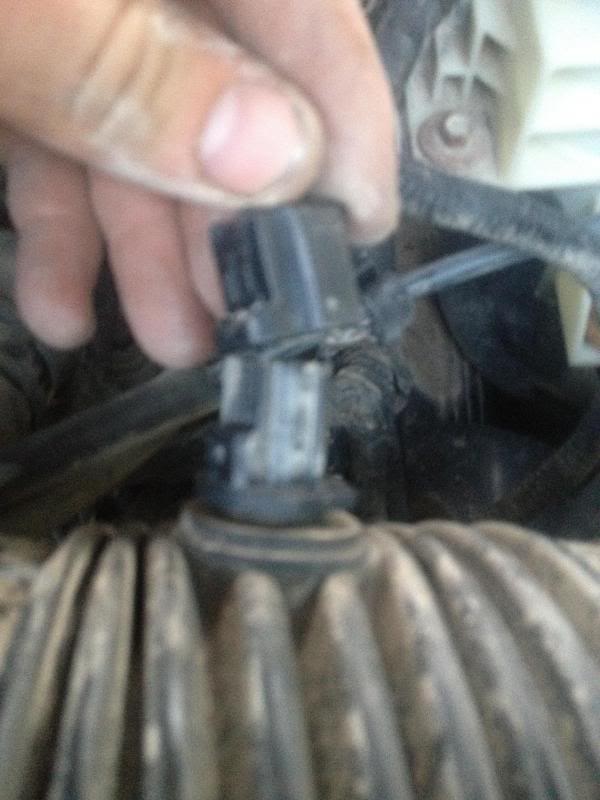
2.) Unplug the MAF (mass air flow sensor) plug
3) Then unclamp the clip that holds the air box/filter in.
4) Finally loosen up the C-clamp attaching to the throttle body with an 8mm socket.
You can now lay the air intake up out of your way, it is not necessary to unplug the air filter sensor. But if you want to take the complete plastic intake off unplug the following plug below.
Laying it out of the way.
Draining radiator and removing hose from thermostat to radiator:
Before proceeding, make sure the engine has proper time to cool, and that the coolant wont burn you.
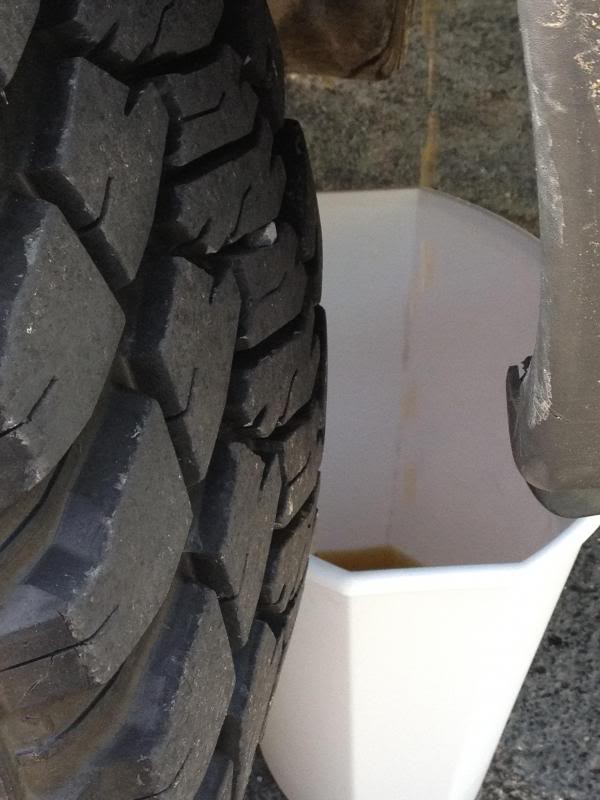
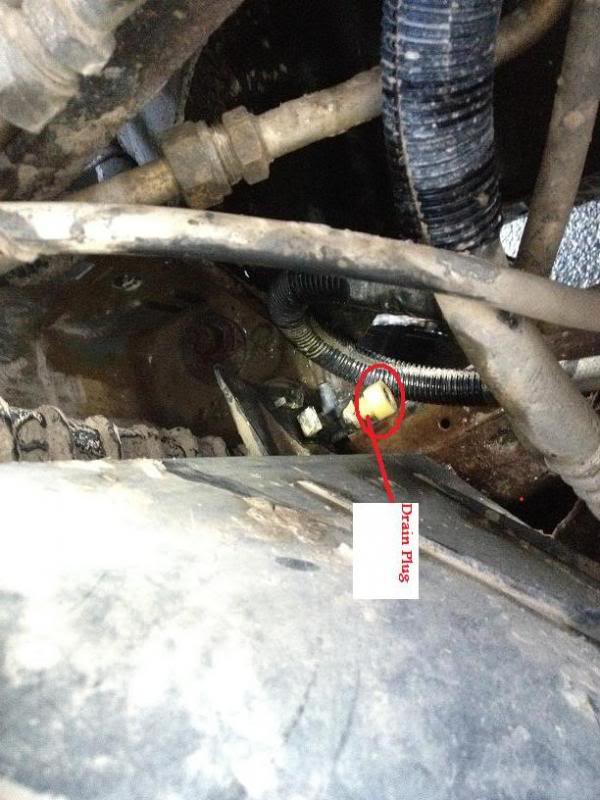
Locate the drain plug at the bottom left of the radiator. Place a 2-3 gallon bucket under the plug so you can reuse or dispose of the coolant properly.
Once the bucket is in place, unsrew the drain plug and give the radiator time to dissipate all the coolant.

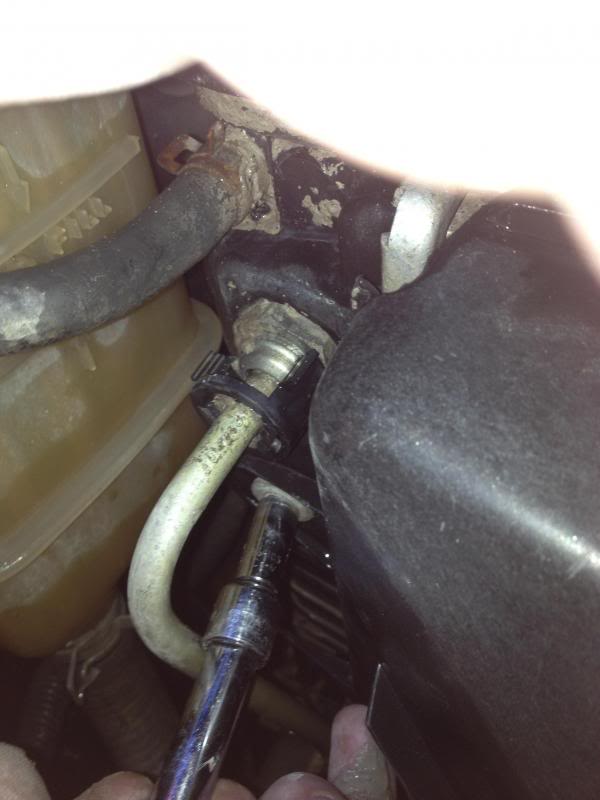
Once most of the coolant has drained, we need to remove the radiator hose at the top left of the radiator. This goes from the engine/thermostat to the radiator. Use caution, some fluid will still be in the hose. Use a pair of channel locks to crimp down on the clamp and pull the hose off.
With the hose disconnected from the radiator, you can lay it up out of the way in order for use to remove the fan shroud and proceed.

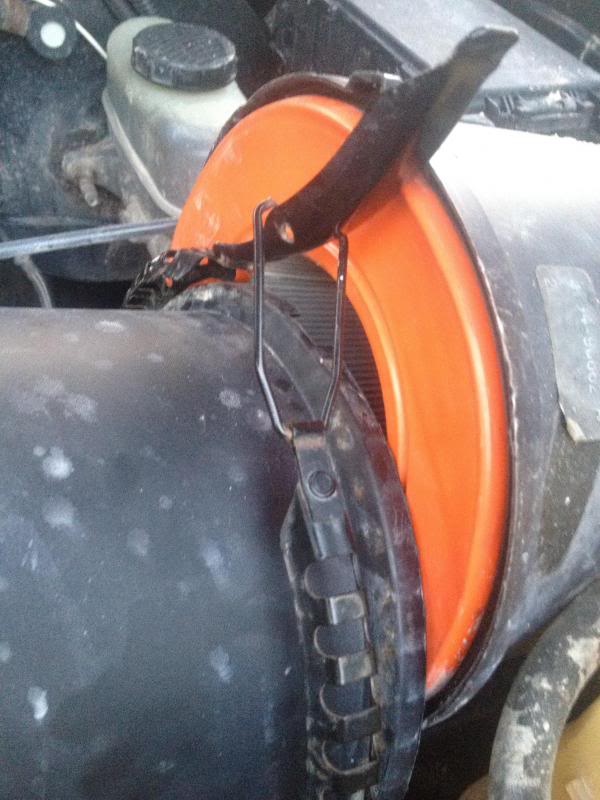
Removing fan shroud and fan clutch:
This part can be a little tricky. We cant just unscrew the fan clutch and pull it out because of the shroud, so we need to try to do them together.
First: Take out the two 8mm bolts at the top of the shroud (1 on each side at the top).
Truck is a 2003 FX4 Supercab.
Materials Needed:


Water Pump with O-Ring
Anti Seize & Loc - Tite
Flat head screwdriver
2 - 10mm open end wrenches
8mm socket
10mm socket
Ratchet & Extensions
1/2" drive Ratchet (Use the Male end for tensioner pulley)
Channel Locks
Large Crescent/Adjustable wrench
Hammer
Rags for clean up
Access to water-hose/Antifreeze
Before you start:
*I always remove the negative battery terminal before doing any work to the truck*
Make sure the truck is cooled down quit a bit before proceeding.
First step is to remove all 3 bolts holding your plastic 5.4 cover (over the throttle body). These are all 8mm.
Removing air intake:
Now we need to take the air intake off to have room to work.
1.) Pull out the two hoses at the top of the intake.

2.) Unplug the MAF (mass air flow sensor) plug

3) Then unclamp the clip that holds the air box/filter in.

4) Finally loosen up the C-clamp attaching to the throttle body with an 8mm socket.

You can now lay the air intake up out of your way, it is not necessary to unplug the air filter sensor. But if you want to take the complete plastic intake off unplug the following plug below.

Laying it out of the way.

Draining radiator and removing hose from thermostat to radiator:
Before proceeding, make sure the engine has proper time to cool, and that the coolant wont burn you.
Locate the drain plug at the bottom left of the radiator. Place a 2-3 gallon bucket under the plug so you can reuse or dispose of the coolant properly.
Once the bucket is in place, unsrew the drain plug and give the radiator time to dissipate all the coolant.


Once most of the coolant has drained, we need to remove the radiator hose at the top left of the radiator. This goes from the engine/thermostat to the radiator. Use caution, some fluid will still be in the hose. Use a pair of channel locks to crimp down on the clamp and pull the hose off.
With the hose disconnected from the radiator, you can lay it up out of the way in order for use to remove the fan shroud and proceed.

Removing fan shroud and fan clutch:
This part can be a little tricky. We cant just unscrew the fan clutch and pull it out because of the shroud, so we need to try to do them together.
First: Take out the two 8mm bolts at the top of the shroud (1 on each side at the top).


Thread Starter
|
Technical Article Contributor
Joined: Mar 2012
Posts: 154
Likes: 0
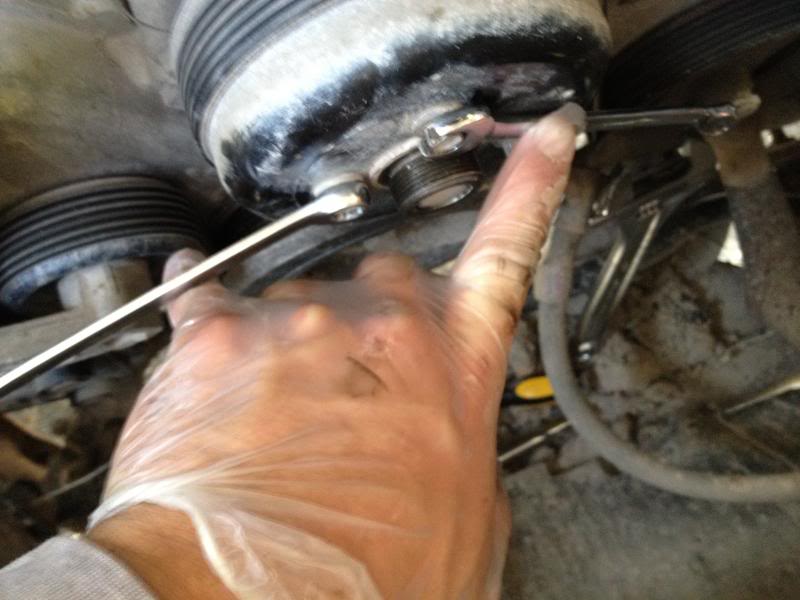
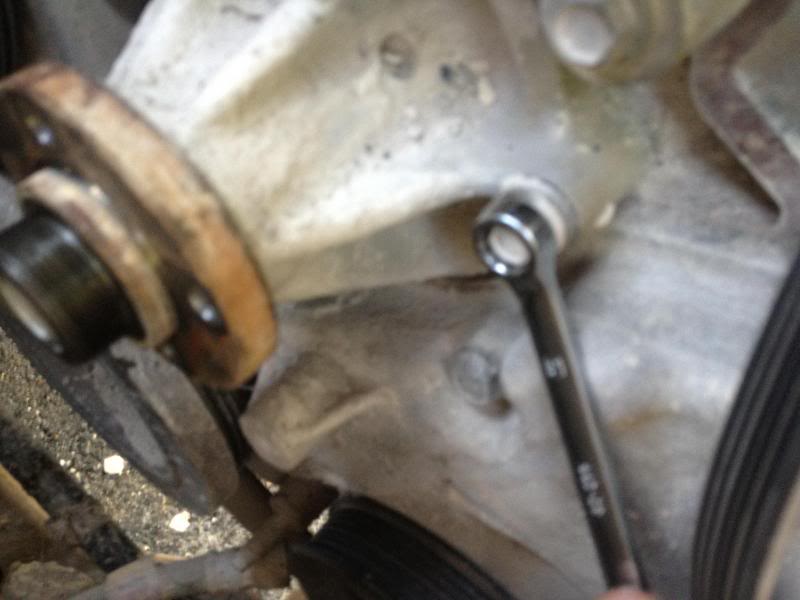
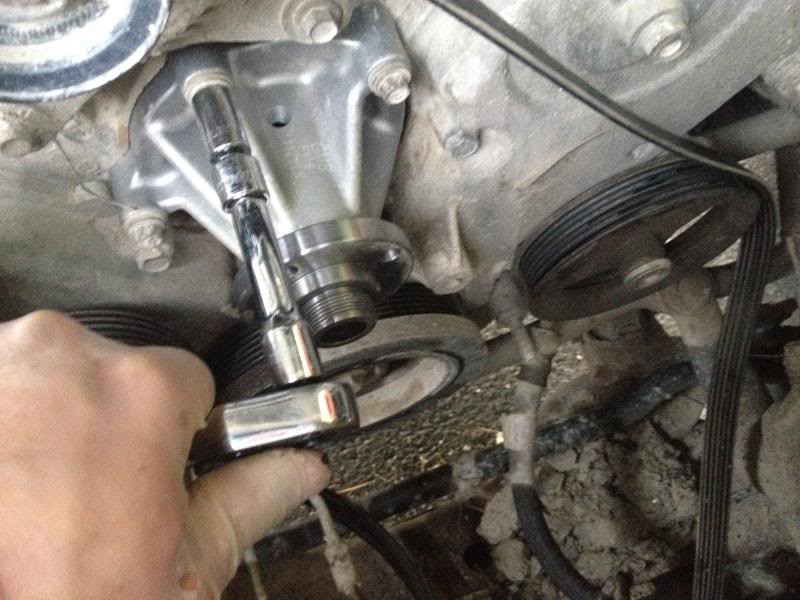
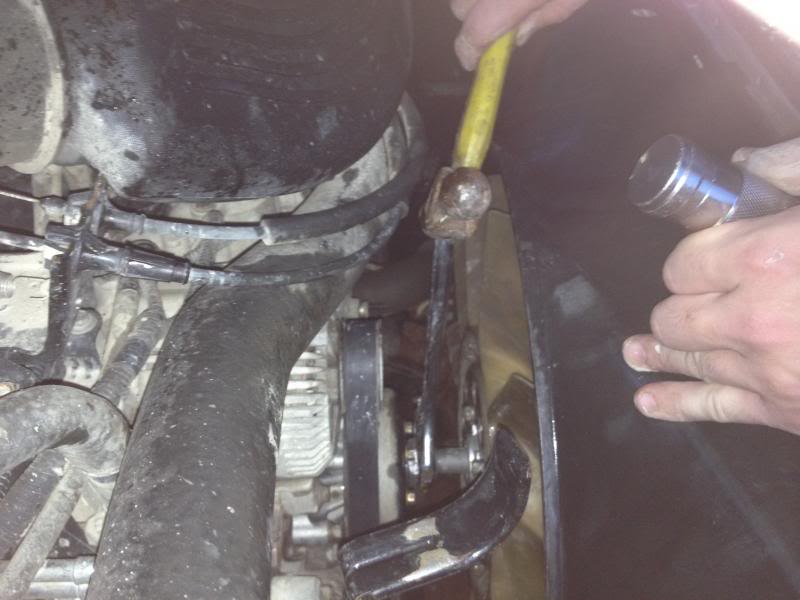
Second: With the two bolts removed, we now need to concentrate on unscrewing the fan clutch from the water-pump. They make a tool to do this with, but it can be done by the following:
Use a large adjustable wrench and put it on the fan clutch nut (approx 1-1/8") . The bolt is right hand threaded, so to take it off we need to turn it to the left. So position the adjustable wrench as far right as you can.
Now you can use one of the 10mm open end wrenches to wedge between bolts of the water-pump pulley to hold for leverage. Once you get some good leverage, tap the adjustable wrench with a hammer and the you should see the fan clutch bolt loosen. Once it breaks loose, you can unscrew it by hand.
With the fan clutch loose, take it off and remove the fan shroud at the same time. The shroud shoudl simply pull up out of the clips at the bottom. This should give us full access to the front of the motor.
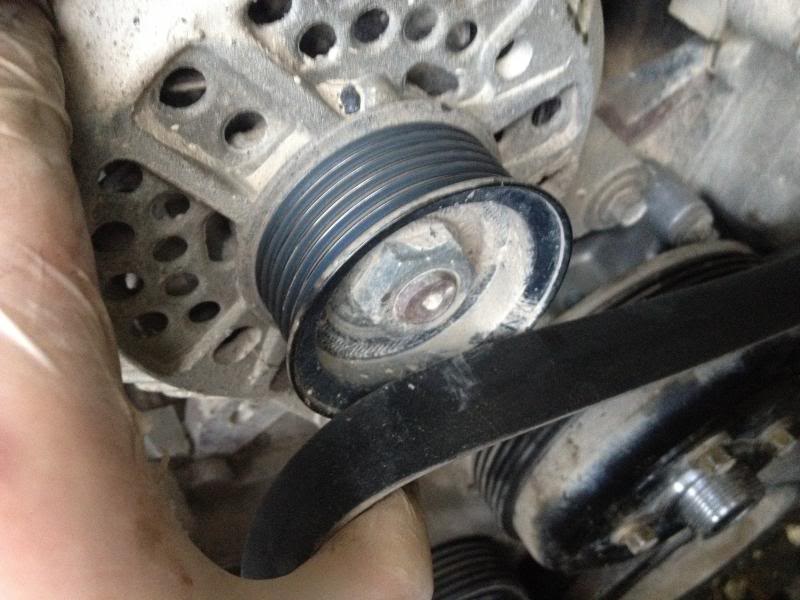
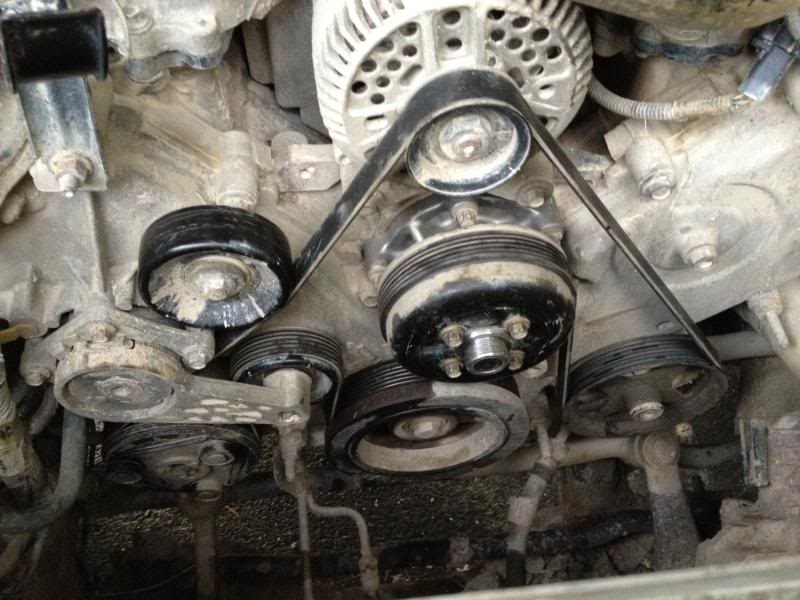
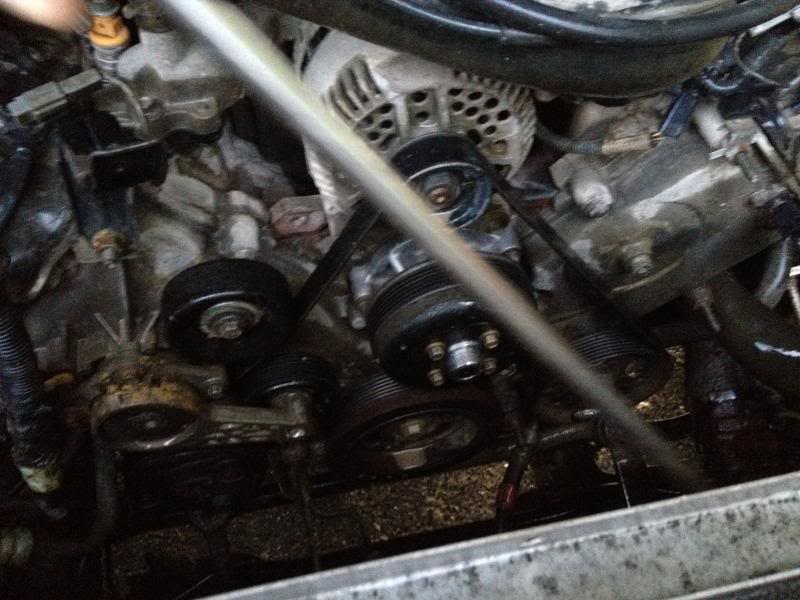
Taking off serpentine belt:
With a clean view and working area, its time to take the belt off the water-pump fly wheel.
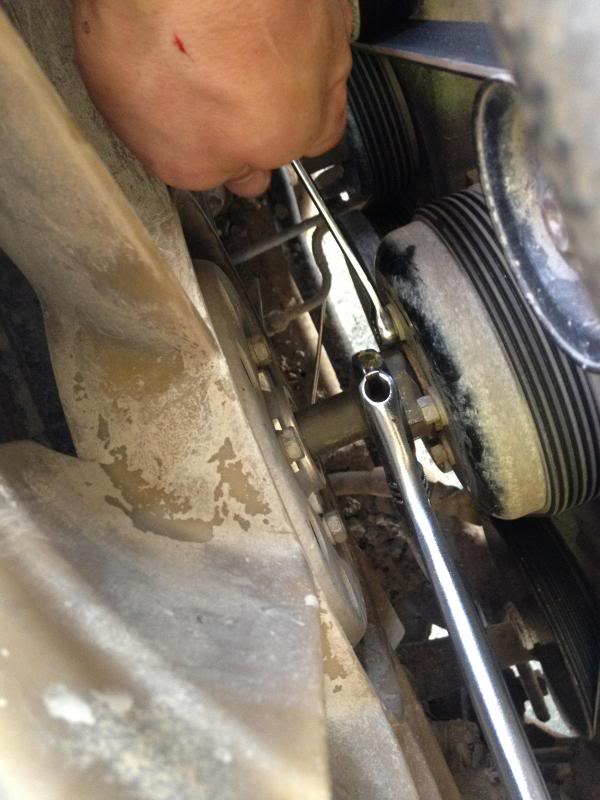
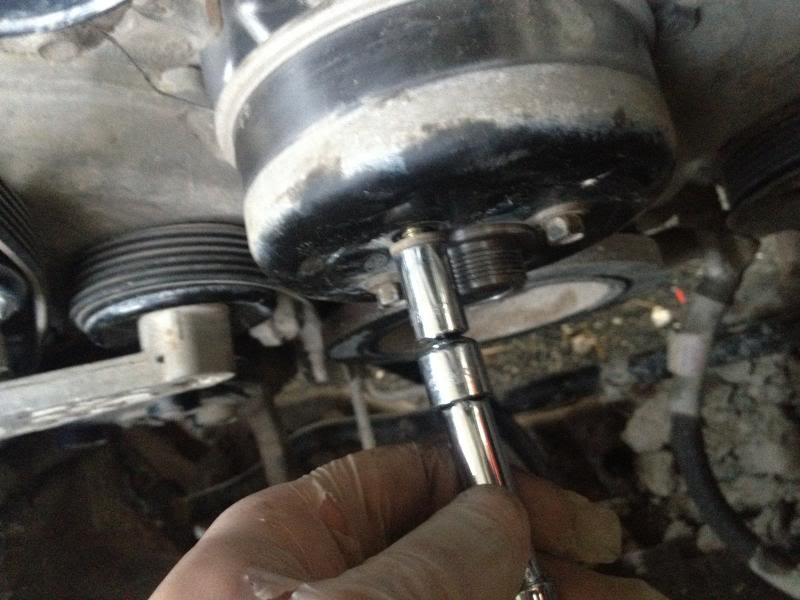
Use your 1/2" male end of the ratchet and place it into the female end of the tensioner pulley. Press firmly on the ratchet to allow play into the belt, then pull the belt off the alternator pulley. This will give you slack to remove the belt off the water-pump pulley.

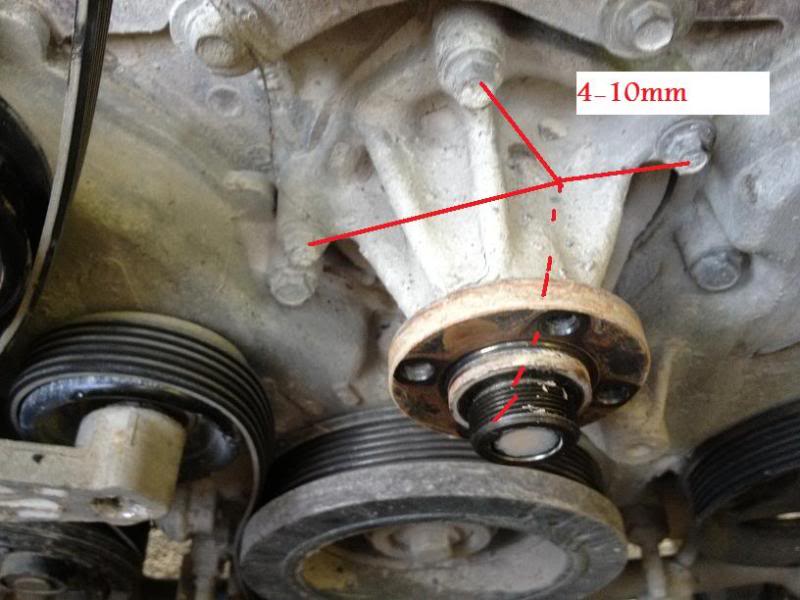
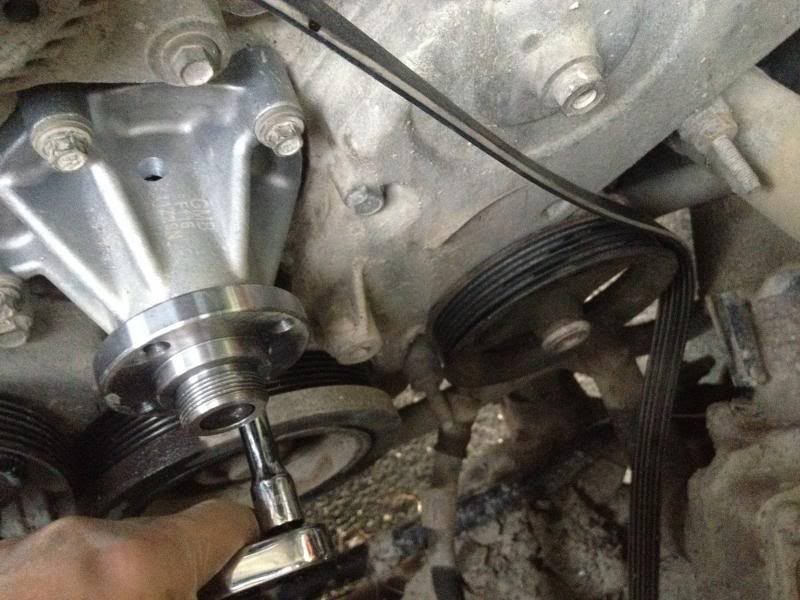
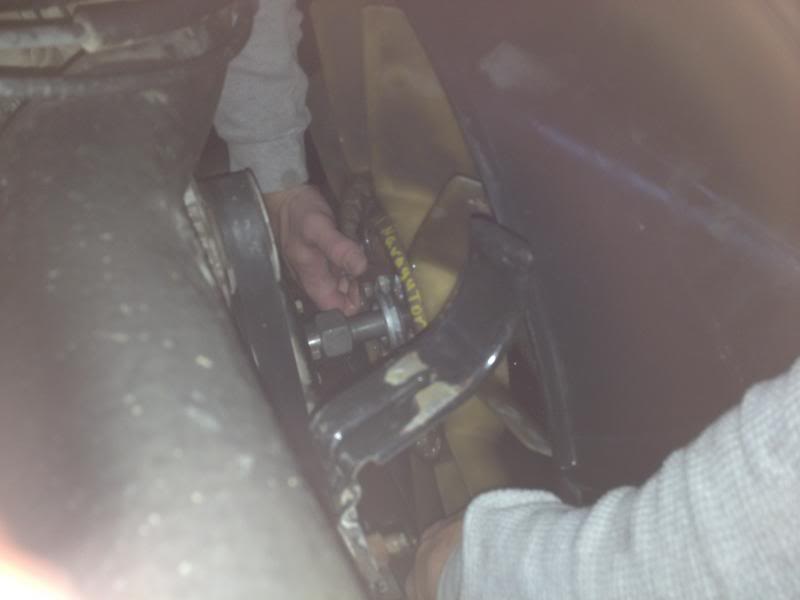
Removing Water-pump pulley.
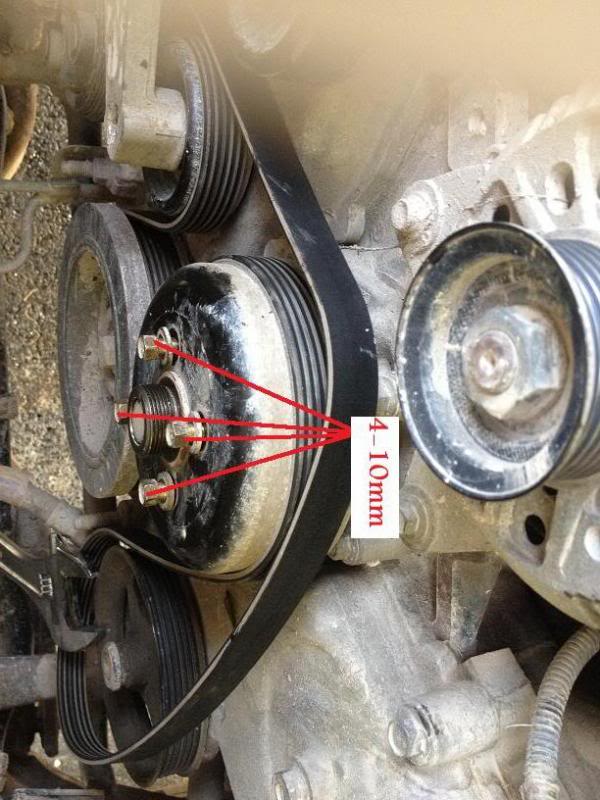
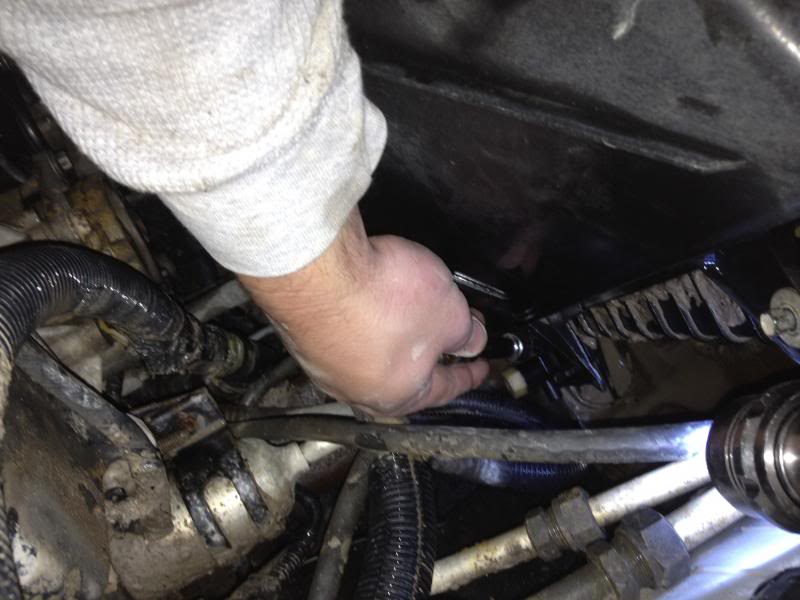
Now we need to remove the 4- 10mm bolts holding the water pump pulley on. This can be tricky because the pulley turns when trying to loosen then. So use two open end 10mm wrenches, gain leverage with one of them and loose with the other. You can latch on to two bolts at the same time, but this wont work for the last two, because loosening one will tighten the other. So just loose all the bolts by leverage and you shouldn't have any issues.
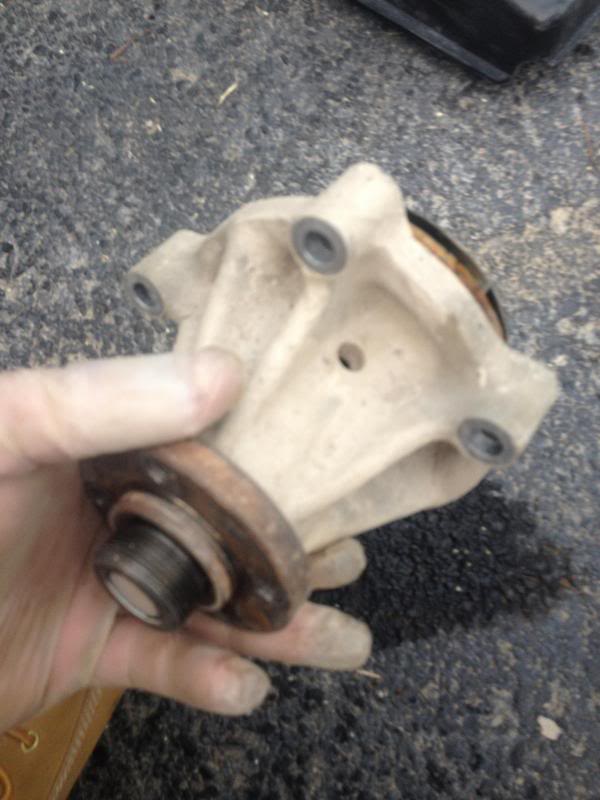
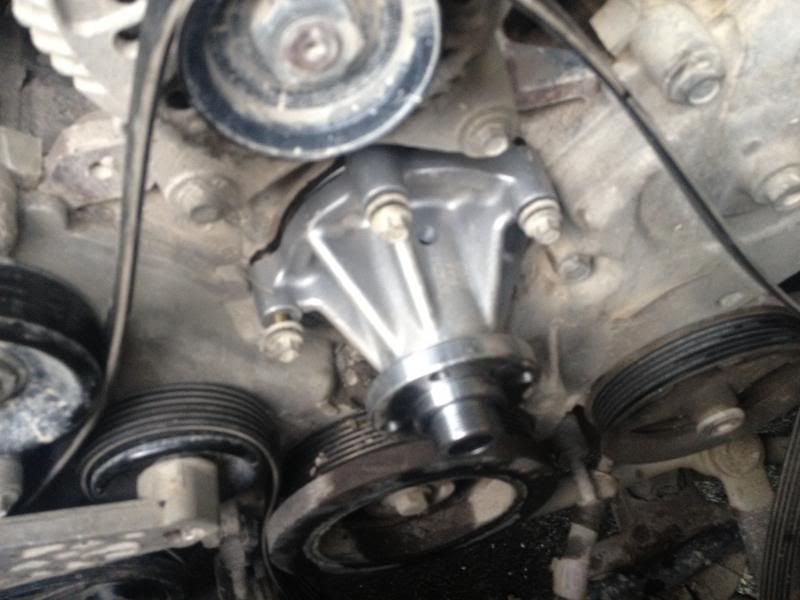
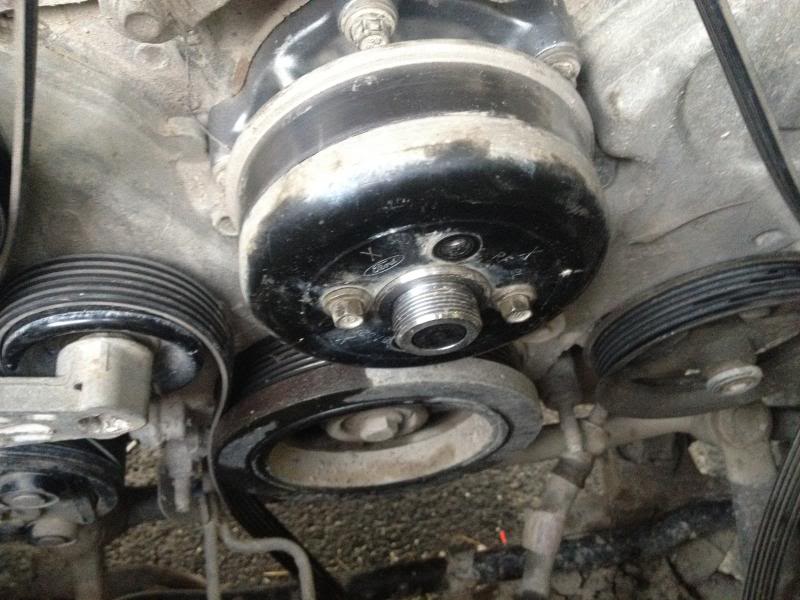
Unbolting water pump
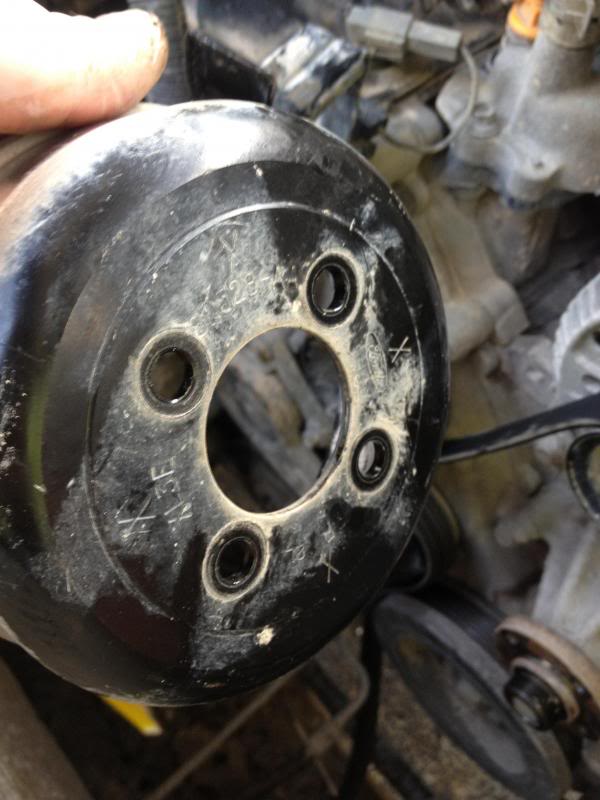
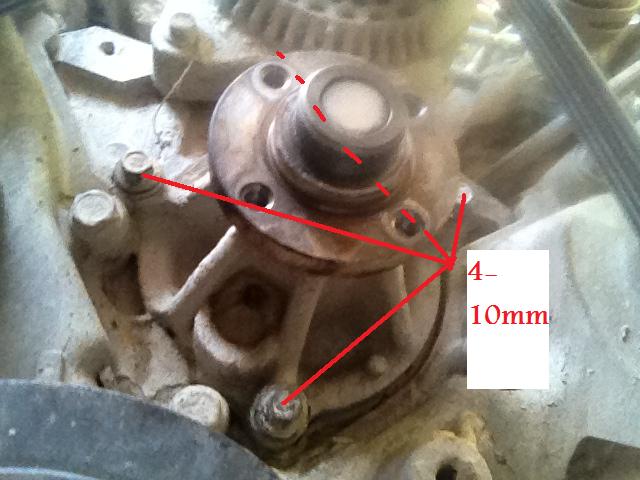
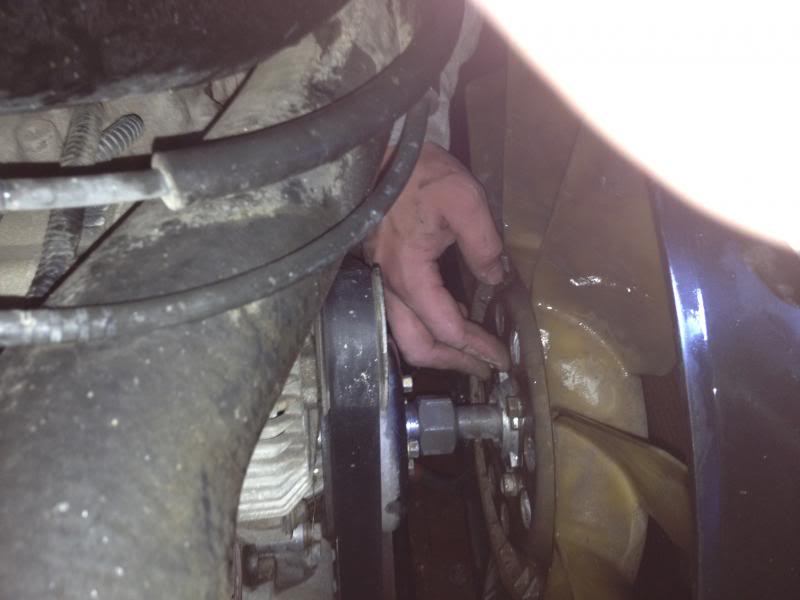
With the pulley off, we can now see the 4 bolts holding the water pump to the block. These 4-bolts are all 10mm and are torque down pretty tight, so make sure you get a good bit on the bolts as to not strip them. Use your new waterpump as a guide to how the bolt pattern is. There is a bolt directly under the pump, so make sure to remove it as well. 4 total!
Here are the bolts we need to removed. Use a 10mm socket to do this.
Top View
Bottom View
Some views of the bolts loosened.
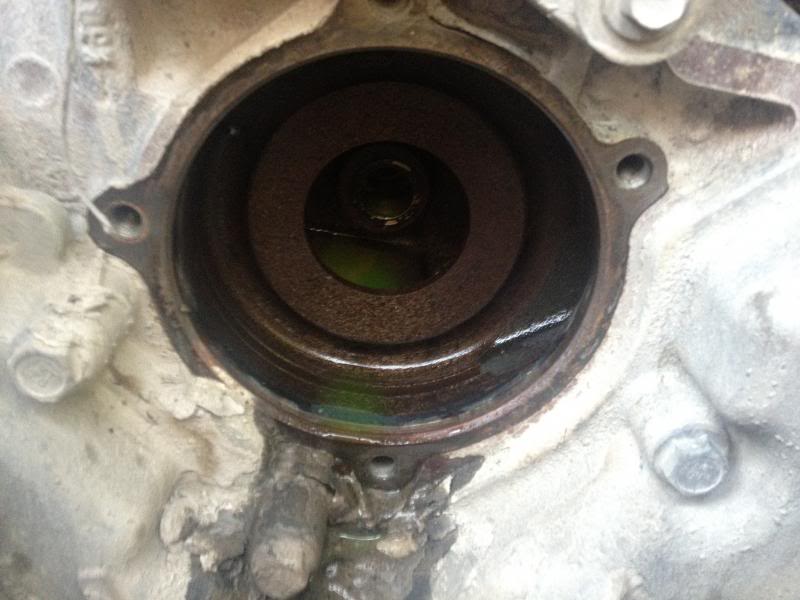
Removing Water-Pump:
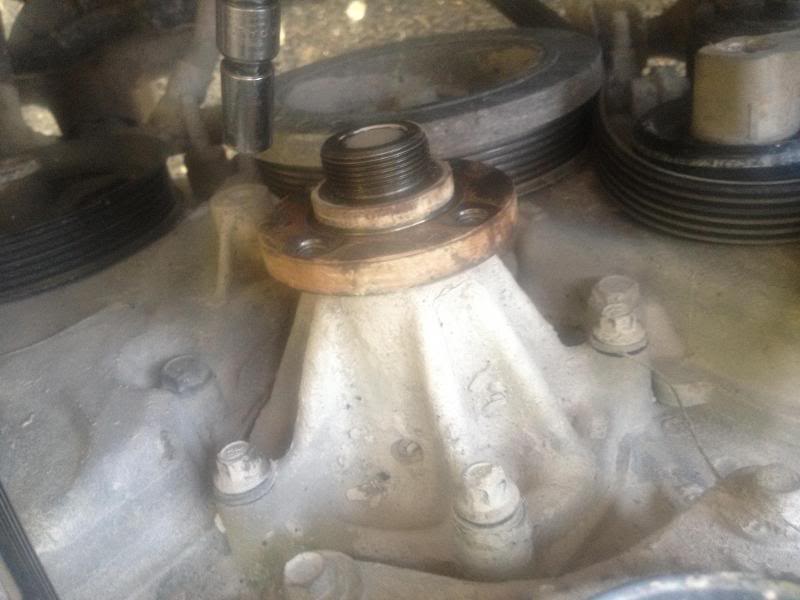
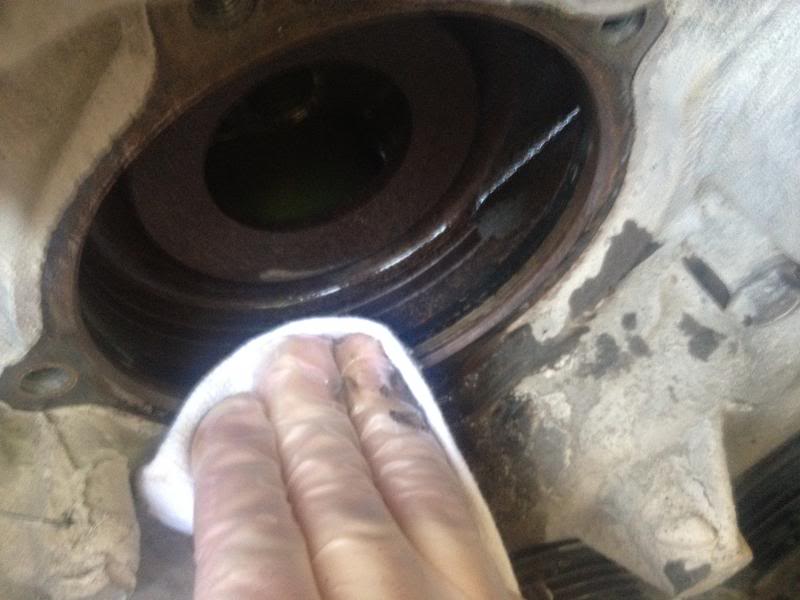
After all 4 bolts are removed, you will feel a little play in the pump. Its held in pretty good by the O-ring. So you have to rock it back and forth a little to get the top or bottom loose and then wedge it on out. Be patient and dont crack or damage anything on the block.
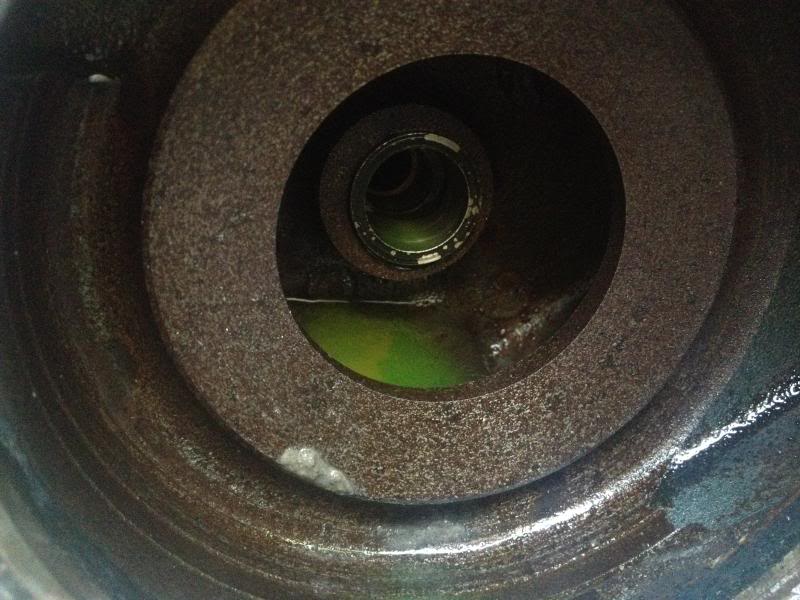
Once wedged out, you should see this.
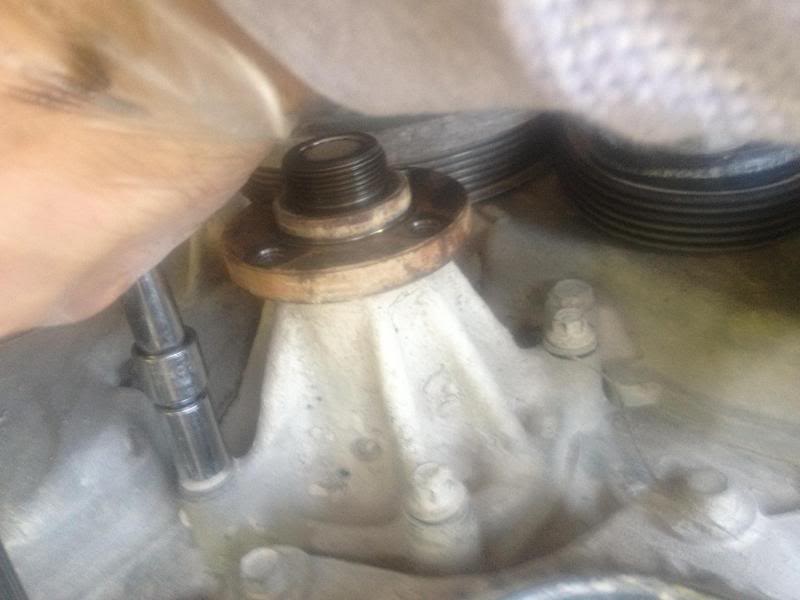
Use a rag(dont get lint or particles inside) to wipe around where the pump bolts up.
Use a large adjustable wrench and put it on the fan clutch nut (approx 1-1/8") . The bolt is right hand threaded, so to take it off we need to turn it to the left. So position the adjustable wrench as far right as you can.
Now you can use one of the 10mm open end wrenches to wedge between bolts of the water-pump pulley to hold for leverage. Once you get some good leverage, tap the adjustable wrench with a hammer and the you should see the fan clutch bolt loosen. Once it breaks loose, you can unscrew it by hand.

With the fan clutch loose, take it off and remove the fan shroud at the same time. The shroud shoudl simply pull up out of the clips at the bottom. This should give us full access to the front of the motor.
Taking off serpentine belt:
With a clean view and working area, its time to take the belt off the water-pump fly wheel.
Use your 1/2" male end of the ratchet and place it into the female end of the tensioner pulley. Press firmly on the ratchet to allow play into the belt, then pull the belt off the alternator pulley. This will give you slack to remove the belt off the water-pump pulley.

Removing Water-pump pulley.

Now we need to remove the 4- 10mm bolts holding the water pump pulley on. This can be tricky because the pulley turns when trying to loosen then. So use two open end 10mm wrenches, gain leverage with one of them and loose with the other. You can latch on to two bolts at the same time, but this wont work for the last two, because loosening one will tighten the other. So just loose all the bolts by leverage and you shouldn't have any issues.


Unbolting water pump
With the pulley off, we can now see the 4 bolts holding the water pump to the block. These 4-bolts are all 10mm and are torque down pretty tight, so make sure you get a good bit on the bolts as to not strip them. Use your new waterpump as a guide to how the bolt pattern is. There is a bolt directly under the pump, so make sure to remove it as well. 4 total!

Here are the bolts we need to removed. Use a 10mm socket to do this.
Top View

Bottom View

Some views of the bolts loosened.


Removing Water-Pump:
After all 4 bolts are removed, you will feel a little play in the pump. Its held in pretty good by the O-ring. So you have to rock it back and forth a little to get the top or bottom loose and then wedge it on out. Be patient and dont crack or damage anything on the block.
Once wedged out, you should see this.


Use a rag(dont get lint or particles inside) to wipe around where the pump bolts up.


Thread Starter
|
Technical Article Contributor
Joined: Mar 2012
Posts: 154
Likes: 0
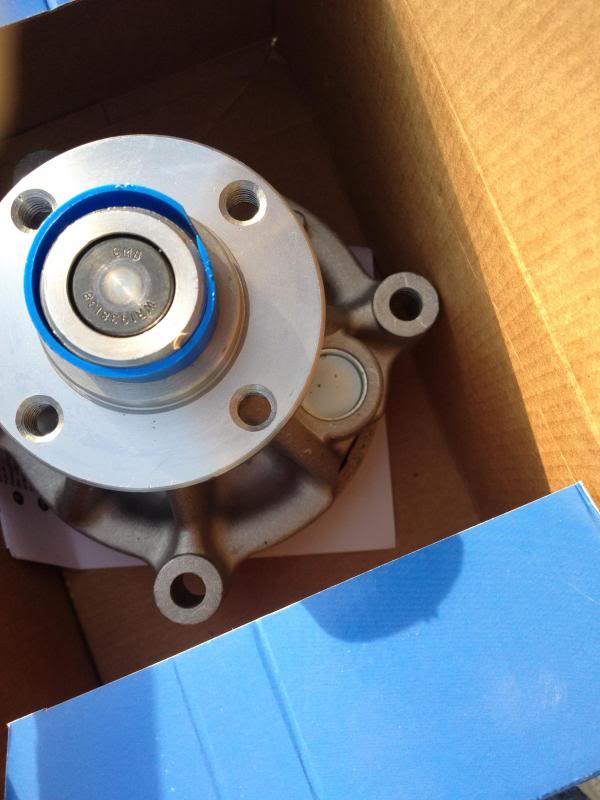
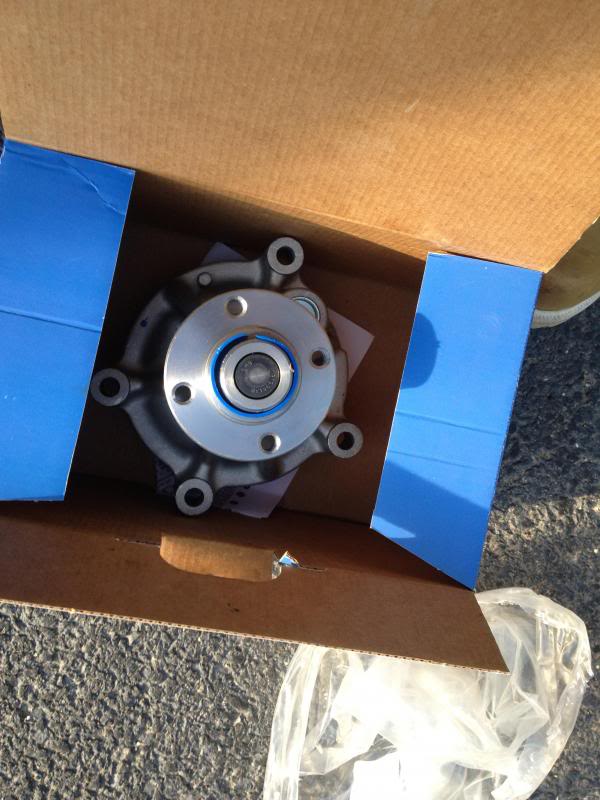
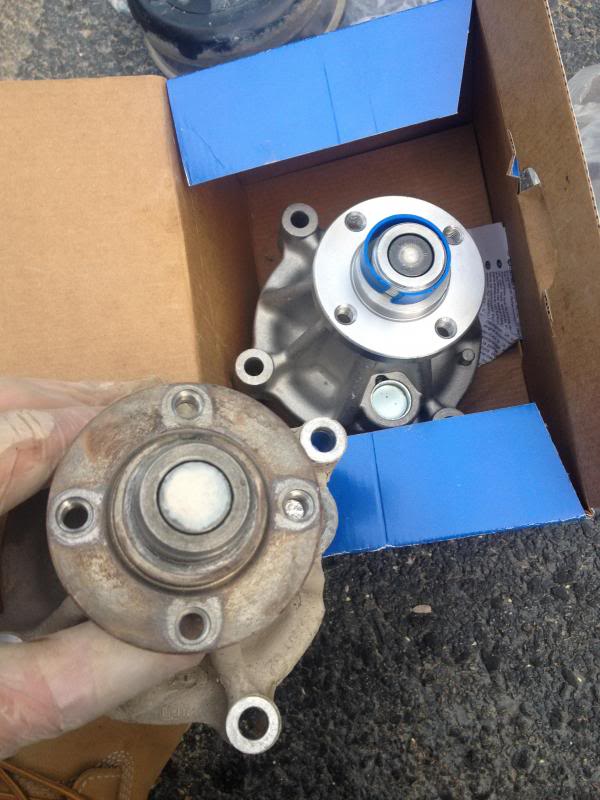
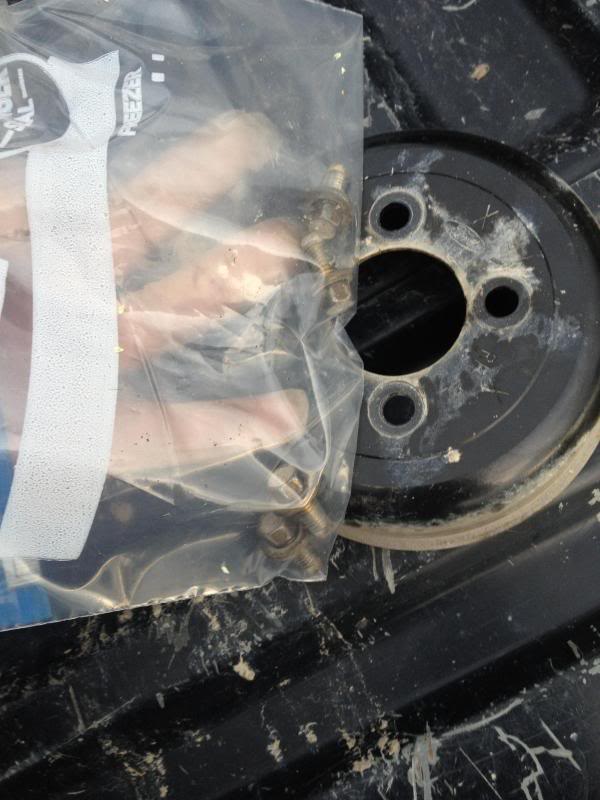
Checking to make sure the pumps match and the O-ring is in place.
Hold the old pump next to your new one to make sure they are the same one. Bolt holes should match up, and the O-ring should be in the same place.
Installing pump:
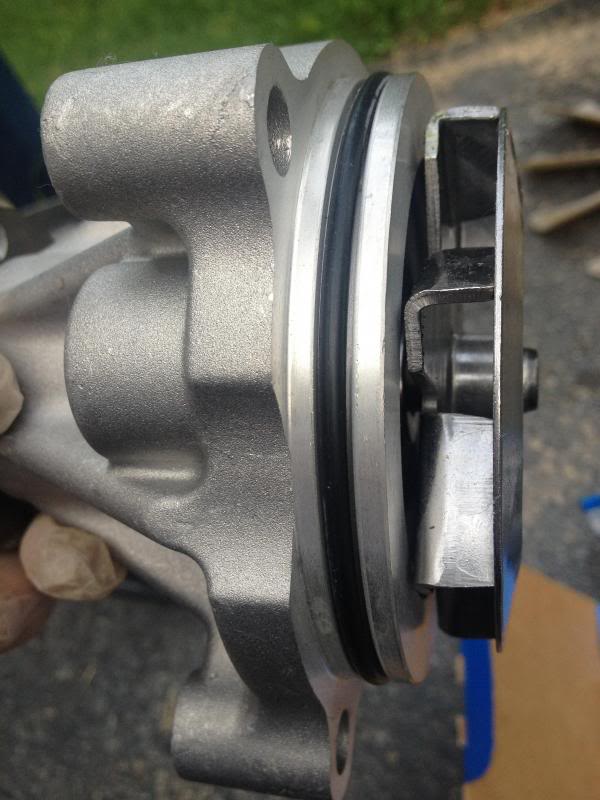
Make sure the orientation of the pump is correct, with the weep hole at the bottom. It will only line up one way.
Once lined up, force the pump in as far as it will go by hand, then loosely add all four 10mm bolts back (I used anti siege on these). The pump takes alot of pressure for the O-ring to go back into the seal, so I suggest tighting the pump bolts up like you do a rim on the car. Start with the bottom one and tighen it just enough so you almost have the seal, then do the same to the very top. Then proceed to all the other bolts the same way. Once you do that, it is safe to torque them down to the appropriate specs to make a nice tight seal.
Re-installing Pulley
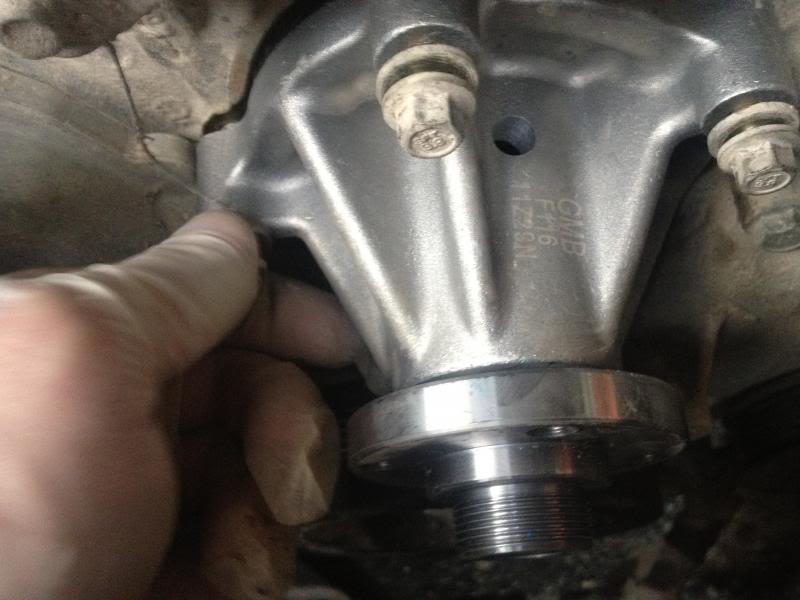
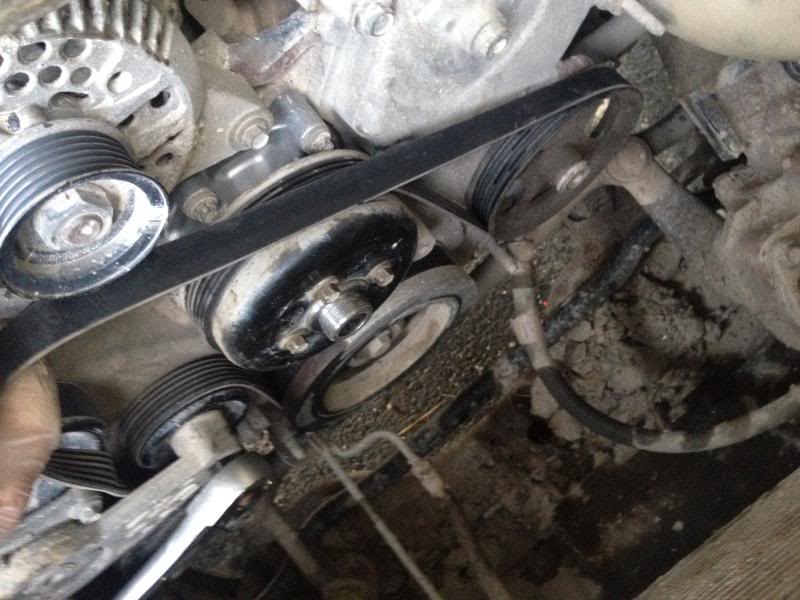
Time to re-install the pulley on the pump. Use the same 4- 10mm bolts you removed earlier. Use the same leverage process to tighten them. Get them nice and snug. It also helpts to clean the pulley so that it doesn't eat up or knock your belt off line.
Putting belt back on:
With the new pump in, and the pulley back on, its time to put the belt back. Use the same 1/2" ratchet to press down the tensioner to allow you to line up the belt. ***MAKE SURE TO GET THE BELT IN ALL THE PROPER GROOVES AND LINED UP ACCORDING TO THE ENGINE SCHEMATICS!


Hold the old pump next to your new one to make sure they are the same one. Bolt holes should match up, and the O-ring should be in the same place.


Installing pump:
Make sure the orientation of the pump is correct, with the weep hole at the bottom. It will only line up one way.
Once lined up, force the pump in as far as it will go by hand, then loosely add all four 10mm bolts back (I used anti siege on these). The pump takes alot of pressure for the O-ring to go back into the seal, so I suggest tighting the pump bolts up like you do a rim on the car. Start with the bottom one and tighen it just enough so you almost have the seal, then do the same to the very top. Then proceed to all the other bolts the same way. Once you do that, it is safe to torque them down to the appropriate specs to make a nice tight seal.


Re-installing Pulley
Time to re-install the pulley on the pump. Use the same 4- 10mm bolts you removed earlier. Use the same leverage process to tighten them. Get them nice and snug. It also helpts to clean the pulley so that it doesn't eat up or knock your belt off line.


Putting belt back on:
With the new pump in, and the pulley back on, its time to put the belt back. Use the same 1/2" ratchet to press down the tensioner to allow you to line up the belt. ***MAKE SURE TO GET THE BELT IN ALL THE PROPER GROOVES AND LINED UP ACCORDING TO THE ENGINE SCHEMATICS!


Thread Starter
|
Technical Article Contributor
Joined: Mar 2012
Posts: 154
Likes: 0
I always put the alt. belt on last because it is the smallest and easiest to get too.
Double check that the belt is put on properly and on all pullies.
Optional:
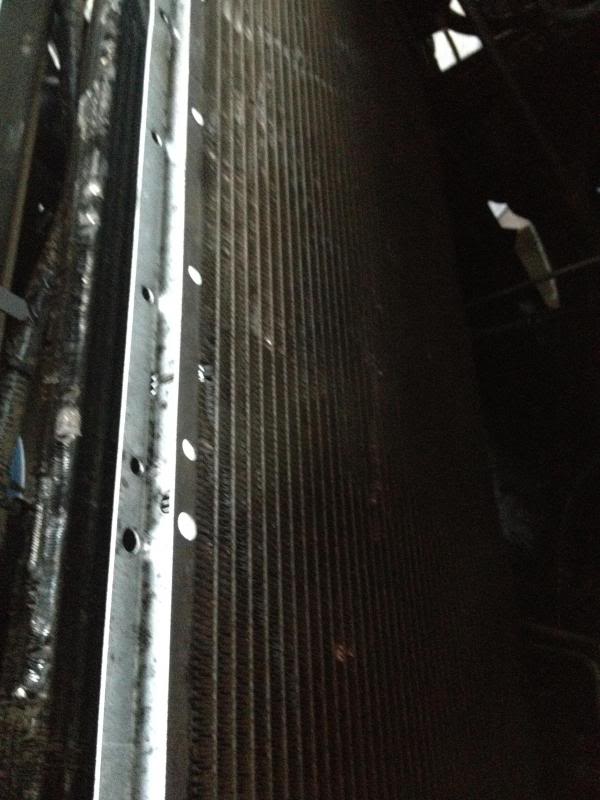
I went ahead and cleaned out the fins on both the condensor and radiator while I still had the shroud off. Make sure to not get water in the throttle body or air intake.
Re-instaling fan clutch and shroud
Now we have to repeat the process we did earlier when removing the shroud and fan clutch. This time we simultaneously put the fan inside the shroud and while hold on to the fan, put the bottom clips of the shroud into the lockers at the bottom.


Double check that the belt is put on properly and on all pullies.

Optional:
I went ahead and cleaned out the fins on both the condensor and radiator while I still had the shroud off. Make sure to not get water in the throttle body or air intake.


Re-instaling fan clutch and shroud
Now we have to repeat the process we did earlier when removing the shroud and fan clutch. This time we simultaneously put the fan inside the shroud and while hold on to the fan, put the bottom clips of the shroud into the lockers at the bottom.


Thread Starter
|
Technical Article Contributor
Joined: Mar 2012
Posts: 154
Likes: 0
Once you have the shroud in the bottom slots, you can go ahead and screw on the fan clutch( to the right).

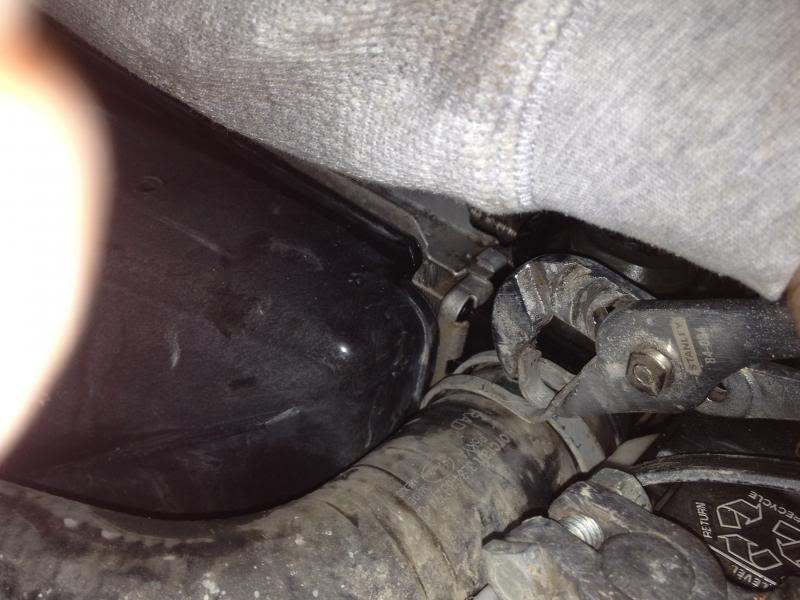
Once you have the fan attached enough to hold, put the 2-8mm bolts back into the top of the shroud.
Then its time to pull out the adjustable wrench and hammer to torque down the fan to the water pump.
First tighten by hand with the wrench while hold the pulley. Once you have it snug, use a hammer to smack the wrench to the right, tightening the fan even tigther. (Once cranked it will tighten up a little more) Just make sure its very snug.
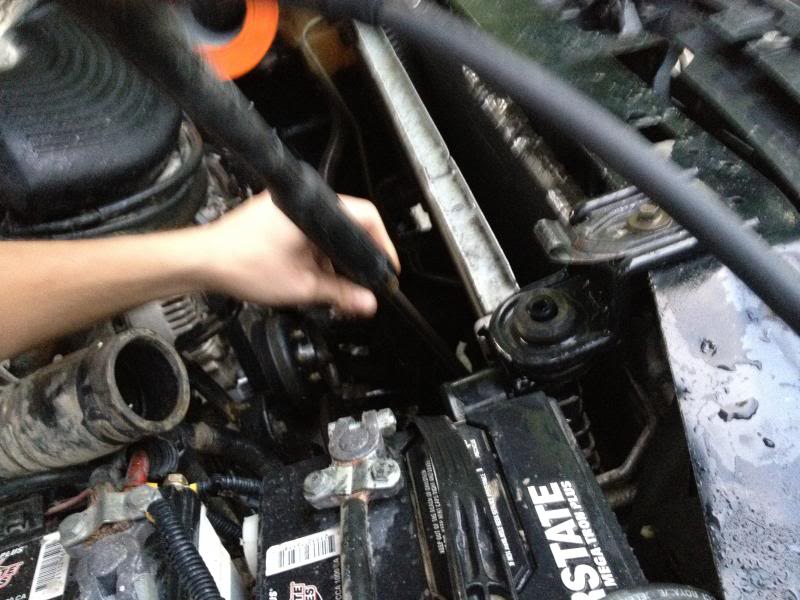
Attaching hoses:
Now re-attach the radiator hose using the same process you took it off with.
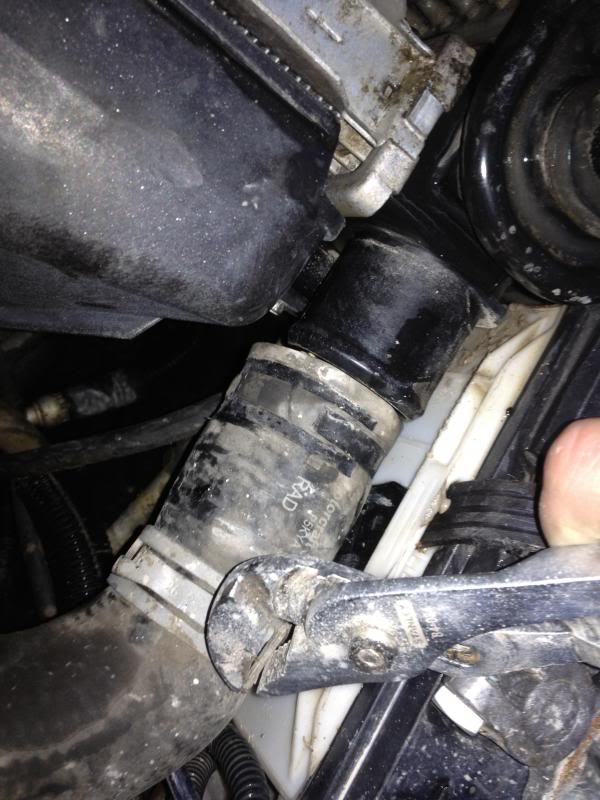
Tightening drain plug and adding coolant.
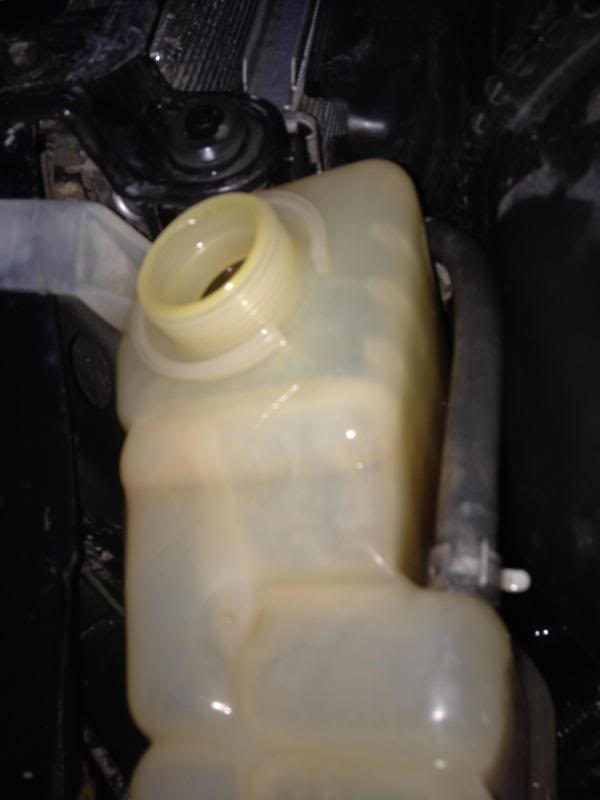
Make sure your drain plug at the bottom of the radiator is tight, and then add coolant back.


Once you have the fan attached enough to hold, put the 2-8mm bolts back into the top of the shroud.

Then its time to pull out the adjustable wrench and hammer to torque down the fan to the water pump.
First tighten by hand with the wrench while hold the pulley. Once you have it snug, use a hammer to smack the wrench to the right, tightening the fan even tigther. (Once cranked it will tighten up a little more) Just make sure its very snug.

Attaching hoses:
Now re-attach the radiator hose using the same process you took it off with.

Tightening drain plug and adding coolant.
Make sure your drain plug at the bottom of the radiator is tight, and then add coolant back.


Junior Member
Joined: Dec 2018
Posts: 4
Likes: 0
Thank you for such an in-depth how-to! I plan on doing this with my 99 Expedition 5.4 4x4 tomorrow. Yesterday as I parked in our driveway, I smelled coolant. It turns out it was leaking out fast from below the water pump. So I have to assume the pump failed or the o-ring? I ordered new parts but if it's the o-ring which failed, is it safe to simply replace the o-ring and reinstall the old pump? I'll also be replacing the serpentine belt which is cracking and showing its age, as well as the tensioner and pulleys. While everything is off, I'll also be replacing the oil filter adaptor gasket which is leaking and requires draining the coolant. Perfect timing!
It looks like you have two batteries in your truck. Is that correct and why do you?
It looks like you have two batteries in your truck. Is that correct and why do you?