
Door Treatments (tutorial)


Thread Starter
|
Technical Article Contributor
Joined: Aug 2006
Posts: 7,862
Likes: 0
From: Northern California
Door Treatments (tutorial)
I have been getting a LOT of questions lately about how I did my doors and the right way to prep them during an install. I decided to do a slightly in-depth writeup on what I did. I dug through my old pictures to help make more sense, and hopefully this will give you guys some ideas for you own installs.
DISCLAIMER: I am NOT a professional. I am simply a DIYer and do this as a hobby for fun. My methods may not be the best, and i certainly cannot afford the best materials. So keep that in mind, I am not saying this is the only proper way to do this. I am only trying to give some simple tips and ideas to those who feel clueless.
Okay, now that that's out of the way...
First of all, let me say that this can get very messy, so you will want to wear some old clothes you dont care about. Also, you will want to be very careful working around your interior, as sound deadener can get everywhere and its sticky and doesn't go well with your seats and such. Another thing is with butyl based deadener, it wont adhere very well if it is extremely cold outside, so take that into consideration when planning.
I used a product called Raamat for the doors. It is a great value deadener. It is butyl based, with foil backing. It is not as thick as Damplifier Pro or Dynamat Extreme, but you do get more dampener for your money. Those 3 deadener choices I mentioned are the only ones I would consider using as they are the easiest to work with, they hold up well to heat, and most importantly they perform the best. (I have used Damplifier Pro in other parts of the truck, and if you can spare the money I highly recommend you use that stuff. It isnt as messy as Raamat and it is the highest quality deadener I have experienced using.)
Some people feel the need to cover every last inch of metal/panel with deadener is the only way to do it. While this is effective, it can be a waste of materials and just add unwanted weight to your vehicle. You only need to deaden places that are prone to vibration, and you dont need to fully cover them. See here for an example (listen to the clips):
http://www.sounddeadenershowdown.com/products/cld
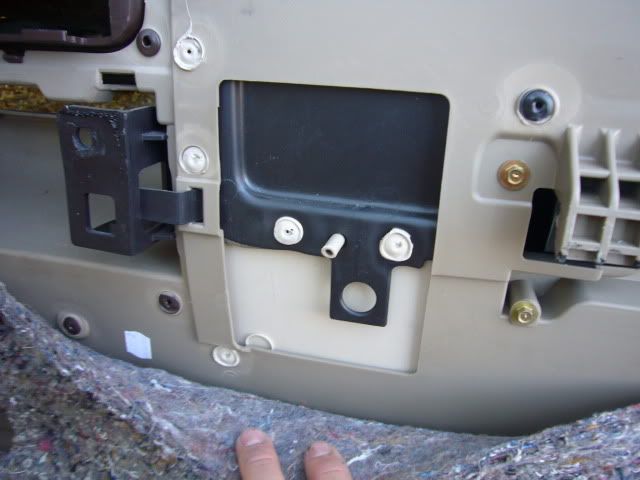
You want to deaden flat areas, areas where panels touch each other, or other areas you feel may be prone to any kind of vibration, resonance or sound transfer. Here is the back of my driver's door panel, an example of a good place to put deadener. Notice there are 3 different plastic panels touching each other, this is an area where resonance can easily occur between the plastic pieces:
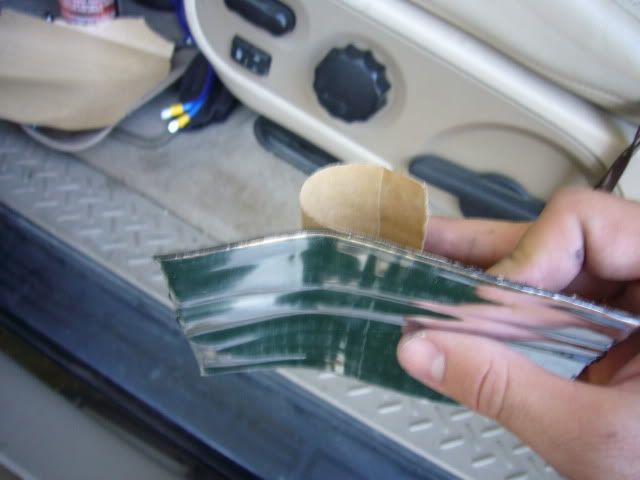
The easiest way I found to apply the Raamat is to use a razor edge to slice your pieces, then peel back part of the paper like this:
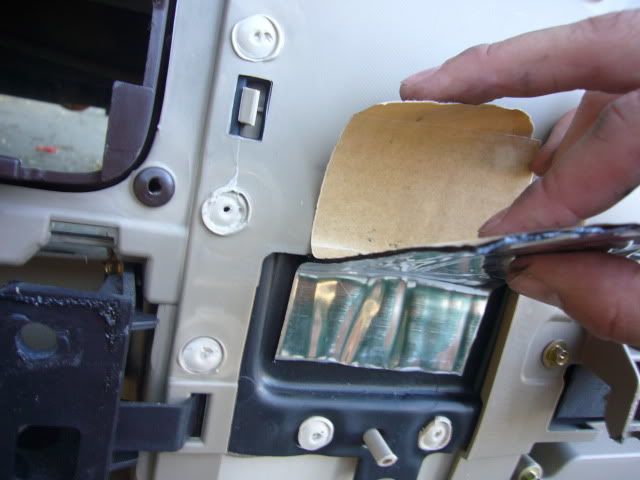
Then apply the revealed part, and slowly peel back the rest of the paper while firmly pressing the dampener down.
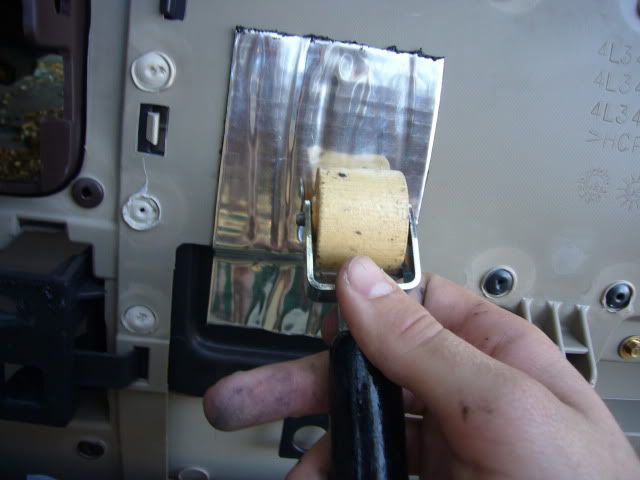
Use a roller to get any bubbles out and to make sure the butyl really adheres well.
DISCLAIMER: I am NOT a professional. I am simply a DIYer and do this as a hobby for fun. My methods may not be the best, and i certainly cannot afford the best materials. So keep that in mind, I am not saying this is the only proper way to do this. I am only trying to give some simple tips and ideas to those who feel clueless.
Okay, now that that's out of the way...
First of all, let me say that this can get very messy, so you will want to wear some old clothes you dont care about. Also, you will want to be very careful working around your interior, as sound deadener can get everywhere and its sticky and doesn't go well with your seats and such. Another thing is with butyl based deadener, it wont adhere very well if it is extremely cold outside, so take that into consideration when planning.
I used a product called Raamat for the doors. It is a great value deadener. It is butyl based, with foil backing. It is not as thick as Damplifier Pro or Dynamat Extreme, but you do get more dampener for your money. Those 3 deadener choices I mentioned are the only ones I would consider using as they are the easiest to work with, they hold up well to heat, and most importantly they perform the best. (I have used Damplifier Pro in other parts of the truck, and if you can spare the money I highly recommend you use that stuff. It isnt as messy as Raamat and it is the highest quality deadener I have experienced using.)
Some people feel the need to cover every last inch of metal/panel with deadener is the only way to do it. While this is effective, it can be a waste of materials and just add unwanted weight to your vehicle. You only need to deaden places that are prone to vibration, and you dont need to fully cover them. See here for an example (listen to the clips):
http://www.sounddeadenershowdown.com/products/cld
You want to deaden flat areas, areas where panels touch each other, or other areas you feel may be prone to any kind of vibration, resonance or sound transfer. Here is the back of my driver's door panel, an example of a good place to put deadener. Notice there are 3 different plastic panels touching each other, this is an area where resonance can easily occur between the plastic pieces:
The easiest way I found to apply the Raamat is to use a razor edge to slice your pieces, then peel back part of the paper like this:
Then apply the revealed part, and slowly peel back the rest of the paper while firmly pressing the dampener down.
Use a roller to get any bubbles out and to make sure the butyl really adheres well.
Thread Starter
|
Technical Article Contributor
Joined: Aug 2006
Posts: 7,862
Likes: 0
From: Northern California
continued...
Okay, now that we know how to apply the stuff, I'll show you what I personally did as far as the door treatments.
You must first take off the plastic door panel. Do a search in the forum on how to do this, its pretty simple. There are 2 6mm bolts at the bottom of the panel, 2 8mm bolts in the door handle, and a single 10mm bolt under the window bottoms (you have to pop that panel off and disconnect the control leads). For those with the speakers in stock location, you must remove the speaker and the 4 screws holding it in as well.
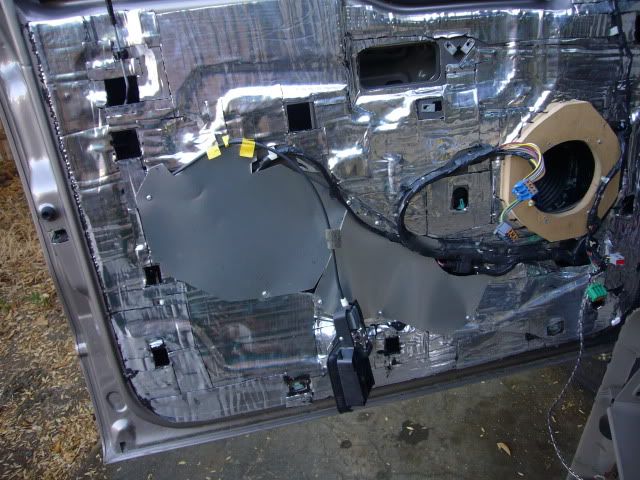
To start off, I put 1-2 layers on the inner and outer door skins. When applying the deadener, you want to use as big of strips/pieces as possibly. smaller pieces tend to fall off easier in the heat, so the bigger the better. You DONT want to cover up the sqaure holes in the panel, those are what hold the plastic door panel on. You obviously dont want to cover the bolt holes either.
Here is what mine looked like after this step:
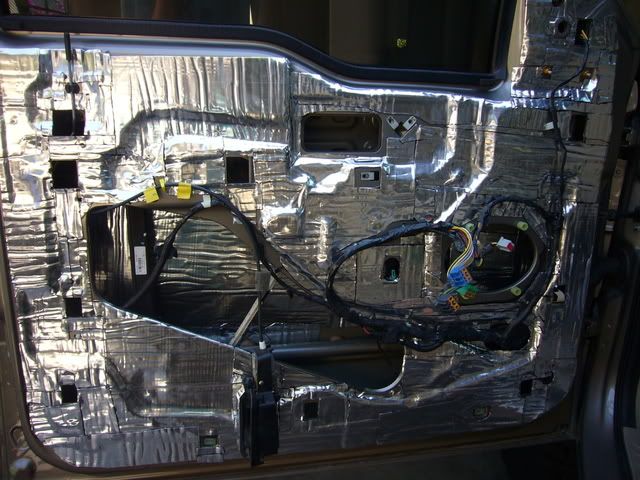
Here is a good example of not needing to cover everything. This bar on the inside only needs one wide, solid strip across it. It will not resonate at all now. This strip has the same exact affect as covering the whole darn thing, so why waste material?
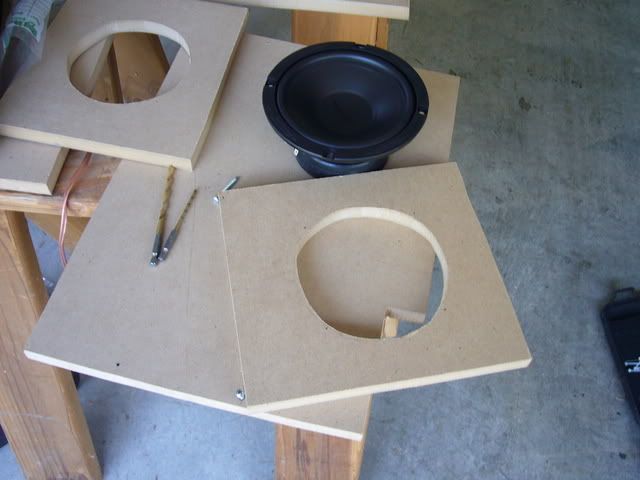
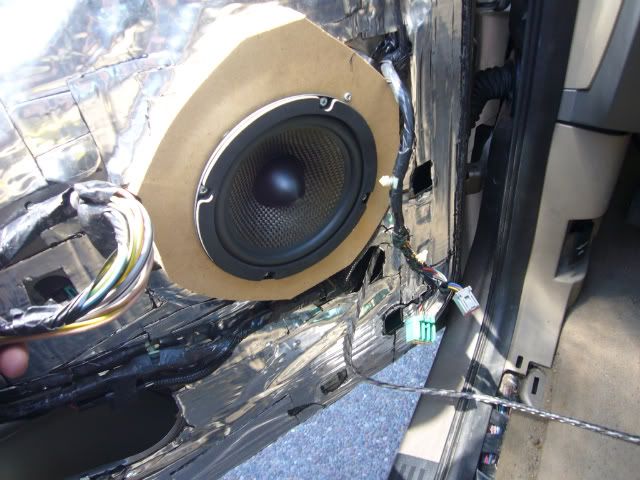
Next what I did was build speaker baffles. While some midbass speakers do fit into the stock location, I highly recommend doing it this way because the stock location is plastic and having a high powered mid mounted to plastic is just asking for unwanted panel buzz. You can use a variety of products for these baffles. Masonite, ABS plastic or MDF are popular choices. If you use wood, make sure to treat it with waterproofing. I personally used 3/4" MDF and treated it with Thompson's waterproofing formula. You can make these baffles with a jigsaw or router with ease.
When mounting the baffles, apply clay between the baffle and metal door skin. This will prevent transfer of vibrations and will seal and leaks that may be present. Install the baffles with 1.5" self tapping sheetmetal screws.
As you can see my baffles are nothing pretty, but get the job done. Here is mine installed:
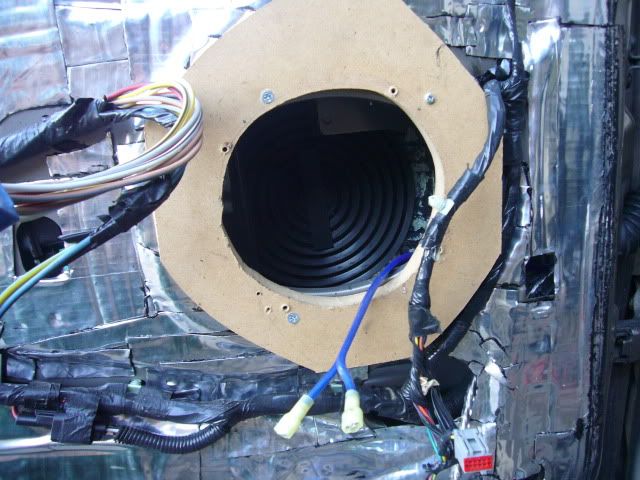
In that picture you can also notice my deflex pad.These help to send backwaves elsewhere into the door, preventing them from bouncing back at the speaker and upsetting cone movement. They basically make the midrange response cleaner, and yes they do work. I applied mine using Second Skin spray, but 3M adhesive will work just fine. Make sure both surfaces are clean before mounting them.
You must first take off the plastic door panel. Do a search in the forum on how to do this, its pretty simple. There are 2 6mm bolts at the bottom of the panel, 2 8mm bolts in the door handle, and a single 10mm bolt under the window bottoms (you have to pop that panel off and disconnect the control leads). For those with the speakers in stock location, you must remove the speaker and the 4 screws holding it in as well.
To start off, I put 1-2 layers on the inner and outer door skins. When applying the deadener, you want to use as big of strips/pieces as possibly. smaller pieces tend to fall off easier in the heat, so the bigger the better. You DONT want to cover up the sqaure holes in the panel, those are what hold the plastic door panel on. You obviously dont want to cover the bolt holes either.
Here is what mine looked like after this step:
Here is a good example of not needing to cover everything. This bar on the inside only needs one wide, solid strip across it. It will not resonate at all now. This strip has the same exact affect as covering the whole darn thing, so why waste material?
Next what I did was build speaker baffles. While some midbass speakers do fit into the stock location, I highly recommend doing it this way because the stock location is plastic and having a high powered mid mounted to plastic is just asking for unwanted panel buzz. You can use a variety of products for these baffles. Masonite, ABS plastic or MDF are popular choices. If you use wood, make sure to treat it with waterproofing. I personally used 3/4" MDF and treated it with Thompson's waterproofing formula. You can make these baffles with a jigsaw or router with ease.
When mounting the baffles, apply clay between the baffle and metal door skin. This will prevent transfer of vibrations and will seal and leaks that may be present. Install the baffles with 1.5" self tapping sheetmetal screws.
As you can see my baffles are nothing pretty, but get the job done. Here is mine installed:
In that picture you can also notice my deflex pad.These help to send backwaves elsewhere into the door, preventing them from bouncing back at the speaker and upsetting cone movement. They basically make the midrange response cleaner, and yes they do work. I applied mine using Second Skin spray, but 3M adhesive will work just fine. Make sure both surfaces are clean before mounting them.
Thread Starter
|
Technical Article Contributor
Joined: Aug 2006
Posts: 7,862
Likes: 0
From: Northern California
continued...
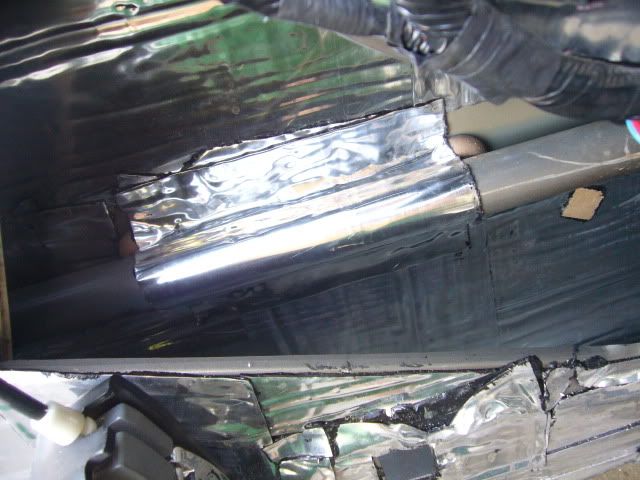
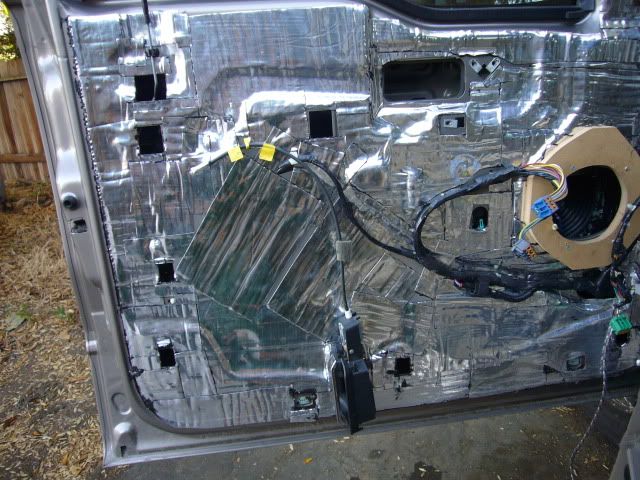
Once I had the inner and outer doorskins well dampened, I moved on to the next task which was sealing the large hole. This can be done in several ways. Some have used MDF or masonite, which is probably the best material to use. I personally used Aluminum flashing, which was nice because it was easy to cut with shears into pieces that fit. Aluminum is obviously a little flimsy and one may worry about it flexing, but with all of the dampener on top of it and with the door card back on, it actually cannot flex at all. I mounted the flashing with 1/2" self tapping sheetmetal screws.
And once this was all covered in 1-2 layers of dampener, it looked like this:
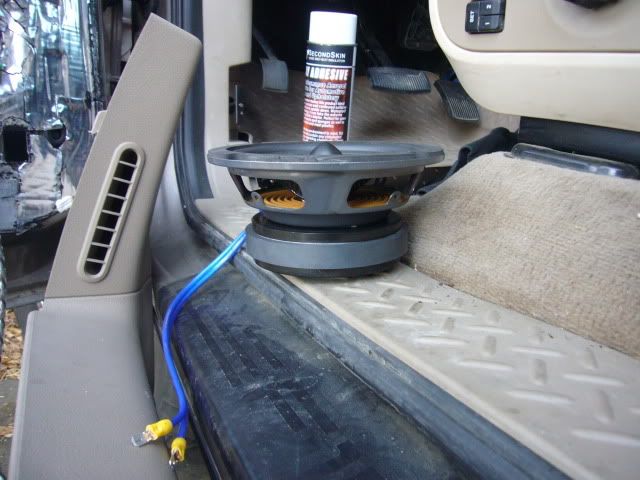
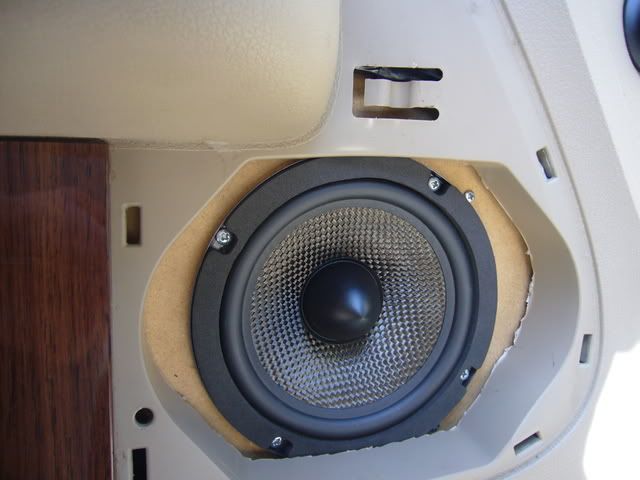
Beastly ID mid (almost 6 pounds!):
And what it looks like installed into the baffle:
And that's pretty much it for what I did. Make sure you thoroughly wash your hands BEFORE you put the door panel back on. This is why:
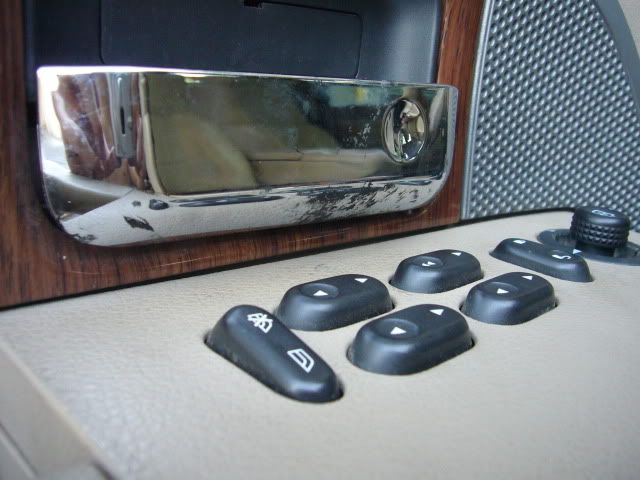
Oops. :o
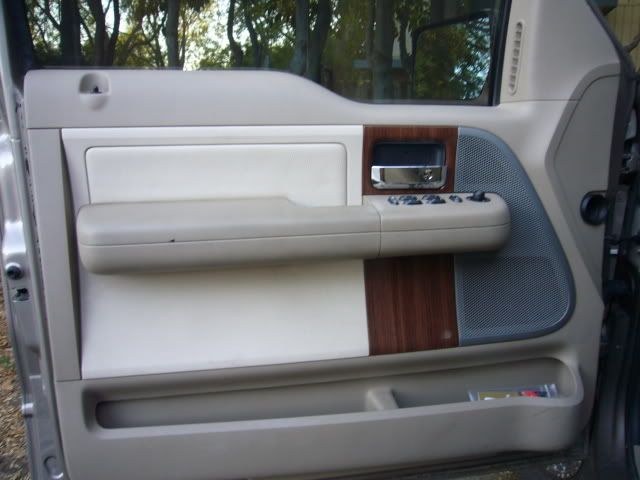
With the panel back on:
At this point, if you push your speaker in and it comes back out slower than before, then you know you have a well sealed door.
And it still looks stock:
All done! It may not be pretty and I know I didn't do the best job, but my midbass is very strong and the midrange clarity from the mids is much better than before these door treatments. The doors are very solid and there is no noticeable buzzing. Its well worth it, trust me.
And once this was all covered in 1-2 layers of dampener, it looked like this:
Beastly ID mid (almost 6 pounds!):
And what it looks like installed into the baffle:
And that's pretty much it for what I did. Make sure you thoroughly wash your hands BEFORE you put the door panel back on. This is why:
Oops. :o
With the panel back on:
At this point, if you push your speaker in and it comes back out slower than before, then you know you have a well sealed door.
And it still looks stock:
All done! It may not be pretty and I know I didn't do the best job, but my midbass is very strong and the midrange clarity from the mids is much better than before these door treatments. The doors are very solid and there is no noticeable buzzing. Its well worth it, trust me.


Senior Member
Joined: Jul 2006
Posts: 250
Likes: 0
I was looking at Lexan to make them out of but it is considerably more expensive. There are several properties that make it ideal for this application. First it is very similar to wood in working with it (easy to cut, drill, and route)and second is you will never have to worry about water damage or sealing it. It also seems to be very durable so it should outlast the truck with no problems. There are several materials you can use for this but I figured I would spend just a little more than the cost of wood and never have to worry about it again.
The reason I mentioned he had a super crew is that the doors are different between the different body styles so I am not certain of the hole size is the same measurement in all of them.

Senior Member
Joined: Dec 2008
Posts: 1,650
Likes: 2
From: The Bayou State
mSaLL150, thanks for this write up. I tackled this project this weekend, or actually one day this weekend and only finished up the driver side door. It does make quite a difference in transmitted vibration and sounds more solid. The mdf baffles are not so easy to cut and I ruined several baffles before I finally got the technique down for cutting them. I did that last weekend. I noticed there was some deadening material that Ford placed in the door. After removing one piece, I figured it wasn't so easy to remove and just put additional deadening material on top of the other piece in the driver's door. I used Dampifier Pro.
I wanted to seal the edges of the mdf to prevent moisture from affecting them and came across a few ways to do it. Not having any luck finding a mdf specific sealer, I tried mixing 3 parts yellow wood glue with 1 part water to "paint" the mdf. After a couple coats and some sanding, they came out really good. A little clear polyurethane finished them off nicely.
I wanted to seal the edges of the mdf to prevent moisture from affecting them and came across a few ways to do it. Not having any luck finding a mdf specific sealer, I tried mixing 3 parts yellow wood glue with 1 part water to "paint" the mdf. After a couple coats and some sanding, they came out really good. A little clear polyurethane finished them off nicely.
Trending Topics

Technical Article Contributor
Joined: Aug 2008
Posts: 1,670
Likes: 0
From: Lorena, TX
How do you like the Raamat? This is the first time I've seen it. Do you have a link to where you bought it? I'll be replacing my vinyl floor with carpet soon and will be doing some sound deadening while I have the seats out. I've heard of some materials that have the butyl or other adhesives having a tar smell come from them. Does the raamat have any smells after installing?
Senior Member
Joined: Dec 2008
Posts: 1,650
Likes: 2
From: The Bayou State
I did the passenger side Friday, since I was leaving for vacation Saturday and taking the truck. The damping and the baffles have really improved the mid bass coving from the front speakers. If you have a good set of premium speakers bolted to the stock door hardware, you really don't know what you're missing. I noticed a very distinct improvement.
I used the dampifier pro and there is no smell with that product. I used Dynamat in my Bronco many years ago, and had a smell for months. I wasn't that objectionable.
I used the dampifier pro and there is no smell with that product. I used Dynamat in my Bronco many years ago, and had a smell for months. I wasn't that objectionable.
Technical Article Contributor
Joined: Aug 2008
Posts: 1,670
Likes: 0
From: Lorena, TX
I did the passenger side Friday, since I was leaving for vacation Saturday and taking the truck. The damping and the baffles have really improved the mid bass coving from the front speakers. If you have a good set of premium speakers bolted to the stock door hardware, you really don't know what you're missing. I noticed a very distinct improvement.
I used the dampifier pro and there is no smell with that product. I used Dynamat in my Bronco many years ago, and had a smell for months. I wasn't that objectionable.
I used the dampifier pro and there is no smell with that product. I used Dynamat in my Bronco many years ago, and had a smell for months. I wasn't that objectionable.
Thread Starter
|
Technical Article Contributor
Joined: Aug 2006
Posts: 7,862
Likes: 0
From: Northern California
Glad it was worth it for you Windsor.
As for the Raamat, it doesn't smell but it can get messy when installing. Damplifier is thicker and very easy to install, but it is also stiffer so it doesn't adhere to curves and corners as well.
For Raamat go to Raamaudio.com, and for Damplifier go to secondskinaudio.com.
As for the Raamat, it doesn't smell but it can get messy when installing. Damplifier is thicker and very easy to install, but it is also stiffer so it doesn't adhere to curves and corners as well.
For Raamat go to Raamaudio.com, and for Damplifier go to secondskinaudio.com.
Senior Member
Joined: May 2005
Posts: 1,514
Likes: 0
From: Southern, CA

