
07 Screw mini build


Thread Starter
|
Member
Joined: Sep 2011
Posts: 32
Likes: 0
07 Screw mini build
Well its been a while since the build has started and I finally decided to start documenting some of the progress its achieved since I bought it. Tell me what y'all think!
I don't have pictures of all the things I've done to it but ill try and show everything I can.
2007 F150 XLT SCrew DSG
Day I bought it

Had 143k miles on it only one owner before me. Previous owner must have drove the crap out of it 143k miles in 5 years!! Interior was in pretty dismal condition, extremely dirty, outside had a few dings and dents and minor paint chips. Overall an extremely good buy at the time.
The build begins...
First on my list was a leveling kit, i went with rough country because it was pretty cheap when i was in the market for one. Decided on 2.5"
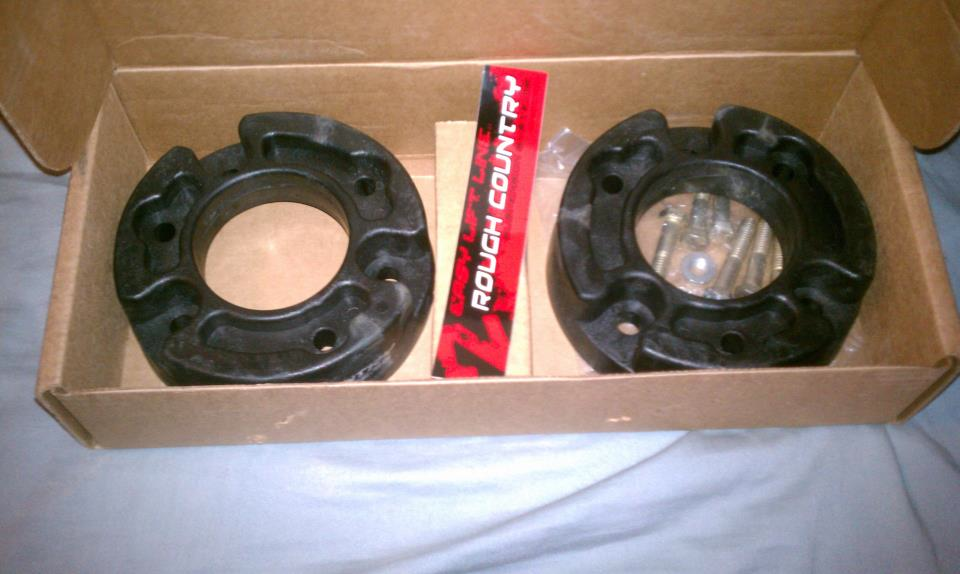
Don't have any pics of installation but i chose to do it myself and save some serious cash. Shops quoted installation at 300$!
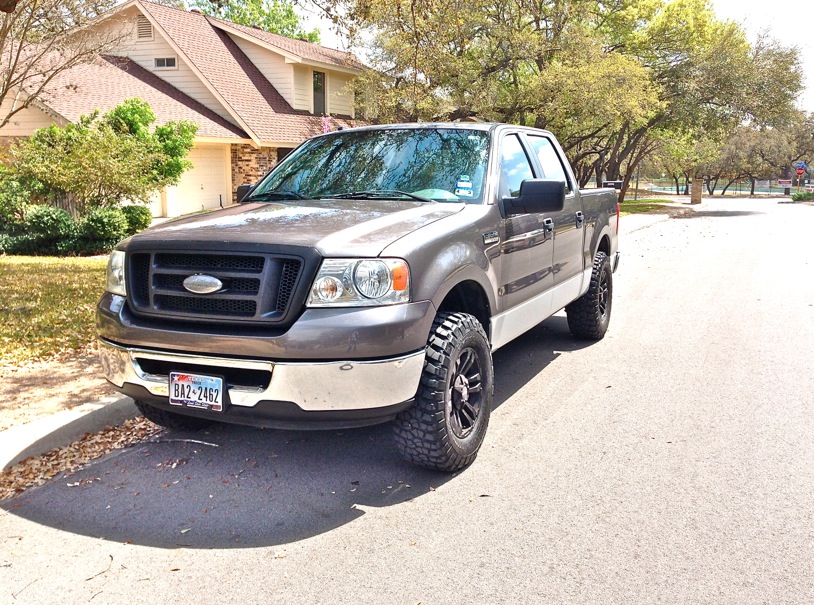
After the leveling kit
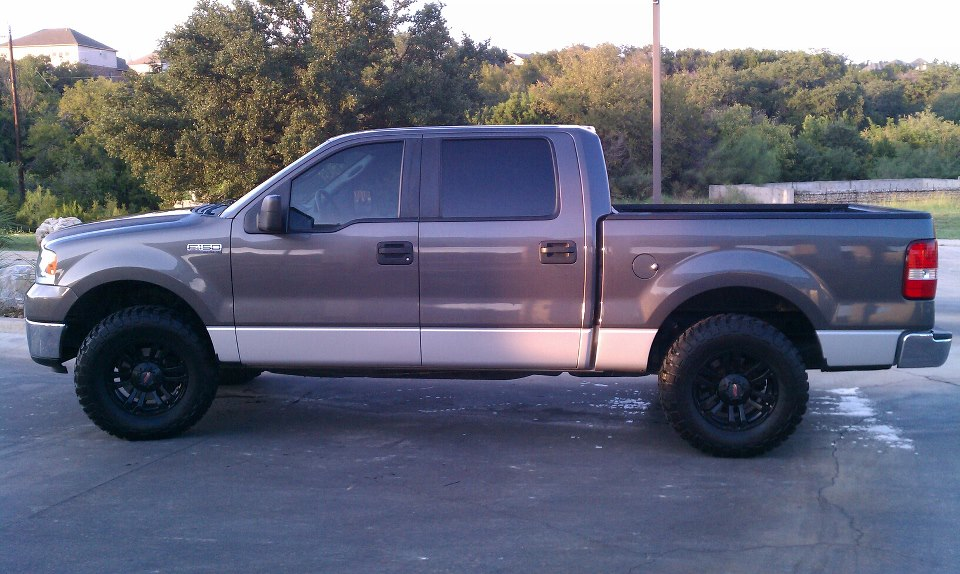
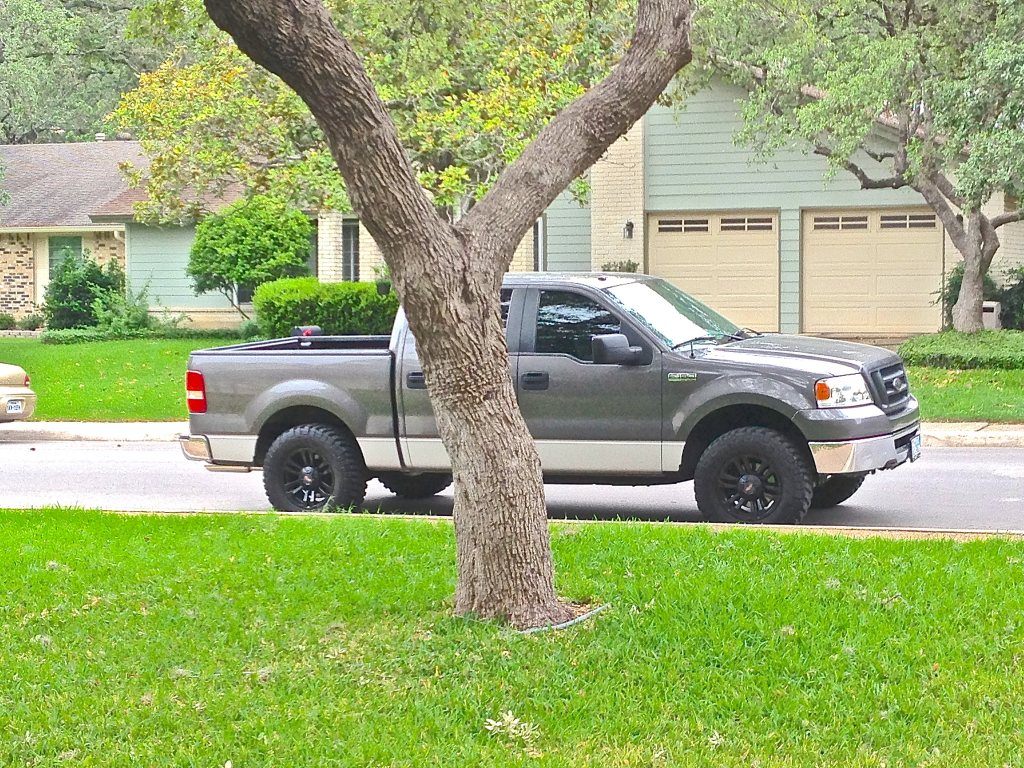
I began the search for rims and tires to throw under that new leveling kit
After searching craigslist everyday for months I finally caught some luck
All 3 tires for $300!!

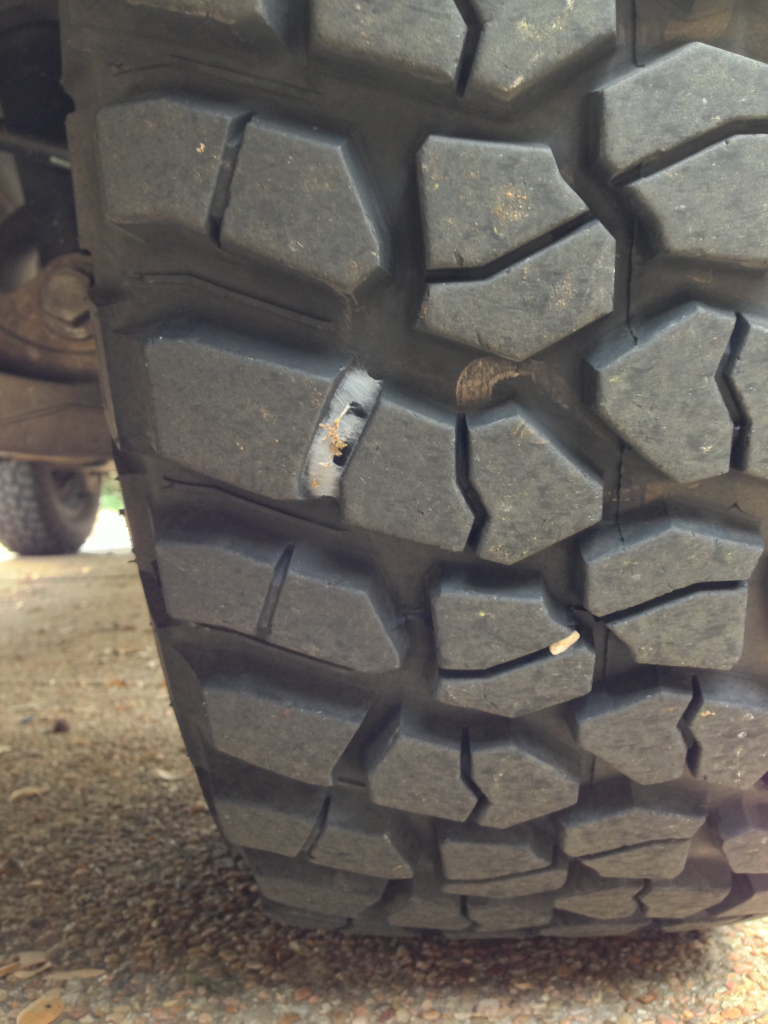
BFG KM2s 285/70/17 about 32.6" 95% tread
I couldn't believe these were such a good deal, but i wasn't gonna argue.
I was stoked and couldn't wait to get these mounted onto some rims so i started looking for rims
My initial rim
Pro Comp 7005
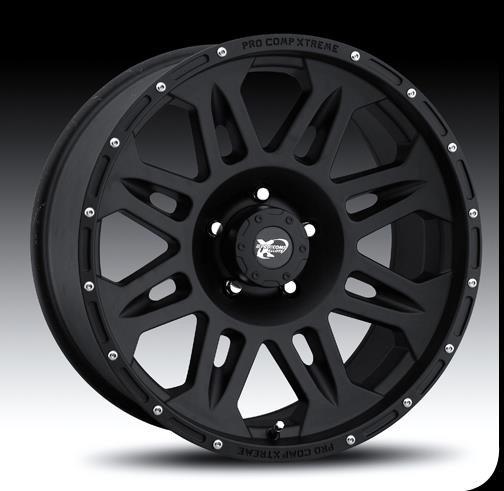
I ordered them and about a month after waiting for them to ship i called 4 wheel parts and they said that those rims were on backorder and would't ship for 6 months! I was so annoyed that they hadn't notified me at all saying they were on backorder. So i cancelled my order and started looking again.
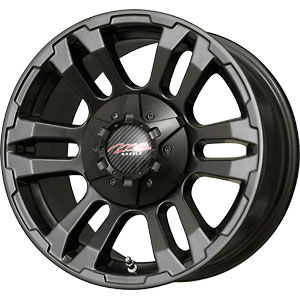
Second rim
Pro Comp 7031

I ordered these ones and waited about a week for them to ship, and nothing changed. so i called 4 wheel parts again and of course they fed me the same line saying these were on back order and would't ship for a while. I canceled my order yet again, needless to say i stopped using 4 wheel parts and pro comp.
Some things came up and i ended up having to repair somethings on the truck (brakes, fuel system cleaning) and spent a good chunk of the money i had set aside for my rims. I continued my search and contemplated Fuels and KMC wheels but they were just too pricey for me, being a broke college student, and one day at work i saw these MB wheels mounted with BFG KM2s and i fell in love.
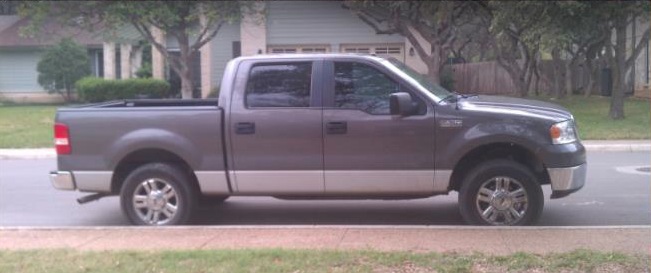
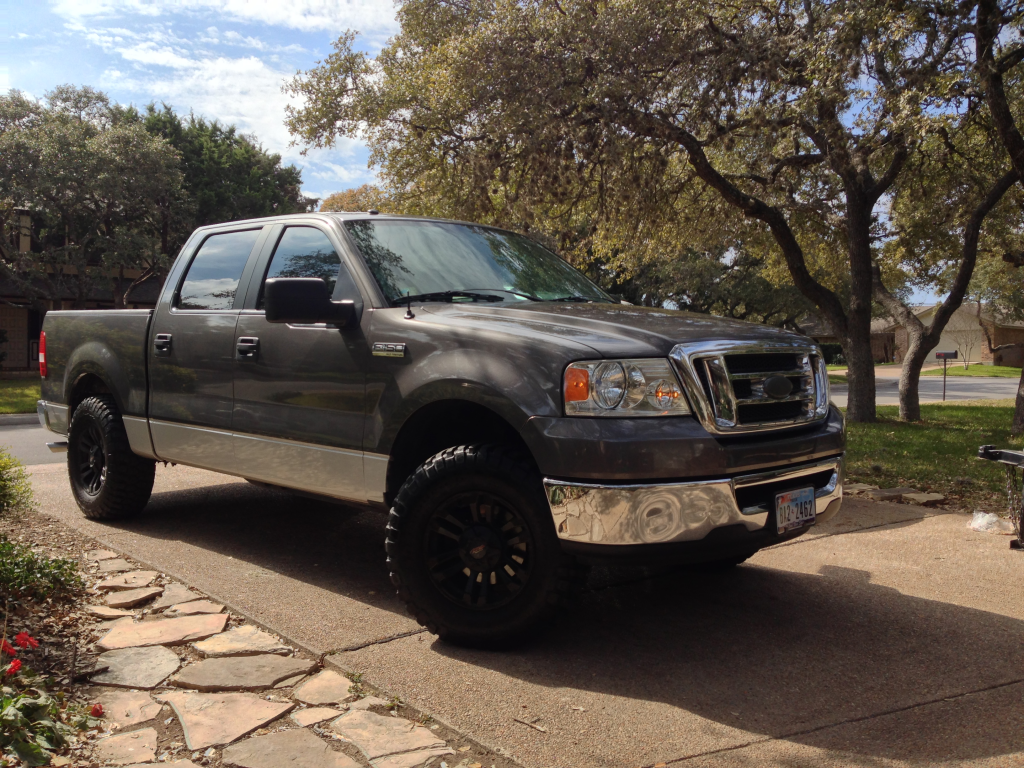
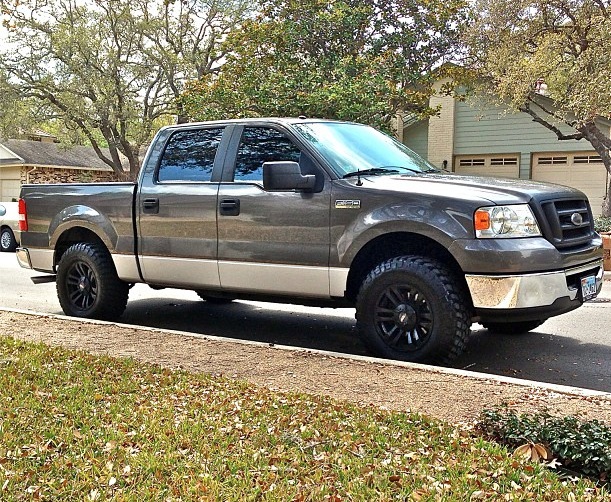
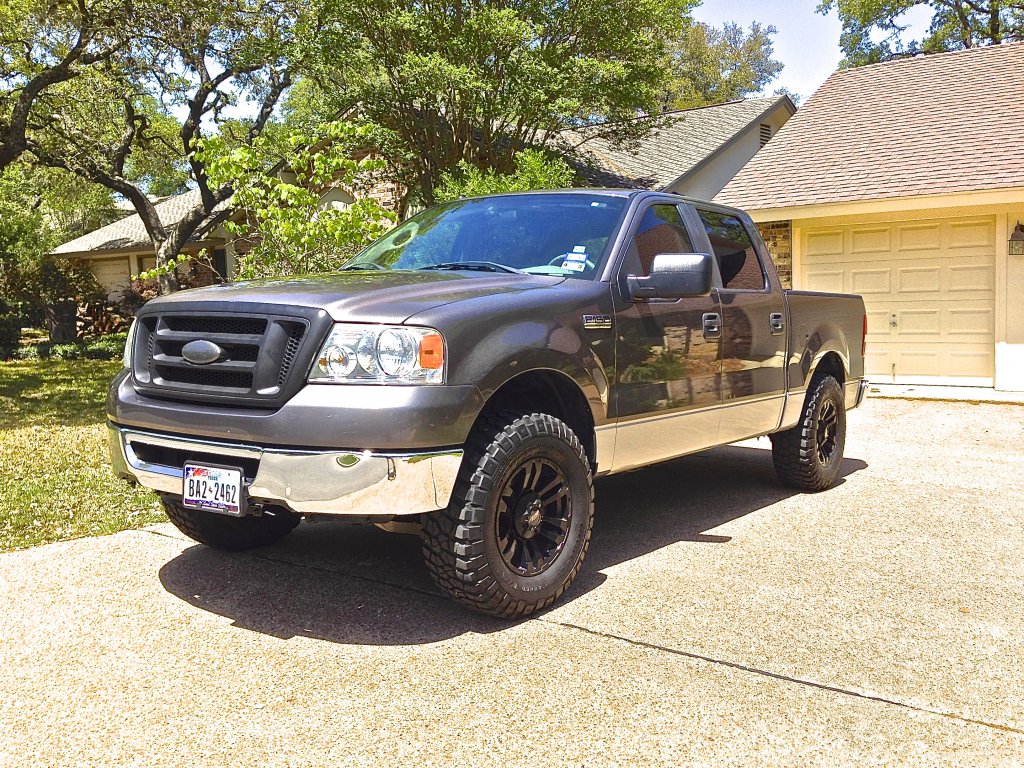
MB TKO 17x8.5
Mounted! Looks like a completely different truck!
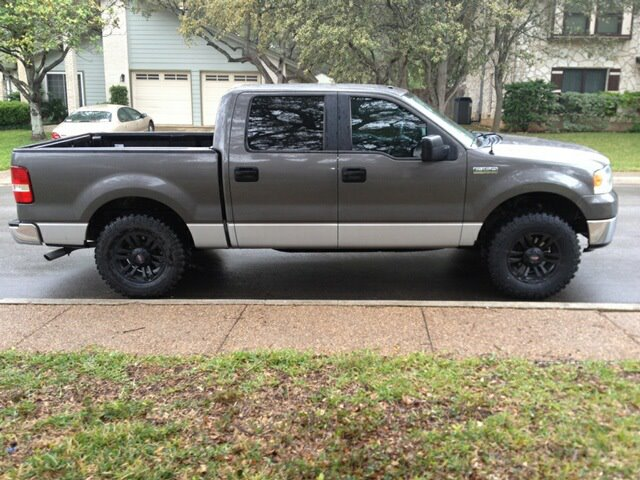
Next on the build was to begin adding some horsepower to her.
went with the aFe Intake rather than K&N because the aFe doesn't require any oil to maintain its performance.

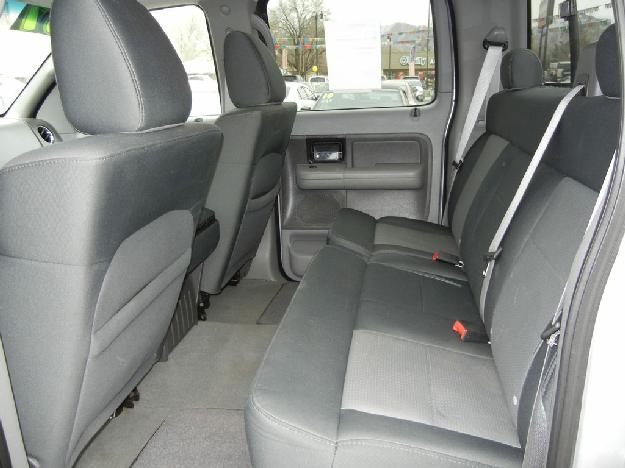
I was getting tired of the dirty clothe seats that had seen 150k miles of someone else's ***! So i decided it was time to upgrade to leather
Before:
After went with Katzkin! I was extremely pleased with how it turned out.
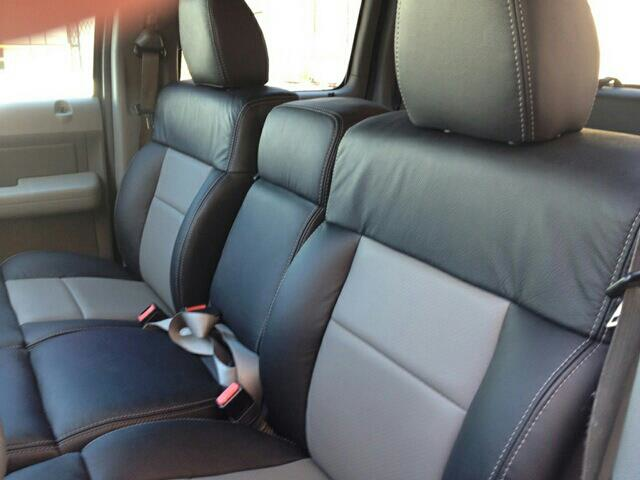
I also decided to replace the headliner while it was at the upholstery shop. I went with black to really bring out the interior of the truck! Don't have any pics of before and after headliner but there isn't much to see anyways lol
I don't have pictures of all the things I've done to it but ill try and show everything I can.
2007 F150 XLT SCrew DSG
Day I bought it

Had 143k miles on it only one owner before me. Previous owner must have drove the crap out of it 143k miles in 5 years!! Interior was in pretty dismal condition, extremely dirty, outside had a few dings and dents and minor paint chips. Overall an extremely good buy at the time.
The build begins...
First on my list was a leveling kit, i went with rough country because it was pretty cheap when i was in the market for one. Decided on 2.5"

Don't have any pics of installation but i chose to do it myself and save some serious cash. Shops quoted installation at 300$!
After the leveling kit

I began the search for rims and tires to throw under that new leveling kit
After searching craigslist everyday for months I finally caught some luck
All 3 tires for $300!!

BFG KM2s 285/70/17 about 32.6" 95% tread
I couldn't believe these were such a good deal, but i wasn't gonna argue.
I was stoked and couldn't wait to get these mounted onto some rims so i started looking for rims
My initial rim
Pro Comp 7005

I ordered them and about a month after waiting for them to ship i called 4 wheel parts and they said that those rims were on backorder and would't ship for 6 months! I was so annoyed that they hadn't notified me at all saying they were on backorder. So i cancelled my order and started looking again.
Second rim
Pro Comp 7031

I ordered these ones and waited about a week for them to ship, and nothing changed. so i called 4 wheel parts again and of course they fed me the same line saying these were on back order and would't ship for a while. I canceled my order yet again, needless to say i stopped using 4 wheel parts and pro comp.
Some things came up and i ended up having to repair somethings on the truck (brakes, fuel system cleaning) and spent a good chunk of the money i had set aside for my rims. I continued my search and contemplated Fuels and KMC wheels but they were just too pricey for me, being a broke college student, and one day at work i saw these MB wheels mounted with BFG KM2s and i fell in love.

MB TKO 17x8.5
Mounted! Looks like a completely different truck!


Next on the build was to begin adding some horsepower to her.
went with the aFe Intake rather than K&N because the aFe doesn't require any oil to maintain its performance.

I was getting tired of the dirty clothe seats that had seen 150k miles of someone else's ***! So i decided it was time to upgrade to leather
Before:

After went with Katzkin! I was extremely pleased with how it turned out.

I also decided to replace the headliner while it was at the upholstery shop. I went with black to really bring out the interior of the truck! Don't have any pics of before and after headliner but there isn't much to see anyways lol
Last edited by Austin_Champion; Nov 26, 2013 at 05:48 PM.


Thread Starter
|
Member
Joined: Sep 2011
Posts: 32
Likes: 0
Thanks guys! There's still a lot of pictures to come I'm just trying to keep everything in chronological order.
@ Dbhost I'm pretty sure they did. The top of the jump seat center console is a lot more comfortable to rest my arm on now and the edges of the seats are more "puffed" out then before.
@ Dbhost I'm pretty sure they did. The top of the jump seat center console is a lot more comfortable to rest my arm on now and the edges of the seats are more "puffed" out then before.

Senior Member

Joined: Mar 2013
Posts: 6,677
Likes: 0
From: Houston and College Station, TX
That looks great! I bet that 4th tire cost about as much as the 3 others, didn't it? Haha I would've killed for a deal like that, great find.
How much did you pay for install on the seats? Leather conversion is on the "eventual" to-do list and I've been looking at Katzkin. I think I can tackle it myself with a lot of swearing and a weeks time, but don't know if it's worth the effort and frustration.
How much did you pay for install on the seats? Leather conversion is on the "eventual" to-do list and I've been looking at Katzkin. I think I can tackle it myself with a lot of swearing and a weeks time, but don't know if it's worth the effort and frustration.
Trending Topics
Thread Starter
|
Member
Joined: Sep 2011
Posts: 32
Likes: 0
yea i think brand new the tires are 305$ i couldn't believe i found that deal. and for some reason Discount even rotates and balances them for free so I'm guessing they were bought through discount tire.
The labor for the Katzkin installation i wouldn't be able to tell ya. One of my family members owns an fabric shop and did some work trade for the upholstery shop and i didn't pay labor. pretty sweet deal if you ask me! You should definitely look into it though make sure to get the perforated seats. they stay pretty cool surprisingly since its a black dominated interior sitting in the Texas sun.
The labor for the Katzkin installation i wouldn't be able to tell ya. One of my family members owns an fabric shop and did some work trade for the upholstery shop and i didn't pay labor. pretty sweet deal if you ask me! You should definitely look into it though make sure to get the perforated seats. they stay pretty cool surprisingly since its a black dominated interior sitting in the Texas sun.
Senior Member
Joined: Mar 2013
Posts: 6,677
Likes: 0
From: Houston and College Station, TX
Discount it pretty good about all that. I bought mine from them and had a buddy mount and balance em, but they still do everything for free 
Gotcha, that is a good deal! I was gonna get the perforated inserts just because they look cooler . . . didn't even think about that keeping them cooler! Haha
Gotcha, that is a good deal! I was gonna get the perforated inserts just because they look cooler . . . didn't even think about that keeping them cooler! Haha
Thread Starter
|
Member
Joined: Sep 2011
Posts: 32
Likes: 0
The build continues;
Next on the list was to change out the OEM head unit and speakers.
I chose to go with Alpine door speakers and a Pioneer DEH 3200 DB, no pics on this but its pretty self explanatory. Sound turned out great, although i wish the alpines had a little bit deeper bass.
My ford oval emblems were pretty shot. The plastic film that covers them was cracking and flaking off. I found a how to on here and was pretty pleased with the result

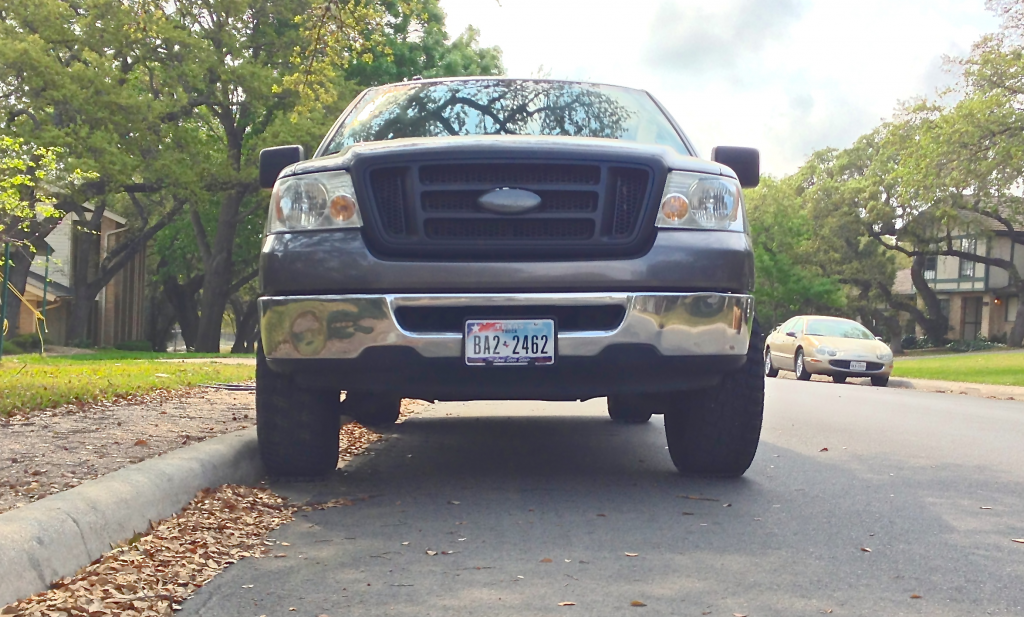
I wasn't too thrilled with the chrome grille and DSG emblem, so i decided to plasti dip the grille and grille surround.
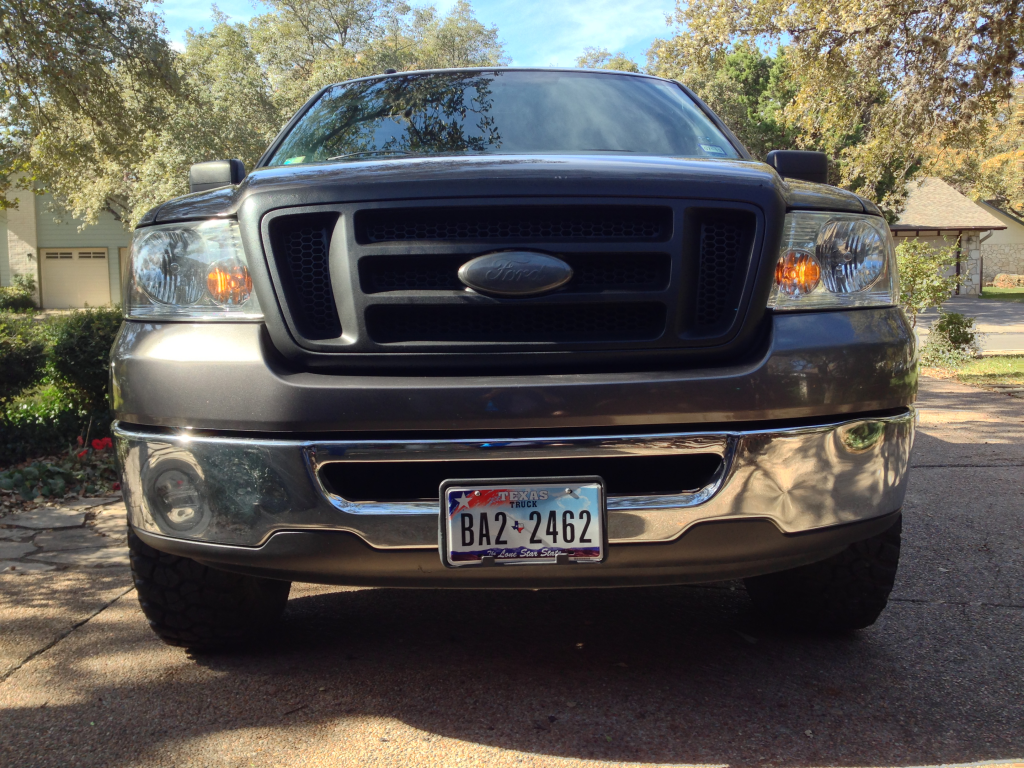
looks WAY better in my opinion!
found a spider web in a very unusual place on the truck!
Got her a little dirty the other day!
One of my favorite pics. Got her all cleaned up after that mud

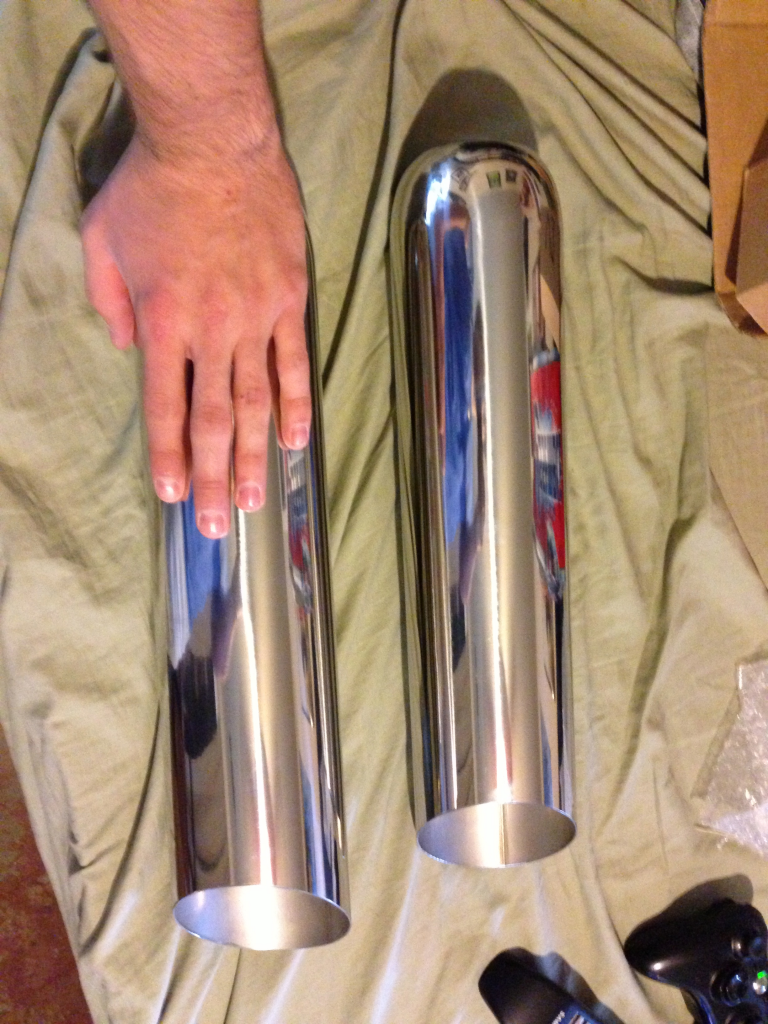
Tips
2.5" inlet 4" Outlet 18" long
so glad i went with the 4" tip instead of 3" i thought it might look too big with only 2.5" pipes being run to them but it looks great and fits well on the bumper.
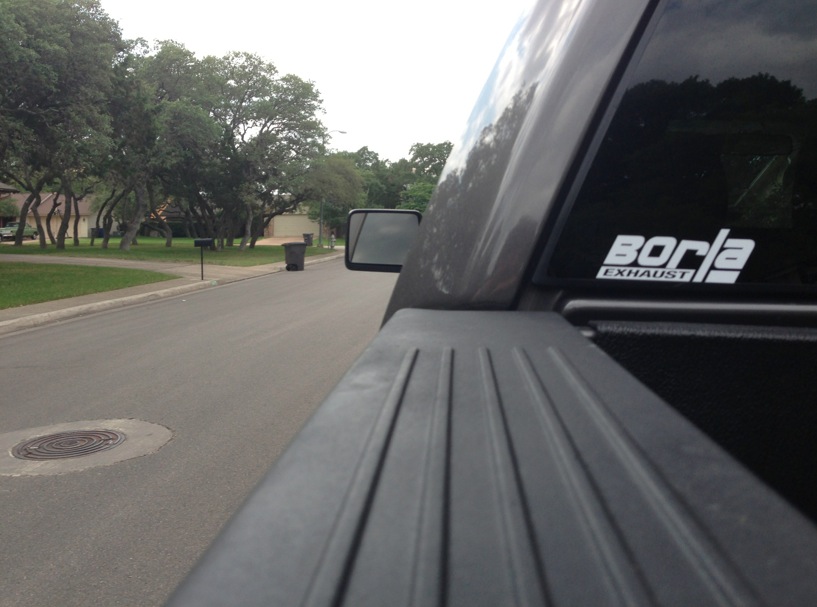
Sneak peak

Really like this picture had to rep the exhaust
Next on the list was to change out the OEM head unit and speakers.
I chose to go with Alpine door speakers and a Pioneer DEH 3200 DB, no pics on this but its pretty self explanatory. Sound turned out great, although i wish the alpines had a little bit deeper bass.
My ford oval emblems were pretty shot. The plastic film that covers them was cracking and flaking off. I found a how to on here and was pretty pleased with the result


I wasn't too thrilled with the chrome grille and DSG emblem, so i decided to plasti dip the grille and grille surround.

looks WAY better in my opinion!
found a spider web in a very unusual place on the truck!

Got her a little dirty the other day!

One of my favorite pics. Got her all cleaned up after that mud


Tips
2.5" inlet 4" Outlet 18" long
so glad i went with the 4" tip instead of 3" i thought it might look too big with only 2.5" pipes being run to them but it looks great and fits well on the bumper.

Sneak peak

Really like this picture had to rep the exhaust

Last edited by Austin_Champion; Nov 27, 2013 at 06:46 AM.
Senior Member
Joined: Mar 2013
Posts: 6,677
Likes: 0
From: Houston and College Station, TX
Looks good! Nice choice with the Borla I'd consider color-matching the grill surround, but that's it!
Where you going to school at, UT? Some pics and the houses look like the hill country to me, maybe? Lol
I'd consider color-matching the grill surround, but that's it!Where you going to school at, UT? Some pics and the houses look like the hill country to me, maybe? Lol
Thread Starter
|
Member
Joined: Sep 2011
Posts: 32
Likes: 0
I'm in San Antonio right now at SAC, I'm planning to head up to A&M in about a year so I'm sure we'll catch each other driving around in CSTAT soon. All pictures were in San Antonio city area up to this point.
Thread Starter
|
Member
Joined: Sep 2011
Posts: 32
Likes: 0
More pics!!!
Exhaust: (I'm aware there is a tree in the way but apparently this is the only picture i took where you can see it with the whole truck)
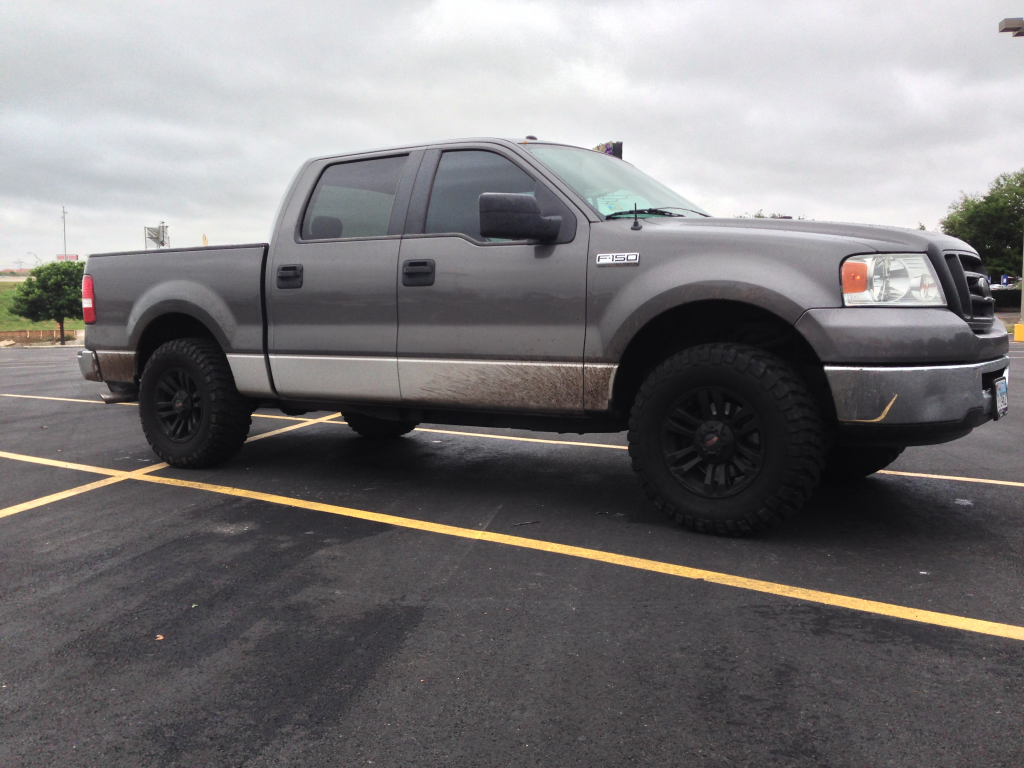
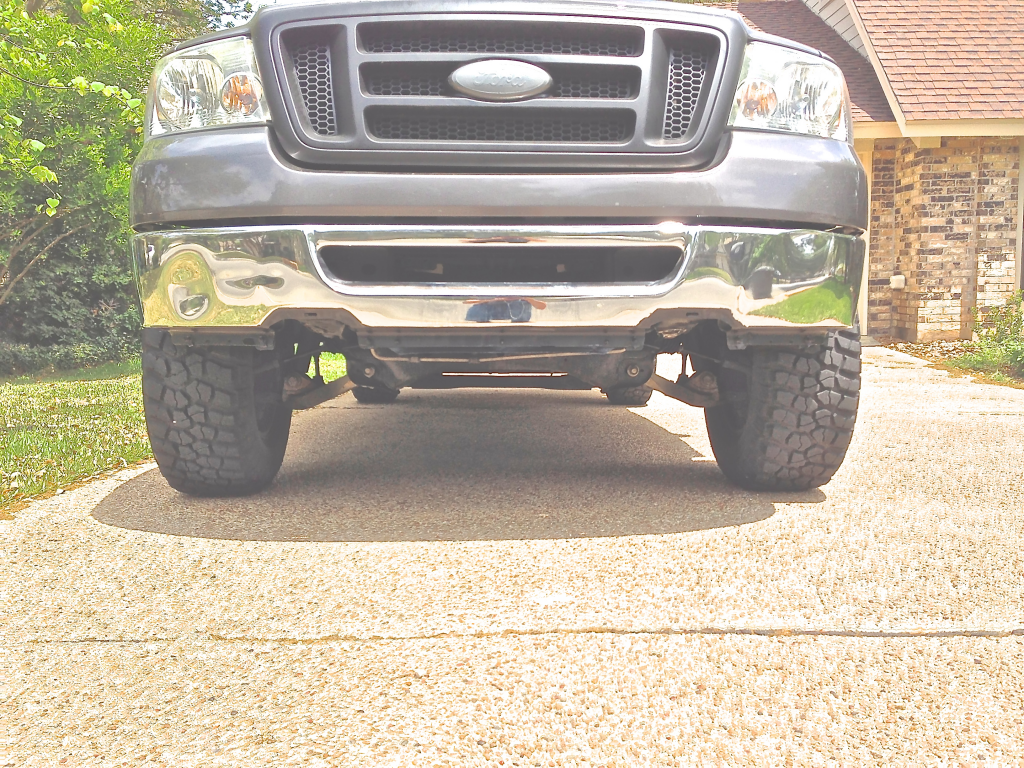
Next on my list was removing the lower valence, i saw one truck with it and really like the look. You can see a lot more suspension components and it almost looks like you have more of a lift without it. No mpg loss from removing IMO it was useless to begin with.
Before:
Tried to bring the brightness up on the pictures so you can tell but it was a little hard to do without ruining the picture..
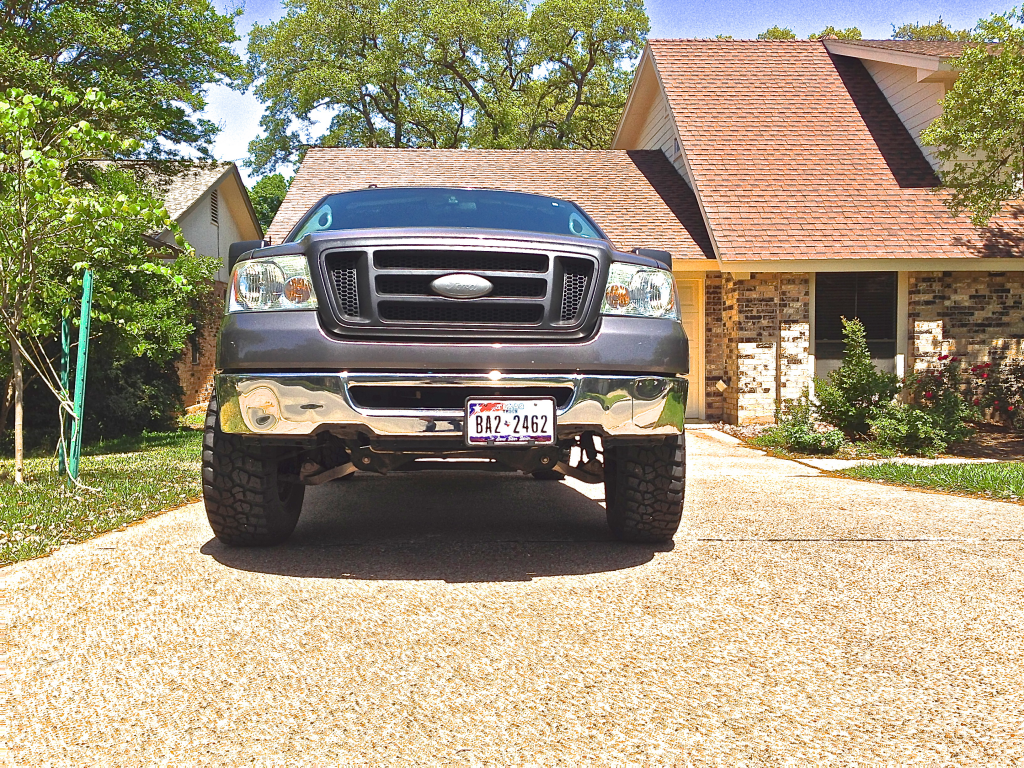
After:
I also plastidipped the lower line of the bumper that was behind the valence to make it blend a little better, also had to relocate the license plate after removing valence.
Some more pics of after removal of valence. Did a little editing to these, I'm no pro haha
Exhaust: (I'm aware there is a tree in the way but apparently this is the only picture i took where you can see it with the whole truck)

Next on my list was removing the lower valence, i saw one truck with it and really like the look. You can see a lot more suspension components and it almost looks like you have more of a lift without it. No mpg loss from removing IMO it was useless to begin with.
Before:
Tried to bring the brightness up on the pictures so you can tell but it was a little hard to do without ruining the picture..

After:

I also plastidipped the lower line of the bumper that was behind the valence to make it blend a little better, also had to relocate the license plate after removing valence.
Some more pics of after removal of valence. Did a little editing to these, I'm no pro haha


Last edited by Austin_Champion; Nov 27, 2013 at 06:48 AM.
Senior Member
Joined: Mar 2013
Posts: 6,677
Likes: 0
From: Houston and College Station, TX
Thanks man, it really has a deep tone even for the 4.6L i was pretty surprised at how good it actually sounds. Glad i went with Borla instead of magna flow or flow master. Thats a good idea i need to take the whole thing off and repaint it the plastidip chipped in one area so i might as well give painting the surround a try. Any ideas for prepping the chrome for regular spray paint, or if it will even stay?
I'm in San Antonio right now at SAC, I'm planning to head up to A&M in about a year so I'm sure we'll catch each other driving around in CSTAT soon. All pictures were in San Antonio city area up to this point.
I'm in San Antonio right now at SAC, I'm planning to head up to A&M in about a year so I'm sure we'll catch each other driving around in CSTAT soon. All pictures were in San Antonio city area up to this point.
That sounds good! I was just gonna give you crap if you were in Austin
 I'm sure we'll see each other, or at least the trucks cause I always catch the unique vehicles in the area.
For the valance, maybe you could try cutting off the bottom-most part that is vertical so that you can have the valance in place while also achieving the "added lift" look. Cause it kinda just looks like it's missing right now
Last edited by KMAC0694; Nov 27, 2013 at 09:30 AM.
