
My Nathan K5 Train Horn Install


Thread Starter
|
Senior Member

Joined: Nov 2009
Posts: 340
Likes: 0
From: Millington Tn
My Nathan K5 Train Horn Install
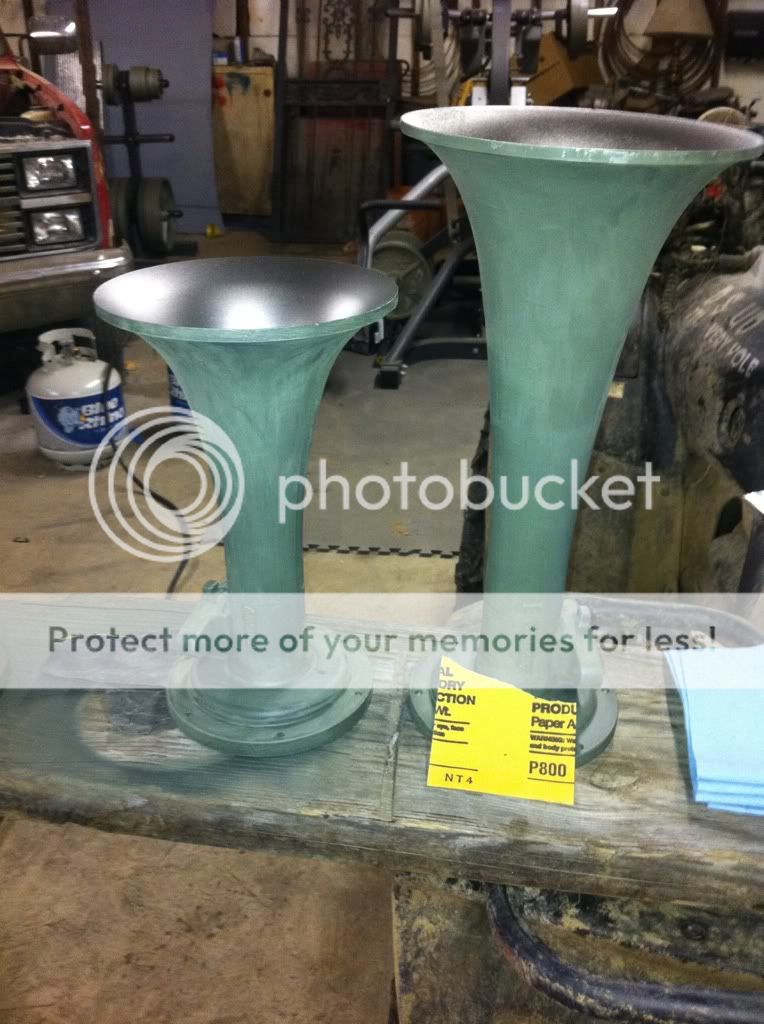
This is my install of Nathan K5HL on my 2007 F-150 screw.

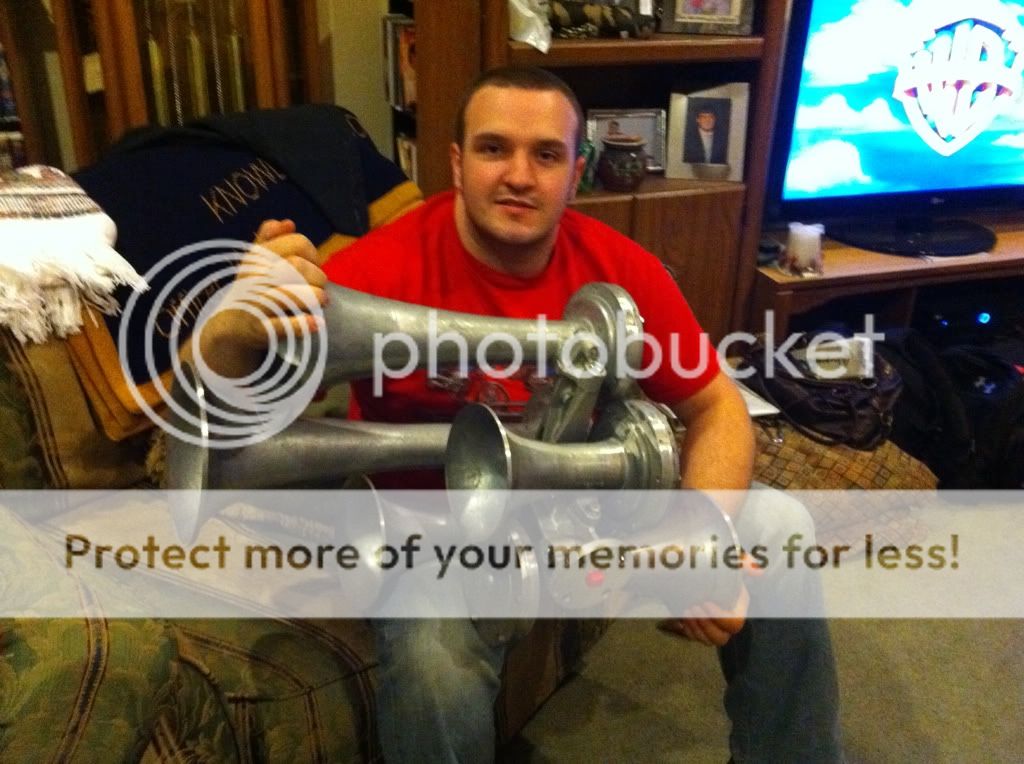
I will be purchasing a turn key kit from realtrainhorns.net | Real Train Horns , I have already talked to the guys there and they helped me decide on a kit.
I will be installing a 8 1/2 gal air tank and two compressors, and I am planning on everything being installed under the truck. The K5s and air tank will be mounted where the spare tire goes and the two compressors will me mounted under the bead just in front of the rear axle on a bed cross member.
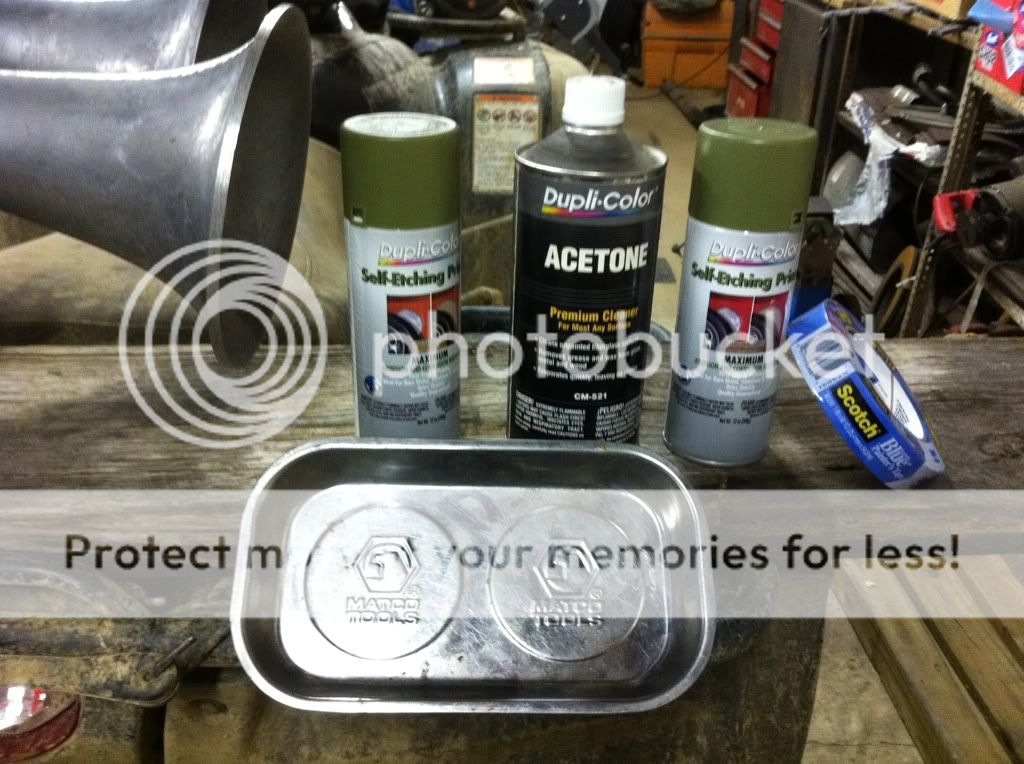
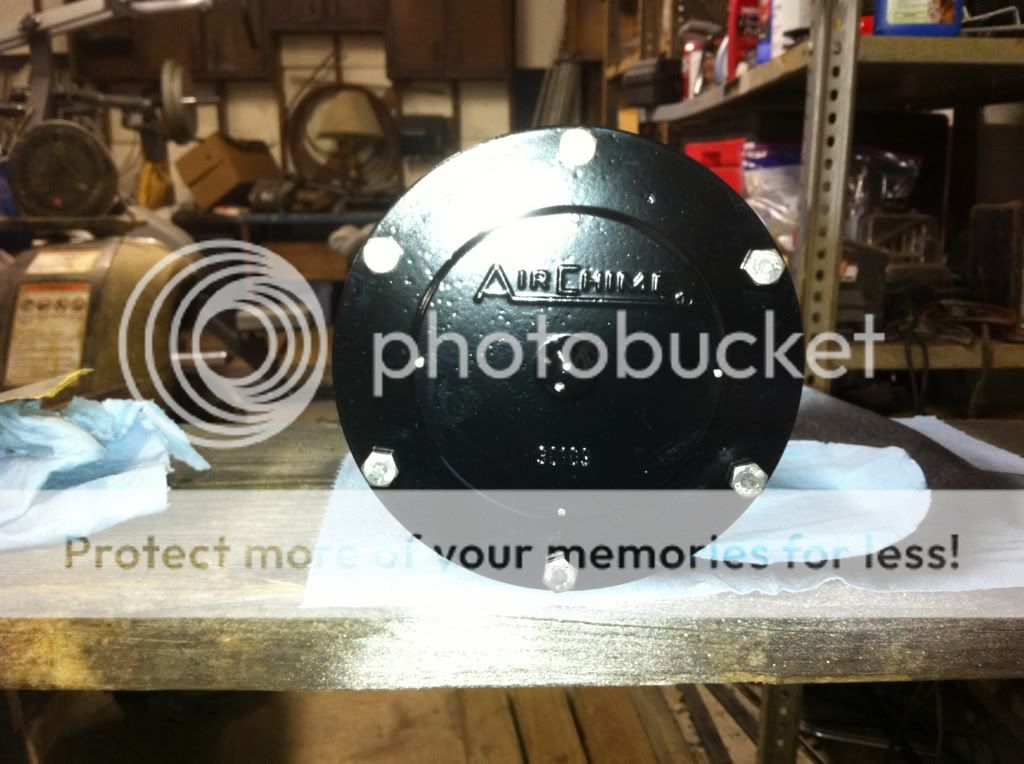
Tonight I got the horns ready to paint by taking them apart and masking off the manifold where the horns mount up, and I covered the Nathan serial number tag. I used Dupli-color Acetone to prep the surface and remove the dirt/ oil/ ect.

Taped all 5 horn mounting locations, the mounting plate, the serial number tag, and the allen head screws

Self etching primer, Acetone, and painters tape( tip: get the 1 1/2" tape and the 1/2" tape, and a X-ACTO knife)
Do notremove the rubber gasket on the horn, just tape over it, just be sure not to remove it with the tape later.

It was easier for me to tape the outside edge with small pieces, use a knife to remove the over hang then tape the center


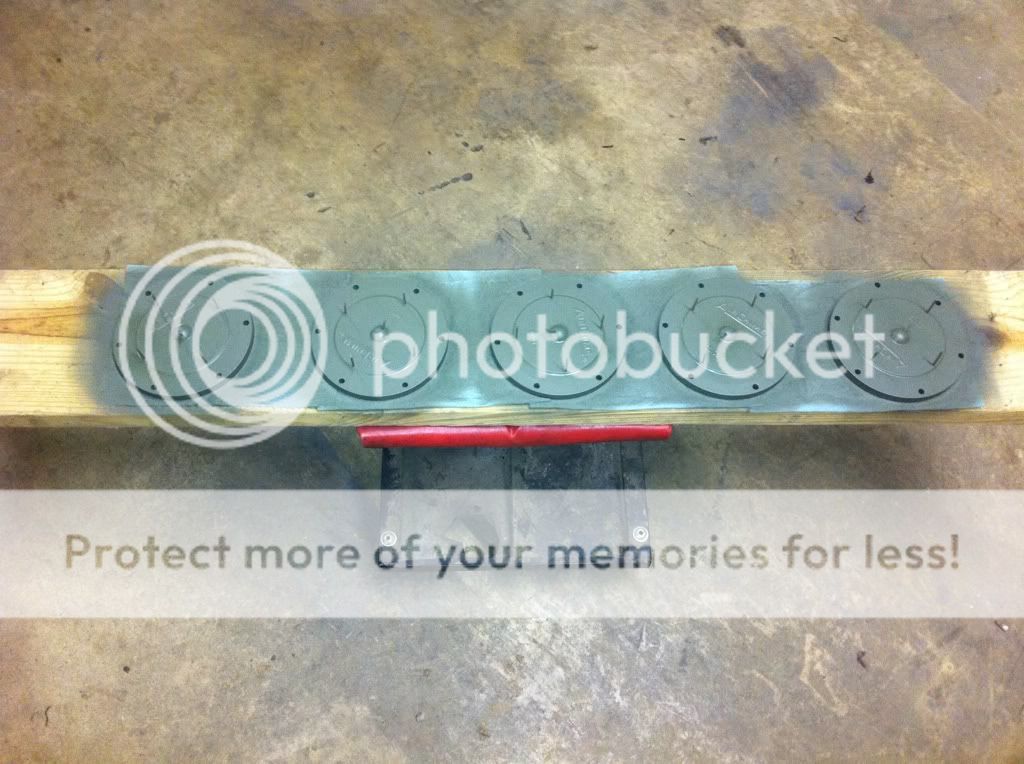
Here is everything prepped, masked and ready for the self etching primer.

I then used 2 cans of the primer to apply about 3 solid coats of primer to all pieces.
Bells

Back plates, used tooth picks to plug the holes in the back.
Manifold

I left the diaphragms and cushions in there sets and wrapped them in shop rags so they would not get over spray on them.
I will be purchasing black gloss spray paint and silver spray paint. I am painting the inside of the bells silver while the outside will be black. I Have not decided if I will be putting a clear coat over it or not.
Test run of horns
http://s542.photobucket.com/albums/g...t=50da678b.mp4
I will update as I go. Will be ordering the kit on 03/18/11
I will be purchasing a turn key kit from realtrainhorns.net | Real Train Horns , I have already talked to the guys there and they helped me decide on a kit.
I will be installing a 8 1/2 gal air tank and two compressors, and I am planning on everything being installed under the truck. The K5s and air tank will be mounted where the spare tire goes and the two compressors will me mounted under the bead just in front of the rear axle on a bed cross member.
Tonight I got the horns ready to paint by taking them apart and masking off the manifold where the horns mount up, and I covered the Nathan serial number tag. I used Dupli-color Acetone to prep the surface and remove the dirt/ oil/ ect.
Taped all 5 horn mounting locations, the mounting plate, the serial number tag, and the allen head screws
Self etching primer, Acetone, and painters tape( tip: get the 1 1/2" tape and the 1/2" tape, and a X-ACTO knife)
Do notremove the rubber gasket on the horn, just tape over it, just be sure not to remove it with the tape later.
It was easier for me to tape the outside edge with small pieces, use a knife to remove the over hang then tape the center
Here is everything prepped, masked and ready for the self etching primer.
I then used 2 cans of the primer to apply about 3 solid coats of primer to all pieces.
Bells
Back plates, used tooth picks to plug the holes in the back.
Manifold
I left the diaphragms and cushions in there sets and wrapped them in shop rags so they would not get over spray on them.
I will be purchasing black gloss spray paint and silver spray paint. I am painting the inside of the bells silver while the outside will be black. I Have not decided if I will be putting a clear coat over it or not.
Test run of horns
http://s542.photobucket.com/albums/g...t=50da678b.mp4
I will update as I go. Will be ordering the kit on 03/18/11
Last edited by J.Wal; Aug 16, 2011 at 04:33 AM.
Thread Starter
|
Senior Member
Joined: Nov 2009
Posts: 340
Likes: 0
From: Millington Tn
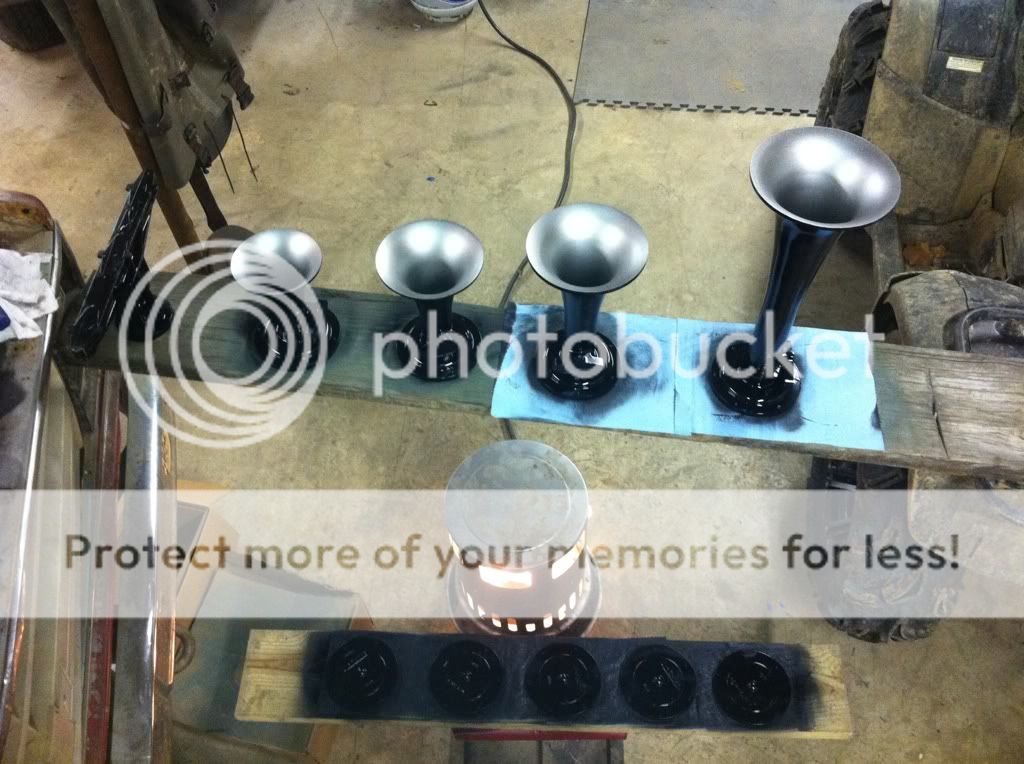
Ok I finished painting tonight. I used Dupli-color gloss black and Dupli-color Stainless Steel paint. Both covered well and I applied about 3 coats of each color.
I sanded the primer with 800 grit paper them went over them with a micro fiber cloth.
I ran a line of tape around the bell so I could paint the inside of them with the SS paint.

Once I had all the bells inside painted I placed them over the heater to speed up the drying process.

I them placed each bell up side down on a shop cloth so I could paint the outside black without taping up the inside of the bell.

Here are all the bells and the manifold drying
Here is a close up

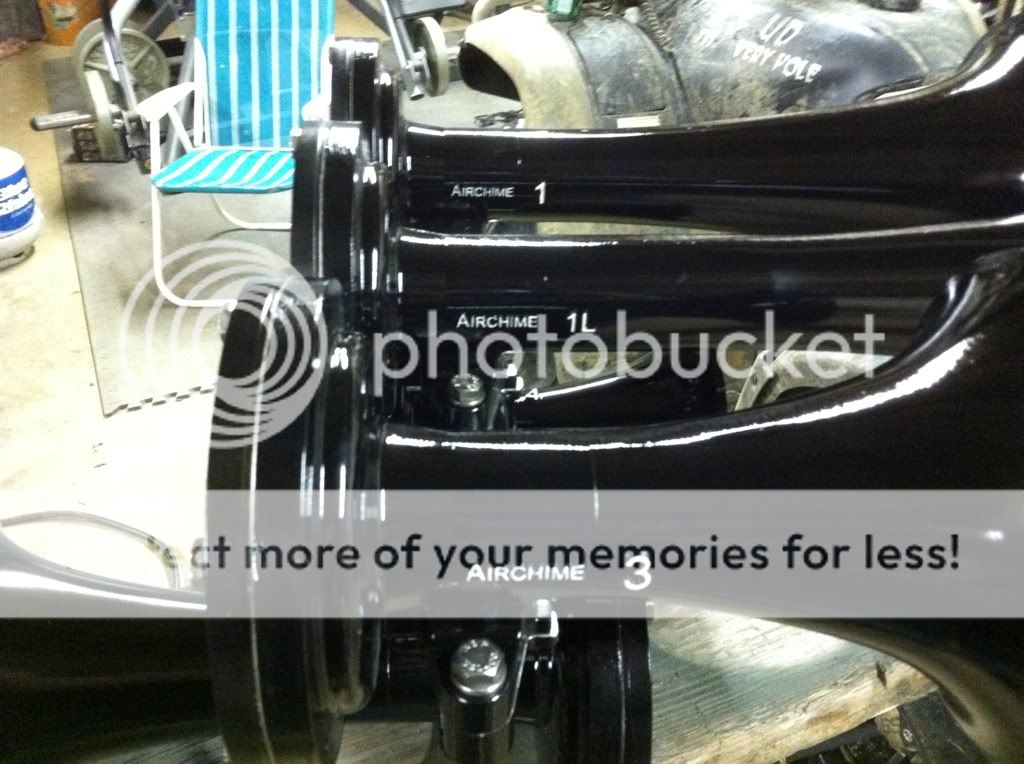
Here are all the bells painted up and tape removed

Not perfect but I think they look good.
Trying to figure out how to make the lettering and numbers stand out on the horns. I really want them to be SS too.
They will be assembled tomorrow. I did not have blue loctite to put them together tonight.
I sanded the primer with 800 grit paper them went over them with a micro fiber cloth.
I ran a line of tape around the bell so I could paint the inside of them with the SS paint.
Once I had all the bells inside painted I placed them over the heater to speed up the drying process.
I them placed each bell up side down on a shop cloth so I could paint the outside black without taping up the inside of the bell.
Here are all the bells and the manifold drying
Here is a close up
Here are all the bells painted up and tape removed
Not perfect but I think they look good.
Trying to figure out how to make the lettering and numbers stand out on the horns. I really want them to be SS too.
They will be assembled tomorrow. I did not have blue loctite to put them together tonight.
Last edited by J.Wal; Aug 16, 2011 at 04:33 AM.
Thread Starter
|
Senior Member
Joined: Nov 2009
Posts: 340
Likes: 0
From: Millington Tn
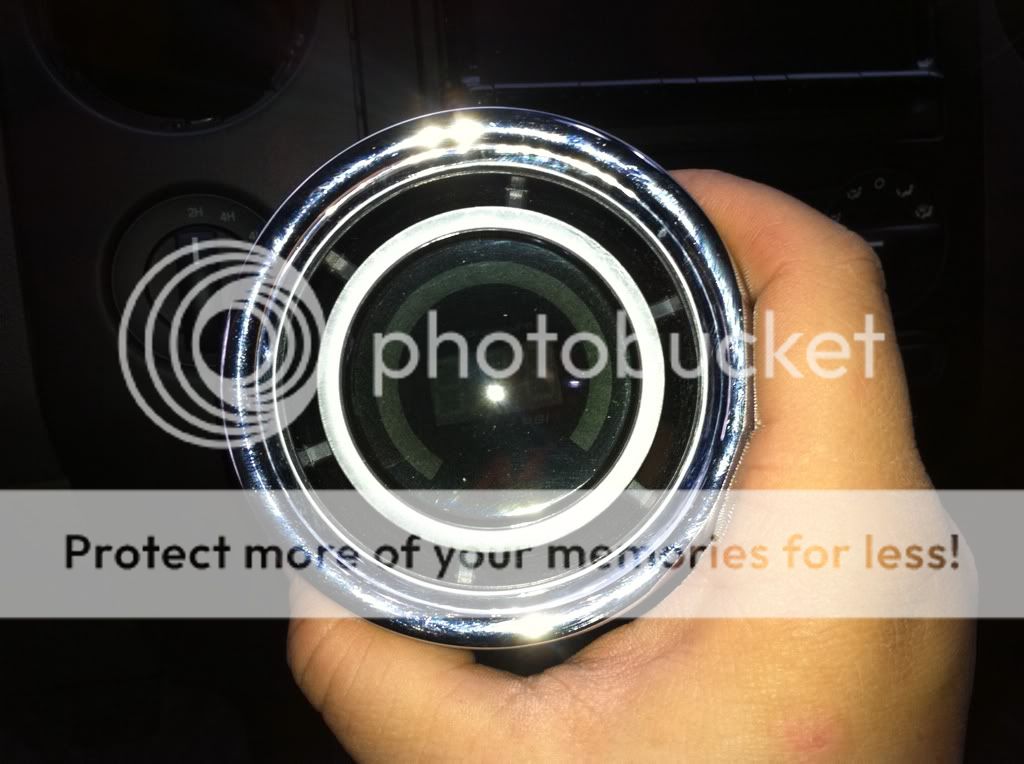
Ok so I got them finished up tonight, I did clear coat them, but first I got some touch up white paint to out-line the letters on the horns. I am happy with the outcome. They are not perfect but good enough to go under the truck. lol
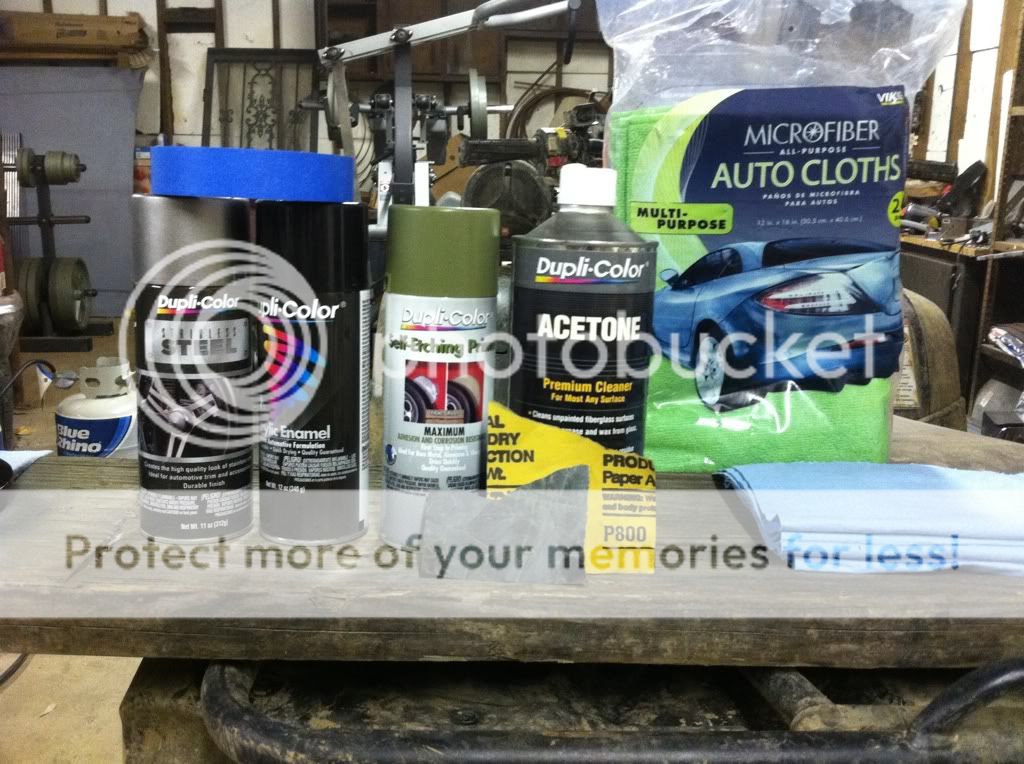
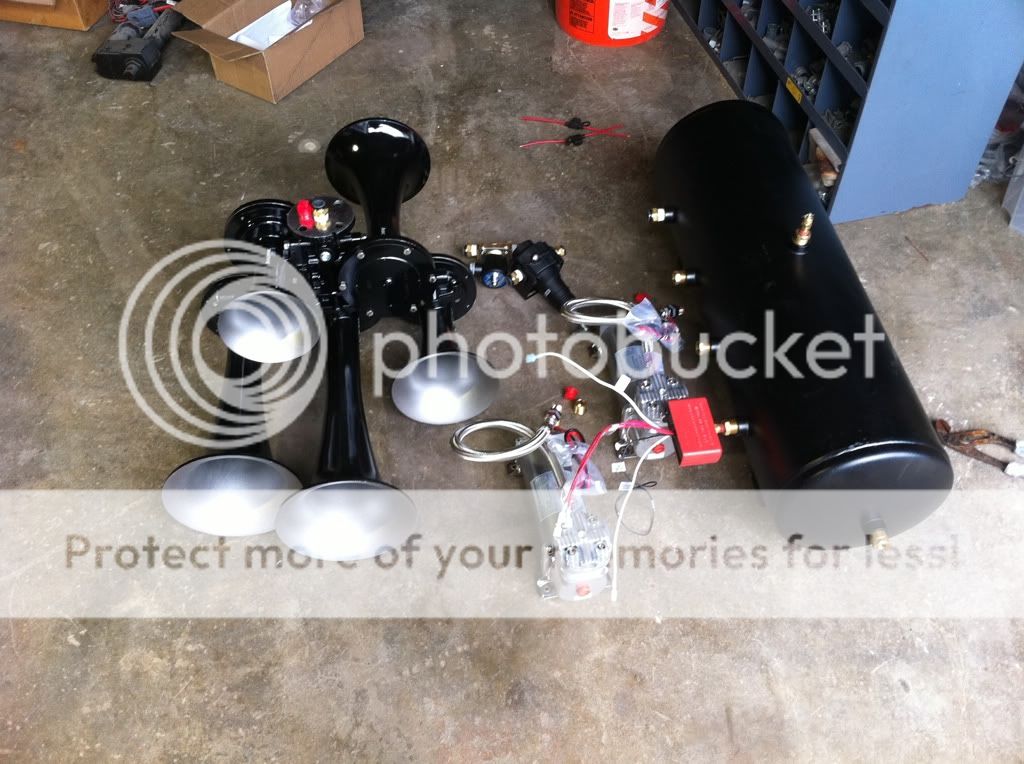
Here are all the tools and materials I used to do the project


Here are all the tools and materials I used to do the project
Last edited by J.Wal; Aug 16, 2011 at 04:34 AM.


Thread Starter
|
Senior Member
Joined: Nov 2009
Posts: 340
Likes: 0
From: Millington Tn
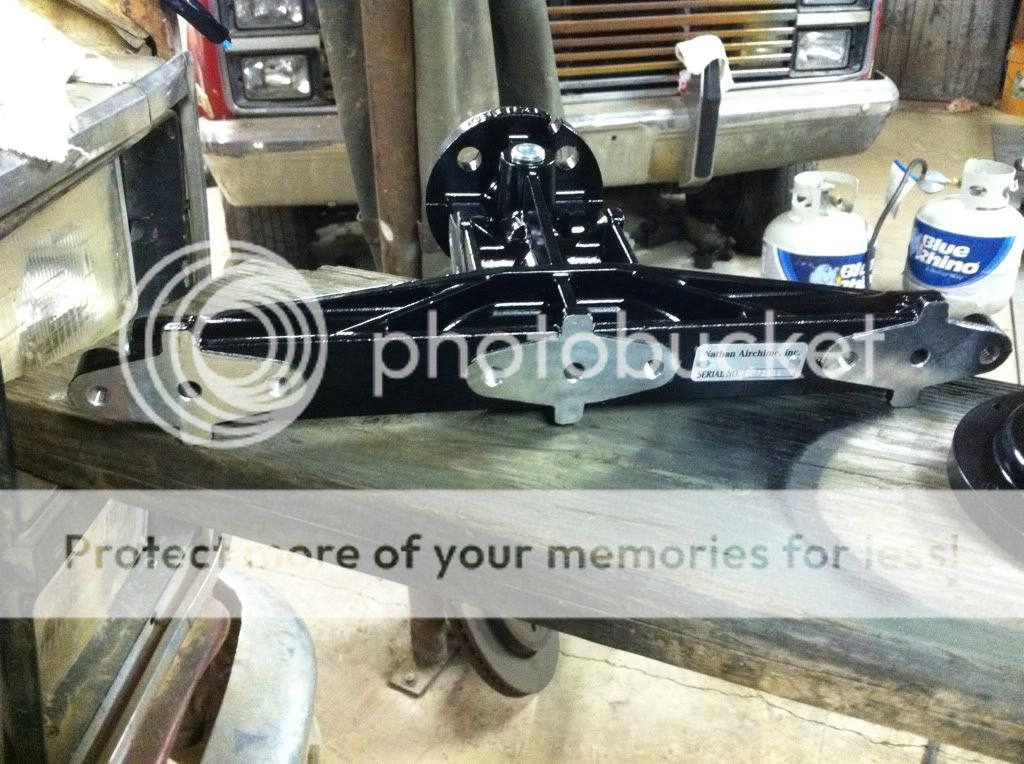
Well got the horn tank and 2 compressors mounted to a metal plate that has a hole in the center. I can lift or lower my entire set up with it. There is some other security in place to keep it from being lowered and someone walking off with it. Here are some pix.
Plate by it's self.

All parts that will be mounted on plate.
Compressors mounted

Horn and compressors mounted.

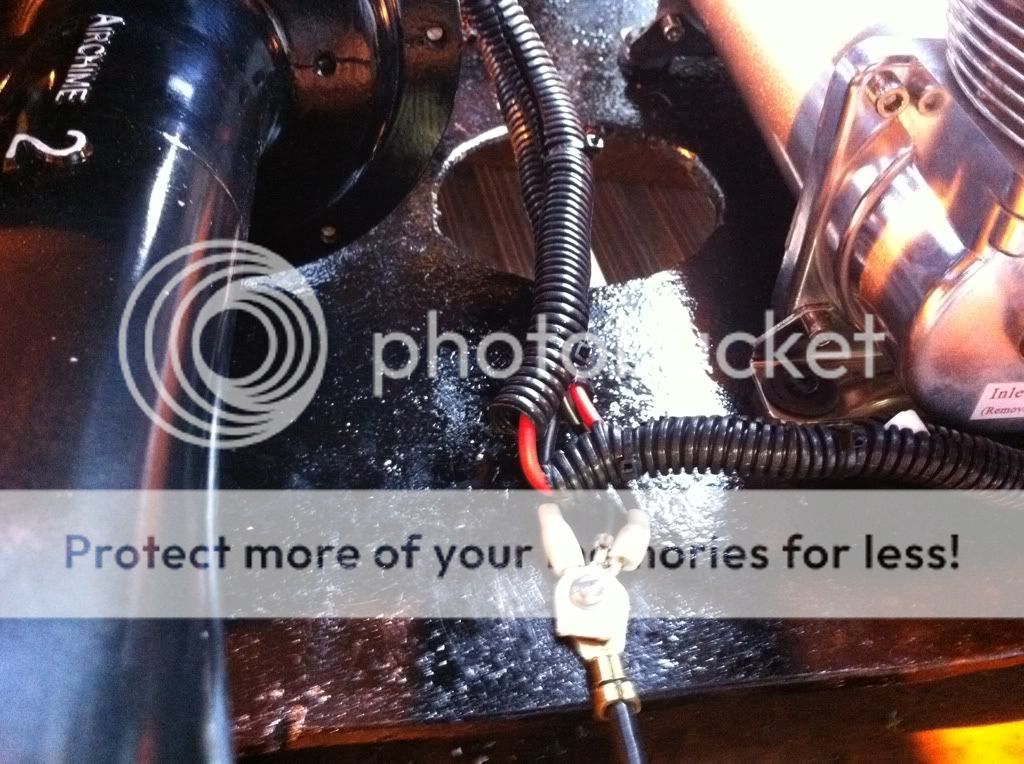
Wiring ground and compressor power to pressure switch.
Everything mounted.
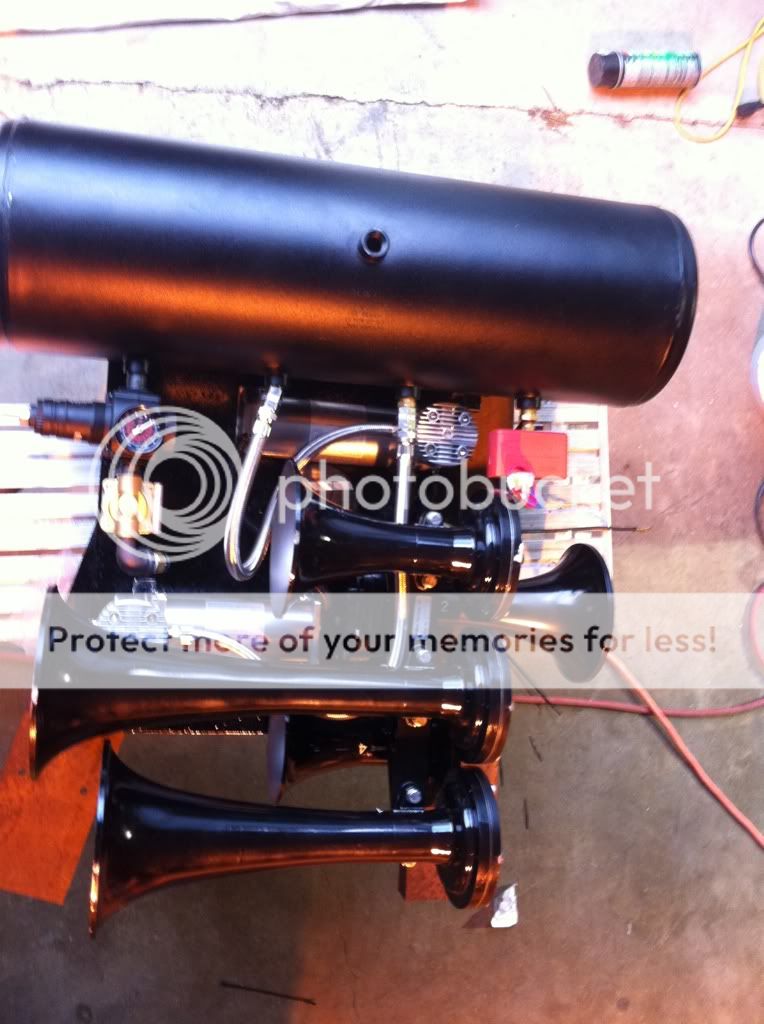
It is flipped over and ready to go under the truck.

And .... Under the truck!

Looking through the bumper, where the license plate goes

And another
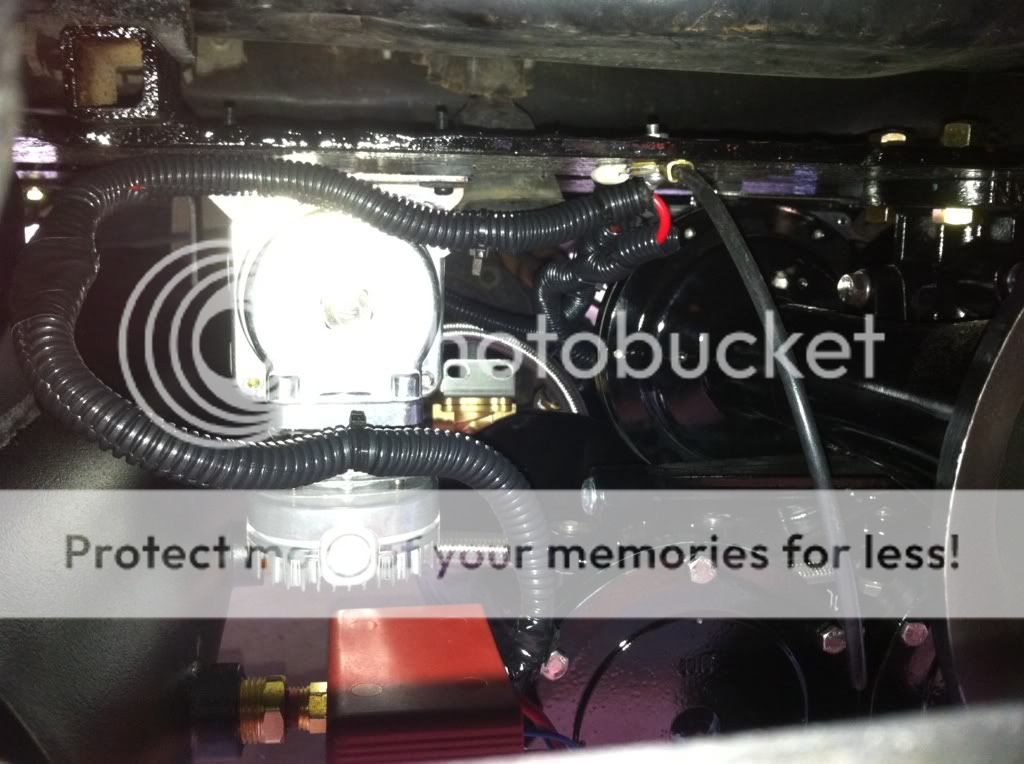
Passenger side view.

From 10' behind the truck.

Pop off valve and quick connect. When in position it is located right beside the end of the leaf spring pointed toward the side of the truck.

Let me know what y'all think.
J.Wal
Plate by it's self.
All parts that will be mounted on plate.
Compressors mounted
Horn and compressors mounted.
Wiring ground and compressor power to pressure switch.
Everything mounted.
It is flipped over and ready to go under the truck.
And .... Under the truck!
Looking through the bumper, where the license plate goes
And another
Passenger side view.
From 10' behind the truck.
Pop off valve and quick connect. When in position it is located right beside the end of the leaf spring pointed toward the side of the truck.
Let me know what y'all think.
J.Wal
Thread Starter
|
Senior Member
Joined: Nov 2009
Posts: 340
Likes: 0
From: Millington Tn
Here are some VIDEOS!
Just a honk at 200psi in the tank and horns regulated down to 150psi.
http://i542.photobucket.com/albums/g...x/e9ac394f.mp4
Video of how fast the K5HL consumes a 8.5 gal tank.
http://i542.photobucket.com/albums/g...x/3415014a.mp4
We were at the state park boat ramp and I honk 3 times, then you can hear the Eco afew seconds later. Much louder when in person.
http://i542.photobucket.com/albums/g...x/15d6951f.mp4

Senior Member
Joined: Feb 2011
Posts: 190
Likes: 0
From: Plano, Texas


