


How to - Changing radiator/Adding heavy duty 3.5 qt.


Thread Starter
|
Technical Article Contributor
Joined: Mar 2012
Posts: 154
Likes: 0
How to - Changing radiator/Adding heavy duty 3.5 qt.
How to change radiator/ add a high capacity radiator.
Materials:
New/ Used radiator
27mm Open end wrench
Normal Socket set
-8mm socket
-10mm socket
Channel Locks
Crescent Wrench
3 Gallon bucket
New anti-freeze/Water
Hammer (If taking off factory fan clutch) Not needed for E-fan installers
Water Hose Access + Pressure Washer if used
Cleaning supplies (de-greaser, SOS pads, wire brush, rags)
Plastic AC/Fuel Line Disconnect piece (3/8)


Cleaning a used radiator (Mine is a 3.5 -4 qt).
Obviously it takes a new(or different) radiator to do this mod. So make sure your radiator is in good shape by taking it to a shop to check for leaks or if you are certain it is in good shape, start by cleaning it out with a water hose if it is used. The next few steps are for cleaning an used radiator.

I wanted to polish the aluminum up on mine so I used a wire brush to get some of the old crude off it and reveal the metal. Make sure not to mess up the fins when doing this.

Make sure to flush your new radiator out several times. I used a little bit of Cascade with my first flush, and continued to flush it several more times. Make sure to keep the drain plug closed with the first flush, and alternate what end you flush from. Once you see nothing but clean bubble free water, open up the drain plug and flush one more time until you see clean water.
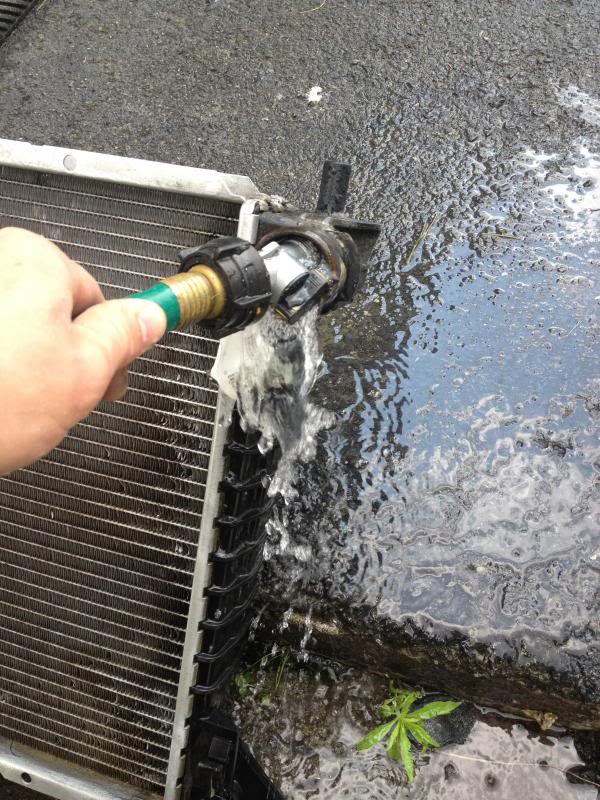


Once you have flushed the engine coolant part of the radiator, flush the transmission side(Not connected to the engine, obviously). The small vents on the drivers side of the radiator.

Now use a low mist pressure washer to clean the fins making sure not to damage them. I used a SOS pad and some greased lightning on the plastic parts for a good clean look . Now that the used/new radiator you are installing is clean, its time to take out the old radiator.
Removing air intake for access to everything.
Now we need to take the air intake off to have room to work.
1.) Pull out the two hoses at the top of the intake.
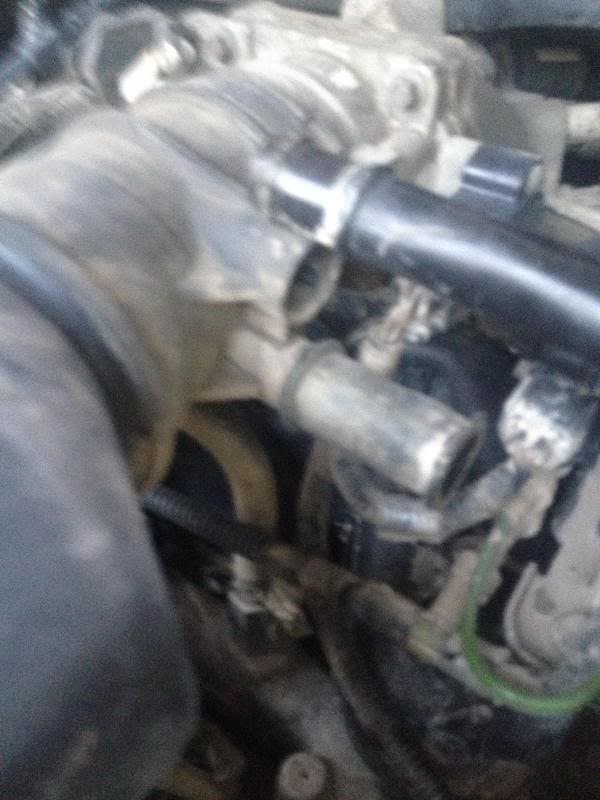
2.) Unplug the MAF (mass air flow sensor) plug

Materials:
New/ Used radiator
27mm Open end wrench
Normal Socket set
-8mm socket
-10mm socket
Channel Locks
Crescent Wrench
3 Gallon bucket
New anti-freeze/Water
Hammer (If taking off factory fan clutch) Not needed for E-fan installers
Water Hose Access + Pressure Washer if used
Cleaning supplies (de-greaser, SOS pads, wire brush, rags)
Plastic AC/Fuel Line Disconnect piece (3/8)


Cleaning a used radiator (Mine is a 3.5 -4 qt).
Obviously it takes a new(or different) radiator to do this mod. So make sure your radiator is in good shape by taking it to a shop to check for leaks or if you are certain it is in good shape, start by cleaning it out with a water hose if it is used. The next few steps are for cleaning an used radiator.

I wanted to polish the aluminum up on mine so I used a wire brush to get some of the old crude off it and reveal the metal. Make sure not to mess up the fins when doing this.

Make sure to flush your new radiator out several times. I used a little bit of Cascade with my first flush, and continued to flush it several more times. Make sure to keep the drain plug closed with the first flush, and alternate what end you flush from. Once you see nothing but clean bubble free water, open up the drain plug and flush one more time until you see clean water.


Once you have flushed the engine coolant part of the radiator, flush the transmission side(Not connected to the engine, obviously). The small vents on the drivers side of the radiator.

Now use a low mist pressure washer to clean the fins making sure not to damage them. I used a SOS pad and some greased lightning on the plastic parts for a good clean look . Now that the used/new radiator you are installing is clean, its time to take out the old radiator.
Removing air intake for access to everything.
Now we need to take the air intake off to have room to work.
1.) Pull out the two hoses at the top of the intake.

2.) Unplug the MAF (mass air flow sensor) plug

Thread Starter
|
Technical Article Contributor
Joined: Mar 2012
Posts: 154
Likes: 0
3) Then unclamp the clip that holds the air box/filter in.

4) Finally loosen up the C-clamp attaching to the throttle body with an 8mm socket.

You can now lay the air intake up out of your way, it is not necessary to unplug the air filter sensor. But if you want to take the complete plastic intake off unplug the following plug below.
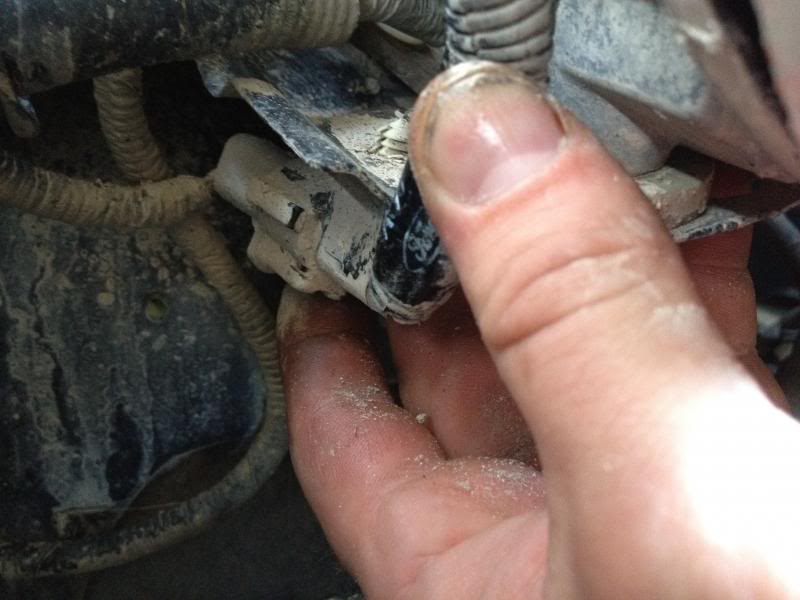
Laying it out of the way.

Removing old radiator.
*MAKE SURE YOUR ENGINE HAS HAD A GOOD 30min TO COOL** No need to take a change on burning yourself or hurting someone else.
Place a 3 gallon bucket under your drain plug to catch what drains out of your radiator. Now drain the fluid in your current radiator by turning the plastic drain plug at the bottom left of your current radiator counter clockwise until you see a consistent flow of coolant coming out. Wait until the radiator has drained completely to continue.
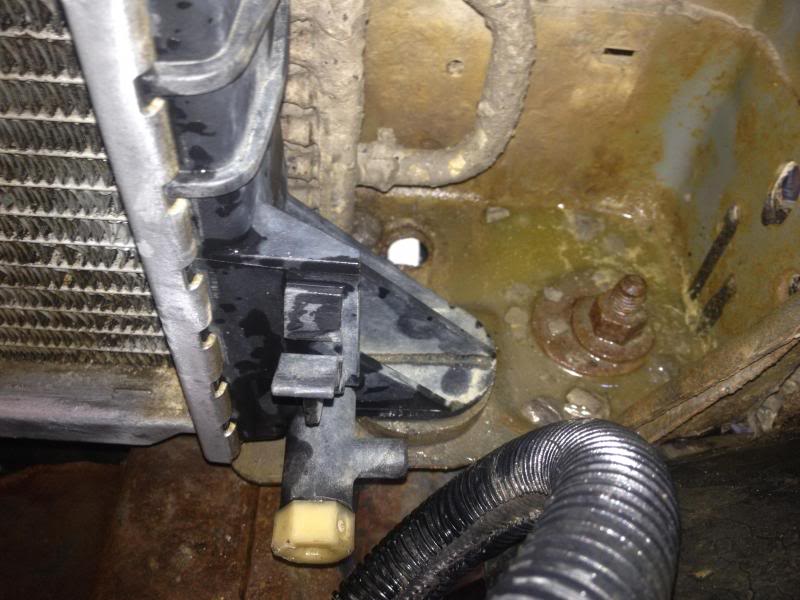


After draining the radiator I suggest removing the top left hose on the radiator (from engine/thermostat to radiator). I suggest this for easier access to the 8mm bolt that holds the fan shroud on.
Use caution, some fluid will still be in the hose. Use a pair of channel locks to crimp down on the clamp and pull the hose off.
With the hose disconnected from the radiator, you can lay it up out of the way in order for use to remove the fan shroud and proceed.

With the top left hose loose and out of the way its time to remove the fan & shroud.

4) Finally loosen up the C-clamp attaching to the throttle body with an 8mm socket.

You can now lay the air intake up out of your way, it is not necessary to unplug the air filter sensor. But if you want to take the complete plastic intake off unplug the following plug below.

Laying it out of the way.

Removing old radiator.
*MAKE SURE YOUR ENGINE HAS HAD A GOOD 30min TO COOL** No need to take a change on burning yourself or hurting someone else.
Place a 3 gallon bucket under your drain plug to catch what drains out of your radiator. Now drain the fluid in your current radiator by turning the plastic drain plug at the bottom left of your current radiator counter clockwise until you see a consistent flow of coolant coming out. Wait until the radiator has drained completely to continue.


After draining the radiator I suggest removing the top left hose on the radiator (from engine/thermostat to radiator). I suggest this for easier access to the 8mm bolt that holds the fan shroud on.
Use caution, some fluid will still be in the hose. Use a pair of channel locks to crimp down on the clamp and pull the hose off.
With the hose disconnected from the radiator, you can lay it up out of the way in order for use to remove the fan shroud and proceed.

With the top left hose loose and out of the way its time to remove the fan & shroud.
Thread Starter
|
Technical Article Contributor
Joined: Mar 2012
Posts: 154
Likes: 0
Removing fan shroud and fan clutch:
This part can be a little tricky. We cant just unscrew the fan clutchh and pull it out because of the shroud, so we need to try to do them together.
First: Take out the two 8mm bolts at the top of the shroud (1 on each side at the top).
With the two bolts removed, we now need to concentrate on unscrewing the fan clutch from the water-pump. They make a tool to do this with, but it can be done by the following:
First, apply the wrench to the nut holding the fan clutch to the water pump and tap it with a hammer to the left. If that doesnt loosen it, do the following.
Use a large adjustable wrench and put it on the fan clutch nut (approx 1-1/8") . The bolt is right hand threaded, so to take it off we need to turn it to the left. So position the adjustable wrench as far right as you can.
Now you can use one of the 10mm open end wrenches to wedge between bolts of the water-pump pulley to hold for leverage. Once you get some good leverage, tap the adjustable wrench with a hammer and the you should see the fan clutch bolt loosen. Once it breaks loose, you can unscrew it by hand.

With the fan clutch loose, take it off and remove the fan shroud at the same time. The shroud shoudl simply pull up out of the clips at the bottom. This should give us full access to the front of the motor.
 [/URL]

Removing brackets holding factory radiator in place.
Use a 10mm socket to remove the two bolts shown below.


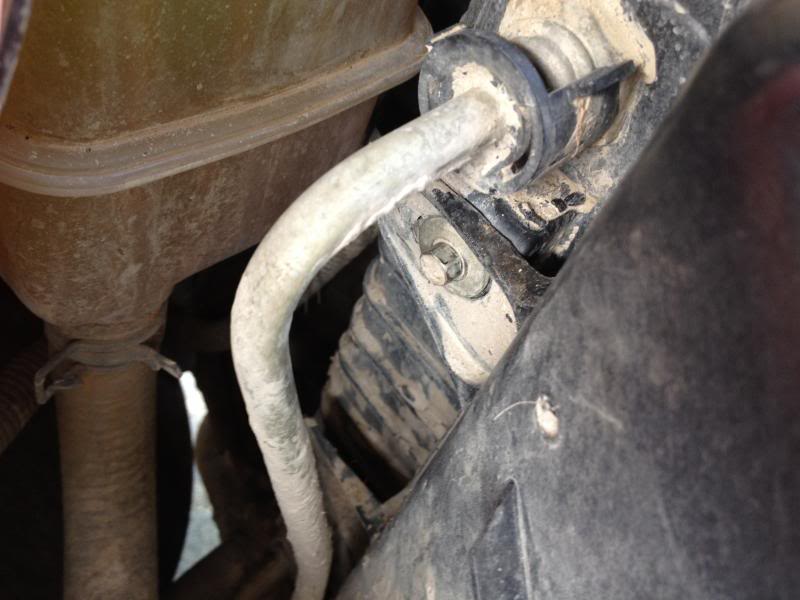
Removing transmission lines and lower radiator hose.
First remove the bottom right radiator line by using your channel locks. This will give you a little better access to the transmission lines.

With the engine coolant lines all disconnect from the radiator its time to disconnect the tranny lines.
This part can be a little tricky. We cant just unscrew the fan clutchh and pull it out because of the shroud, so we need to try to do them together.
First: Take out the two 8mm bolts at the top of the shroud (1 on each side at the top).

With the two bolts removed, we now need to concentrate on unscrewing the fan clutch from the water-pump. They make a tool to do this with, but it can be done by the following:
First, apply the wrench to the nut holding the fan clutch to the water pump and tap it with a hammer to the left. If that doesnt loosen it, do the following.
Use a large adjustable wrench and put it on the fan clutch nut (approx 1-1/8") . The bolt is right hand threaded, so to take it off we need to turn it to the left. So position the adjustable wrench as far right as you can.
Now you can use one of the 10mm open end wrenches to wedge between bolts of the water-pump pulley to hold for leverage. Once you get some good leverage, tap the adjustable wrench with a hammer and the you should see the fan clutch bolt loosen. Once it breaks loose, you can unscrew it by hand.

With the fan clutch loose, take it off and remove the fan shroud at the same time. The shroud shoudl simply pull up out of the clips at the bottom. This should give us full access to the front of the motor.
[/URL]
Removing brackets holding factory radiator in place.
Use a 10mm socket to remove the two bolts shown below.


Removing transmission lines and lower radiator hose.
First remove the bottom right radiator line by using your channel locks. This will give you a little better access to the transmission lines.

With the engine coolant lines all disconnect from the radiator its time to disconnect the tranny lines.
Thread Starter
|
Technical Article Contributor
Joined: Mar 2012
Posts: 154
Likes: 0
You can either use your quick disconnect plastice piece of manuall unscrew the lines from the radiator.

I didn't want to replace any O-rings, so I unscrewed both 27mm bolts from the radiator tranny cooler (on the drivers side). Note: it is probably easier to do the disconnect, but I would have to drive over an hour to get O-rings so I decided against it. I used a combination of an open end 27mm wrench and a pair of channel locks for this.


Removing radiator reservoir and radiator.
I found it hard to remove the radiator without removing the reservoir, so I decided to remove the reservoir and clean it too.
First remove both: the small hose and the larger bottom hose connecting to the reservoir.


Once the lines are disconnect, use an 8mm socket to take out the two bolts holding it in place. Note: It uses a clip on the bottom to help hold it up, so it just pulls up once the bolts are out.

The other bolt is on the side of the engine bay.


I didn't want to replace any O-rings, so I unscrewed both 27mm bolts from the radiator tranny cooler (on the drivers side). Note: it is probably easier to do the disconnect, but I would have to drive over an hour to get O-rings so I decided against it. I used a combination of an open end 27mm wrench and a pair of channel locks for this.


Removing radiator reservoir and radiator.
I found it hard to remove the radiator without removing the reservoir, so I decided to remove the reservoir and clean it too.
First remove both: the small hose and the larger bottom hose connecting to the reservoir.


Once the lines are disconnect, use an 8mm socket to take out the two bolts holding it in place. Note: It uses a clip on the bottom to help hold it up, so it just pulls up once the bolts are out.

The other bolt is on the side of the engine bay.

Thread Starter
|
Technical Article Contributor
Joined: Mar 2012
Posts: 154
Likes: 0


Pull radiator out of engine bay.
Simply pull the radiator out now.
Once it is out, check to make sure the mounting bushings are still good and rust hasnt completely rotted your support out.


Installing new radiator.
The new radiator should fit right down on the factory bushings. Make sure you have at least an inch gap between the condenser.
Then put your mounting brackets back with the 10mm bolts to hold the new radiator in place.

Now connect the transmission lines to the right side of the new radiator.
You can use tephlon tape if you desire.


Once you have the transmission lines snug, its time to put the bottom right hose back on the radiator with the factory clamp.

Re-installing reservoir.
Use the two 8-mm bolts you took out of the reservoir to mount it back in place, making sure the bottom clip is attached to the proper mount. Once secured, plug the hoses back in the bottom and the top of the reservoir with the clamps.
**See pictures above for reference***
Reinstall fan and shroud.
Now reinstall the factory fan clutch and shroud the same way you took it off. Use the wrench and hammer to make sure the nut is tight on the water pump. Also make sure you have the 8mm bolts holding the shroud on, snug.
Thread Starter
|
Technical Article Contributor
Joined: Mar 2012
Posts: 154
Likes: 0
Now replace the last hose at the top left of the radiator with the factory clamp.
Finally add fluid to fill your radiator/reservoir and add any additional tranny fluid you may have lost. Usually you wont lose hardly any tranny fluid.
Finally enjoy your new updated radiator and cooling power.

Much more cooling power

Finally add fluid to fill your radiator/reservoir and add any additional tranny fluid you may have lost. Usually you wont lose hardly any tranny fluid.
Finally enjoy your new updated radiator and cooling power.

Much more cooling power


Senior Member
Joined: Jul 2007
Posts: 3,291
Likes: 0
From: Beaverton Or.
Trending Topics
Thread Starter
|
Technical Article Contributor
Joined: Mar 2012
Posts: 154
Likes: 0
The 23.9 quart system was base/standard on all models. However, for some very odd reason the larger 2-row radiator was not optional IN 2003. Weird spec, but you could get the 25.5 system (3.5 quart 2-row) from 97-02 but not in 03.
All 99-01 navi's have the 3.5 quart. But I would assume you could find the 2-rows in most of the 99-02 F150's with the towing package.
Can't understand why in 2003 they didn't make it an option?
http://www.fleet.ford.com/maintenance/owner-manuals/
http://www.motorcraftservice.com/pub.../03f12og5e.pdf

Senior Member
Joined: Aug 2007
Posts: 1,867
Likes: 9
My 01 had a 1 row with tow package. Replace mine with the 2.5 inch radiator 2 row from summit for 139.00. easy swap. mine should of had the larger radiator but it was one of those Ford looks the other way things they are known for. Funny how the 1 row radiator is 1 inch thick. pathetic if you ask me.
Last edited by 01 gt f150; Jun 9, 2013 at 08:45 PM.
Thread Starter
|
Technical Article Contributor
Joined: Mar 2012
Posts: 154
Likes: 0
My 01 had a 1 row with tow package. Replace mine with the 2.5 inch radiator 2 row from summit for 139.00. easy swap. mine should of had the larger radiator but it was one of those Ford looks the other way things they are known for. Funny how the 1 row radiator is 1 inch thick. pathetic if you ask me.

Member
Joined: Nov 2012
Posts: 33
Likes: 0
From: Bowen Island BC
Thank you so much for posting this. I am in the process of upgrading my 4.2 to tow and haul my camper, so the last time I was at the pick'n'pull, I picked up the same rad and shroud to replace my 1" rad. They have been sitting in my shed for the better part of two months. The only thing holding me back was concerns about the compatibility of the tranny line fittings. Your post has answered those questions for me. Big thumbs up from me for posting this tutorial! 

Senior Member
Joined: Jun 2002
Posts: 4,293
Likes: 6
I didn't check out your links, but the large radiator was not an option on my '02 when I bought it in '02. At some point, Ford swapped (probably as a cost saving measure) because the large radiator isn't needed. The small radiator will handle any cooling requirements for anything this truck is rated for. If not, you're most likely exceeding the (conservative) capability (as opposed to rated capacity...two different things) of the truck. I have never seen another '02 with the large radiator.
Thread Starter
|
Technical Article Contributor
Joined: Mar 2012
Posts: 154
Likes: 0
I didn't check out your links, but the large radiator was not an option on my '02 when I bought it in '02. At some point, Ford swapped (probably as a cost saving measure) because the large radiator isn't needed. The small radiator will handle any cooling requirements for anything this truck is rated for. If not, you're most likely exceeding the (conservative) capability (as opposed to rated capacity...two different things) of the truck. I have never seen another '02 with the large radiator.
You are correct it should handle anything the truck is rated for, but more cooling isn't a bad thing(within reason). And yes, I do exceed the ratings occasionally but nothing stupid and the truck isn't factory anymore. Swapped 4r70 for a 4r100, 4.10's and 305/70/17 GY MTR (Just like you have). I also use a gooseneck often for horse shows and pulling my bmw around, so the upgrade was worth it *to me*. Not many people live in an area where a 10 min drive to town requires climbing 1000ft in elevation and every highway withing a perimeter of 50 miles has up to a 10% grade.