


97-03 window motor replacement how to


Thread Starter
|
Technical Article Contributor
Joined: Mar 2006
Posts: 1,460
Likes: 1
From: Near Houston
97-03 window motor replacement how to
This is a detailed post on replacing the front door window motor on the 97-03
body style trucks. These pics are from a 2001 expedition pass side front door,
most will be identical but some bolts/screws may be a different size on different years/trim levels. If your motor is dead hopefully it died with the window rolled up, but if it got stuck down its ok well get to that later.
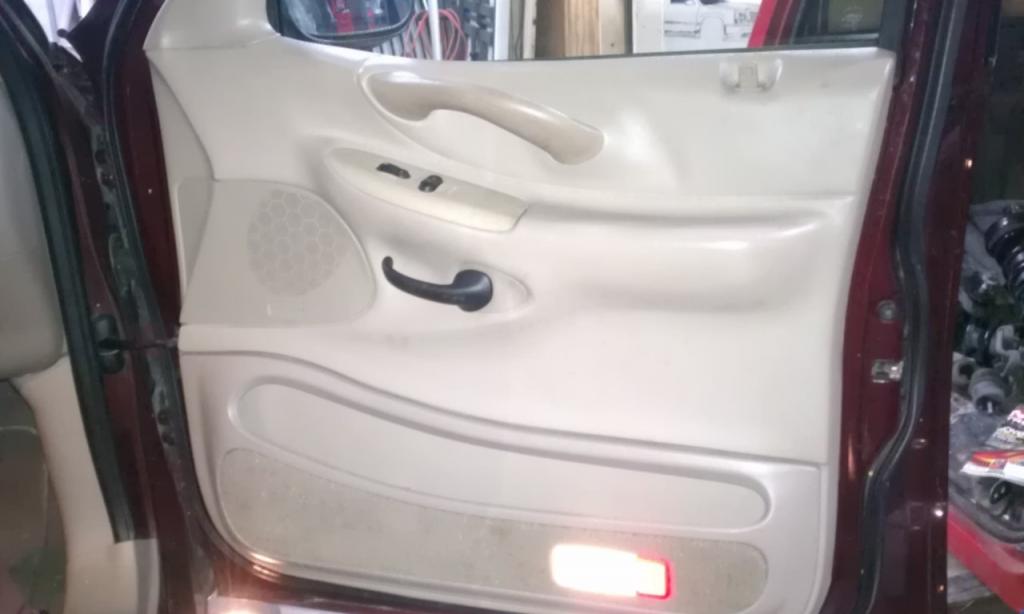
This is what we start with
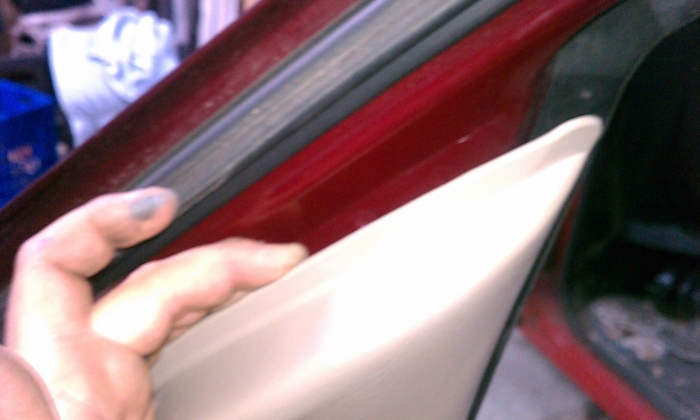
You have to remove the upper small panel, directly inline with the outside rearview mirror. Start at the top edge and gently but firmly pull out.
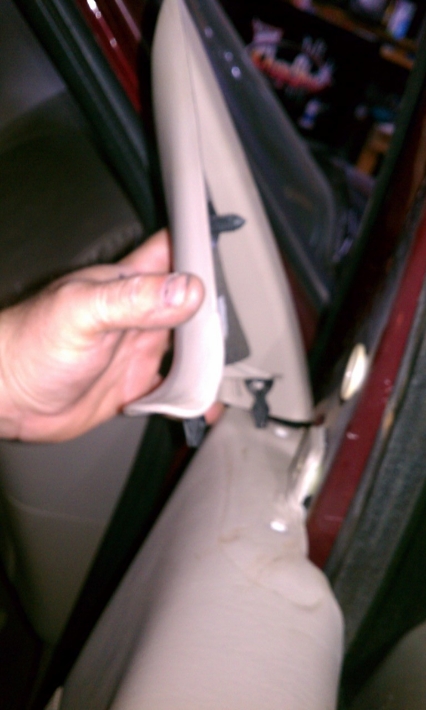
The bottom of the small panel has two tabs that go down, once you pop the top tab out pull the panel upwards to release these tabs
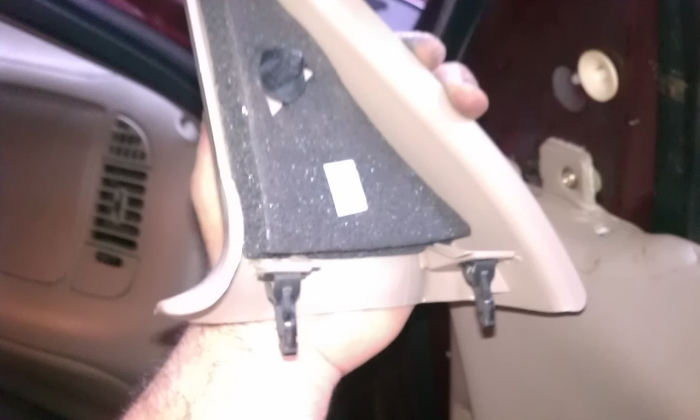
Heres a better pic of the panel so you can see the pop in tabs and their positions.
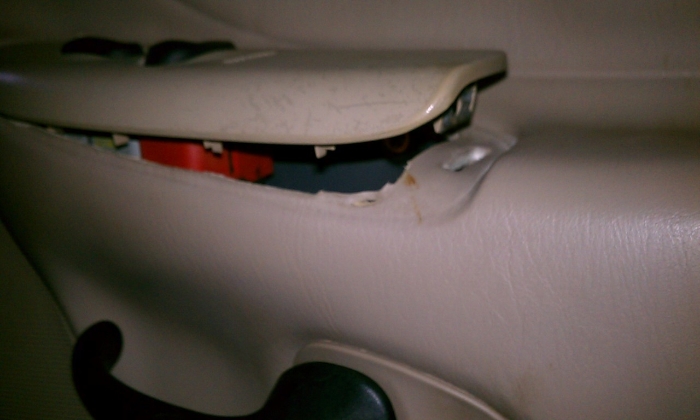
Next we will pop out the switch panel. I find it easier to pry the most rearward part first and then work up to the front since the front seems to always be a little tighter.
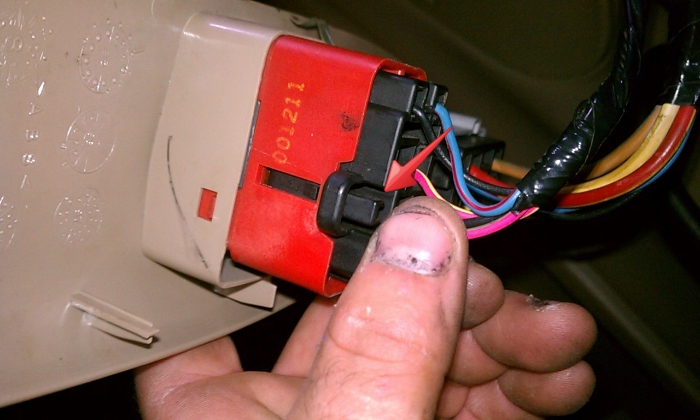
Once its out push the small tabs (red arrow) on the electrical connectors and disconnect them. Set the panel aside within reach so it can be used later to move the window up and down.
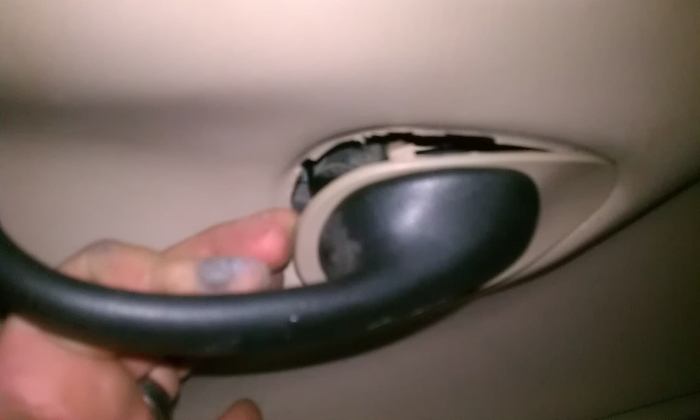
Moving down to the handle, pry the outer surround off. Start at the most forward part, pry it out and the rear will slide forward and out.
Note the blue arrow, thats the rearward tab. If you pry from the rear it could break.
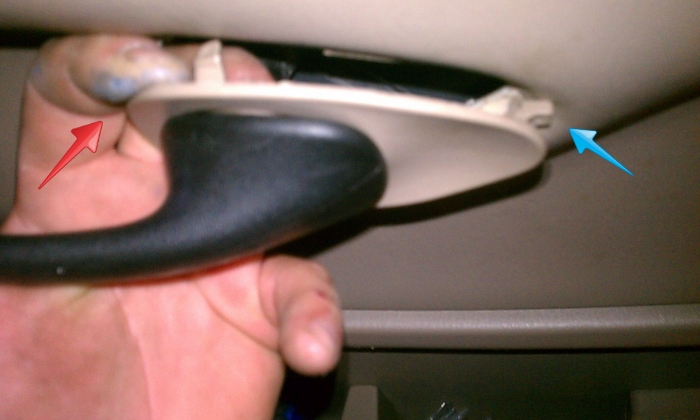
Snake the trim surround behind the door panel. this may take a little effort.
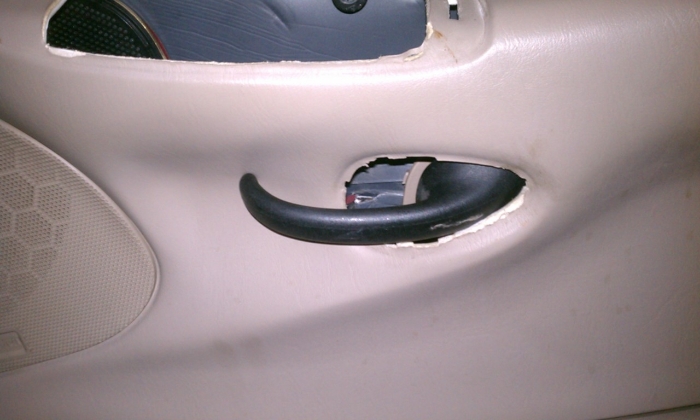
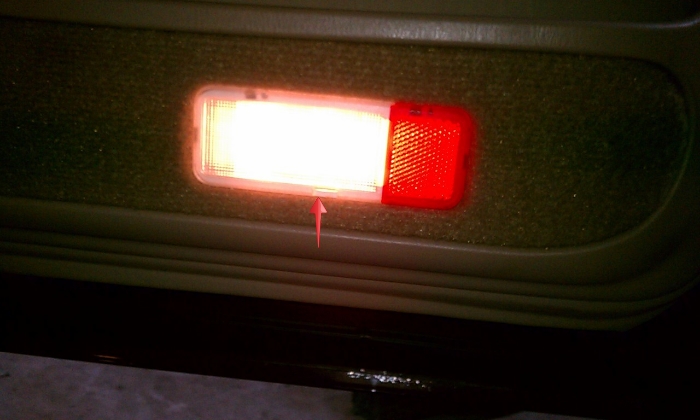
The last piece removed will be the lower reflector/ light.
Theres a small tab on the bottom, pry it out gently and the reflector falls right out.
Closer shot
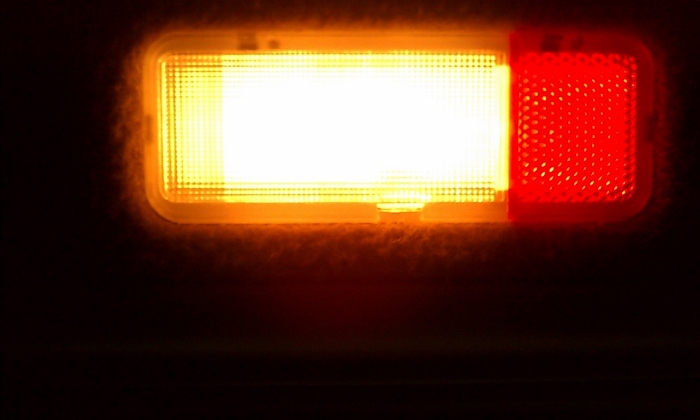
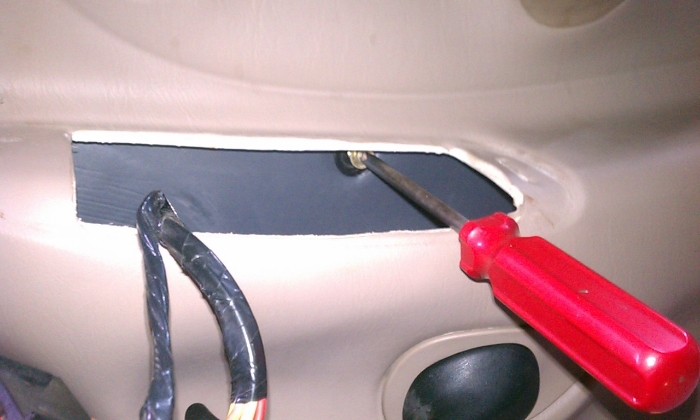
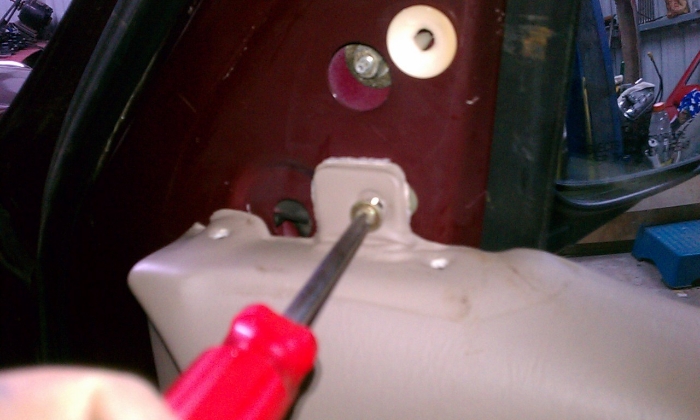
There are three screws that must be removed to be able to remove the door panel. One is a torx T15 that is located under the reflector that was removed in the previous step.
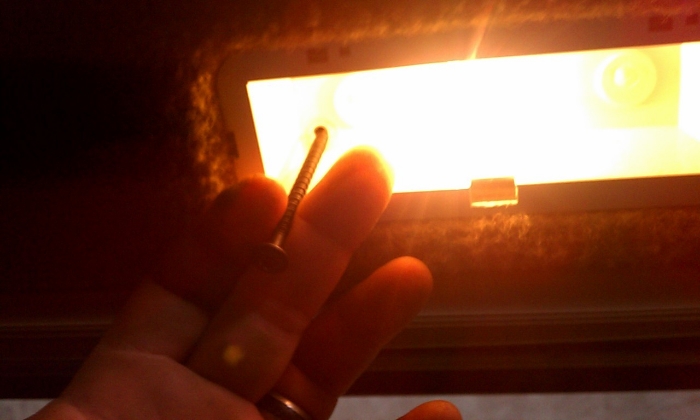
The other two are phillips head screws.
One is located inside the panel, in the hole where the window switch panel was removed. Its tucked up top.
The last one is top-forward, where the first small panel was pulled, by the rearview mirror.
Grab the panel firmly from the handle and pull up about and inch to release the catches. You will have to play with the door handle a bit to maneuver it thru and be able to pull the panel away from the door. No pics of this since it takes two hands to do this and i didnt have a third to hold the camera, but its not hard. Once its loose dont pull too far away, you must disconnect the light on the bottom corner where the reflector was.
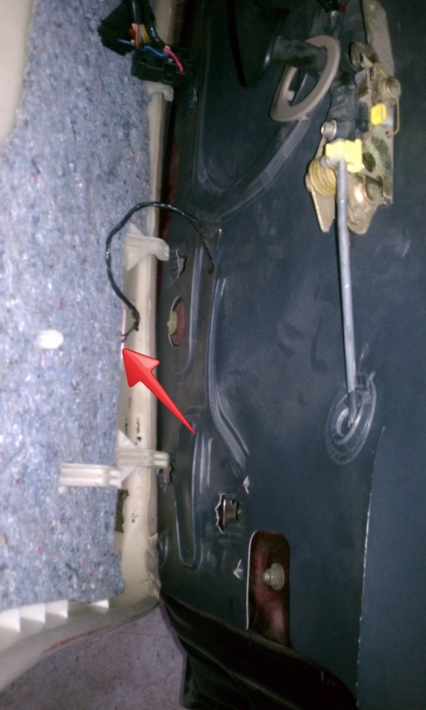
Set the panel aside, Next is to remove some hardware so we can get the plastic liner off.
Start at the speaker.
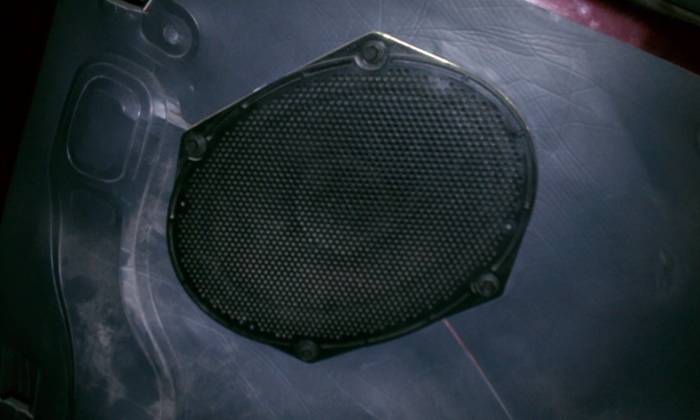
There are four 6mm screws holding it in. (ive noticed some models have a 5.5mm screw) Remove them and pull the speaker out a bit and unplug the speaker. Set the wiring inside the hole and out of the way.
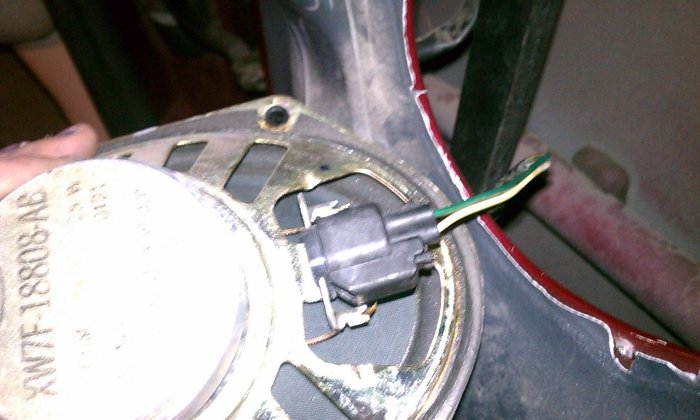
The door handle will also have to be removed.
Unbolt the 8mm bolt that holds the plastic handle on the assembly. It doesnt have to come all the way out, just far enough to back off the metal assembly. Makes it easier to not misplace it.
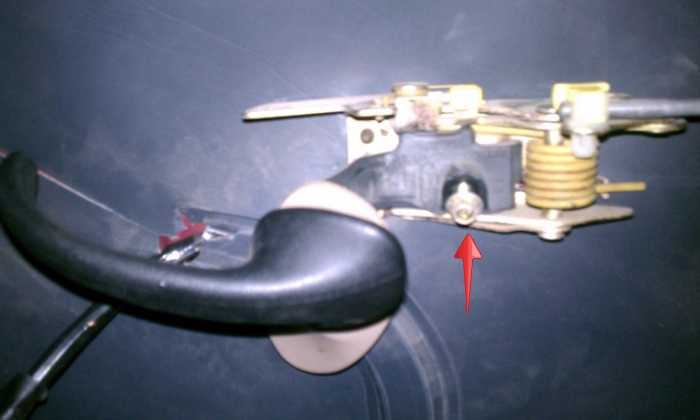
The metal assembly goes next, unclip the yellow clip that holds the door rod. (blue arrow) and then remove the other 8mm bolt. (red arrow)
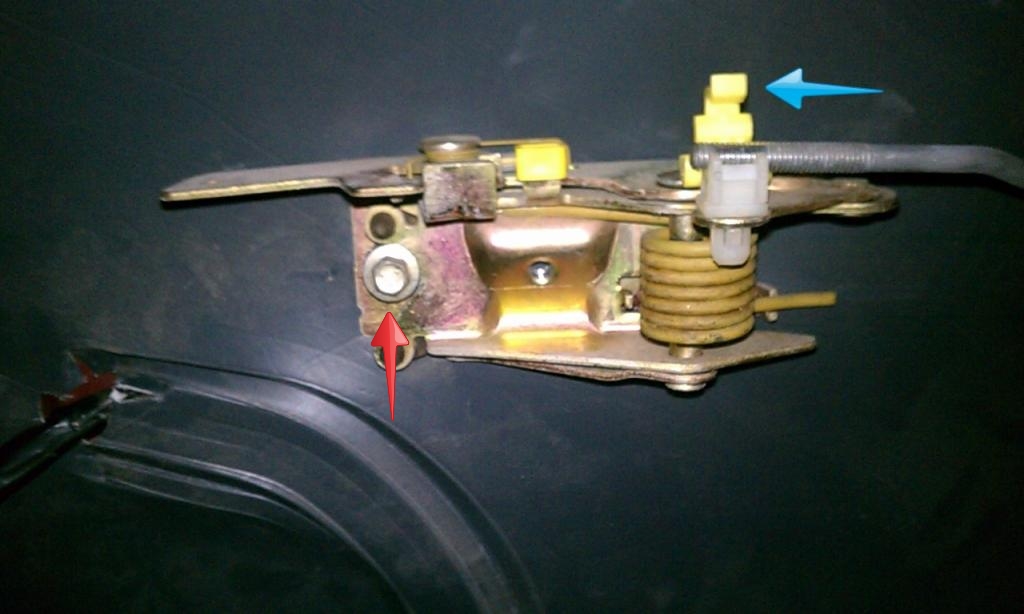
the assembly will slide forward (front of vehicle) and out
This is the grey plastic liner that has to be pulled, be sure to slide the rod out, the window/lock wiring, and the lower light wiring thru the liner
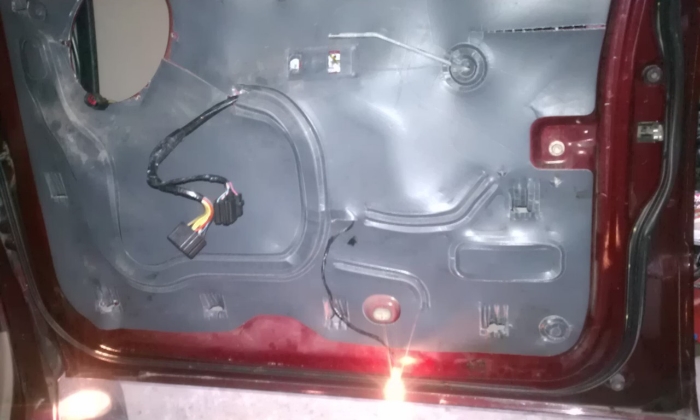
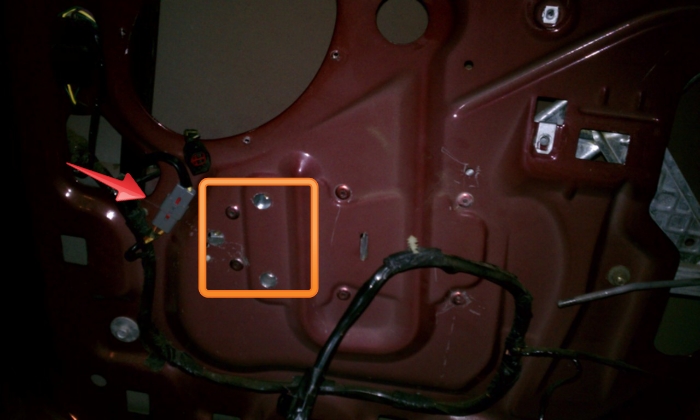
Once off, the inner door skin looks like this. the motor sits behind where the orange square is and the plug pigtail is marked with a red arrow.
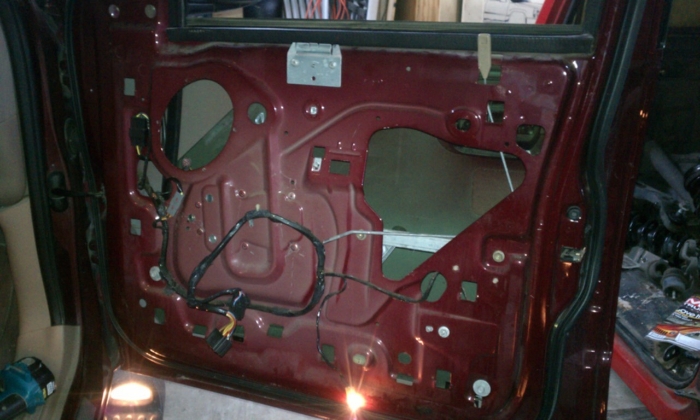
Another view, window down.
Before the next step plug the window switch back in and turn the key forward to roll up the window. If you were unfortunate enough that the motor is dead and left the window stuck down you will have to grab the glass and help pull it up.
body style trucks. These pics are from a 2001 expedition pass side front door,
most will be identical but some bolts/screws may be a different size on different years/trim levels. If your motor is dead hopefully it died with the window rolled up, but if it got stuck down its ok well get to that later.
This is what we start with
You have to remove the upper small panel, directly inline with the outside rearview mirror. Start at the top edge and gently but firmly pull out.
The bottom of the small panel has two tabs that go down, once you pop the top tab out pull the panel upwards to release these tabs
Heres a better pic of the panel so you can see the pop in tabs and their positions.
Next we will pop out the switch panel. I find it easier to pry the most rearward part first and then work up to the front since the front seems to always be a little tighter.
Once its out push the small tabs (red arrow) on the electrical connectors and disconnect them. Set the panel aside within reach so it can be used later to move the window up and down.
Moving down to the handle, pry the outer surround off. Start at the most forward part, pry it out and the rear will slide forward and out.
Note the blue arrow, thats the rearward tab. If you pry from the rear it could break.
Snake the trim surround behind the door panel. this may take a little effort.
The last piece removed will be the lower reflector/ light.
Theres a small tab on the bottom, pry it out gently and the reflector falls right out.
Closer shot
There are three screws that must be removed to be able to remove the door panel. One is a torx T15 that is located under the reflector that was removed in the previous step.
The other two are phillips head screws.
One is located inside the panel, in the hole where the window switch panel was removed. Its tucked up top.
The last one is top-forward, where the first small panel was pulled, by the rearview mirror.
Grab the panel firmly from the handle and pull up about and inch to release the catches. You will have to play with the door handle a bit to maneuver it thru and be able to pull the panel away from the door. No pics of this since it takes two hands to do this and i didnt have a third to hold the camera, but its not hard. Once its loose dont pull too far away, you must disconnect the light on the bottom corner where the reflector was.
Set the panel aside, Next is to remove some hardware so we can get the plastic liner off.
Start at the speaker.
There are four 6mm screws holding it in. (ive noticed some models have a 5.5mm screw) Remove them and pull the speaker out a bit and unplug the speaker. Set the wiring inside the hole and out of the way.
The door handle will also have to be removed.
Unbolt the 8mm bolt that holds the plastic handle on the assembly. It doesnt have to come all the way out, just far enough to back off the metal assembly. Makes it easier to not misplace it.
The metal assembly goes next, unclip the yellow clip that holds the door rod. (blue arrow) and then remove the other 8mm bolt. (red arrow)
the assembly will slide forward (front of vehicle) and out
This is the grey plastic liner that has to be pulled, be sure to slide the rod out, the window/lock wiring, and the lower light wiring thru the liner
Once off, the inner door skin looks like this. the motor sits behind where the orange square is and the plug pigtail is marked with a red arrow.
Another view, window down.
Before the next step plug the window switch back in and turn the key forward to roll up the window. If you were unfortunate enough that the motor is dead and left the window stuck down you will have to grab the glass and help pull it up.
Thread Starter
|
Technical Article Contributor
Joined: Mar 2006
Posts: 1,460
Likes: 1
From: Near Houston
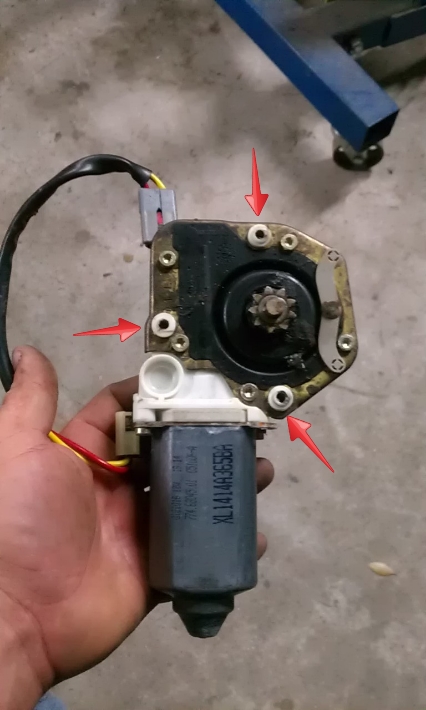
This is what the motor looks like, the red arrows point to the three screw locations. It faces this way inside the door panel, gear towards the inside (of vehicle) and the back toward the outside.
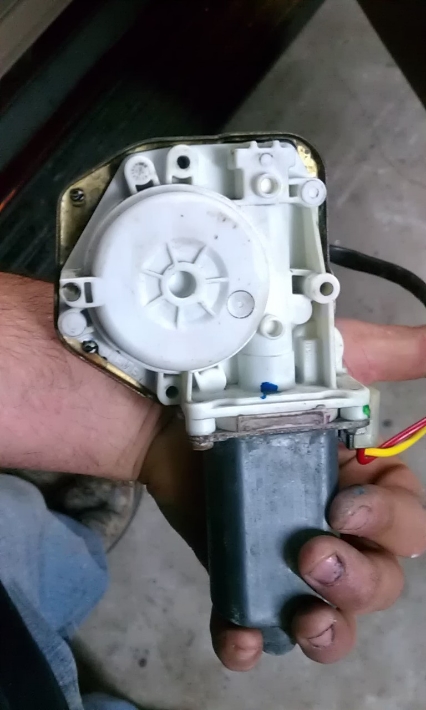
this is the backside (part that faces outside of vehicle)
And this is a horrible pic of how it sits inside the door.
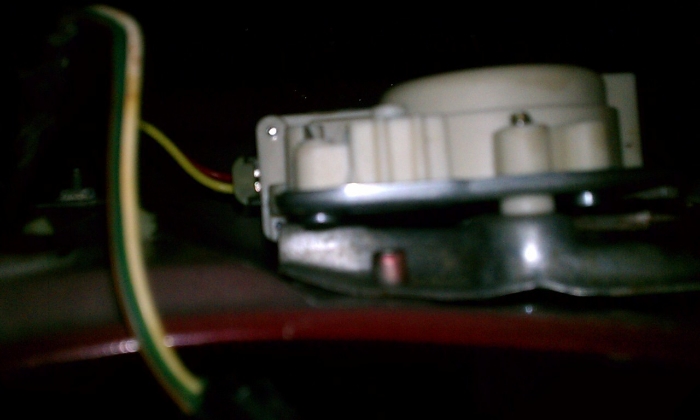
Go ahead and unplug the motor from the pigtail.
Now in order to get the entire assembly out you would have to remove six rivets and be a contortionist to get it out.... We will NOT be doing that since we are only replacing the motor.
There are three dimples already prestamped in the sheetmetal. The screws are right behind them. I used a smaller bit first and stepped it up to about a half inch bit at the end. It just has to be big enough to get your socket in there to unbolt the screws.
Unfortunately i snapped these pics after i had already drilled the dimples but you can see their locations here.
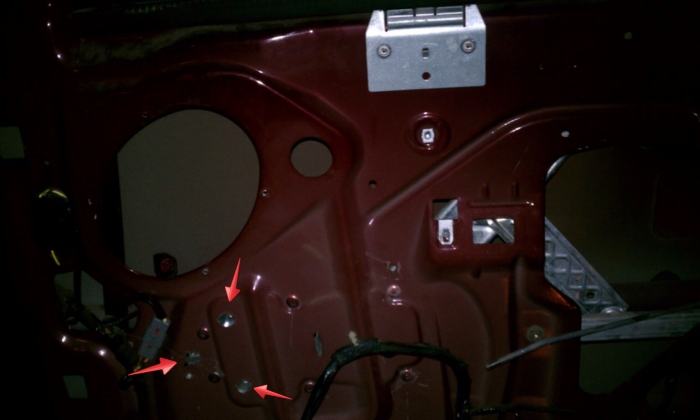
Once they are all drilled insert a (i cant remember if it was a 10 or 11 mm) socket and remove two screws. Leave one in. Either have a helper or you can hold the glass up as you remove the last screw and pull the motor out.
Most of the time the glass will stay put, it has enough resistance to not move up and down but i hold it as a precaution.
The new one goes right in, and it may have to be twisted a bit for the gears to fall into place. It can then be twisted back to line it up with the screw locations.
Plug it in and check operation. Its also a good idea to grease up the tracks with fresh grease while your in there.
Replace items opposite of removal.
A few notes;
If you have issues lining up the motor you can pull the glass up or down accordingly by hand to try to line the gears up.
Also the screws have to make threads in the new motor housing.
I find it was easier once the motor is lined up to put the socket on an extension and a cordless drill. It drills the screw in far easier than by hand.
It can be a pain to try to hold the motor and screw them in by hand.
Once you are ready to put the door panel back on be sure to route the window and lock wiring back into place so it doesnt get stuck behind the panel, also remember to line the door lock pin back in on the top rear of the door panel.
this is the backside (part that faces outside of vehicle)
And this is a horrible pic of how it sits inside the door.
Go ahead and unplug the motor from the pigtail.
Now in order to get the entire assembly out you would have to remove six rivets and be a contortionist to get it out.... We will NOT be doing that since we are only replacing the motor.
There are three dimples already prestamped in the sheetmetal. The screws are right behind them. I used a smaller bit first and stepped it up to about a half inch bit at the end. It just has to be big enough to get your socket in there to unbolt the screws.
Unfortunately i snapped these pics after i had already drilled the dimples but you can see their locations here.
Once they are all drilled insert a (i cant remember if it was a 10 or 11 mm) socket and remove two screws. Leave one in. Either have a helper or you can hold the glass up as you remove the last screw and pull the motor out.
Most of the time the glass will stay put, it has enough resistance to not move up and down but i hold it as a precaution.
The new one goes right in, and it may have to be twisted a bit for the gears to fall into place. It can then be twisted back to line it up with the screw locations.
Plug it in and check operation. Its also a good idea to grease up the tracks with fresh grease while your in there.
Replace items opposite of removal.
A few notes;
If you have issues lining up the motor you can pull the glass up or down accordingly by hand to try to line the gears up.
Also the screws have to make threads in the new motor housing.
I find it was easier once the motor is lined up to put the socket on an extension and a cordless drill. It drills the screw in far easier than by hand.
It can be a pain to try to hold the motor and screw them in by hand.
Once you are ready to put the door panel back on be sure to route the window and lock wiring back into place so it doesnt get stuck behind the panel, also remember to line the door lock pin back in on the top rear of the door panel.