4wd indicator bulb
#1
 09-29-2011, 09:21 PM


Join Date: May 2000
Location: Encinitas
Posts: 38
Likes: 0
Received 0 Likes
on
0 Posts
4wd indicator bulb
I have a 2003 4wd screw.
The indicator light behind the 4wd selector switch does not seem to work and I think it is the bulb.
I pulled the dash apart and found a long skinny bulb, but I cannot find a part number or a replacement on any parts site.
Does anyone have experience with this light and how to replace it.
Thanks
PS: The brilliant ford designers made the climate control fan and 4wd selector switches almost identical and right next to each other. So the other night (with my climate control lights also burned out) (since replaced), I accidentally engaged the 4wd instead of the fan while I was on the freeway. Fortunately only 4wd High, but it was not a good thing.
#2
01-16-2012, 07:17 PM

2003 F150 fwd selector switch light
There is a bulb that is easily removed from the switch. I need one also . They make a replacement for the ranger fwd switch, but the only response I have gotten so far from Ford and all auto parts stores is I have to buy the whole switch. Cost from $55 to $58.
#3
01-16-2012, 10:13 PM

#4
02-17-2012, 11:24 AM

Fixed!
First post, and I registered just so that I could provide a solution to this.
It is none of the bulbs that you mentioned. It looks like this:
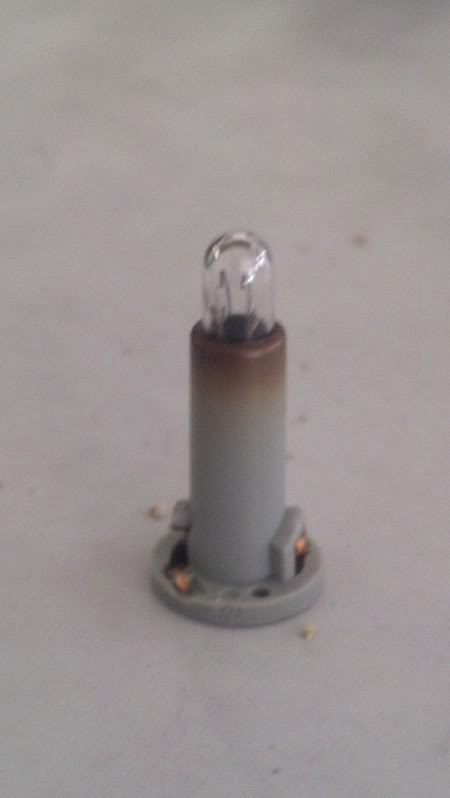
I called the stealership the other day to verify, and they suggested that I buy the $67 4WD selector switch. Nice. Eff that. $3 at Radio shack and I ended up with a bag of assorted LEDs and some 470ohm resistors.
1) Gently pry up the flat tabs that hold the copper contacts in place and pull the contacts out through the bottom of the lamp ***'y with some needlenose pliers. Put them in a safe place.
2) The filament leads from the OEM bulb extend through the holder and are now visible at the bottom. bend them as straight as possible and remove the old bulb.
3) Select your LED. Mini LEDs fit best and have no noticeable difference in intensity once installed in the switch. The indicator is a plastic strip that gets it's light from the side of the bulb, not the front. I used a mini-LED first, then went with a clear one (yet still green, see step 3) later for comparison.
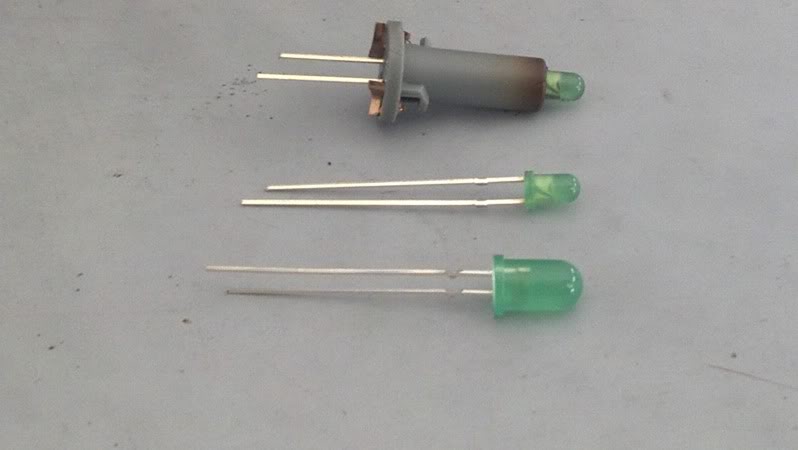
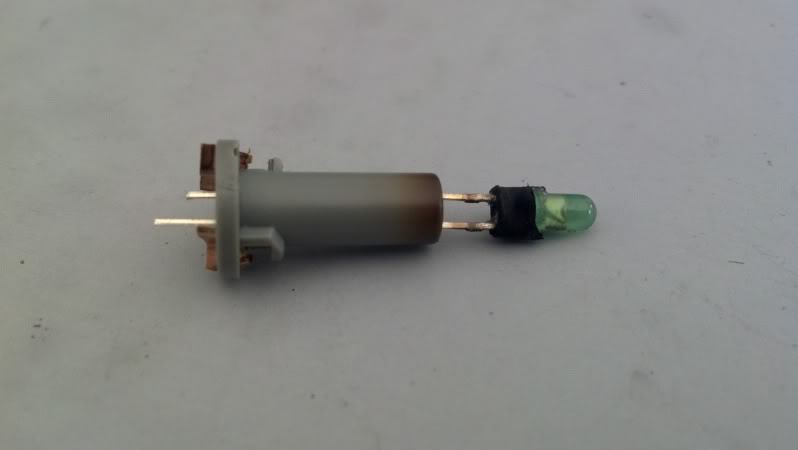
With the Mini-LED, I used a small piece of heat-shrink at the base as a spacer.
The larger sized LEDs will not seat in the narrow base and will need to have the tip sanded a bit, but they work equally well.
4) Install the LED in the lamp base and trim the ends accordingly. Polarity is not important yet, but the LED negative lead corresponds to the flat side on the round housing. It is usually shorter as well. Trim the leads and bend them over just like the original bulb leads. Carefully reinstall the copper contacts. These are very important because they hold the lamp base tight in the hole, as well as providing the contact points for the lamp itself.
5) Splice a 470 ohm resistor into the Lt. Blue-Red stripe wire coming into the 4WD switch. It is pin 1 (or 4, depending on your orientation). The pin on the other end is the (black) ground wire for the illumination. Don't forget the heat shrink.
6) Put the new bulb in the hole and carefully twist it in with a flat-blade screwdriver. Turn on the parking lights. If the bulb doesn't light, take the bulb out of the hole and rotate it 180 degrees. If it still doesn't light, then you likely have the wrong value resistor. A 470 ohm value should work for any 2.1-2.5VDC LED, both at 13.8V and 11.8V (key on and key off).
If anything goes awry during the process, just solder the resistor to the end of the positive LED lead after you put it in the base. Then solder positive and negative leads and splice them into the illumination wires for the 4WD selector. Only drawback to this is that it lacks the ability to be quickly disconnected, but polarized connectors are available at Radio shack as well. LEDs are cheap, and should easily outlast standard filament bulbs.
Jason
I called the stealership the other day to verify, and they suggested that I buy the $67 4WD selector switch. Nice. Eff that. $3 at Radio shack and I ended up with a bag of assorted LEDs and some 470ohm resistors.
1) Gently pry up the flat tabs that hold the copper contacts in place and pull the contacts out through the bottom of the lamp ***'y with some needlenose pliers. Put them in a safe place.
2) The filament leads from the OEM bulb extend through the holder and are now visible at the bottom. bend them as straight as possible and remove the old bulb.
3) Select your LED. Mini LEDs fit best and have no noticeable difference in intensity once installed in the switch. The indicator is a plastic strip that gets it's light from the side of the bulb, not the front. I used a mini-LED first, then went with a clear one (yet still green, see step 3) later for comparison.
With the Mini-LED, I used a small piece of heat-shrink at the base as a spacer.
The larger sized LEDs will not seat in the narrow base and will need to have the tip sanded a bit, but they work equally well.
4) Install the LED in the lamp base and trim the ends accordingly. Polarity is not important yet, but the LED negative lead corresponds to the flat side on the round housing. It is usually shorter as well. Trim the leads and bend them over just like the original bulb leads. Carefully reinstall the copper contacts. These are very important because they hold the lamp base tight in the hole, as well as providing the contact points for the lamp itself.
5) Splice a 470 ohm resistor into the Lt. Blue-Red stripe wire coming into the 4WD switch. It is pin 1 (or 4, depending on your orientation). The pin on the other end is the (black) ground wire for the illumination. Don't forget the heat shrink.
6) Put the new bulb in the hole and carefully twist it in with a flat-blade screwdriver. Turn on the parking lights. If the bulb doesn't light, take the bulb out of the hole and rotate it 180 degrees. If it still doesn't light, then you likely have the wrong value resistor. A 470 ohm value should work for any 2.1-2.5VDC LED, both at 13.8V and 11.8V (key on and key off).
If anything goes awry during the process, just solder the resistor to the end of the positive LED lead after you put it in the base. Then solder positive and negative leads and splice them into the illumination wires for the 4WD selector. Only drawback to this is that it lacks the ability to be quickly disconnected, but polarized connectors are available at Radio shack as well. LEDs are cheap, and should easily outlast standard filament bulbs.
Jason
Last edited by ae86guy; 02-17-2012 at 11:29 AM.
#5
02-17-2012, 02:15 PM
#6
02-17-2012, 04:03 PM
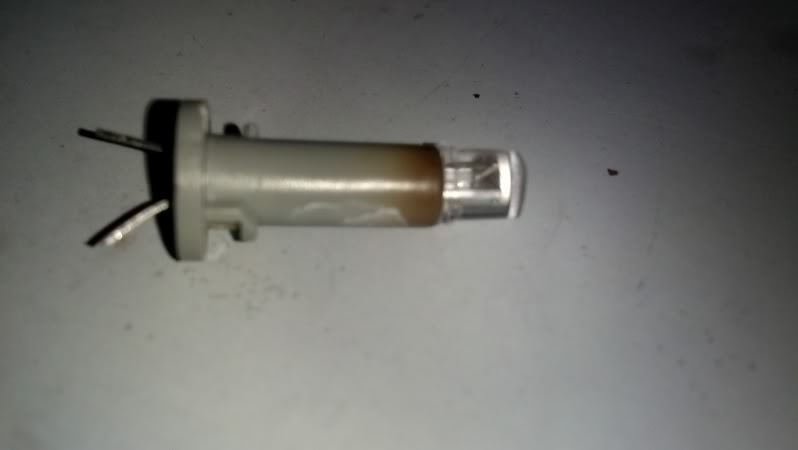
I would like to agree with you, but I promise that it is not a simple type 74 bulb.
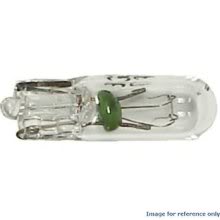
A type 74 automotive lamp plugs into a receptacle, whereas this does not. If you can figure out how to plug the type 74 bulb pictured above into that socket which only has contacts at the bottom, please enlighten me.
But, I suppose that another option would be to extend the leads on the type 74 so that they extend through the bottom of the base, and just use a regular incandescent. My feeling is that if you use the LED, you'll never have to worry about replacing it again.
Last edited by ae86guy; 02-17-2012 at 04:07 PM.
#7
02-17-2012, 10:37 PM
Trending Topics
#8
02-18-2012, 08:06 AM
I was mostly perturbed at the lack of availability, and I have also had an accidental engagement of 4H (at a low speed) due to the similarity and proximity of the 4WD and blower switches. The light being out doesn't help matters at all, and neither does the obstruction of the <lit> indicators by the shift lever. Call it a safety issue if you wish, as if you try to turn the AC on high at 85 MPH and the TC goes 4L, you might have plenty of fresh air coming in through the newly formed hole in the floor. I think there's <hopefully> a lockout for that, but I'm not going to intentionally test it.
Please don't think that I stopped looking for this bulb assembly after I hung up with the stealership. I looked, but I wasn't going to invest a too much time looking for it when I thought I had a viable solution. (Also this post was pretty much the only thing I found online regarding this issue)
The long leads of the original bulb are what inspired the idea of using an LED. Aside from car security installs, I really haven't worked with them much in an automotive environment. Radio shack also sells incandescent bulbs with similar filament leads:
12V Microlamps (2-Pack)
Model 272-1092
Catalog #: 272-1092
I guess you could use those, from the reviews they seem to be used in similar replacement situations. I could have tried that first, but not knowing the specs of the original bulb coupled with RS's inability to provide consistent labeling of their products steered me towards the very cool burning LED device. I didn't particularly want to have to melt a hole in my trim to find out the bulb was too loud.
I performed a comparison of mini and standard green housing (filter) LEDs of unknown values, and neither seemed more intense than the other. I then compared those to the other standard size LED (green, but with clear housing) and found the latter to be notably brighter, so I sanded it down and used it. I am perfectly content to leave it as is, but I could quickly and easily swap out another (brighter) LED.
Offhand, I don't know the brightness of the LED I am using. I know that they probably make much brighter (3x, 4x?), however I didn't have any frame of reference for LED intensity. I also didn't happen to see a brighter one in green, and since my bulb condom broke when I tried to wiggle the original bulb loose, green was a prerequisite.
Last edited by ae86guy; 02-18-2012 at 08:11 AM. Reason: Mo' info

#10
12-22-2014, 10:13 AM

I doubt anyone needs this still but I just had my headlight switch bulb go out last night. I looked and then chatted with a great lady named Stephanie at this site and she confirmed that a NEO4-B should work. It will be shorter but after I get it I'll see how it looks.
https://www.superbrightleds.com/more...panel-led/220/
https://www.superbrightleds.com/more...panel-led/220/