the more I read, the more confused I get
#1
 07-29-2009, 02:22 AM


Join Date: May 2009
Location: Sacramento, CA
Posts: 67
Likes: 0
Received 0 Likes
on
0 Posts
the more I read, the more confused I get
Everytime I think that I'm ready to place an order, I make a vital mistake. I read some more posts or blogs and change my mind. I am not a pro at this by any means. The last time I polished and waxed a car was many moons ago, but my new baby deserves better.
I have an 07 red fire supercab. The paint is in very good condition. There are a couple of very light, small scratches. My plan was to get a da and do the following (do I even need a da?)
1. megs smooth surface clay kit
2. some kind of polish
3. some kind of carnuba wax
4. some kind of leather cleaner
can somebody recommend product and tell me what steps to follow
#2
07-29-2009, 02:25 AM
Join Date: May 2009
Location: Sacramento, CA
Posts: 67
Likes: 0
Received 0 Likes
on
0 Posts
#3
07-29-2009, 06:50 AM

Senior Member
Join Date: May 2009
Location: Coon Rapids, MN
Posts: 163
Likes: 0
Received 0 Likes
on
0 Posts
This is the how to remove swirls and light scratches.
Look at what you have to start with. Is there deep scratches (ones you can catch your fingernail on) or just light surface scratches?
Do I have swirls?
Is there places one the car that look dull and cloudy?
Is the surface of the paint smooth?
What do I want to accomplish with my polishing?
Ok now that you know what you have and where you want to go I will fill in the path to get there.
I will look at what I have to start with.
 From the gas cap hitting the paint.
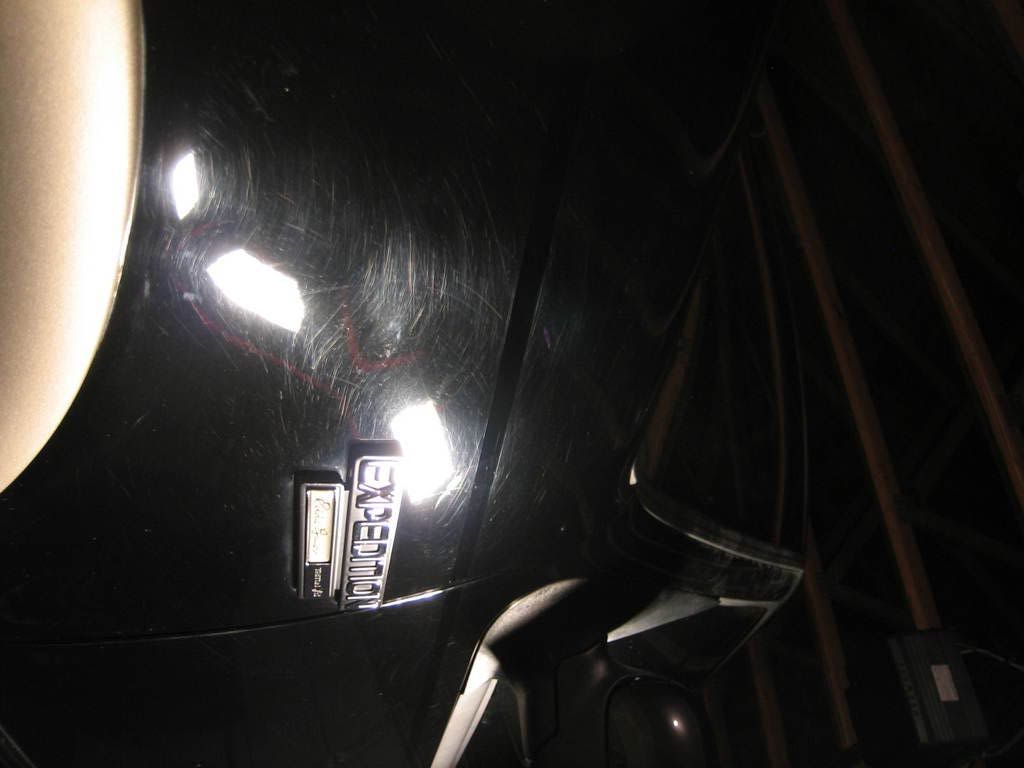 Swirl and scratch city and I’m the major. I also removed the pinstripe you can see where it use to be.
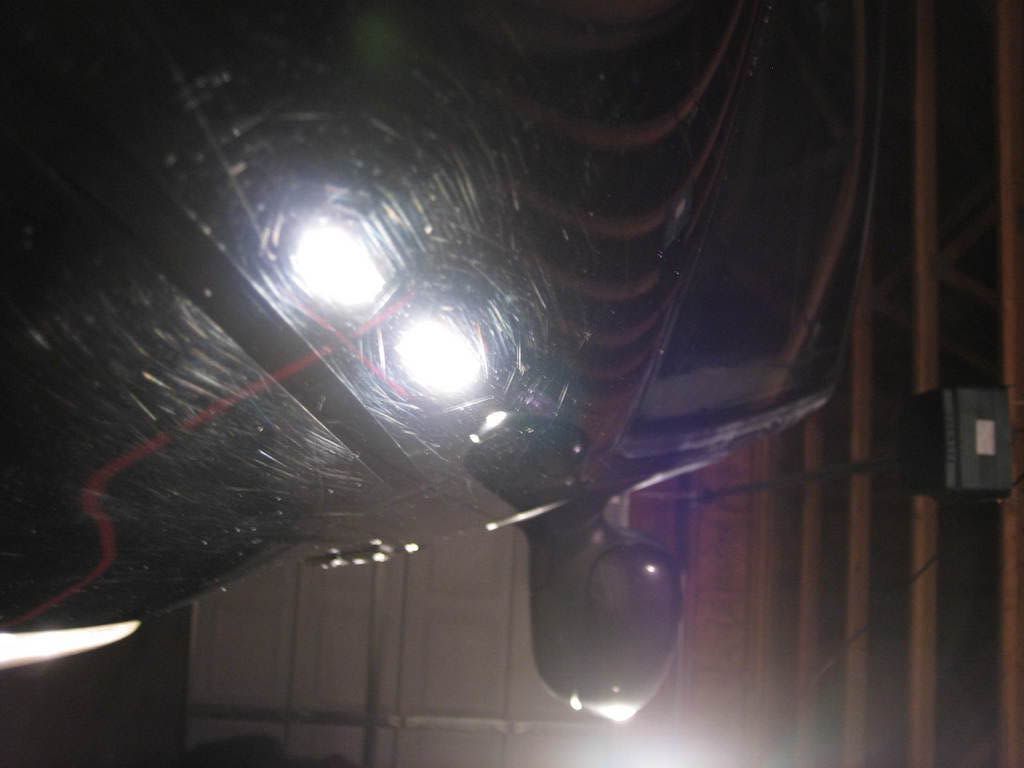 See the strip of perfect paint that was a pinstripe.
Now I will figure out where I want to end up. With my truck it is a 01 with 100k on it so I can’t expect it to get back to perfect. I want there to be no swirls and to make the scratch less noticeable. I would also like to remove some of the scratches when possible.
My first step is an easy one wash the car. I use what is called the two bucket method. Let’s start with clean water and a freshly rinsed container and a micro fiber wash mitt. Use two buckets. Fill one bucket with soapy water and fill the other with clean water. Always rinse your vehicle thoroughly before you begin washing in order to remove loose dirt and grime. Each time you’re ready to reload your mitt with soapy water, dip it in the clean water first, to rinse out the grit and contamination you’ve just removed from your vehicle. Then dip it in the soapy water and continue washing. Then begin washing at the top of the vehicle. Wash down the vehicle as opposed to front to back. Remember that the lower panels are dirtiest. You want to clean the windows and the upper panels before cleaning the lower half of the vehicle so that you don’t transfer grit to the top half of the vehicle. Rinse and reload your mitt often to prevent cross-contamination. Rinse your vehicle frequently as you work, especially in hot weather. Free-flowing water (no nozzle) will allow the water to sheet off of your vehicle for a more thorough rinsing.
Then I will use a clay bar to remove contaminates from the clear coat.
Sorry no pictures the ****en camera **** the bed on me and I had to replace it. The first thing you need to know about clay is that IT IS ABBRASIVE. So don’t think that you are going to be ok with just running the clay bar over your car every time you wax. You should only clay two to three times a year. If you drop the clay bar on the ground count that one out and toss it in the trash. There is a good possibility that it has picked up some grit from the ground and you don’t want to rub that on your clear coat do you. Lets get this going.
Get your clay bar out (doesn’t matter what brand they are all the same really they are) and a spray bottle with about a 100/1 of water/car shampoo. Don’t use dawn it will strip the wax off your car and there are a lot of places that you don’t want that to happen unless you enjoy waxing you door jams every time you wash your car then feel free to use dawn. Spray the panel you rare working on down with the soap mix and place the bar on the paint and go in long STRAIT lines. Don’t go in circles that is how a lot of swirls get put into the paint. Also only work on like a three square foot area at a time.
As you rub keep the panel wet with the spray and you will feel it becoming much easier to move as the paint is cleaned.
After you have made about three passes over every spot on the panel rinse with fresh water and dry with an mft (micro fiber towel). You will see some dull places in the paint, no fear they will be gone in the end, but the paint should feel very smooth and clean if not back to the clay for a few more passes.
As you go don’t forget the windows. Clay works just the same on you windows as it does on the clear coat. The only thing that is different is the glass is significantly harder then the clear coat, so don’t be afraid scratching it.
After your done with the clay it is time for another wash.
Look at what you have to start with. Is there deep scratches (ones you can catch your fingernail on) or just light surface scratches?
Do I have swirls?
Is there places one the car that look dull and cloudy?
Is the surface of the paint smooth?
What do I want to accomplish with my polishing?
Ok now that you know what you have and where you want to go I will fill in the path to get there.
I will look at what I have to start with.
From the gas cap hitting the paint.Swirl and scratch city and I’m the major. I also removed the pinstripe you can see where it use to be.See the strip of perfect paint that was a pinstripe.Now I will figure out where I want to end up. With my truck it is a 01 with 100k on it so I can’t expect it to get back to perfect. I want there to be no swirls and to make the scratch less noticeable. I would also like to remove some of the scratches when possible.
My first step is an easy one wash the car. I use what is called the two bucket method. Let’s start with clean water and a freshly rinsed container and a micro fiber wash mitt. Use two buckets. Fill one bucket with soapy water and fill the other with clean water. Always rinse your vehicle thoroughly before you begin washing in order to remove loose dirt and grime. Each time you’re ready to reload your mitt with soapy water, dip it in the clean water first, to rinse out the grit and contamination you’ve just removed from your vehicle. Then dip it in the soapy water and continue washing. Then begin washing at the top of the vehicle. Wash down the vehicle as opposed to front to back. Remember that the lower panels are dirtiest. You want to clean the windows and the upper panels before cleaning the lower half of the vehicle so that you don’t transfer grit to the top half of the vehicle. Rinse and reload your mitt often to prevent cross-contamination. Rinse your vehicle frequently as you work, especially in hot weather. Free-flowing water (no nozzle) will allow the water to sheet off of your vehicle for a more thorough rinsing.
Then I will use a clay bar to remove contaminates from the clear coat.
Sorry no pictures the ****en camera **** the bed on me and I had to replace it. The first thing you need to know about clay is that IT IS ABBRASIVE. So don’t think that you are going to be ok with just running the clay bar over your car every time you wax. You should only clay two to three times a year. If you drop the clay bar on the ground count that one out and toss it in the trash. There is a good possibility that it has picked up some grit from the ground and you don’t want to rub that on your clear coat do you. Lets get this going.
Get your clay bar out (doesn’t matter what brand they are all the same really they are) and a spray bottle with about a 100/1 of water/car shampoo. Don’t use dawn it will strip the wax off your car and there are a lot of places that you don’t want that to happen unless you enjoy waxing you door jams every time you wash your car then feel free to use dawn. Spray the panel you rare working on down with the soap mix and place the bar on the paint and go in long STRAIT lines. Don’t go in circles that is how a lot of swirls get put into the paint. Also only work on like a three square foot area at a time.
As you rub keep the panel wet with the spray and you will feel it becoming much easier to move as the paint is cleaned.
After you have made about three passes over every spot on the panel rinse with fresh water and dry with an mft (micro fiber towel). You will see some dull places in the paint, no fear they will be gone in the end, but the paint should feel very smooth and clean if not back to the clay for a few more passes.
As you go don’t forget the windows. Clay works just the same on you windows as it does on the clear coat. The only thing that is different is the glass is significantly harder then the clear coat, so don’t be afraid scratching it.
After your done with the clay it is time for another wash.
#4
07-29-2009, 06:51 AM
Senior Member
Join Date: May 2009
Location: Coon Rapids, MN
Posts: 163
Likes: 0
Received 0 Likes
on
0 Posts
Ok now you have a very clean and contaminate free car. The next step will be to remove the swirls and scratches.
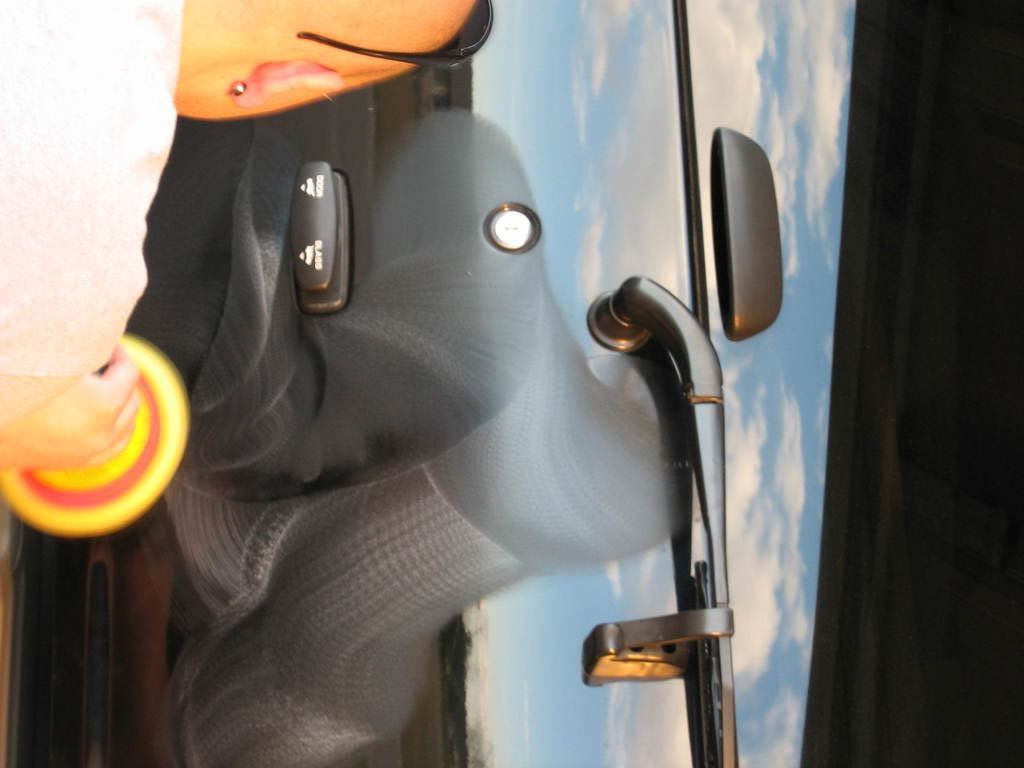
To do this I will be using fine cut rubbing compound and a compounding pad on my PC (Porter-Cable orbital polisher/sander). First thing you want to do is setup the car for polish to do this tape off all black trim that you will be coming close to with the polisher. As you can see in this picture.

Once you have the car taped you can get to the compounding. Take the same approach as with the clay move panel by panel in about three square foot blocks around the car.
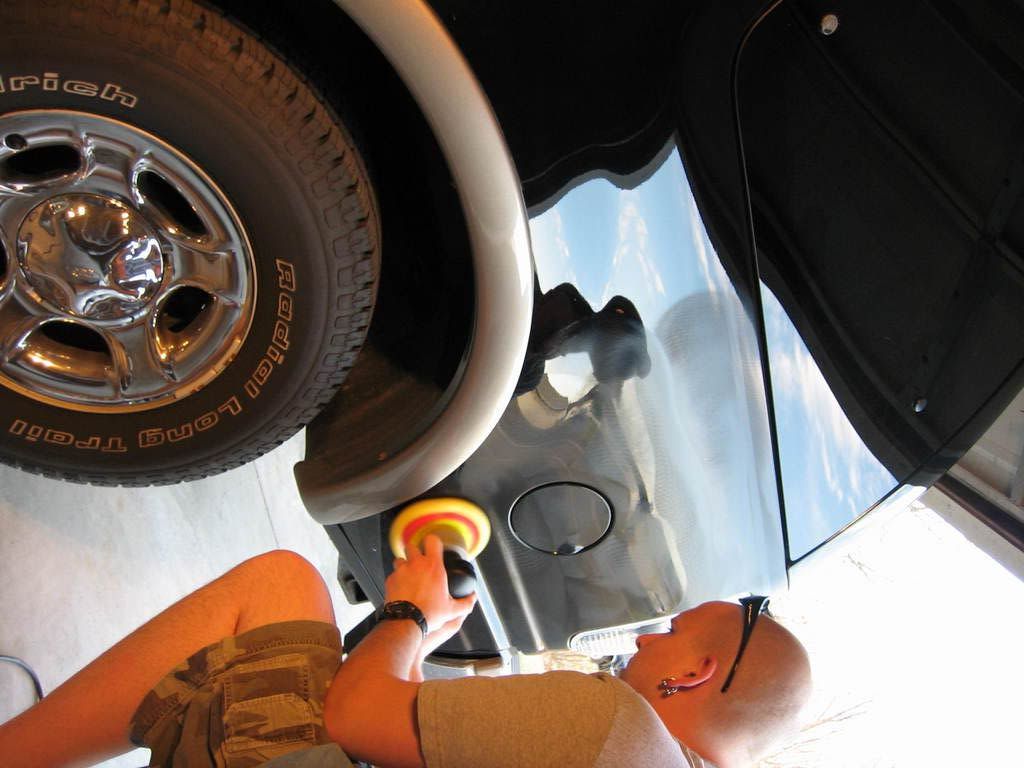
Here you can see how much I do at a time. Only use about three quarter sized spots of polish on the pad on each panel you do. Start at a very slow rpm and move across the surface very slowly over lapping you r passes by 50%. Go in at least three different directions. As the polish breaks down it will begin to dry at this time you can pump up the speed a bit and move much more rapidly over the clear coat. When there is little to no haze left on the surface you are good stop wipe with an mft and check you results. If there are still some small scratches and marks you can repeat the process.
Here is a good shot of what it looks like when you can bump up the speed a bit.
Ok you made your way all the way around the car with the polish now it is time to polish again. I know your like **** this is going to take forever if I have to do it all over again but please bear with me and stick it out your clear coat will thank you.
Do this step the exact same as the previous compounding step only switch to a polishing glaze or finishing compound. Also clean your pad out very well so can get the finer finishing compound to work properly.
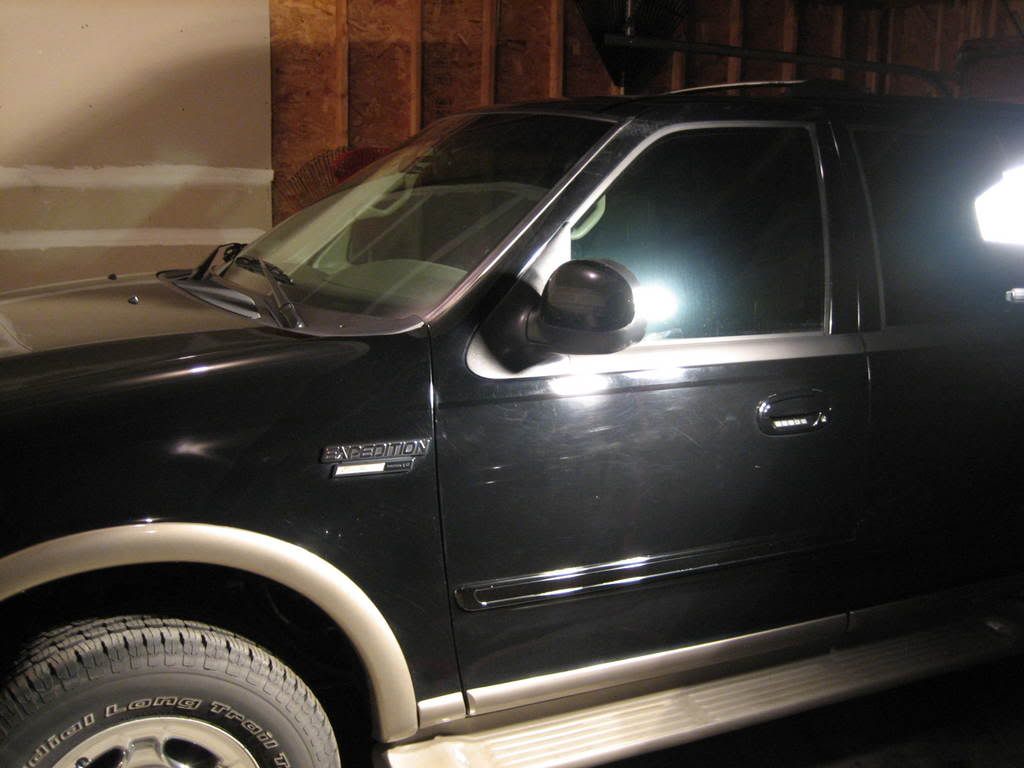
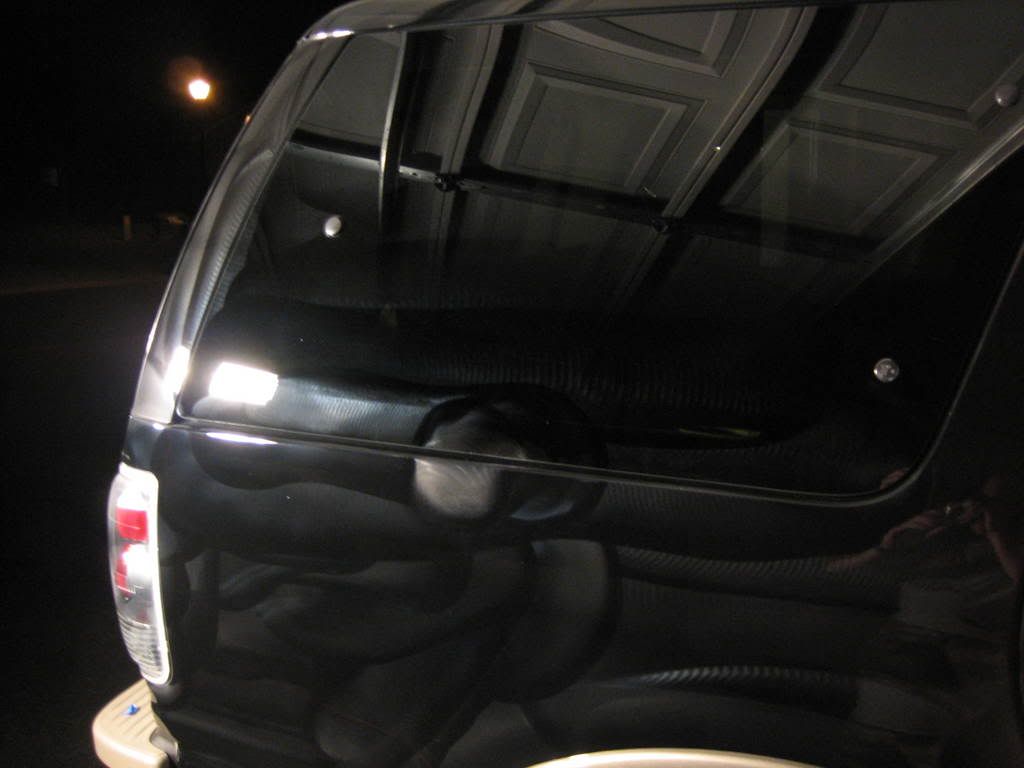
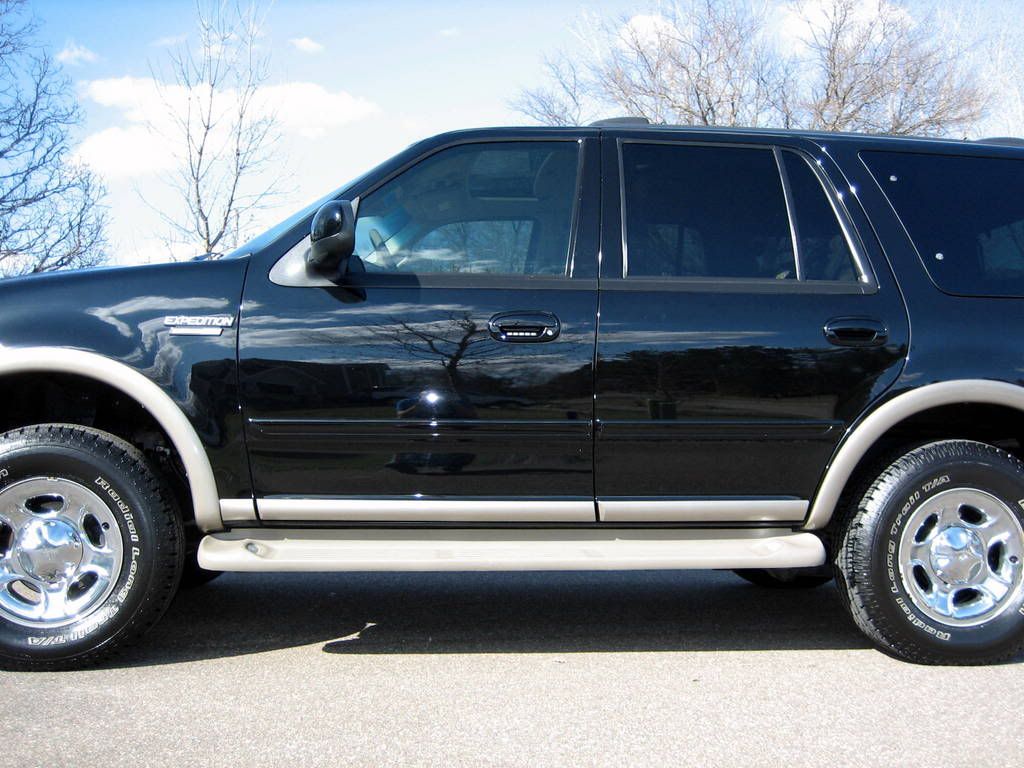
Here are some money shots for you to take a look at.
This is before compound and glaze
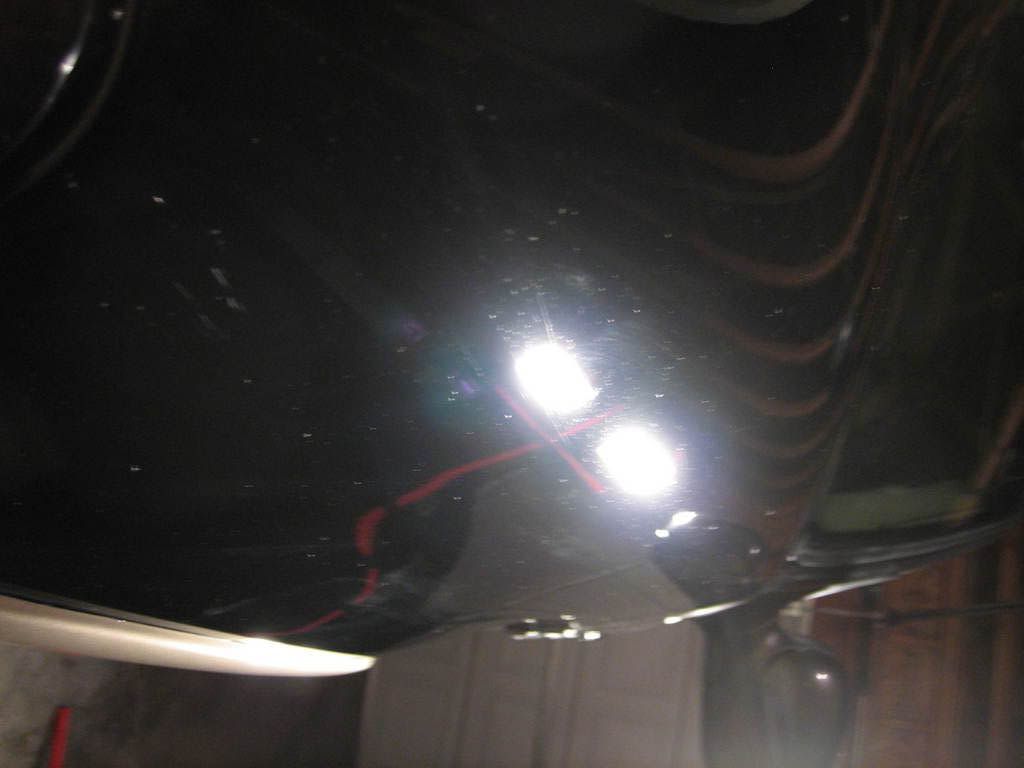
This is after.
To do this I will be using fine cut rubbing compound and a compounding pad on my PC (Porter-Cable orbital polisher/sander). First thing you want to do is setup the car for polish to do this tape off all black trim that you will be coming close to with the polisher. As you can see in this picture.
Once you have the car taped you can get to the compounding. Take the same approach as with the clay move panel by panel in about three square foot blocks around the car.
Here you can see how much I do at a time. Only use about three quarter sized spots of polish on the pad on each panel you do. Start at a very slow rpm and move across the surface very slowly over lapping you r passes by 50%. Go in at least three different directions. As the polish breaks down it will begin to dry at this time you can pump up the speed a bit and move much more rapidly over the clear coat. When there is little to no haze left on the surface you are good stop wipe with an mft and check you results. If there are still some small scratches and marks you can repeat the process.
Here is a good shot of what it looks like when you can bump up the speed a bit.
Ok you made your way all the way around the car with the polish now it is time to polish again. I know your like **** this is going to take forever if I have to do it all over again but please bear with me and stick it out your clear coat will thank you.
Do this step the exact same as the previous compounding step only switch to a polishing glaze or finishing compound. Also clean your pad out very well so can get the finer finishing compound to work properly.
Here are some money shots for you to take a look at.
This is before compound and glaze
This is after.
#5
07-29-2009, 06:51 AM
Senior Member
Join Date: May 2009
Location: Coon Rapids, MN
Posts: 163
Likes: 0
Received 0 Likes
on
0 Posts
Now its on to wax. This step is one of the most misunderstood steps in the detail process. First thing, the true wax is not designed to remove scratches or swirls at all. It is designed to make the finish shine and look wet and deep. There are several cleaner wax products available that are designed to remove some scratches and swirls I do not recommend them as a final coat though (if you use the process that I use that is). The 3M liquid wax that I use has no abrasive properties what so ever. It is only for protection and shine.
Please feel free to post a picture of what you have or a link to a picture and I will tell you what I think of the product. I my car cleaning carrier I have used well over 30 different products some with much success and others with very little success to actually making the clear coat worse.
So now let’s get to the point. Start buy masking off the trim if you haven’t yet. Leave the windows open though you will be waxing them as well.
Use the finest pad you can find and use the highest speed the PC has. This will apply the most even coat to the surface as possible. Preload your pad with quick detail spray so you don’t over load it with wax. To do this pray the pad with two to three sprays and then put your three quarter sized drops on the pad. You can move much faster with the wax because there is no need to break down the product.
Here is a shot of how much more space you can cover when you apply the wax.
Also look at how I did the window just the same as the clear coat.
To remove the wax I use a power waxier like this.
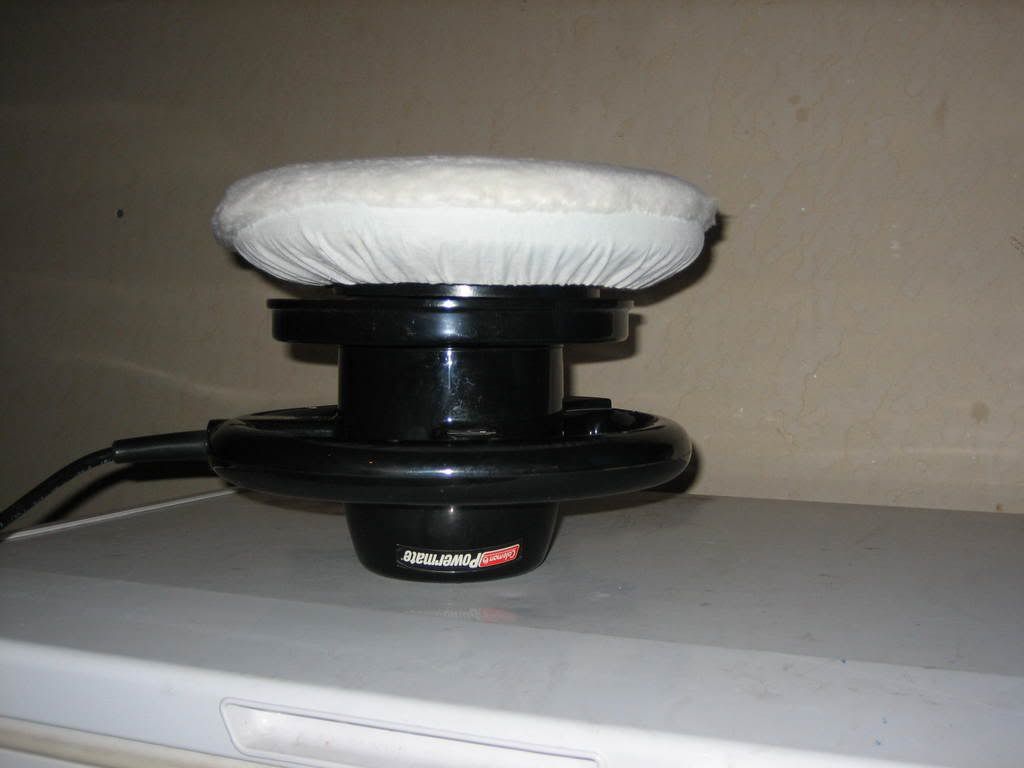
Like I have said before I don’t do anything by hand unless that is the only way. Plus this will help you shine it up and make it look like a deep pool of water.
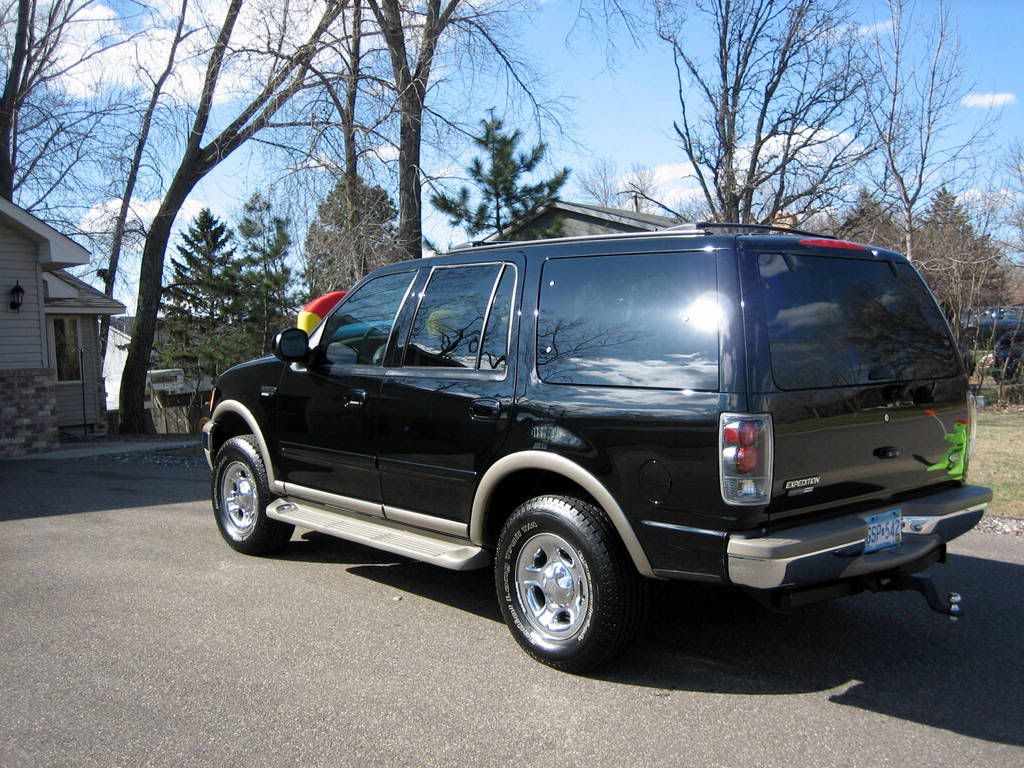
Here we go a before wax
And an after wax
You can see how much more depth there is to the shine also I have a good shot here.

And from here on till the next wax/polish you can use a quick detail spray to help the shine. Just make sure the surface is clean before you use it. I like to use quick detail spray for water spots that come after a wash and dry.
Tonight I will take some picture out in the sun so you can get the full affect of the detail that I do.
PS I am open for new ideas if you have anything to add just post it up.
Nate
Please feel free to post a picture of what you have or a link to a picture and I will tell you what I think of the product. I my car cleaning carrier I have used well over 30 different products some with much success and others with very little success to actually making the clear coat worse.
So now let’s get to the point. Start buy masking off the trim if you haven’t yet. Leave the windows open though you will be waxing them as well.
Use the finest pad you can find and use the highest speed the PC has. This will apply the most even coat to the surface as possible. Preload your pad with quick detail spray so you don’t over load it with wax. To do this pray the pad with two to three sprays and then put your three quarter sized drops on the pad. You can move much faster with the wax because there is no need to break down the product.
Here is a shot of how much more space you can cover when you apply the wax.
Also look at how I did the window just the same as the clear coat.
To remove the wax I use a power waxier like this.
Like I have said before I don’t do anything by hand unless that is the only way. Plus this will help you shine it up and make it look like a deep pool of water.
Here we go a before wax
And an after wax
You can see how much more depth there is to the shine also I have a good shot here.
And from here on till the next wax/polish you can use a quick detail spray to help the shine. Just make sure the surface is clean before you use it. I like to use quick detail spray for water spots that come after a wash and dry.
Tonight I will take some picture out in the sun so you can get the full affect of the detail that I do.
PS I am open for new ideas if you have anything to add just post it up.
Nate
#6
07-29-2009, 08:28 AM

Senior Member
Join Date: Jul 2005
Location: Long Island, NY
Posts: 6,071
Likes: 0
Received 0 Likes
on
0 Posts
Everytime I think that I'm ready to place an order, I make a vital mistake. I read some more posts or blogs and change my mind. I am not a pro at this by any means. The last time I polished and waxed a car was many moons ago, but my new baby deserves better.
I have an 07 red fire supercab. The paint is in very good condition. There are a couple of very light, small scratches. My plan was to get a da and do the following (do I even need a da?)
1. megs smooth surface clay kit
2. some kind of polish
3. some kind of carnuba wax
4. some kind of leather cleaner
can somebody recommend product and tell me what steps to follow
I have an 07 red fire supercab. The paint is in very good condition. There are a couple of very light, small scratches. My plan was to get a da and do the following (do I even need a da?)
1. megs smooth surface clay kit
2. some kind of polish
3. some kind of carnuba wax
4. some kind of leather cleaner
can somebody recommend product and tell me what steps to follow
Clay Magic clay or Megs
Megs #205
Megs #21 2.0 (let cure for 12 hours)
Megs #26
Megs has a 2 step Leather cleaner/conditioner that works great.
There are other companys that make good products like Poorboys, Adams Polishes,Wolfgang, Optimum etc. The Megs products I mentioned are easy on and easy off and leave you with great results. As for Clay I like Clay magic better then megs and its cheaper just my opinion. My sig pic I used #80 with was replaced with #205 and #21 and it came out great. Good luck, I tried to keep this short.
#7
07-29-2009, 08:34 AM
Senior Member
Join Date: Jul 2005
Location: Long Island, NY
Posts: 6,071
Likes: 0
Received 0 Likes
on
0 Posts
Trending Topics
#8
07-29-2009, 09:18 AM
Senior Member
Join Date: May 2009
Location: Coon Rapids, MN
Posts: 163
Likes: 0
Received 0 Likes
on
0 Posts

#10
07-29-2009, 11:25 AM
Senior Member
Join Date: Jul 2005
Location: Long Island, NY
Posts: 6,071
Likes: 0
Received 0 Likes
on
0 Posts
#11
07-29-2009, 01:30 PM
Join Date: May 2009
Location: Sacramento, CA
Posts: 67
Likes: 0
Received 0 Likes
on
0 Posts
Thanks so much guys. That is very very helpful. A lot of the info I have gotten is very piecemeal, and did not paint the big picture. My paint is in very good condition. No swirls. Only a couple of very light, slight scratches. And one area, a couple inches in diameter, where the shine is dull.
BigNate, your write up is great, and the results look wonderful. Here is what I will do:
1. wash
2. caly bar
3. wash
4. tape off trim
5. use da to apply fine cut rubbing compound and compounding pad
6. remove with mft
7. use da to apply polishing glaze or finishing compound
8. remove with mft
9. apply wax
10. remove with _____________
and I'm good to go. Thanks. BigNate, is it right that you use a different tool to take off wax? Can I use the da or should I remove wax by hand with mft? and finally, in regard to windows, do you wash, clay, wash, and wax (using same wax used on paint)?
#12
07-29-2009, 01:44 PM

Senior Member
Join Date: Feb 2007
Location: Salt Lake City, UT
Posts: 408
Likes: 0
Received 0 Likes
on
0 Posts
I don't see the issue being what order to do these things on, as your posting as the order is as you mentioned, Wash, Clay, Polish, LSP (sealant, wax, etc). This should not be confusing. Th confusing part is what _product_ to use and how to apply it given the situation such as the amount of correction you need to the paint.
If you want to simply fill a few light swirls you can try a sealer with fillers such as NXT. If you want to remove these swirls you could try something like a light glaze.
Personally I apply a LSP with the DA and remove it by hand. When applied with the DA it goes on light and since the paint was clean, it comes off very easy.
#13
07-29-2009, 02:27 PM
Senior Member
Join Date: May 2009
Location: Coon Rapids, MN
Posts: 163
Likes: 0
Received 0 Likes
on
0 Posts
Thanks so much guys. That is very very helpful. A lot of the info I have gotten is very piecemeal, and did not paint the big picture. My paint is in very good condition. No swirls. Only a couple of very light, slight scratches. And one area, a couple inches in diameter, where the shine is dull.
BigNate, your write up is great, and the results look wonderful. Here is what I will do:
1. wash
2. caly bar
3. wash
4. tape off trim
5. use da to apply fine cut rubbing compound and compounding pad
6. remove with mft
7. use da to apply polishing glaze or finishing compound
8. remove with mft
9. apply wax
10. remove with _____________
and I'm good to go. Thanks. BigNate, is it right that you use a different tool to take off wax? Can I use the da or should I remove wax by hand with mft? and finally, in regard to windows, do you wash, clay, wash, and wax (using same wax used on paint)?
BigNate, your write up is great, and the results look wonderful. Here is what I will do:
1. wash
2. caly bar
3. wash
4. tape off trim
5. use da to apply fine cut rubbing compound and compounding pad
6. remove with mft
7. use da to apply polishing glaze or finishing compound
8. remove with mft
9. apply wax
10. remove with _____________
and I'm good to go. Thanks. BigNate, is it right that you use a different tool to take off wax? Can I use the da or should I remove wax by hand with mft? and finally, in regard to windows, do you wash, clay, wash, and wax (using same wax used on paint)?
I would remove the wax with an mft if you don't have a low speed option like the one I used.
The products you listed look great. They will do the job fine. Remember if you drop your mft don't use it anymore until it can be washed. And if you drop the clay bar toss it in the trash. Don't risk scratching the paint with anything it picked up.
Good luck and post if you have more questions.
Nate
#14
08-01-2009, 02:32 PM

2 comments to Nate, minor issues -
1. I would not use soap as a clay lube, it can be rough on the clay. Use cheap quick detailer spray.
2. I would not use an orbital buffer to remove wax. Proper waxing will do all its work on application (which should be VERY THIN), and you should remove what little residue you have by hand with a MF.