Auxiliary backup lights installed (How to/pics)
#1
 05-05-2008, 07:42 PM


Join Date: Nov 2005
Location: Land of 10,000 Lakes
Posts: 889
Likes: 0
Received 0 Likes
on
0 Posts
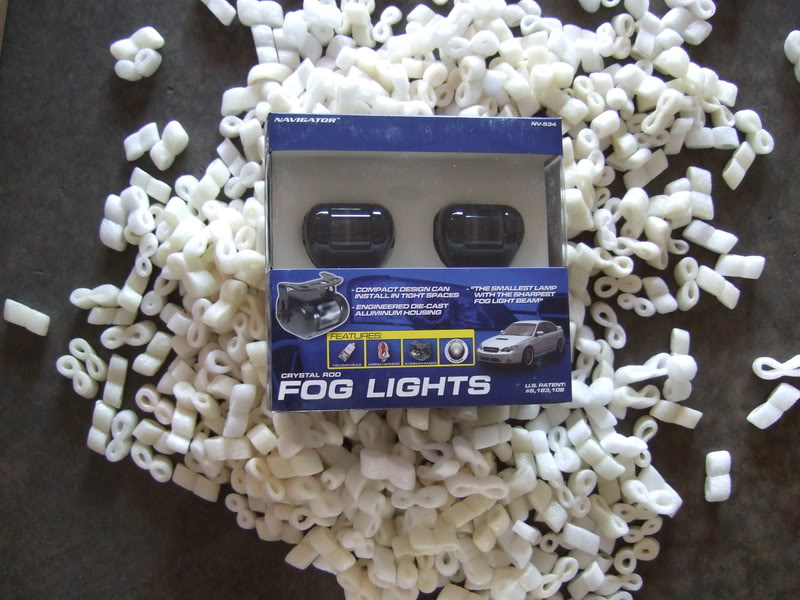
Well I have another thing off my list of things to do. I have wanted to install auxiliary backup lights for sometime now and finally got around to doing it. I ordered the lights from Jcwhitney.com; they are the Navigator (NV-534). They were 46.99 for the set. They are actually fog lights but there low profile design was just what I was looking for. Each light is 55 watts a piece; they come with the wiring, fuse, switch, mounting brackets, and hardware.
I opted to buy a new fuse holder that was more heavy duty with a lid along with a new switch, and the wiring since I needed much more then they gave me. I also ran 14G wire over the 16G they supplied since I was more then tripling the length. I am also using a relay so they will come on only when the switch activated with the key in the ON/RUN position. I also did NOT tap into the reverse wire was I did not want them on every time I backed up, only to be activated with the switch.
Here are some pictures along with a little how to.
Enjoy
The parts List
-100ft 14G wire
-3/8in x 10ft slit tubing (2 packs)
-8in zip ties
-1/4 eyelets
-14/16g disconnect crimps
-Heavy duty fuse holder with lid
-3/16 heat shrink
-Relay
-Red L.E.D toggle Switch
-10-32 x 3/4 machine screws
-L-bracket
-Electrical tape (2 rolls)

For the Relay
85-Ground
86-From Switch
87-To lights
30-From fused battery
The Switch
1-Ground
2-To 86
3-12v Ignition (under steering column Dk. blue/Lt. green)
When everything is connected tape/ zip tie it up nicely under the dash out of the way.
Here are the lights in the box
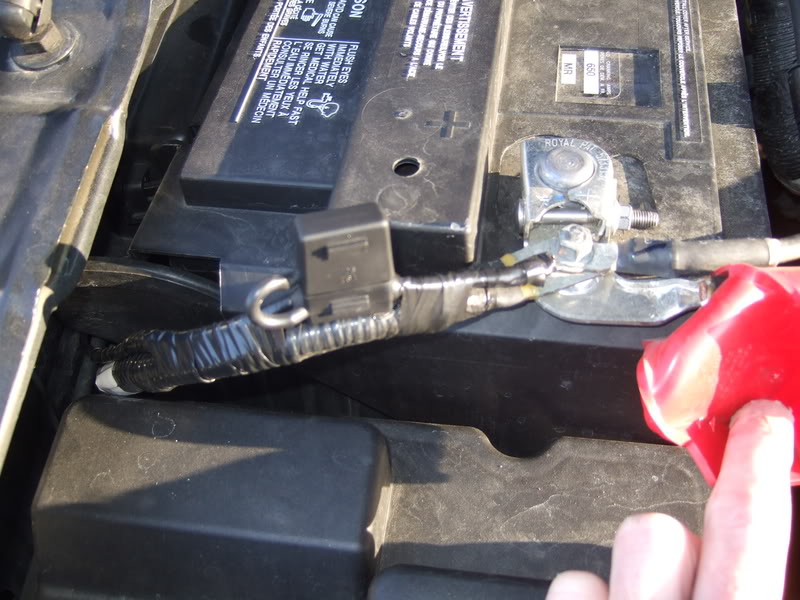
Here�s the fuse holder, crimped an eyelet on one end and connected to the positive battery bolt. I ran the wire behind the battery, takes a little work to get it through.
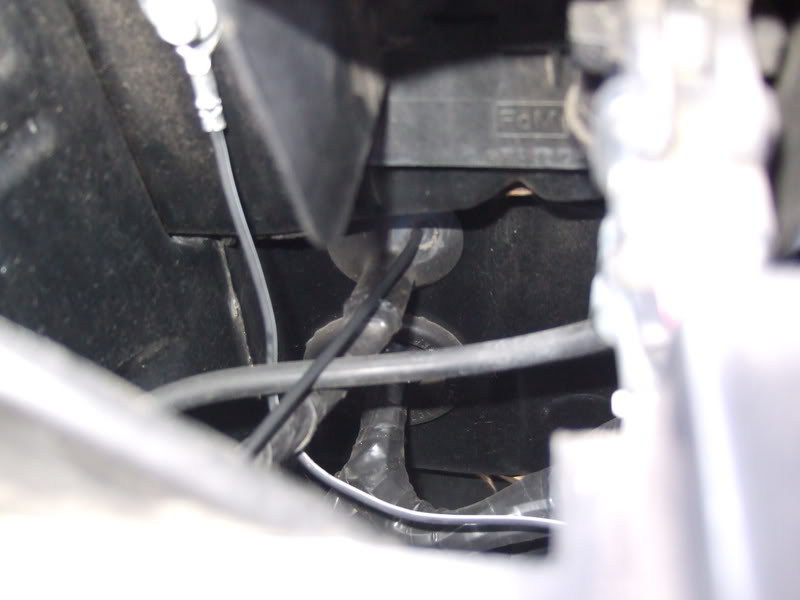
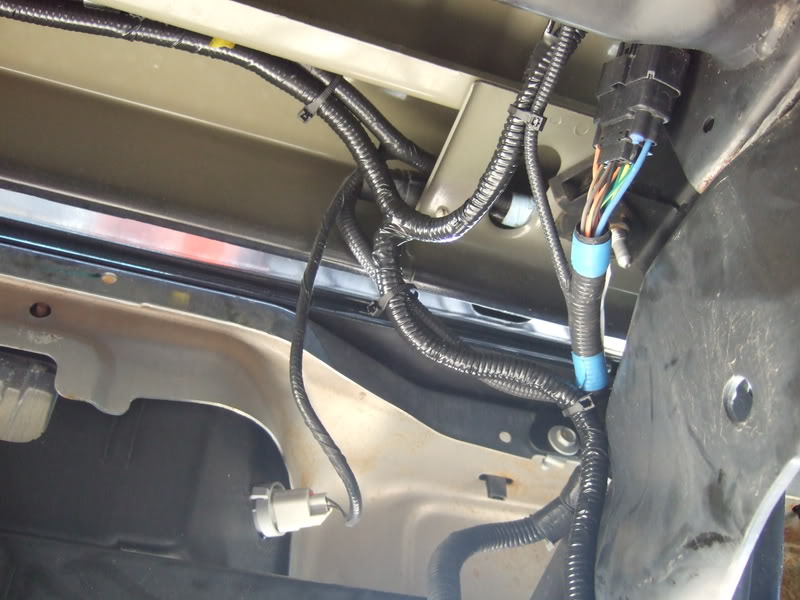
I ran the wire into the cab using the same grommet as the power feed for the fuse box uses since I was already on top of it, I used a coat hanger to pull the wire through. You need the take the glove box out and reach to the firewall and find the wire coming out. Once it is pulled through follow the existing wiring looms across the dash to the switch location, taping the wire down every 6-8�. It is a very tight reach to the fire wall from inside so you will need to bend your arm in ways you never thought were possible.
I opted to buy a new fuse holder that was more heavy duty with a lid along with a new switch, and the wiring since I needed much more then they gave me. I also ran 14G wire over the 16G they supplied since I was more then tripling the length. I am also using a relay so they will come on only when the switch activated with the key in the ON/RUN position. I also did NOT tap into the reverse wire was I did not want them on every time I backed up, only to be activated with the switch.
Here are some pictures along with a little how to.
Enjoy
The parts List
-100ft 14G wire
-3/8in x 10ft slit tubing (2 packs)
-8in zip ties
-1/4 eyelets
-14/16g disconnect crimps
-Heavy duty fuse holder with lid
-3/16 heat shrink
-Relay
-Red L.E.D toggle Switch
-10-32 x 3/4 machine screws
-L-bracket
-Electrical tape (2 rolls)
For the Relay
85-Ground
86-From Switch
87-To lights
30-From fused battery
The Switch
1-Ground
2-To 86
3-12v Ignition (under steering column Dk. blue/Lt. green)
When everything is connected tape/ zip tie it up nicely under the dash out of the way.
Here are the lights in the box
Here�s the fuse holder, crimped an eyelet on one end and connected to the positive battery bolt. I ran the wire behind the battery, takes a little work to get it through.
I ran the wire into the cab using the same grommet as the power feed for the fuse box uses since I was already on top of it, I used a coat hanger to pull the wire through. You need the take the glove box out and reach to the firewall and find the wire coming out. Once it is pulled through follow the existing wiring looms across the dash to the switch location, taping the wire down every 6-8�. It is a very tight reach to the fire wall from inside so you will need to bend your arm in ways you never thought were possible.
#2
05-05-2008, 07:44 PM
Join Date: Nov 2005
Location: Land of 10,000 Lakes
Posts: 889
Likes: 0
Received 0 Likes
on
0 Posts
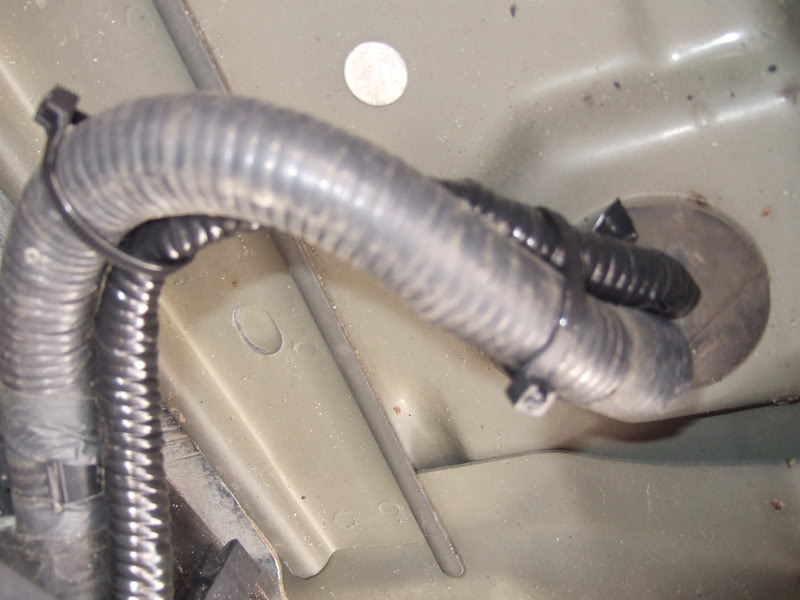
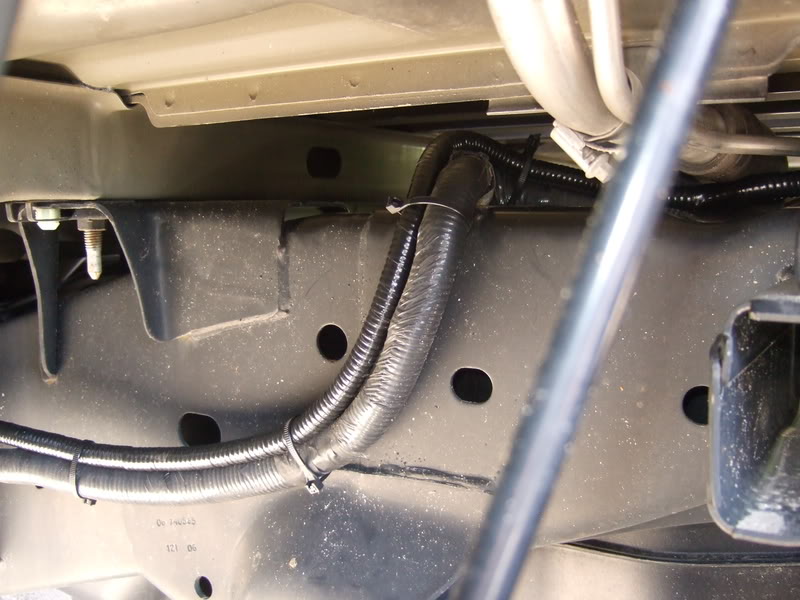
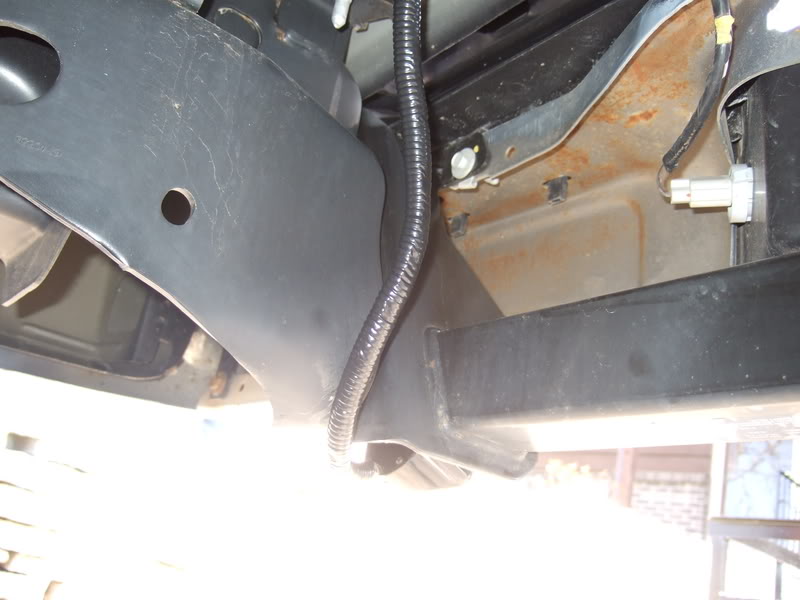
Next I pulled the wire that will be going to the lights. Again I used the factory grommet in the driver’s side sill. Once the wire was though I put slit tubing over it and wrapped it in electrical tape, as extra protection from water and salt. I just followed the existing wiring looms all the way to the back of the truck using Zip ties every 8” or so to secure it.

Here is where it is coming out of the sill plate.
Here it is running down the frame.
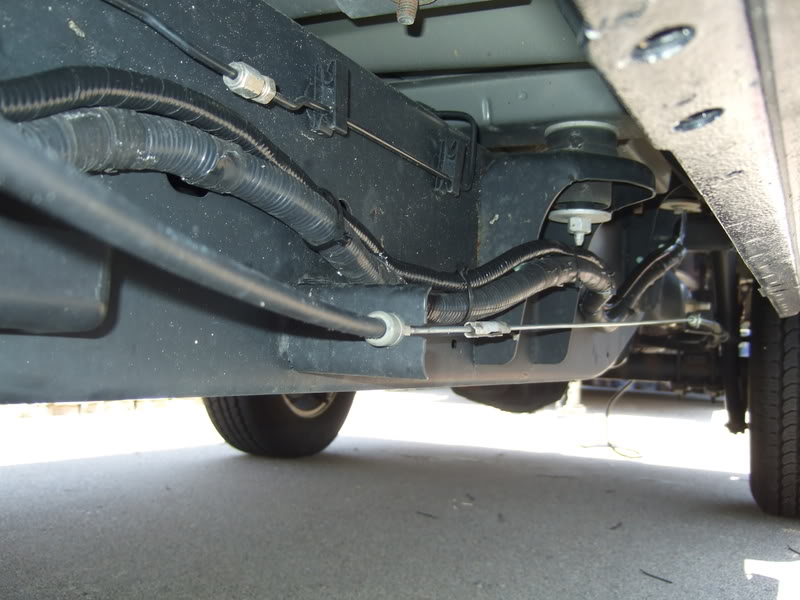
Crossing over to the inside of the frame, still following the factory loom.
Here is where it is coming out of the sill plate.
Here it is running down the frame.
Crossing over to the inside of the frame, still following the factory loom.
Last edited by blackjack8900; 06-06-2009 at 12:24 AM.
#3
05-05-2008, 07:46 PM
Join Date: Nov 2005
Location: Land of 10,000 Lakes
Posts: 889
Likes: 0
Received 0 Likes
on
0 Posts
Again following the inside of the frame to the back of the truck
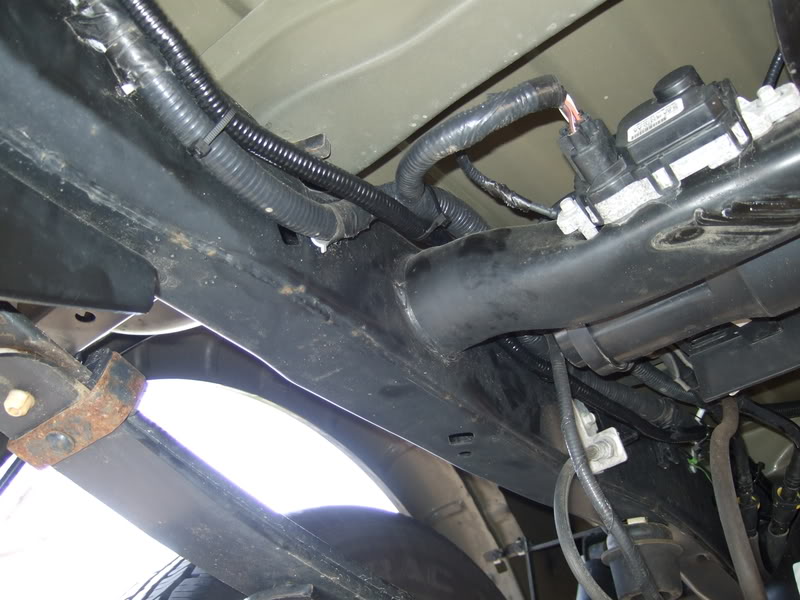
At the back of the truck where it splits off to each light.
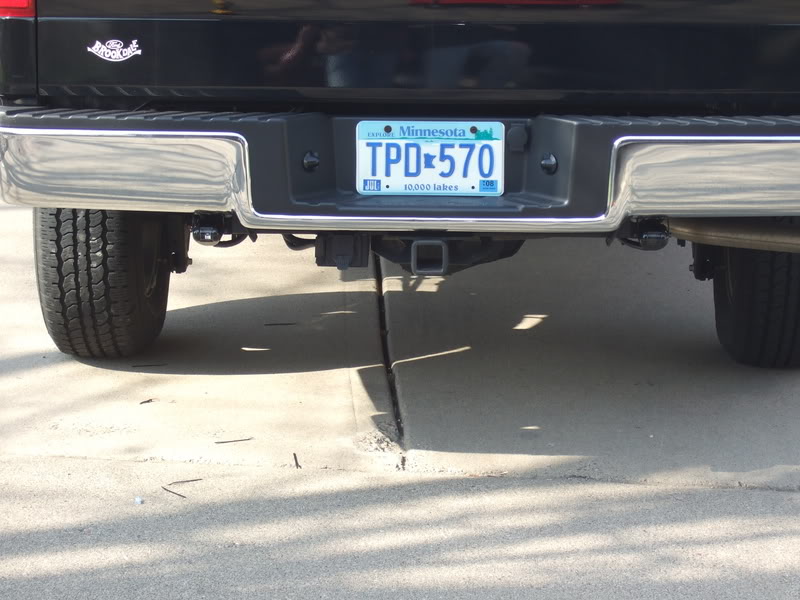
I mounted the lights on the bumper just past the sides of the hitch, even on each side. The screws they gave me looked like wood screws with very course threads and would not bite, so I simply used some brass screws I had. The lights also need to be grounded so I used the grounding point were the 7-pin connecter is grounded to above the spare tie on the frame cross member.
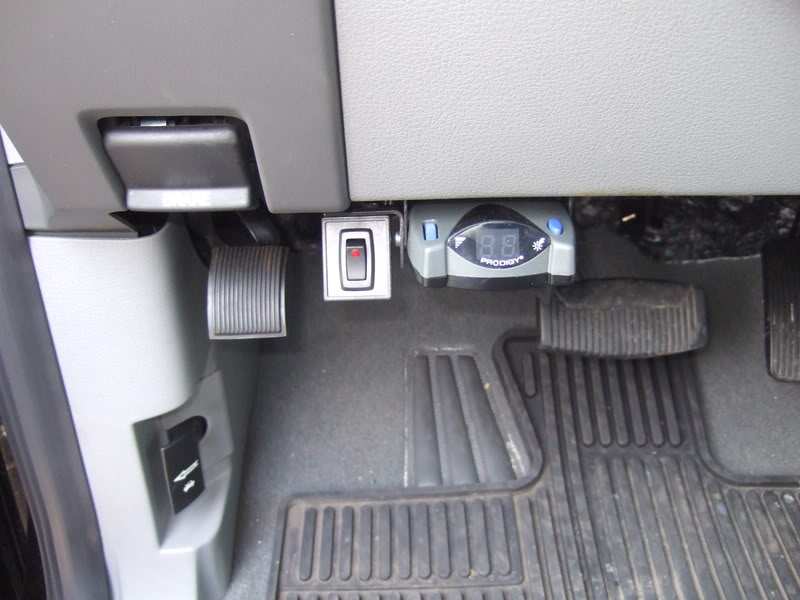
I mounted the switch right next to the brake controller with an L bracket and two machined nuts. I was going to put it below the headlight switch or along side the cigarette lighter but it fits perfect here and I didn�t have to drill the dash then. I secured it from the side by using the same screw that the brake controller and two machined screws secured the switch bracket to the L bracket. I also spray painted it black to match. For grounding the switch I used the existing grounding point in the kick panel.
At the back of the truck where it splits off to each light.
I mounted the lights on the bumper just past the sides of the hitch, even on each side. The screws they gave me looked like wood screws with very course threads and would not bite, so I simply used some brass screws I had. The lights also need to be grounded so I used the grounding point were the 7-pin connecter is grounded to above the spare tie on the frame cross member.
I mounted the switch right next to the brake controller with an L bracket and two machined nuts. I was going to put it below the headlight switch or along side the cigarette lighter but it fits perfect here and I didn�t have to drill the dash then. I secured it from the side by using the same screw that the brake controller and two machined screws secured the switch bracket to the L bracket. I also spray painted it black to match. For grounding the switch I used the existing grounding point in the kick panel.
#4
05-05-2008, 07:48 PM
Join Date: Nov 2005
Location: Land of 10,000 Lakes
Posts: 889
Likes: 0
Received 0 Likes
on
0 Posts
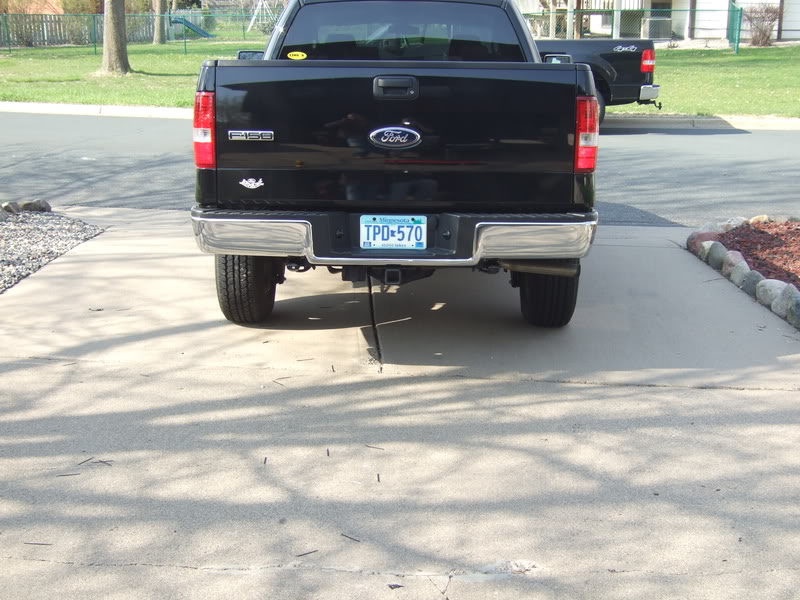
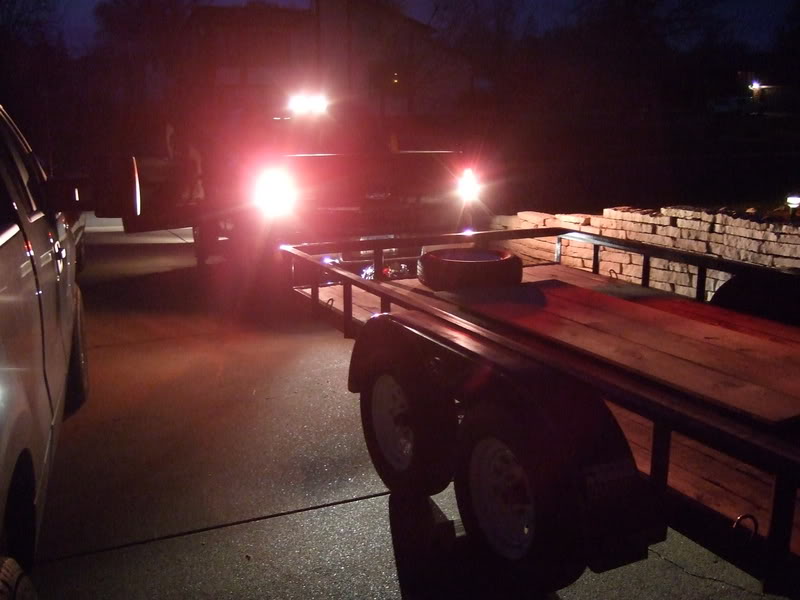
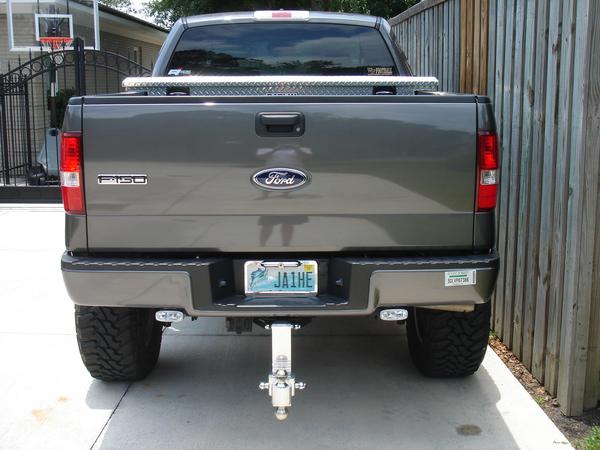
Day time
LET THERE BE LIGHT
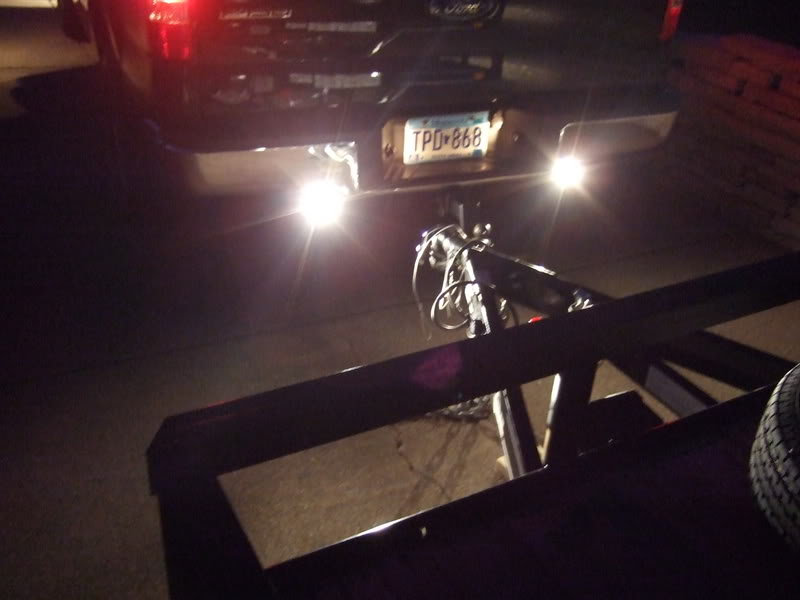
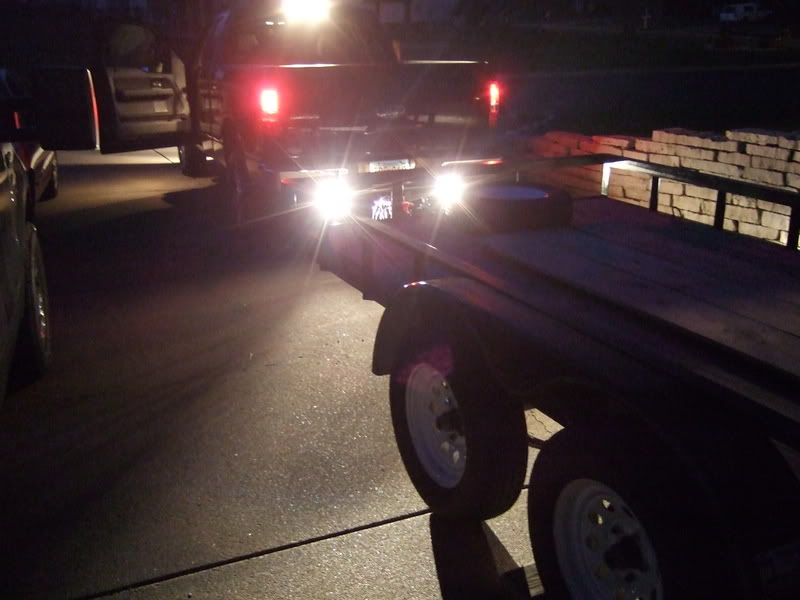
Over all I am very pleased with them, they put out a good amount of light, yet during the day they are not extremely noticeable. They light up the sides of the trailer real good which was why I put them on. As backing up at night with less then a foot of clearance on each side was a pain when you could not see the sides. Now even hooking up at night I will have light to see what I am doing. They will still be very useful without the trailer also.
LET THERE BE LIGHT
Over all I am very pleased with them, they put out a good amount of light, yet during the day they are not extremely noticeable. They light up the sides of the trailer real good which was why I put them on. As backing up at night with less then a foot of clearance on each side was a pain when you could not see the sides. Now even hooking up at night I will have light to see what I am doing. They will still be very useful without the trailer also.
#5
05-05-2008, 07:49 PM
Join Date: Nov 2005
Location: Land of 10,000 Lakes
Posts: 889
Likes: 0
Received 0 Likes
on
0 Posts
#6
05-05-2008, 07:54 PM

Member
#7
05-05-2008, 08:00 PM

Senior Member
Join Date: Apr 2008
Location: Fairfield,CA
Posts: 1,016
Likes: 0
Received 0 Likes
on
0 Posts

Trending Topics
#8
05-05-2008, 08:12 PM

Member
Join Date: Mar 2008
Location: Calgary, Canada
Posts: 18
Likes: 0
Received 0 Likes
on
0 Posts

#10
05-05-2008, 09:34 PM
Join Date: Nov 2005
Location: Land of 10,000 Lakes
Posts: 889
Likes: 0
Received 0 Likes
on
0 Posts
Thanks for the complements everyone!
No, you don't have to use the relay, I used it because it protects them from accidentally being left on and draining the battery.
No, you don't have to use the relay, I used it because it protects them from accidentally being left on and draining the battery.

#12
05-05-2008, 10:40 PM

Senior Member
Join Date: May 2006
Location: Jacksonville, FL
Posts: 579
Likes: 0
Received 0 Likes
on
0 Posts
Looks good man! I did this install a while back. Opted for the Piaas and couldn't be happier. I think my rear lights are better than my fronts! haha
heres the link
https://www.f150online.com/forums/sh...d.php?t=287864
heres the link
https://www.f150online.com/forums/sh...d.php?t=287864
#13
05-05-2008, 10:54 PM

Senior Member
#14
05-05-2008, 10:59 PM

Senior Member
Join Date: Dec 2006
Location: Tuscaloosa, AL
Posts: 881
Likes: 0
Received 0 Likes
on
0 Posts

#15
05-05-2008, 11:29 PM

Senior Member
Join Date: Mar 2007
Location: NJ
Posts: 348
Likes: 0
Received 0 Likes
on
0 Posts
")

