Led cluster anyone? (lots o pics)
#16
 02-26-2009, 07:55 PM


Senior Member
Join Date: Apr 2008
Location: Fairfield,CA
Posts: 1,016
Likes: 0
Received 0 Likes
on
0 Posts
#17
02-26-2009, 08:26 PM

Senior Member
Join Date: Jan 2009
Location: va
Posts: 349
Likes: 0
Received 0 Likes
on
0 Posts
Led
check out my pics, I've done several of the LED swaps. haven't got a photo bucket account yet to post pics on here.
http://www.**************/album.php?albumid=467
http://www.**************/album.php?albumid=844
http://www.**************/album.php?albumid=467
http://www.**************/album.php?albumid=844
Last edited by fomoco466; 02-27-2009 at 10:52 AM.
#18
02-26-2009, 11:08 PM


Thanks for the compliments guys, sorry for the blunt see pics post. i was dead tired and just carelessly closed the browser without submitting the post and it was the last straw...
Look out for my update on the exterior of the truck coming soon
Thanks, took a little over two months, just working on it on my spare time.
No not at all, it can be fully dimmed and at its lowest setting it glows about as nicely as the stock high setting on the factory lighting. It really glows at night which is great for those long trips where you get drowsy.
Thanks, hours, i would estimate about 20-30 hours total, most of which was spent carefully soldering the circuit board.
I just ran out of patience last night, i was plum tired, and i have been going on about 6 hours of sleep and 15 hours of solid work all week. I had it all ready and accidently closed my browser before hitting submit.... ill probably do a writeup this weekend to answer all the questions.
Thanks, all in due time, i already have researched the switches, just have to find the time to pull everything apart, and order some blue leds.
Thanks Az, time has already been stated. cost was a little less than one of those stainless faces from US speedo. The blue glow series is what sparked this idea but i wasnt paying $280 for the face, and it looked horrible all blue on the XLT face. I fell in love with the superduty gauges in their blue, so i just replicated them.
I got the LEDs 19.99 for 100
the stainless face was 20 shipped
the chrome blue overlays were $62 from whitefacegagues.net.
Justin was very helpful and the 62 was high cause he had to put in the R&R time to custom cut my faces. He has it saved now so any of you guys will probably get it way cheaper.
The breadboard was 15 bucks i think....
and the rest was just time in on my part. so figure up $115 for material and about 20-30 hours of labor.
Ill be sure to get that writeup re-wrote and posted.
Wheres your pics? post them up.
Look out for my update on the exterior of the truck coming soon
Thanks, took a little over two months, just working on it on my spare time.
 how long did that take?
Thanks, hours, i would estimate about 20-30 hours total, most of which was spent carefully soldering the circuit board.
I got the LEDs 19.99 for 100
the stainless face was 20 shipped
the chrome blue overlays were $62 from whitefacegagues.net.
Justin was very helpful and the 62 was high cause he had to put in the R&R time to custom cut my faces. He has it saved now so any of you guys will probably get it way cheaper.
The breadboard was 15 bucks i think....
and the rest was just time in on my part. so figure up $115 for material and about 20-30 hours of labor.
Ill be sure to get that writeup re-wrote and posted.
Wheres your pics? post them up.

#20
02-26-2009, 11:48 PM


#22
02-27-2009, 07:35 PM


#23
02-27-2009, 09:05 PM
I love the blue too, but just the blue on the black didnt look right to me, so i had to outline and accent the blue, to me it looks like now each gauge is an actual gauge and not just a readout in a sea of black. I may do the stainless a silver later down the road, everything else on the truck is colormatched blue and silver anyway.
Last edited by Fabian06SC; 02-28-2009 at 12:39 AM.
#24
02-27-2009, 09:31 PM

Senior Member

#25
02-27-2009, 10:28 PM

Member
Join Date: Dec 2004
Location: Reading, PA
Posts: 75
Likes: 0
Received 0 Likes
on
0 Posts

#26
05-17-2009, 03:38 AM
Update
Thanks for the comments guys, HERE IT IS!
The full WRITE-UP once more!
Its long, enjoy
Well i finally found the time to do a quick writeup for you guys.
This will be long so bear with me, i like to make my posts well detailed so that anyone
can come back and attempt to recreate what i have done if they chose to do so.
This was a slow thought out project that i started back in november after being so tired
of the bland XLT cluster and not really wanting to upgrade to a Lariat cluster due to the
complexity of the as-built data transfusion and my local dealers lack of drive to do such things.
And then i would still have the same cluster as every lariat on the road.
On to the write-up.
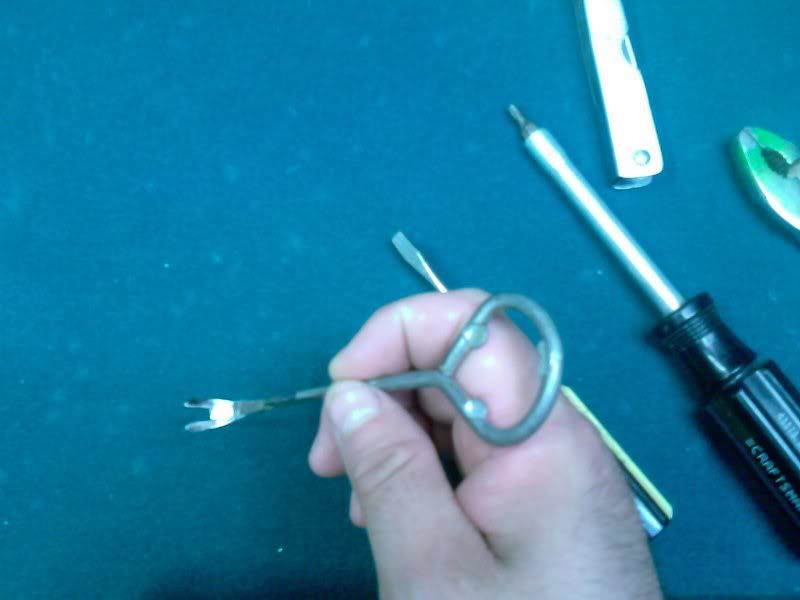
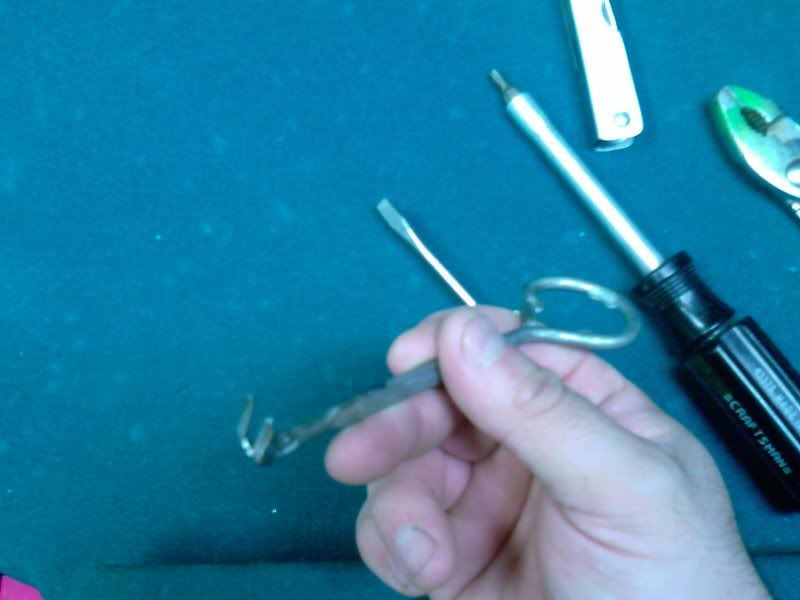
First of all, you will need to pull the needles, and i really didnt want to wait on a tool to get
here so i made my own. Its a paint can opener, i slit it down the middle with my slim cut-off wheel,
hammered the prongs flat,and then bent the tips like so. will cost you like 99 cents to do.
Just make sure to get a peice of thin cardboard to put under the fulcrum or it will leave a mark
on the black surface of your gauges.
I wont go into detail for removing the cluster and taking it apart. there are already plenty of
threads here that discuss that in FULL detail, and If your attempting something like this i would hope
you could figure out how to take the thing apart on your own.
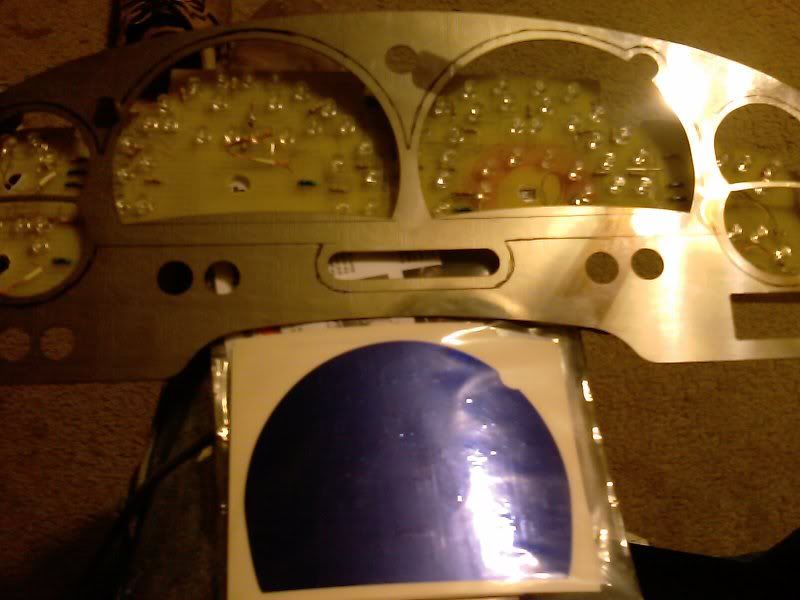
I did the acetone trick to get all the green film of the rear of the gauges so it is now clear to run
whatever color your heart desires.
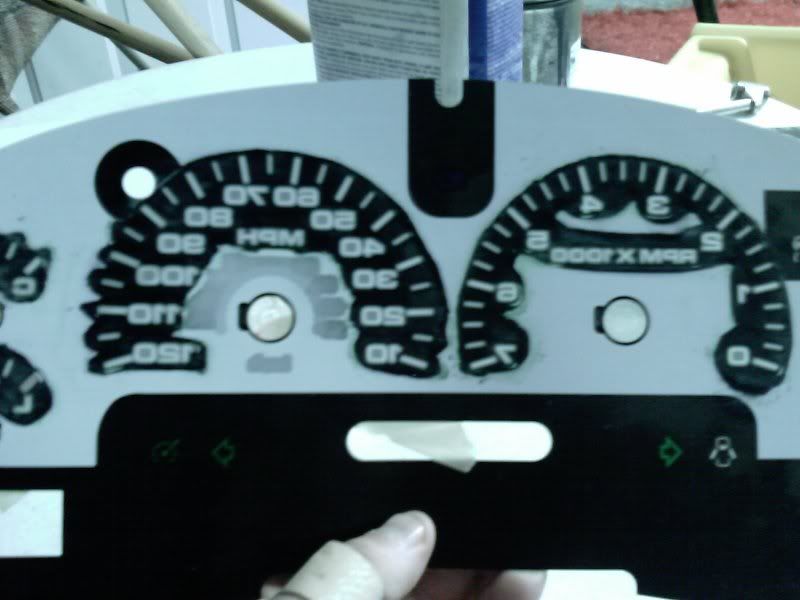
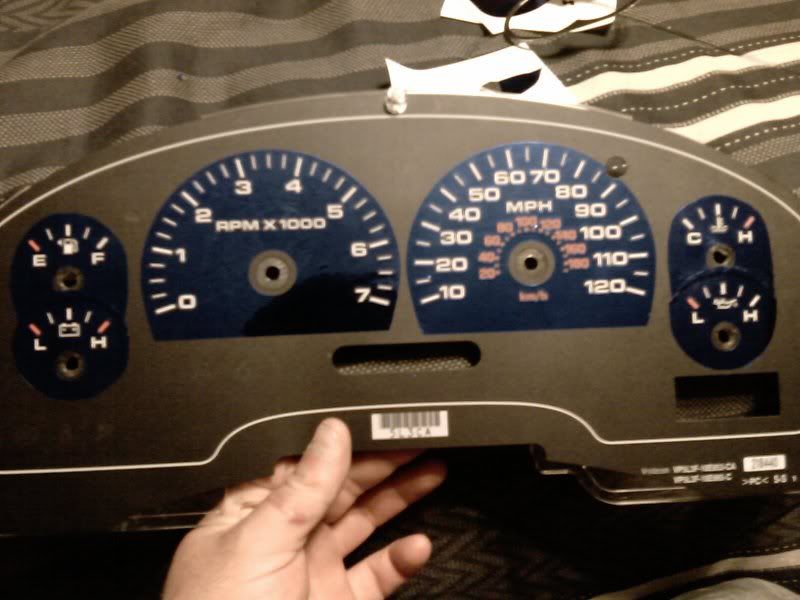
and heres the front up to a light, notice i marked off all the locations of the needles with tape.
notice how the light shines right thru with no color added.
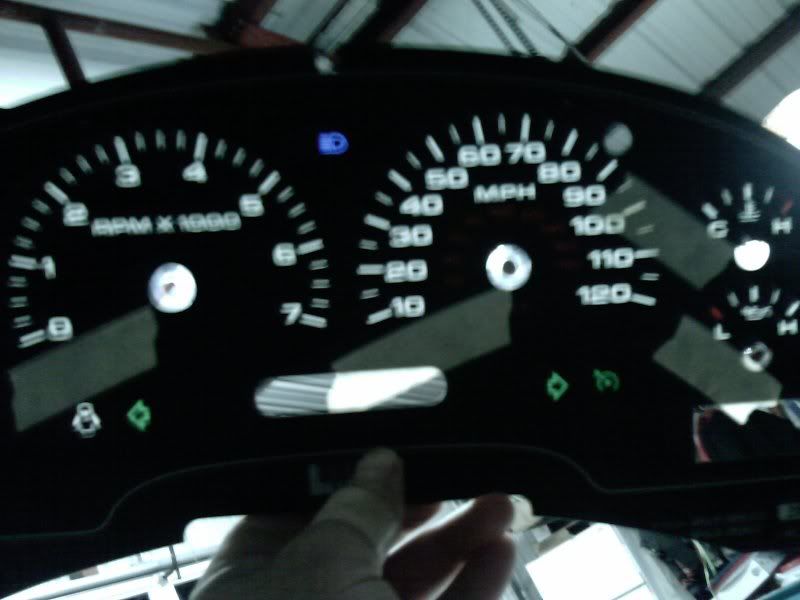
and here it is with NO film and all stock incandecent lights in the dash.
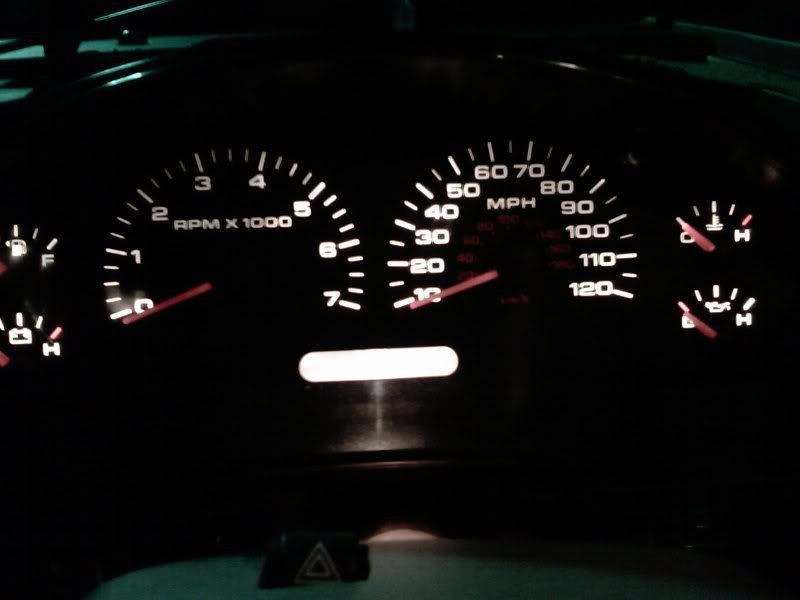
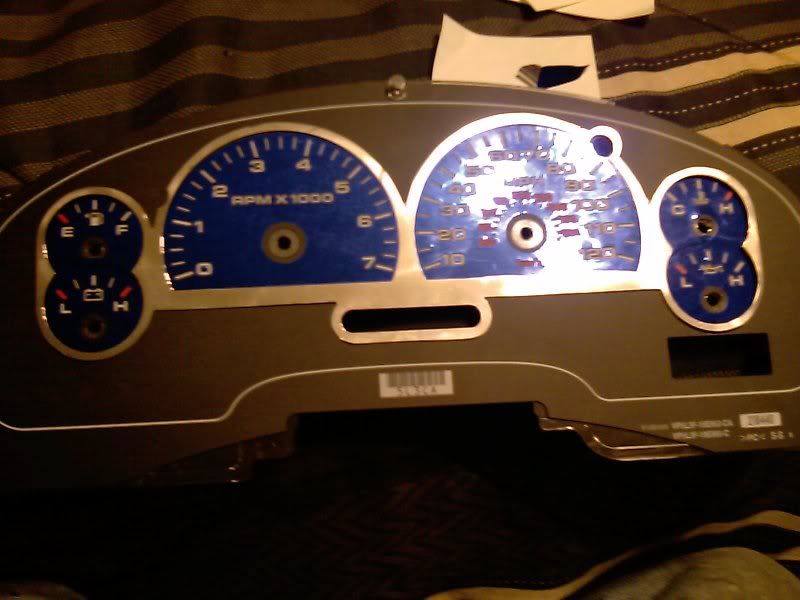
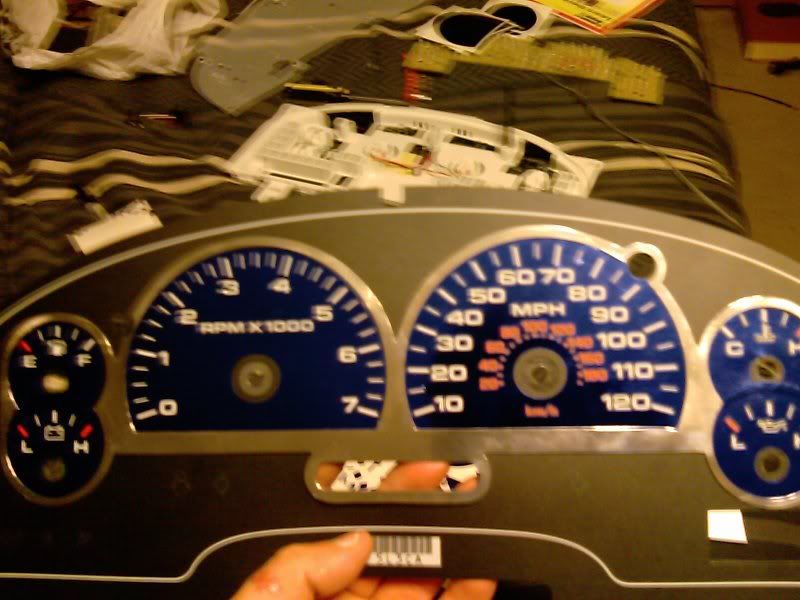
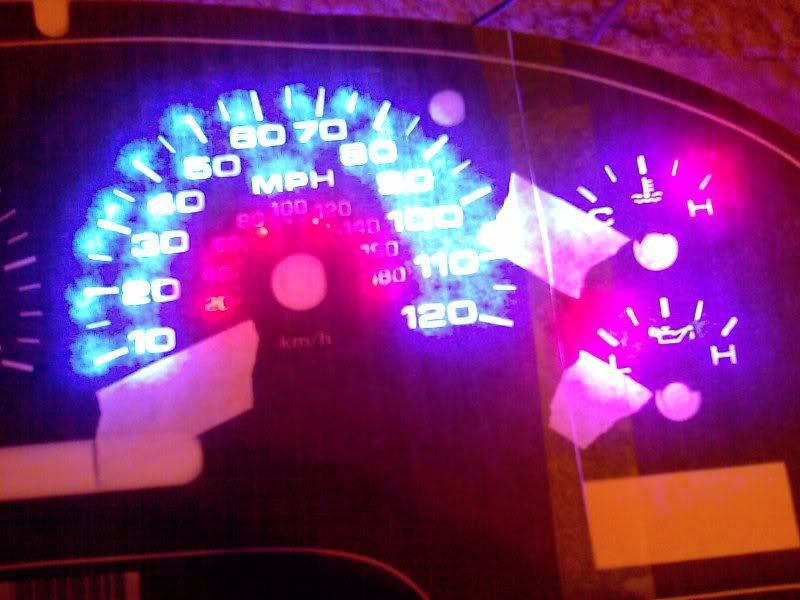
So i did what i would call the "norm"
I installed LED bulbs in place of all the incandecent ones... and here are the results.
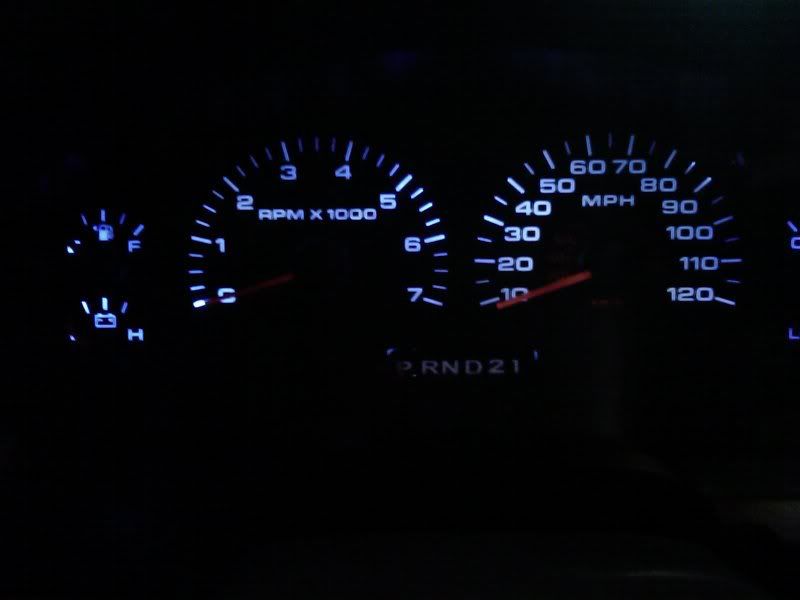

For those who have seen my projects, you know i would not be satisfied with this....
Not very pretty IMO, actually quite ugly. No red shines thru on the face or the needles do to the
red filtering out any blue light that comes thru, it has hot spots and dim spots, and
the digital readout looks like a nasty sea green/blue color. This was left temporarily till I figured
out another solution. I hated every bit of those two weeks.
Now comes the fun part.
I took the cluster apart to figure out how to light up the needles and make them come to life.
My first and most sensible solution was to install a red or white LED right into the needle. Seemed
easy and effective...
So i filed down a bright red 3mm LED to a square that fit right inside the needle "shine hole" lol
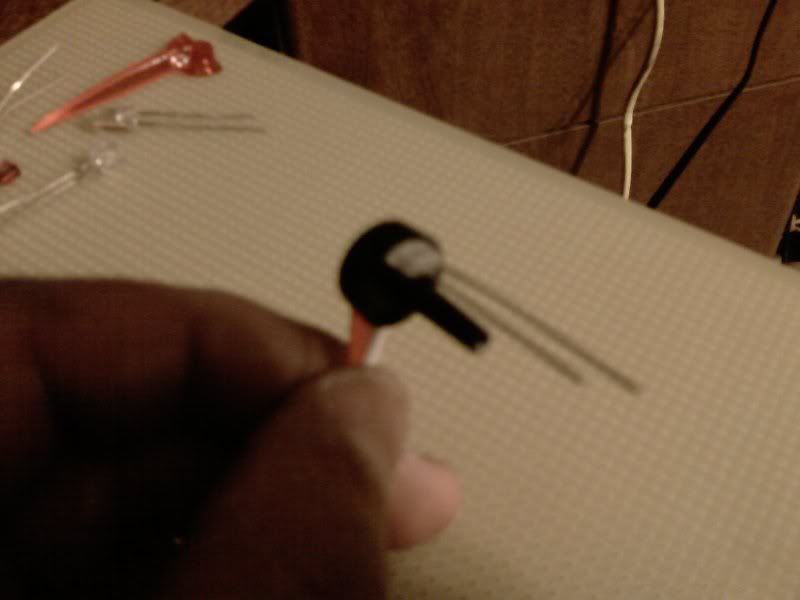
after a couple of tests on the bench, (not pictured) it proved to be REALLY effective and downright
awesome looking. I have never seen a needle GLOW like that! It was almost like a star wars saber than
an instrument cluster needle lol. Problem solved.
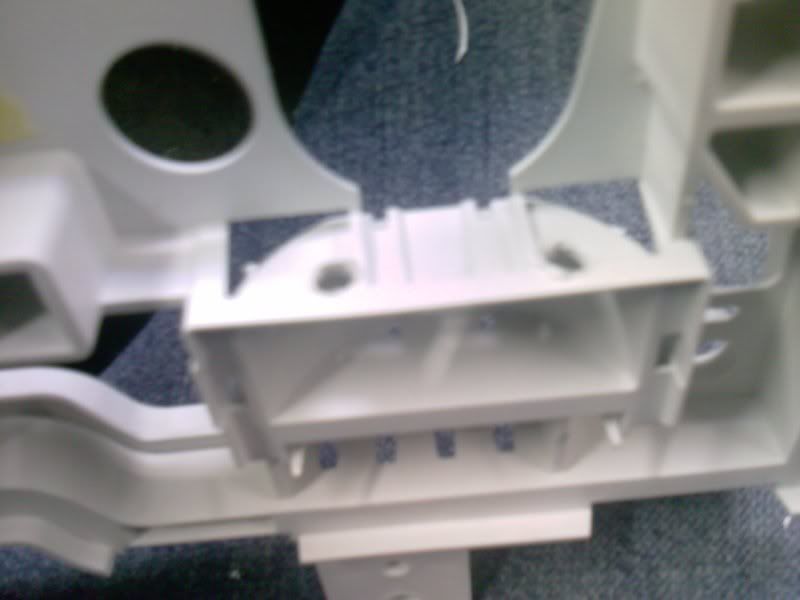
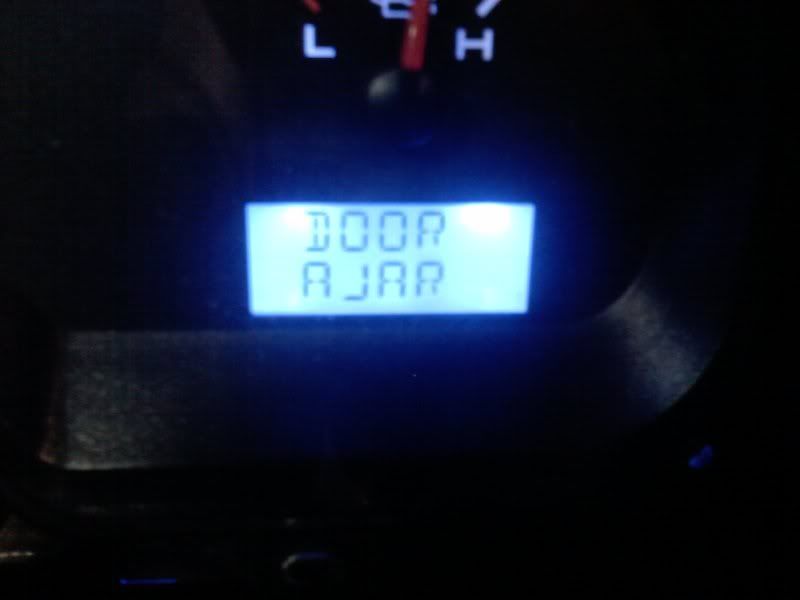
Moved on to the ugly green readout.
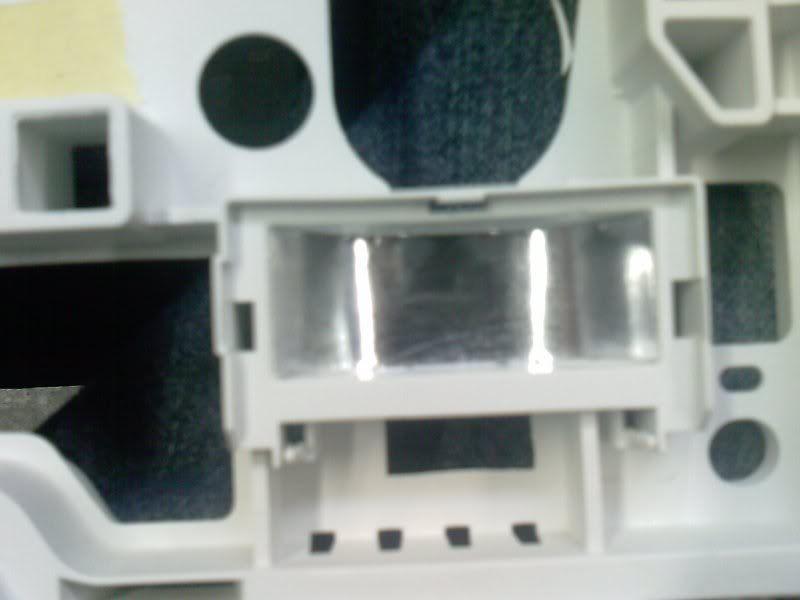
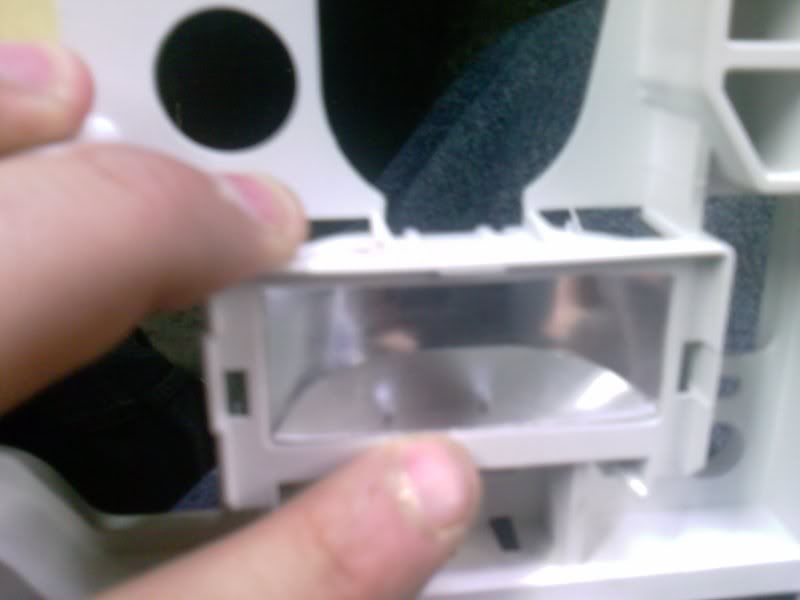
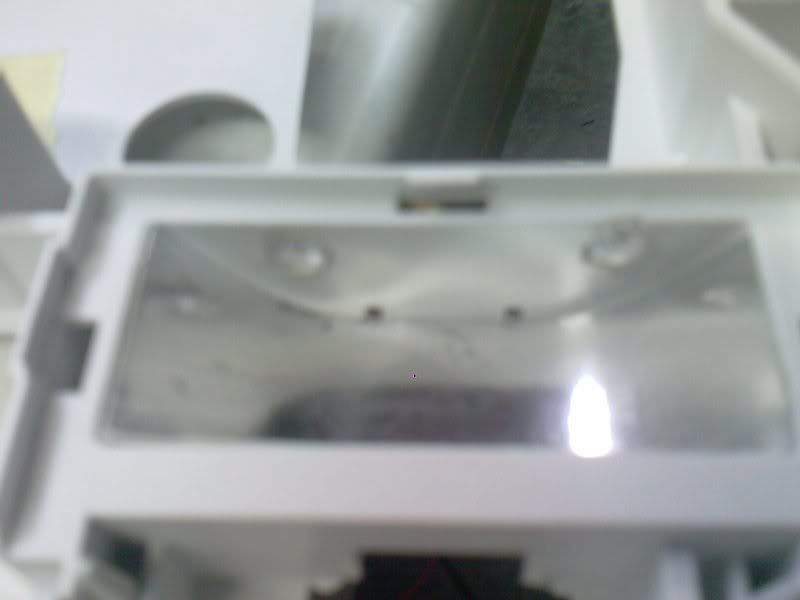
I decided the backlit bulb wasnt the best output, and drilled to small holes just big enough for a 5mm LED
to sit in, and i wanted to make sure the LED light would be bounced around and reflcted enough to light
the area up evenly and nicely.
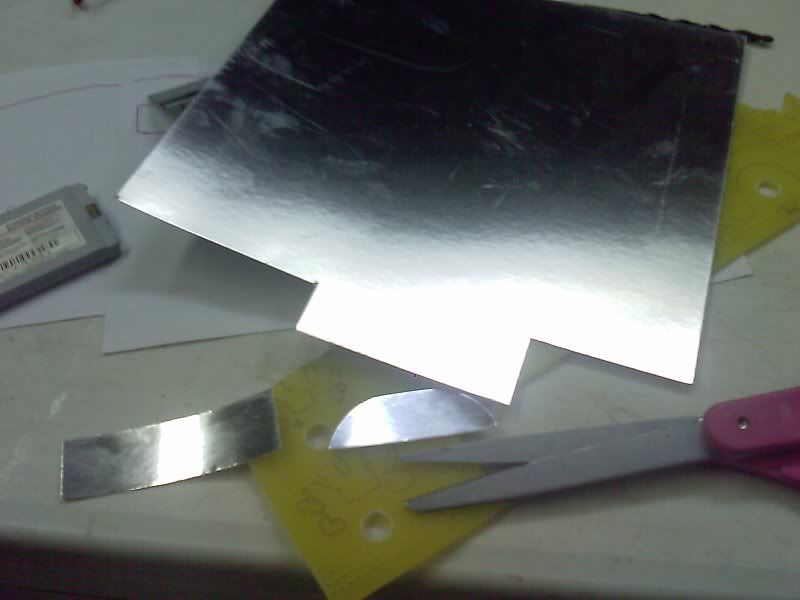
so i got some mirror cardboard from a cologne box i got for chirstmas and cut some strips and double face
taped them in place. Notice i covered up the round back hole where the old bulb sat.
The full WRITE-UP once more!
Its long, enjoy
Well i finally found the time to do a quick writeup for you guys.
This will be long so bear with me, i like to make my posts well detailed so that anyone
can come back and attempt to recreate what i have done if they chose to do so.
This was a slow thought out project that i started back in november after being so tired
of the bland XLT cluster and not really wanting to upgrade to a Lariat cluster due to the
complexity of the as-built data transfusion and my local dealers lack of drive to do such things.
And then i would still have the same cluster as every lariat on the road.
On to the write-up.
First of all, you will need to pull the needles, and i really didnt want to wait on a tool to get
here so i made my own. Its a paint can opener, i slit it down the middle with my slim cut-off wheel,
hammered the prongs flat,and then bent the tips like so. will cost you like 99 cents to do.
Just make sure to get a peice of thin cardboard to put under the fulcrum or it will leave a mark
on the black surface of your gauges.
I wont go into detail for removing the cluster and taking it apart. there are already plenty of
threads here that discuss that in FULL detail, and If your attempting something like this i would hope
you could figure out how to take the thing apart on your own.
I did the acetone trick to get all the green film of the rear of the gauges so it is now clear to run
whatever color your heart desires.
and heres the front up to a light, notice i marked off all the locations of the needles with tape.
notice how the light shines right thru with no color added.
and here it is with NO film and all stock incandecent lights in the dash.
So i did what i would call the "norm"
I installed LED bulbs in place of all the incandecent ones... and here are the results.
For those who have seen my projects, you know i would not be satisfied with this....
Not very pretty IMO, actually quite ugly. No red shines thru on the face or the needles do to the
red filtering out any blue light that comes thru, it has hot spots and dim spots, and
the digital readout looks like a nasty sea green/blue color. This was left temporarily till I figured
out another solution. I hated every bit of those two weeks.
Now comes the fun part.
I took the cluster apart to figure out how to light up the needles and make them come to life.
My first and most sensible solution was to install a red or white LED right into the needle. Seemed
easy and effective...
So i filed down a bright red 3mm LED to a square that fit right inside the needle "shine hole" lol
after a couple of tests on the bench, (not pictured) it proved to be REALLY effective and downright
awesome looking. I have never seen a needle GLOW like that! It was almost like a star wars saber than
an instrument cluster needle lol. Problem solved.
Moved on to the ugly green readout.
I decided the backlit bulb wasnt the best output, and drilled to small holes just big enough for a 5mm LED
to sit in, and i wanted to make sure the LED light would be bounced around and reflcted enough to light
the area up evenly and nicely.
so i got some mirror cardboard from a cologne box i got for chirstmas and cut some strips and double face
taped them in place. Notice i covered up the round back hole where the old bulb sat.
Last edited by Fabian06SC; 05-17-2009 at 04:02 AM.
#27
05-17-2009, 03:39 AM
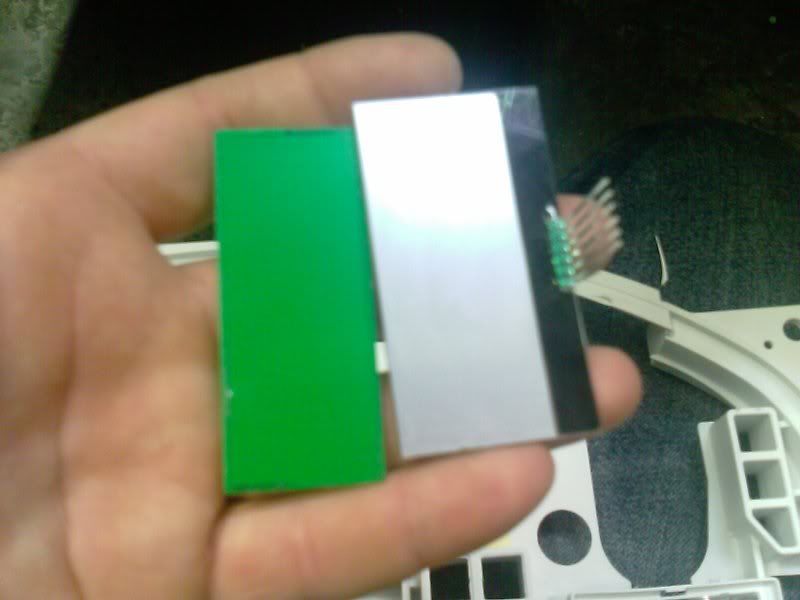
I also looked closely at the digital readout, the reason its green is because it has a green backing
stuck to the rear! BE VERY CAREFULL HERE. I took a razorblade and the green backing easily came off.
I was very patient though cause you dont want to break that LCD! Once its off you can see its semi transparent
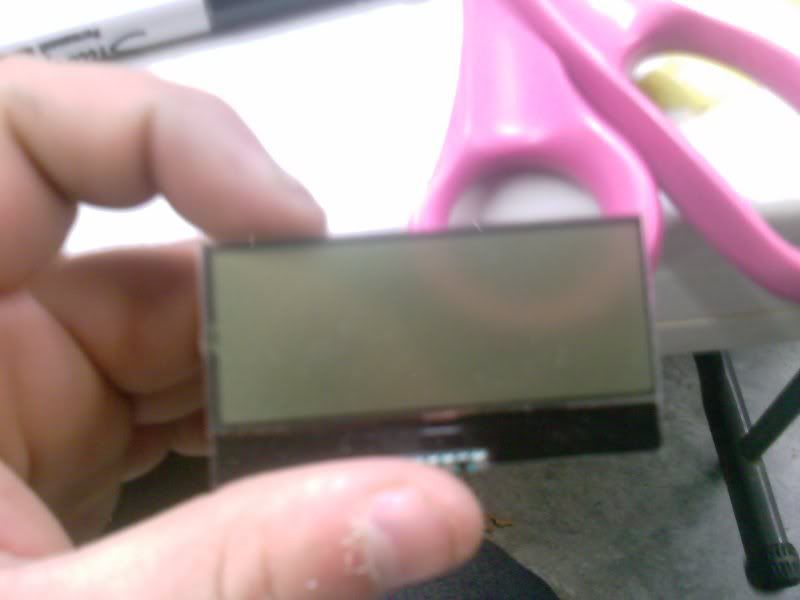
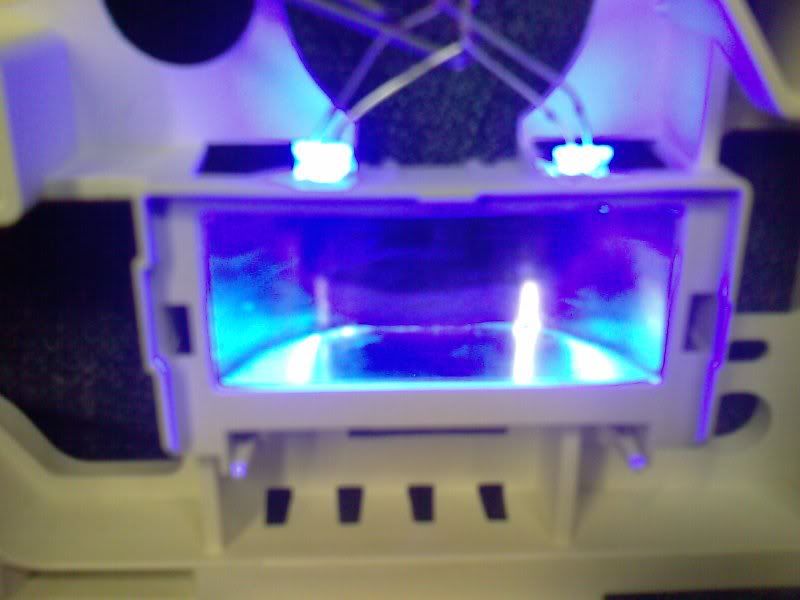
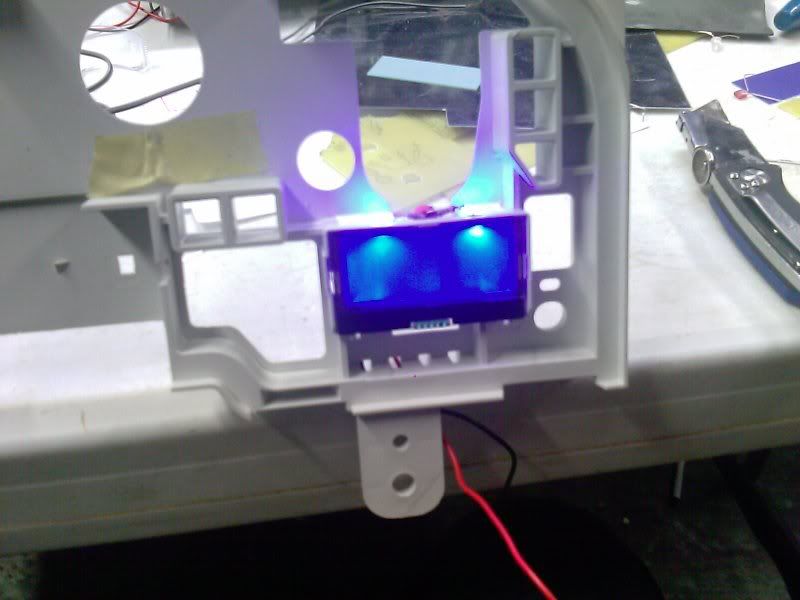
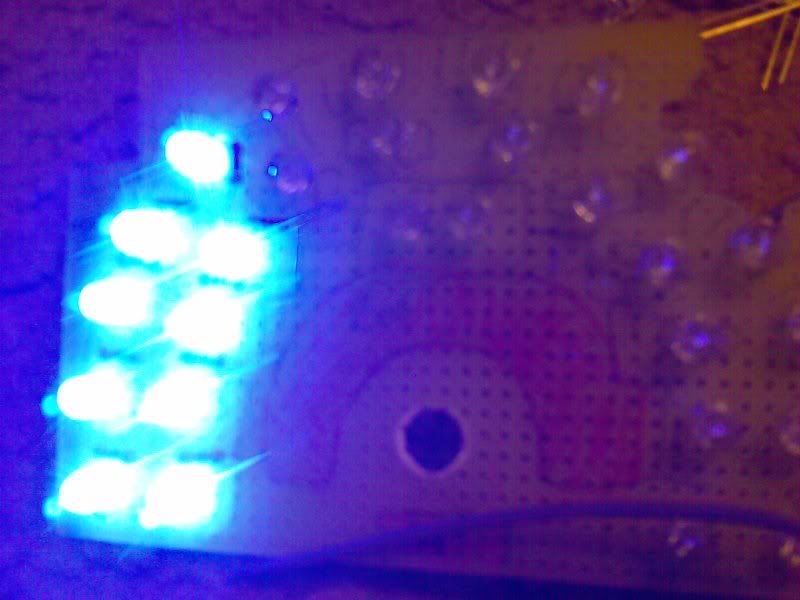
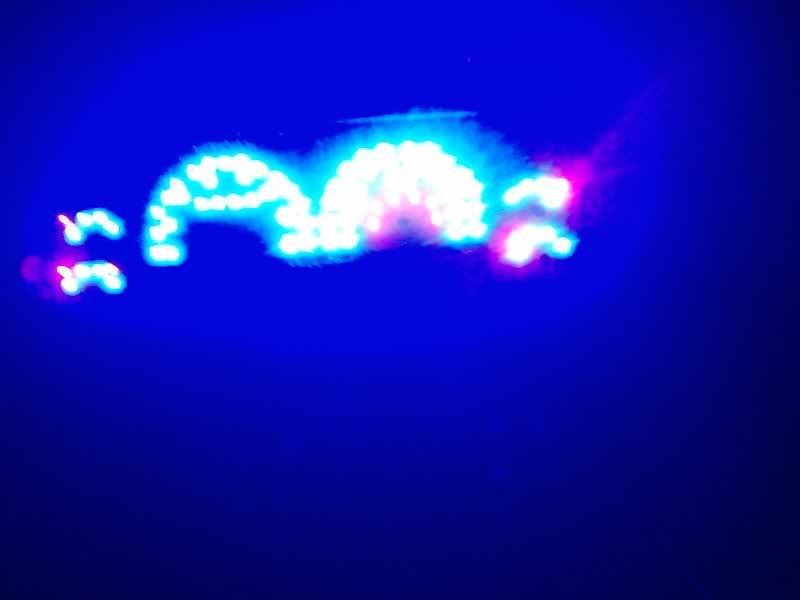
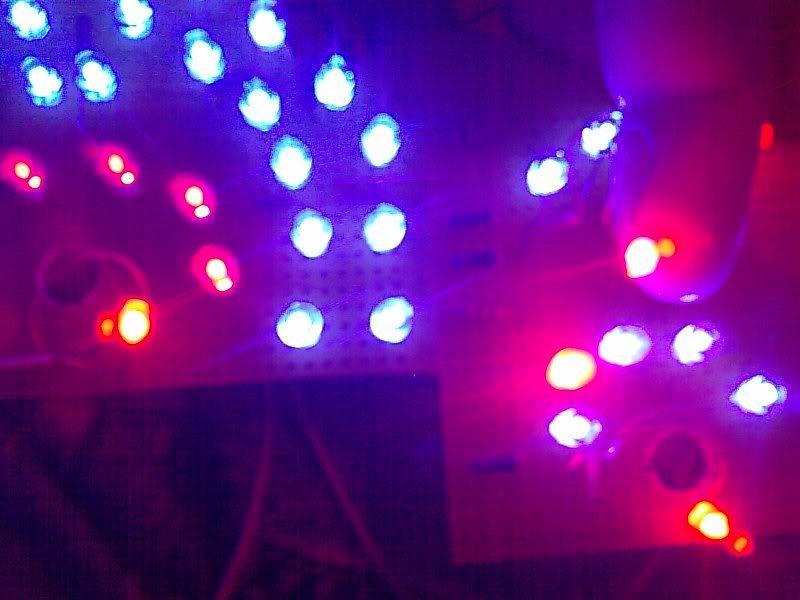
I soldered up some blue 5mm wide beam LEDs into the panel. Here are a few shots of testing in progress. The
camera pics up the "cones" of light more than the naked eye can, in person the blue is really deep and filled
with no noticable cones of light showing.
With LCD
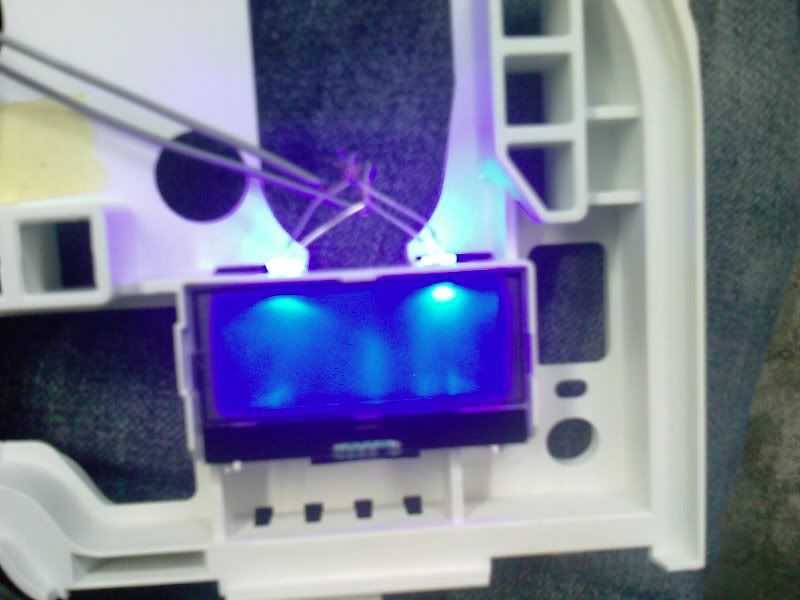
without
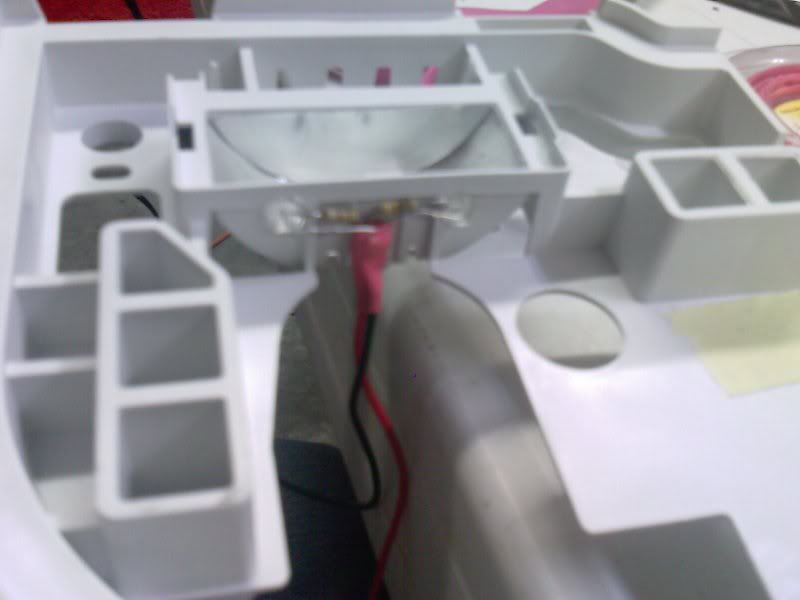
Wiring
Detail of LEDs in the box
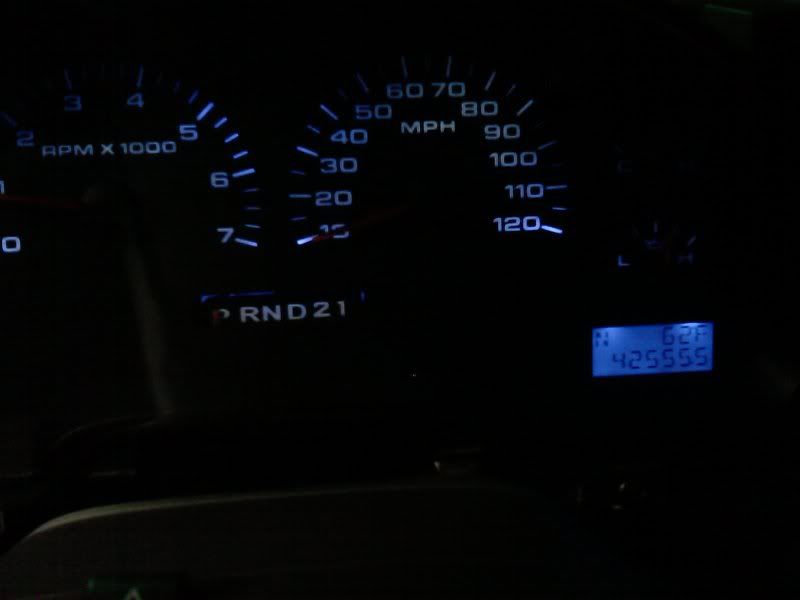
and lit up and done
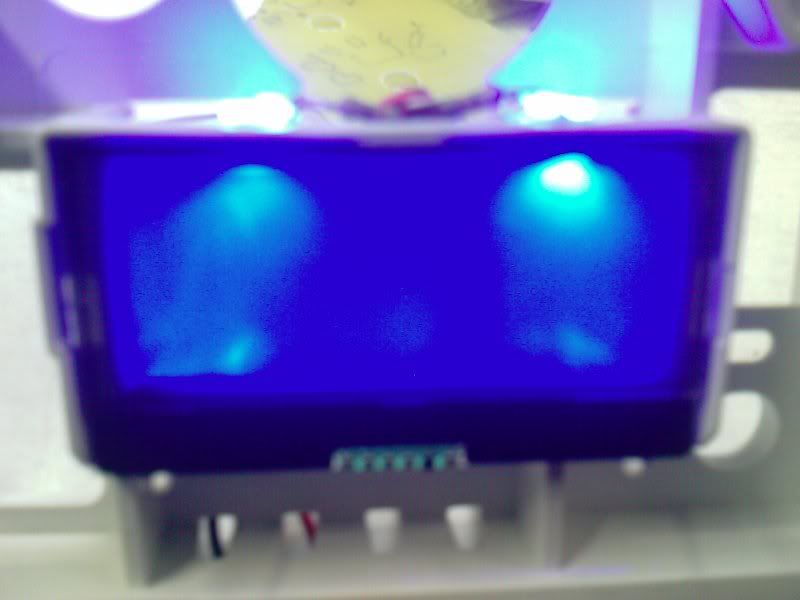
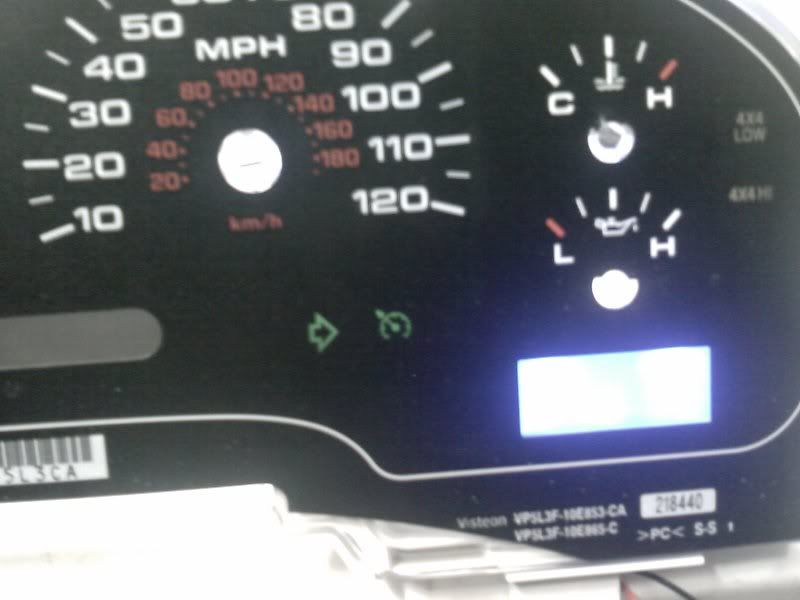
^^ Thats pretty much what it looks like in person, no cones and BRIGHT!
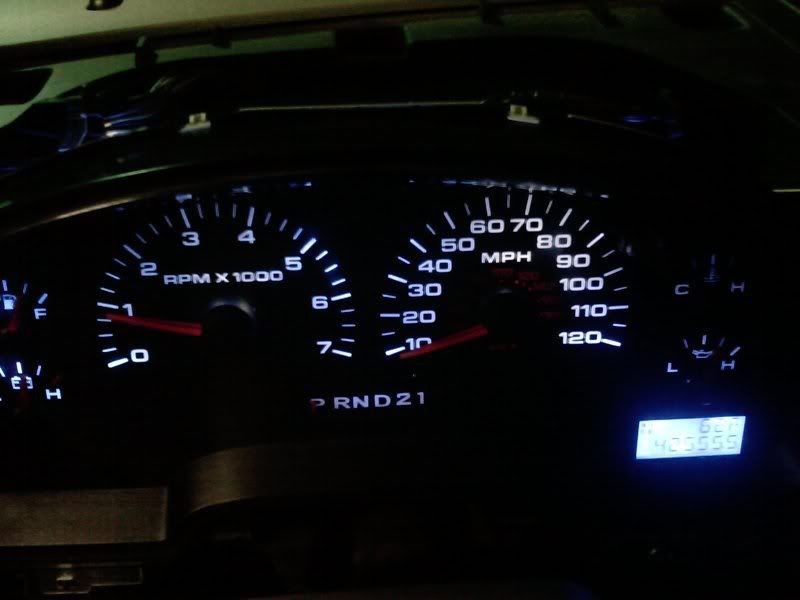
Fully functional and dims just like the OEM light.
I didnt get a pic of the wiring connections but youll see some later in the thread, this was done the
same way and soldered to the spot where the bulb for the LCD was placed.
LCD was done! threw it all back together and got the truck ready for work all week.
Parts were ready for assembly on the next step.
stuck to the rear! BE VERY CAREFULL HERE. I took a razorblade and the green backing easily came off.
I was very patient though cause you dont want to break that LCD! Once its off you can see its semi transparent
I soldered up some blue 5mm wide beam LEDs into the panel. Here are a few shots of testing in progress. The
camera pics up the "cones" of light more than the naked eye can, in person the blue is really deep and filled
with no noticable cones of light showing.
With LCD
without
Wiring
Detail of LEDs in the box
and lit up and done
^^ Thats pretty much what it looks like in person, no cones and BRIGHT!
Fully functional and dims just like the OEM light.
I didnt get a pic of the wiring connections but youll see some later in the thread, this was done the
same way and soldered to the spot where the bulb for the LCD was placed.
LCD was done! threw it all back together and got the truck ready for work all week.
Parts were ready for assembly on the next step.
Last edited by Fabian06SC; 05-17-2009 at 03:52 AM.
#28
05-17-2009, 03:41 AM
This part gets REALLY REALLY time consuming.
The LED in the factory placement was sub-par for me, and i wanted a better brighter and more stylish
gauge set. Lots of part gathering/ordering and planning went into this before one solder joint was made.
First off i wanted a FULL LED light up cluster, not just diffused LED lights from a few factory points.
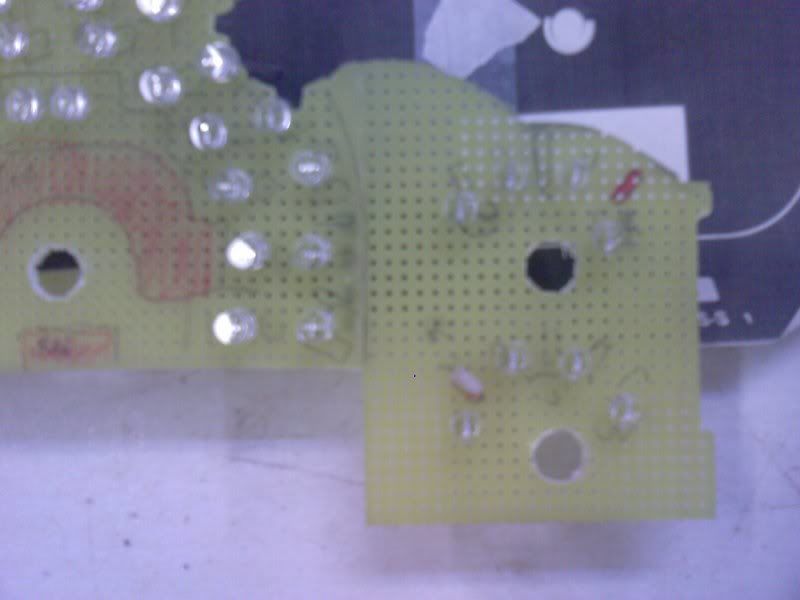
So i picked up some prototype board. This was probably the most costly at 20 bucks from Fry's electronics.
I cut it into sections so that i wouldnt have to buy a large and very expensive peice or two medium pieces.
and i laid it out on the cluster area and marked off what needed to be trimmed.
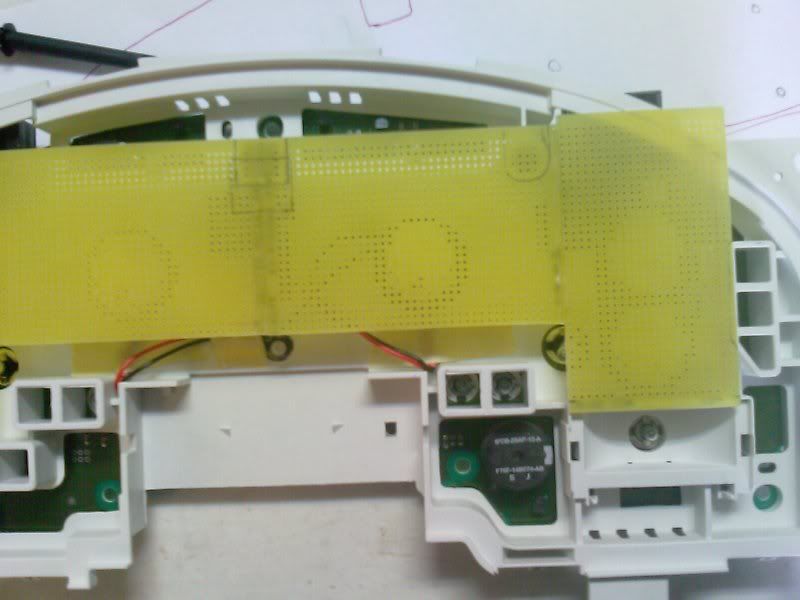
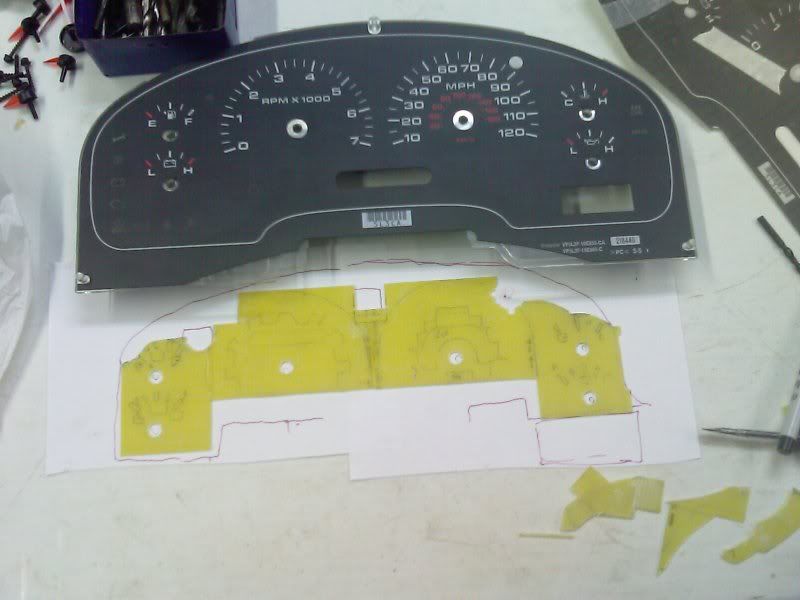
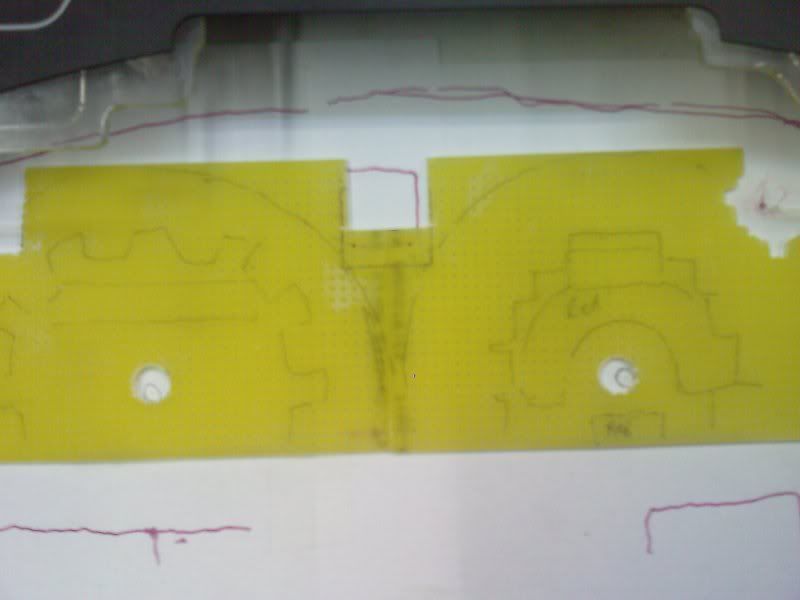
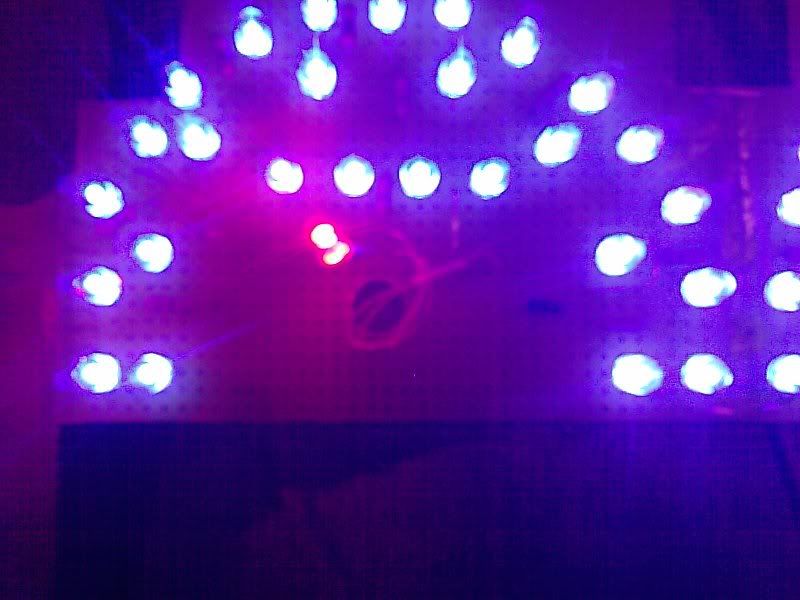
And i marked off my blue LED spacing and the small red spaces.
and i slid in the proper amount of LEDs to see how they would lay out.
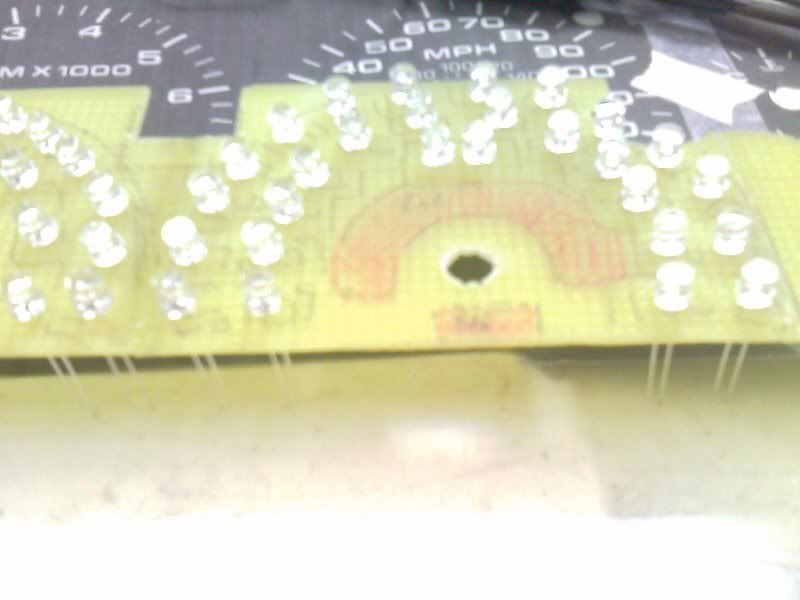
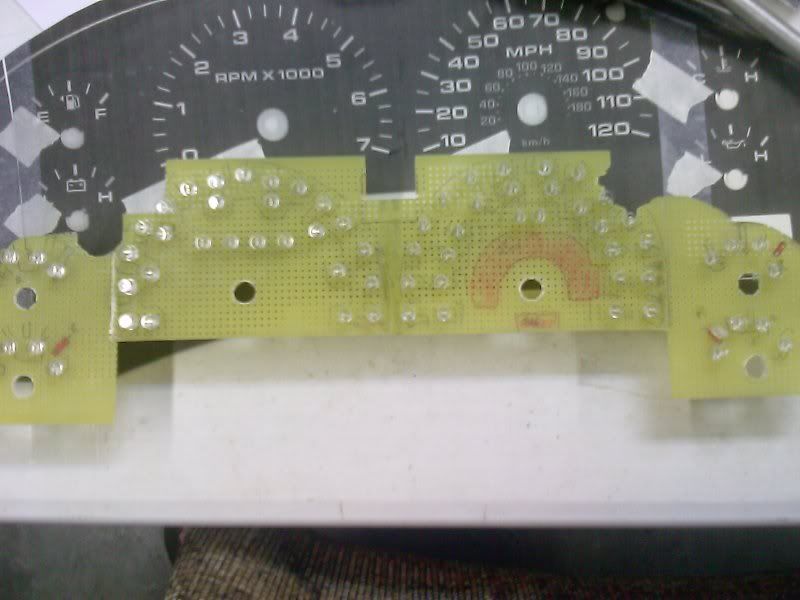
After making sure all my leds would lite up in the proper areas, and making sure my RED leds would hit
their respective RED areas on the cluster face i began soldering....
and testing and soldering.....
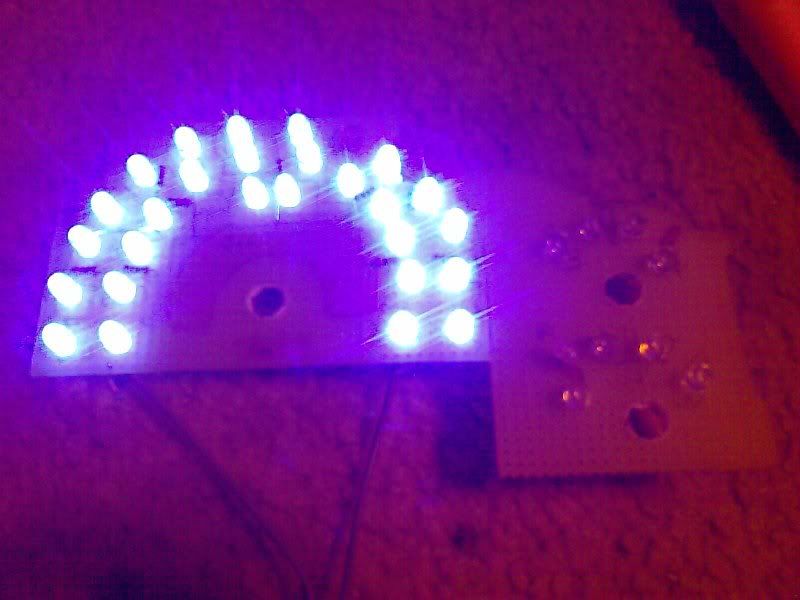
and more soldering...
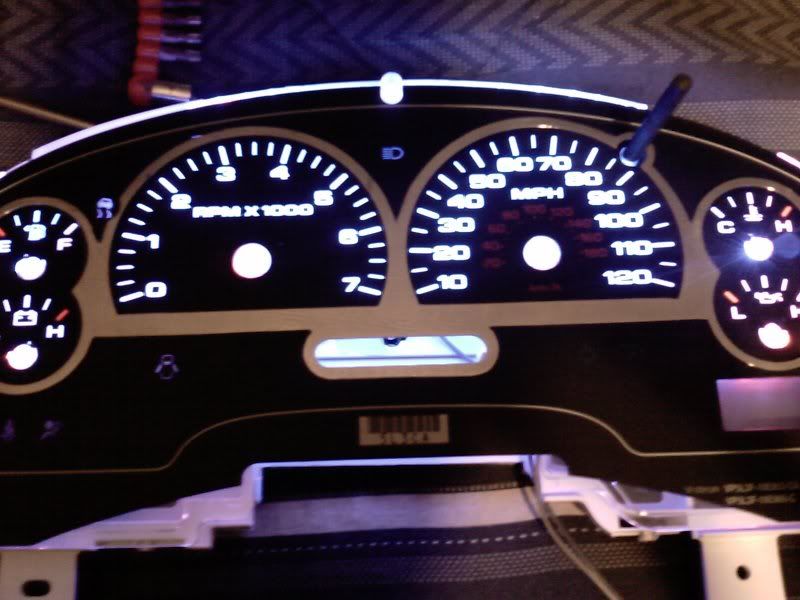
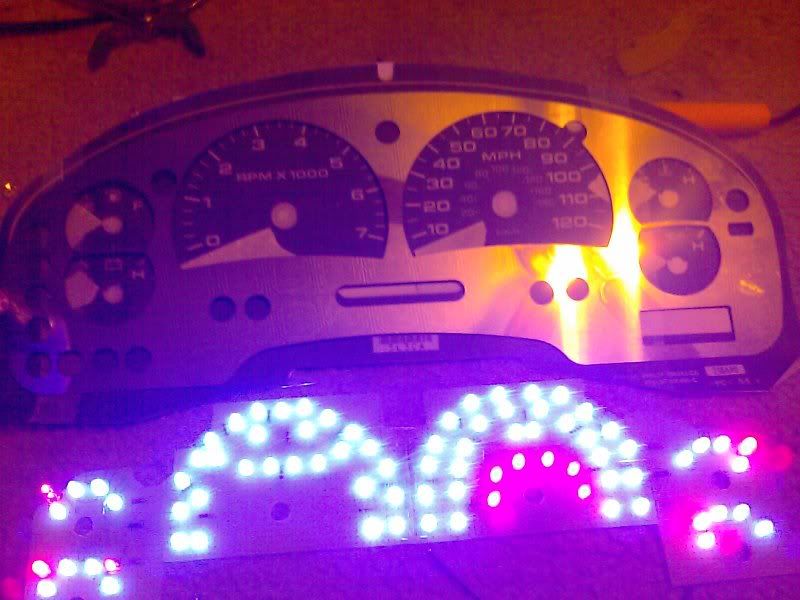
Finally done and it is burn your retinas bright....

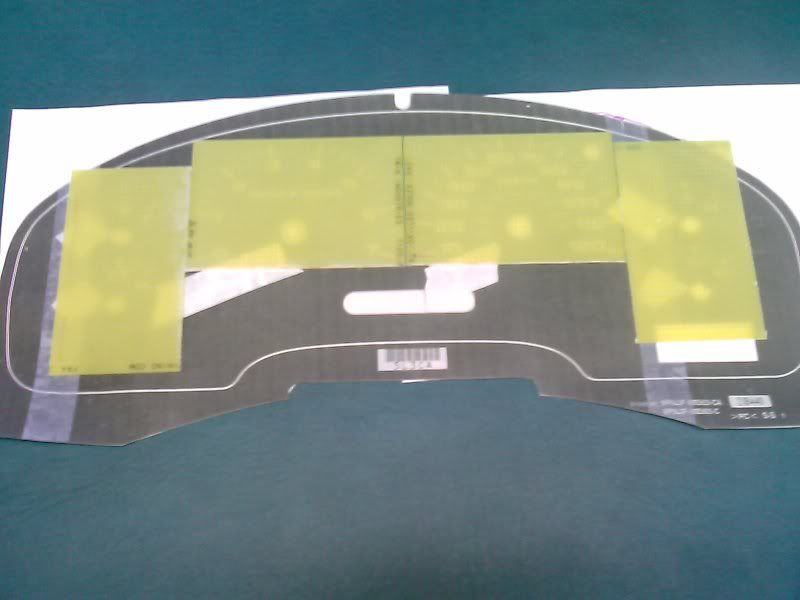
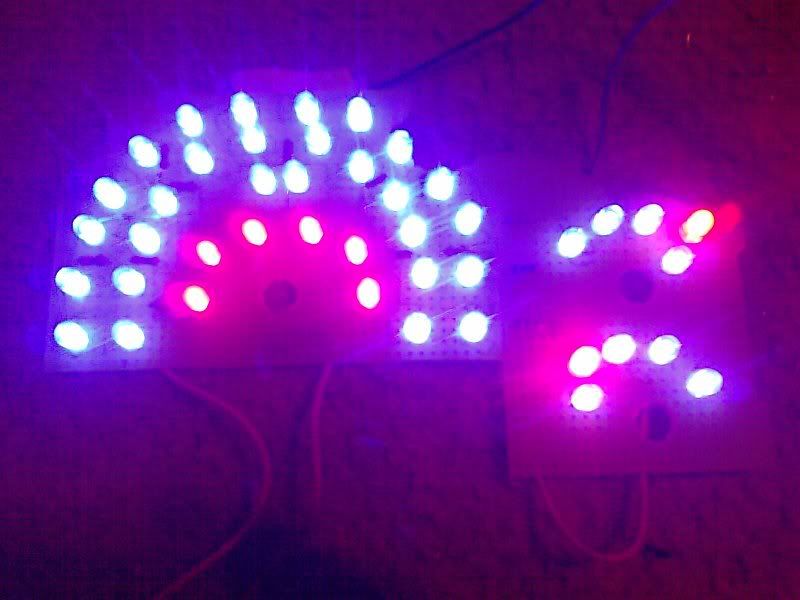
Matched against a scanned copy of the cluster i did for testing purposes. (light soaks right
thru that printed paper) The LEDs are wired in a group of three parallels per resistor, which
brings the temp of the resitor down quite a lot than if you were to wire one resistor per LED.
One per burns brighter but produced too much heat for me, and honestly i dont think i lost much
brightness. I did all the math but have since then lost it. IDK where it ended up.
The LED in the factory placement was sub-par for me, and i wanted a better brighter and more stylish
gauge set. Lots of part gathering/ordering and planning went into this before one solder joint was made.
First off i wanted a FULL LED light up cluster, not just diffused LED lights from a few factory points.
So i picked up some prototype board. This was probably the most costly at 20 bucks from Fry's electronics.
I cut it into sections so that i wouldnt have to buy a large and very expensive peice or two medium pieces.
and i laid it out on the cluster area and marked off what needed to be trimmed.
And i marked off my blue LED spacing and the small red spaces.
and i slid in the proper amount of LEDs to see how they would lay out.
After making sure all my leds would lite up in the proper areas, and making sure my RED leds would hit
their respective RED areas on the cluster face i began soldering....
and testing and soldering.....
and more soldering...
Finally done and it is burn your retinas bright....
Matched against a scanned copy of the cluster i did for testing purposes. (light soaks right
thru that printed paper) The LEDs are wired in a group of three parallels per resistor, which
brings the temp of the resitor down quite a lot than if you were to wire one resistor per LED.
One per burns brighter but produced too much heat for me, and honestly i dont think i lost much
brightness. I did all the math but have since then lost it. IDK where it ended up.
#29
05-17-2009, 03:44 AM
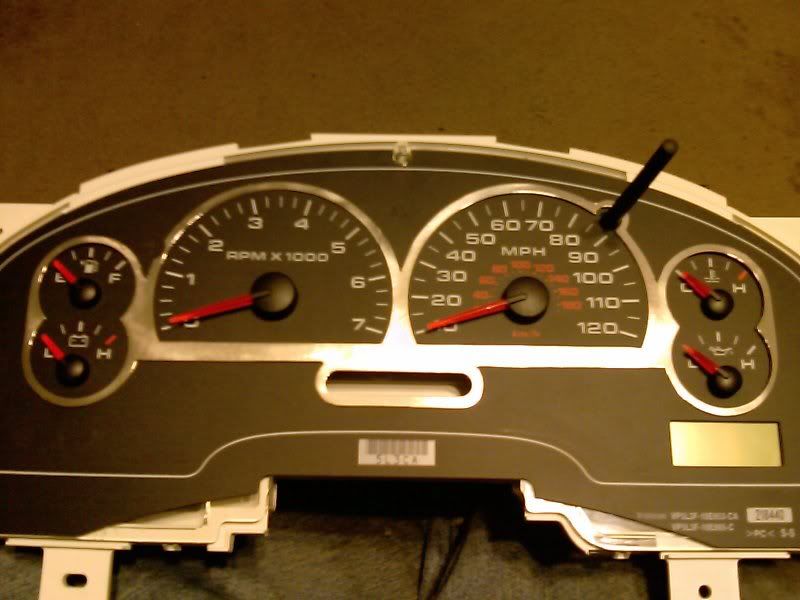
and a sneak peak at the upcoming dress up mods
Ok remember the needles?
I needed some cable/wire that was going to be strong yet flexible enought to let the needles do
their full sweep with no drag.
I had an older pair of earbud earphones that were pretty much on thier last leg, and decided that
the speaker wire on those tiny things was just what i needed.
Left plenty of wire on and soldered my filed down LEds to one end and the other to the board with its
respective resistor. see them dangling there?
Ok LIGTHING DONE!
Now to make this thing look a little less ordinary.
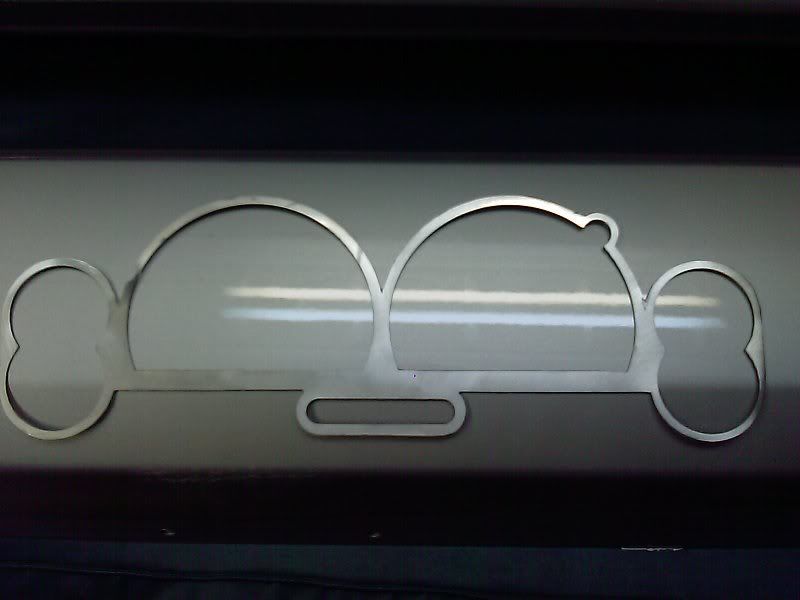
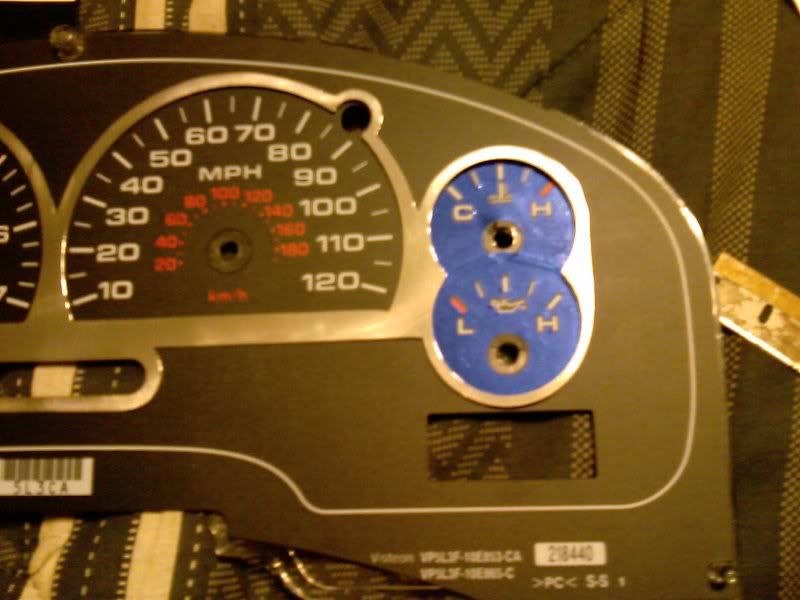
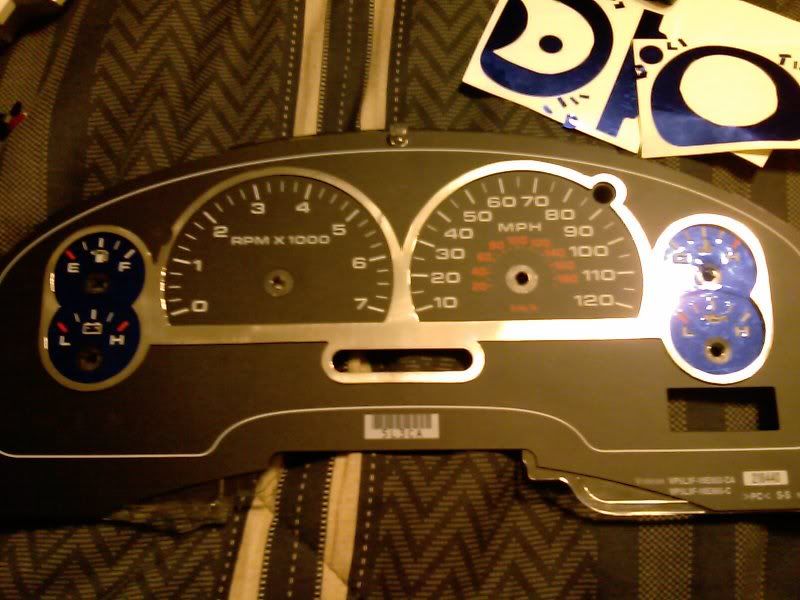
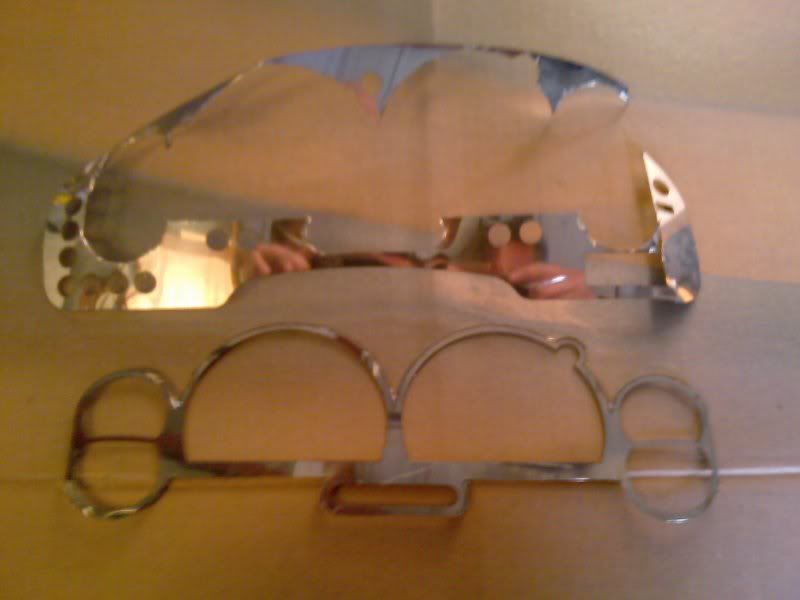
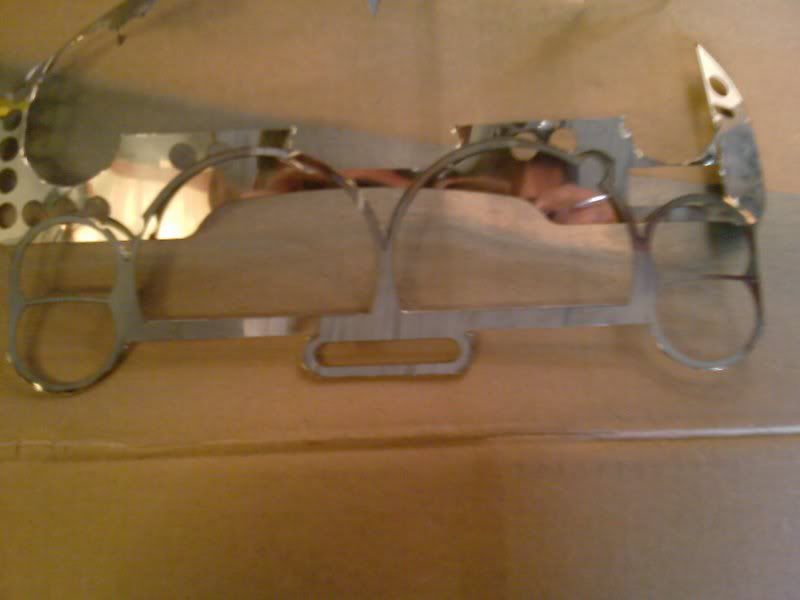
I got a stainless steel cover from ebay, and got a guy to cut me up some nice reflective vinyl gauges
for the cluster. He did an amazing job, and was a pleasure to work with! Anyone that can put up with
my picky and sometime assinine demands deserves the credit! He even sent me two sets of cut-outs!
(pm me for details if wanted)
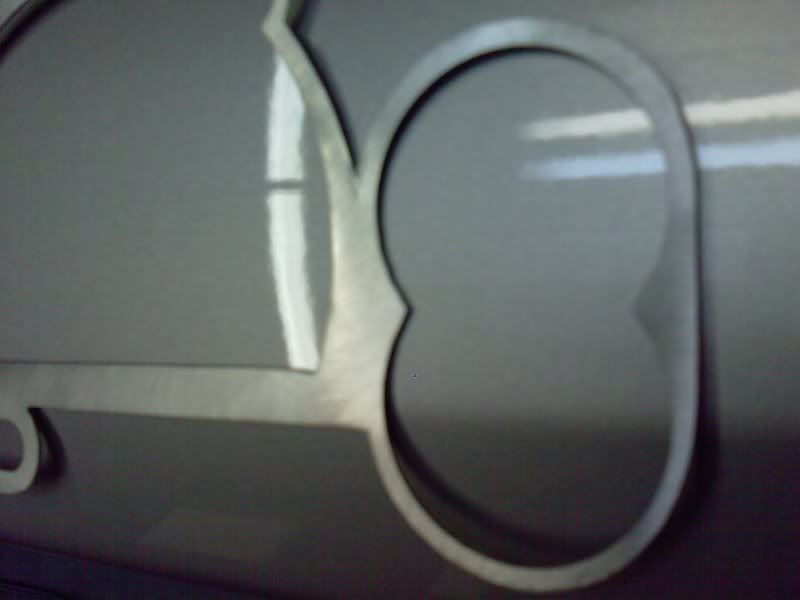
The gauge surround looks great, just not my style though.
So i made some marks...

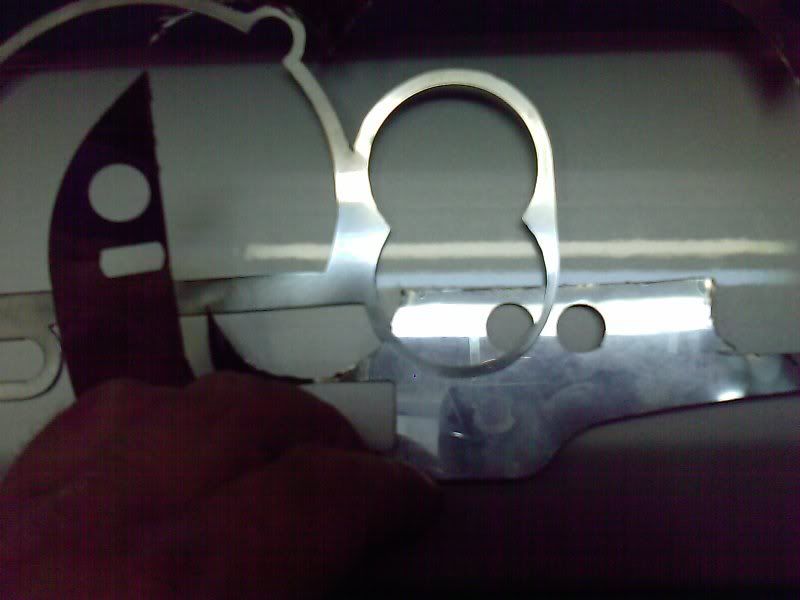
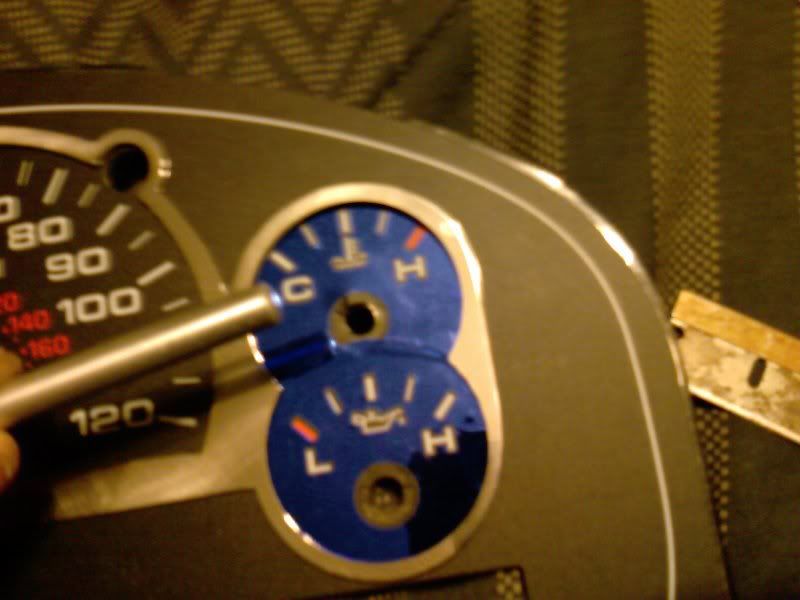
With the blue gauge overlays
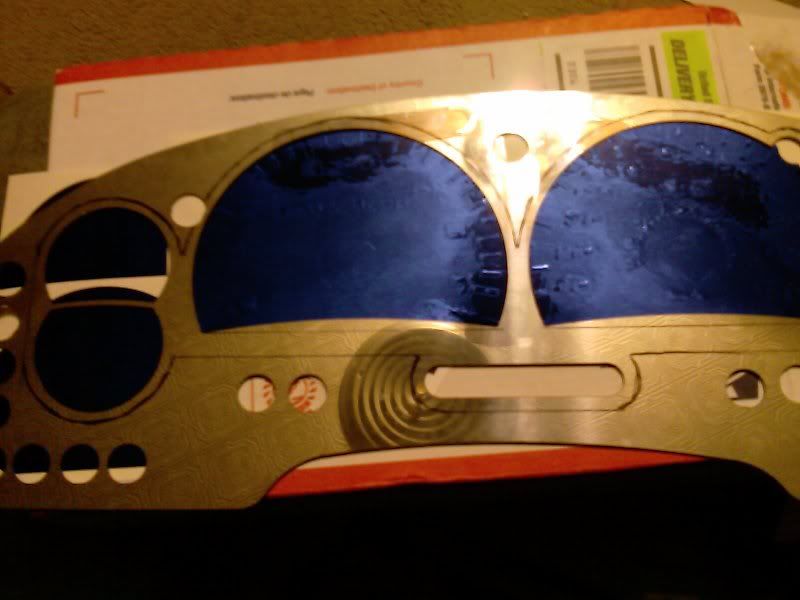
Took a half used three inch (more like 1.75" now) cut-off wheel and went to town carefully.
#30
05-17-2009, 03:45 AM