DIY Black Headlights Done...again lots of pics...not 56k friendly
#31
 11-19-2008, 02:27 PM


#32
11-19-2008, 03:28 PM

Senior Member
Join Date: Nov 2008
Location: Illinois
Posts: 188
Likes: 0
Received 0 Likes
on
0 Posts
I think you need to get a little pic inside the seal, and scrape it out. Maybe I am wrong, I haven't done it yet. You have to make sure you cook em hot enough to melt the seal.
If your putting yours back on, throw an extra layer of your seal around it. It will help make sure you have no leaks.
If your putting yours back on, throw an extra layer of your seal around it. It will help make sure you have no leaks.
And yes, I did use the sealant that I planned on using to put them back together, and I put a bead around where I pryed, just in case.
IF YOU GUYS ATTEMPT THIS MOD, GOOD LUCK, MAY THE FORCE BE WITH YOU.
Last edited by Jimbo45; 11-19-2008 at 03:30 PM.
#33
11-19-2008, 03:33 PM

Senior Member
Join Date: Aug 2007
Location: Rohnert Park, CA
Posts: 3,858
Likes: 0
Received 0 Likes
on
0 Posts
Yes, I came in the house with flat screw drivers and multiple picks of different curvature. Nothing I did would get those sumbishes apart! There was no way to scrape anything out, without getting the parts separated. Plus, I already cooked the darn lenses enough (at 250 degrees) to put spider web cracks all over them, so I don't think insufficient heat was an issue.
And yes, I did use the sealant that I planned on using to put them back together, and I put a bead around where I pryed, just in case.
IF YOU GUYS ATTEMPT THIS MOD, GOOD LUCK, MAY THE FORCE BE WITH YOU.
And yes, I did use the sealant that I planned on using to put them back together, and I put a bead around where I pryed, just in case.
IF YOU GUYS ATTEMPT THIS MOD, GOOD LUCK, MAY THE FORCE BE WITH YOU.
 I dunno what happened. Like I said, I haven't done it, so i really have no clue. I still plan to give her a try. Worse comes to worse, I buy headlights already black like I was plannin to anyways.
#34
11-19-2008, 04:38 PM
Senior Member
Join Date: Nov 2008
Location: Illinois
Posts: 188
Likes: 0
Received 0 Likes
on
0 Posts
Just ordered these:

They look to be glossy black, like the OEM HD ones, with an amber side marker. I don't particularly like the euro-fart can-car clear marker lenses.
Before mounting them, I will run a bead of this sealer around the joint for extra assurance. For the price, I don't expect much. If they turn out to be junk, then I guess I am only out $125 bucks, and can look for a cheap OEM right side capsule to replace the one I messed up.
#35
11-19-2008, 05:02 PM

Senior Member
Join Date: Feb 2007
Location: Native New Yorker
Posts: 3,329
Likes: 0
Received 0 Likes
on
0 Posts
#36
11-19-2008, 06:25 PM

CRAP! Forget this mod! I pulled my headlight out of the oven to start pulling it apart, and I noticed that there are now, very slight spider web looking cracks ALL OVER THE CLEAR PORTION OF THE LENS!!!!!!!!! I even had a thermometer in the oven, and had to set the oven at about 200 degrees, to get actual 250 degrees. Then, I tried pulling them apart. No luck. I then tried prying them apart, no luck. I even managed to loosen the factory seal enough that it will probably leak, but I don't see any way in hell you guys got them apart without breaking/damaging something. Either I am a girly man (I really don't think so) or mine are put together with something different than normal.
maybe the lens is brittle from being 3-4 yrs old and sunlight.
my heads lived in Washington and didn't really ever get any sunshine for the 2 yrs I've owned it.
also, how close were your heads to the heating element? I had mine sitting on the tray with it at the lowest level possible. My oven only has heating elements on the top. So I had about 6-8" of seperation
as for light output, I've never seen anything negative about painting the whole schebang black
again, for those considering this mod. how you do it
Oven at 250F
A small screwdriver (tiny sucker)
A "bigger" screwdriver
Let the headlight heat for about 10 mintues. Poke the silicone with the screwdriver. It should be fairly pliable. If not, cook the headlight for a few more minutes.
The silicone needs to be the consistency of putty. It will bend/deform, but retain it's shape.
At this point, quickly use the small screwdriver and start gently prying. You'll notice the silicone getting harder as it cools. Just frequently reheat.
After a little bit, you'll be able to seperate the 2 halfs.
BE VERY PATIENT. YOU ARE WORKING WITH PLASTIC. DON'T FORCE IT. JUST BE GENTLE AND TAKE YOUR TIME.
#37
11-19-2008, 06:45 PM
Senior Member
Join Date: Aug 2007
Location: Rohnert Park, CA
Posts: 3,858
Likes: 0
Received 0 Likes
on
0 Posts

#38
11-19-2008, 07:04 PM
Senior Member
Join Date: Nov 2008
Location: Illinois
Posts: 188
Likes: 0
Received 0 Likes
on
0 Posts
sorry man, don't know what to tell you. what year is your truck? a 04/05?
maybe the lens is brittle from being 3-4 yrs old and sunlight.
my heads lived in Washington and didn't really ever get any sunshine for the 2 yrs I've owned it.
also, how close were your heads to the heating element? I had mine sitting on the tray with it at the lowest level possible. My oven only has heating elements on the top. So I had about 6-8" of seperation

Maybe I will go out and try to get a pic of the damaged lens with the lights on.....
#39
11-19-2008, 07:26 PM

Senior Member
Join Date: Mar 2008
Location: Texas
Posts: 708
Likes: 0
Received 0 Likes
on
0 Posts
Hey Darren, they look great on ya truck! They working out for ya?
Hey MercedesTech, don't get discouraged on painting your headlights.. it's actually pretty easy.. I've already done 3 different sets.. Darren has my first set on his truck now, I'm wearing my 2nd set with blacked out reflectors, and just finished up a pair for a friend from work this past weekend.
Personally, I haven't noticed any loss of light output from blacking them out, if anything, the light is more focused.. either way, they still look fine.
I dunno where the "250" came from, but you generally wont cause any harm to your headlights plastic until you start hitting 400+ in your oven. If 250 doesn't work for you, try 300.. it's no big deal.. I did it on 250 for about 10 minutes and it worked fine for me..
The best place to pry them apart is on the top middle corner (I circled the spot in green in the pic below)
Immediately after pulling them out of the oven, bend back with your fingers all of the tabs around the headlights, while they are still pliable, be quick. After you bend back those snaps pry your screwdriver or whatever (I used a butter knife.. lol) into the median top corner.. and pry it apart just enough to manage to stick your hand inbetween the housing and lense and then turn into the Hulk and rip them apart..
Well.. be gentle.. but they should come right apart on the first try, the only things that will hold you up will be those tabs..
Here's a few more pics of my headlights... Personally I love the blacked out headlights, it really goes with my look.. Another thing that I did slightly different than the HD lights and etc, is that I painted directly around the headlight circles, the only chrome I left were "inside" the circles.. you might be able to see the difference..
PRY HERE, directly on corner (in green circle)

More shots.. lol


Hey MercedesTech, don't get discouraged on painting your headlights.. it's actually pretty easy.. I've already done 3 different sets.. Darren has my first set on his truck now, I'm wearing my 2nd set with blacked out reflectors, and just finished up a pair for a friend from work this past weekend.
Personally, I haven't noticed any loss of light output from blacking them out, if anything, the light is more focused.. either way, they still look fine.
I dunno where the "250" came from, but you generally wont cause any harm to your headlights plastic until you start hitting 400+ in your oven. If 250 doesn't work for you, try 300.. it's no big deal.. I did it on 250 for about 10 minutes and it worked fine for me..
The best place to pry them apart is on the top middle corner (I circled the spot in green in the pic below)
Immediately after pulling them out of the oven, bend back with your fingers all of the tabs around the headlights, while they are still pliable, be quick. After you bend back those snaps pry your screwdriver or whatever (I used a butter knife.. lol) into the median top corner.. and pry it apart just enough to manage to stick your hand inbetween the housing and lense and then turn into the Hulk and rip them apart..
Well.. be gentle.. but they should come right apart on the first try, the only things that will hold you up will be those tabs..
Here's a few more pics of my headlights... Personally I love the blacked out headlights, it really goes with my look.. Another thing that I did slightly different than the HD lights and etc, is that I painted directly around the headlight circles, the only chrome I left were "inside" the circles.. you might be able to see the difference..
PRY HERE, directly on corner (in green circle)
More shots.. lol
#40
11-19-2008, 07:37 PM
Senior Member
Join Date: Nov 2008
Location: Illinois
Posts: 188
Likes: 0
Received 0 Likes
on
0 Posts
I went out and took some pics in the garage. Remember, I am no photographer, but you get the idea.
Untouched driver's side unit:

Heated, resulting in spider webbing, pass side:


I want to make clear, I am not trying to stomp on the OP's original post here. I appreciate his mod as well as anyone. It lets you keep OEM quality lights, and have black ones at the same time, all while saving the cost of new ones. His look great. For some reason, mine didn't work out so well, and I am posting this as a warning to others that want to try this.
At this point, I wished I had simply ordered the cheapo's off ebay to begin with (plus I would have had ALL the leaves raked in my yard ), and kept the OEMS intact for resale. Oh well, live and learn...I guess I can pick up a cheap used pass side OEM unit on ebay at some point. To all that attempt this mod, good luck and be careful.
Untouched driver's side unit:
Heated, resulting in spider webbing, pass side:
I want to make clear, I am not trying to stomp on the OP's original post here. I appreciate his mod as well as anyone. It lets you keep OEM quality lights, and have black ones at the same time, all while saving the cost of new ones. His look great. For some reason, mine didn't work out so well, and I am posting this as a warning to others that want to try this.
At this point, I wished I had simply ordered the cheapo's off ebay to begin with (plus I would have had ALL the leaves raked in my yard
), and kept the OEMS intact for resale. Oh well, live and learn...I guess I can pick up a cheap used pass side OEM unit on ebay at some point. To all that attempt this mod, good luck and be careful.
Last edited by Jimbo45; 11-19-2008 at 07:49 PM.
#41
11-19-2008, 07:46 PM
Senior Member
Join Date: Nov 2008
Location: Illinois
Posts: 188
Likes: 0
Received 0 Likes
on
0 Posts
...I dunno where the "250" came from, but you generally wont cause any harm to your headlights plastic until you start hitting 400+ in your oven. If 250 doesn't work for you, try 300.. it's no big deal.. I did it on 250 for about 10 minutes and it worked fine for me..
The best place to pry them apart is on the top middle corner (I circled the spot in green in the pic below)
Immediately after pulling them out of the oven, bend back with your fingers all of the tabs around the headlights, while they are still pliable, be quick. After you bend back those snaps pry your screwdriver or whatever (I used a butter knife.. lol) into the median top corner.. and pry it apart just enough to manage to stick your hand inbetween the housing and lense and then turn into the Hulk and rip them apart..
Well.. be gentle.. but they should come right apart on the first try, the only things that will hold you up will be those tabs..
#42
11-19-2008, 08:00 PM
Senior Member
Join Date: Mar 2008
Location: Texas
Posts: 708
Likes: 0
Received 0 Likes
on
0 Posts
#43
11-19-2008, 09:41 PM
you got me curious Jimbo so I went out and looked mine over. other than the road pitting from 2 winters...nothing.
I feel bad they didn't turn out for ya. at least you have a reason to buy the OEM black ones though.
the 250F comes from other people before me. 250F seems to be a pretty good rule of thumb. hot enough to make the silicone pliable...but cool enough you can still handle the headlight.
I feel bad they didn't turn out for ya. at least you have a reason to buy the OEM black ones though.
the 250F comes from other people before me. 250F seems to be a pretty good rule of thumb. hot enough to make the silicone pliable...but cool enough you can still handle the headlight.
#44
11-19-2008, 10:33 PM
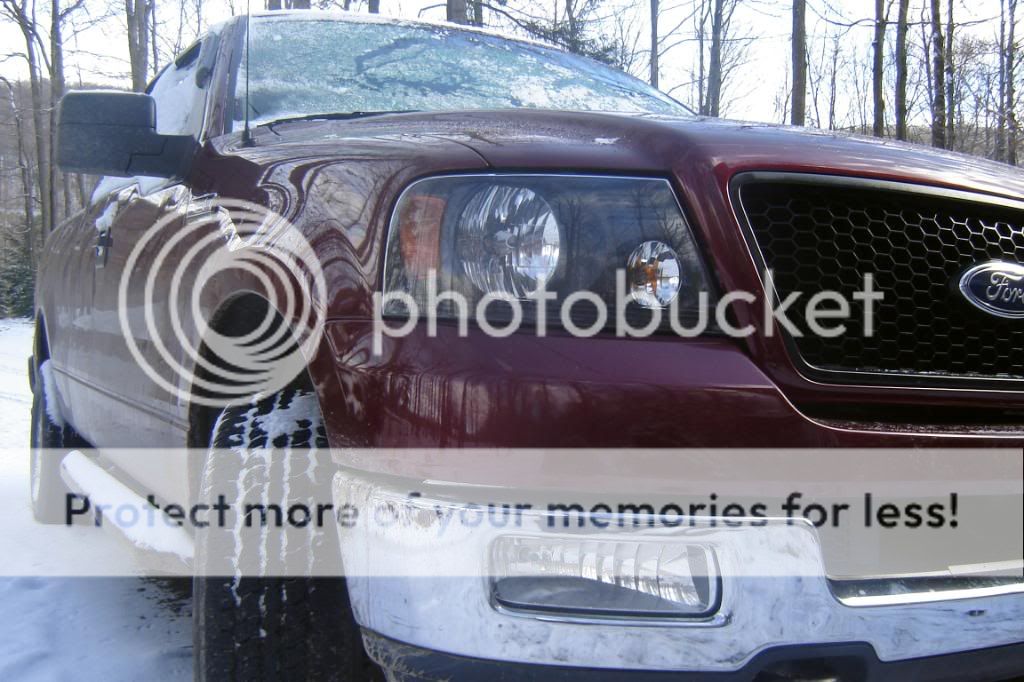
Thanks man, I'm loving them! Makes it a very different truck. My theme is starting to take off, dark red & black. They look great as before at night too. My original headlamps had the nasty pitted/spotted look to them minorly. These headlamps from your '08 FX4, the lenses are incredibly clear and brand new, so its a win x2 for me! Only thing I really did to re-assure they would be ok is I can a little clear sealant under the left one. Now they're seeing 20 degree Pennsylvania weather Thanks again man.
Thanks again man.
#45
11-24-2008, 01:48 AM

Senior Member
Join Date: Apr 2008
Location: Arlington TN, near Memphis
Posts: 316
Likes: 0
Received 0 Likes
on
0 Posts
I did mine about 6 months ago and it was definitely a PITA to get em seperated, once you get the first done the second is alot easier just because you can see how they were put together. Mine came out great and you've got me thanking god that they didn't "spider" like that. thats no fun, hate it happened to ya man. good luck MT, they look great on DSG trucks.
SouthernStyle
SouthernStyle