Cowl Removal and Painting Step-By-Step (56K Waring)
#1
 04-26-2008, 01:01 PM


Join Date: Aug 2005
Location: New Port Richey, FL
Posts: 2,331
Likes: 0
Received 0 Likes
on
0 Posts
Cowl Removal and Painting Step-By-Step (56K Waring)
Well I successfully did it, and since no one else had posted up good pictures and a step by step I decided I would.
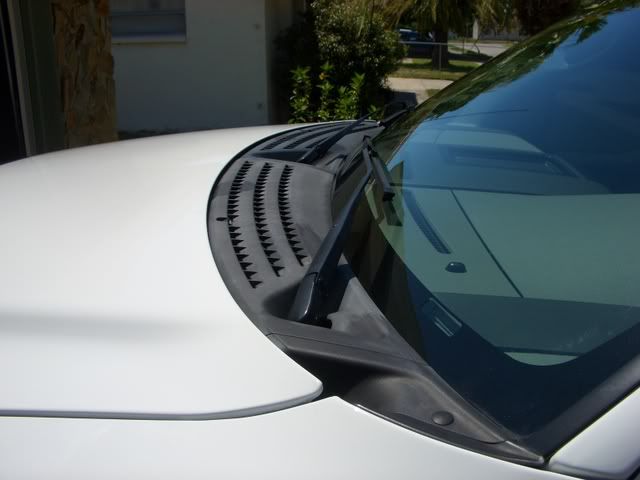
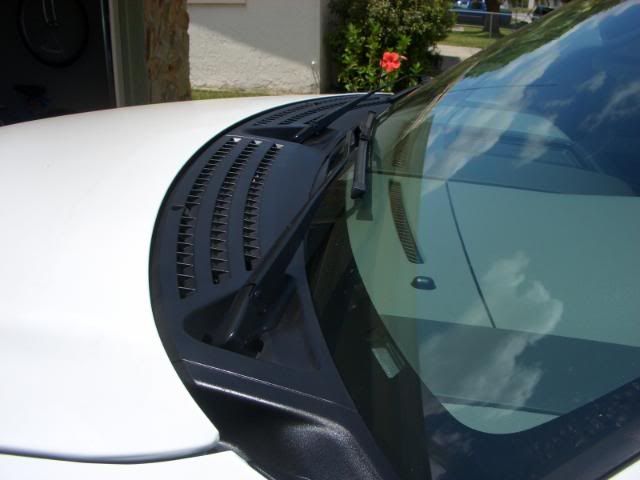
First, let's take a look at the before so you know what we're working with:
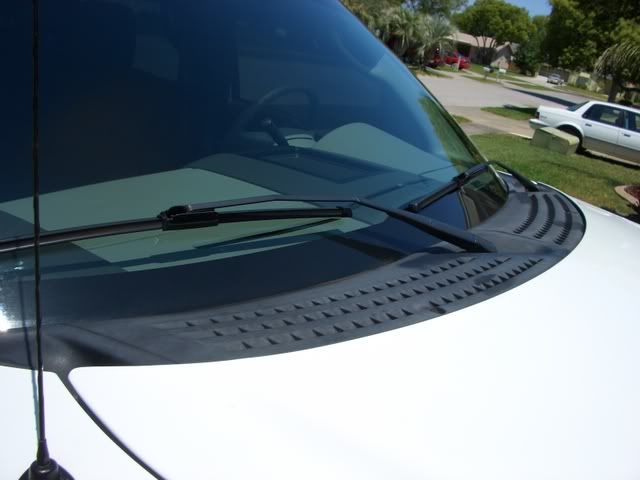
So, first, remove the windsheild wipers. Just look for the little tab and pull it out, then gently pull up on the wiper arm and it's off.
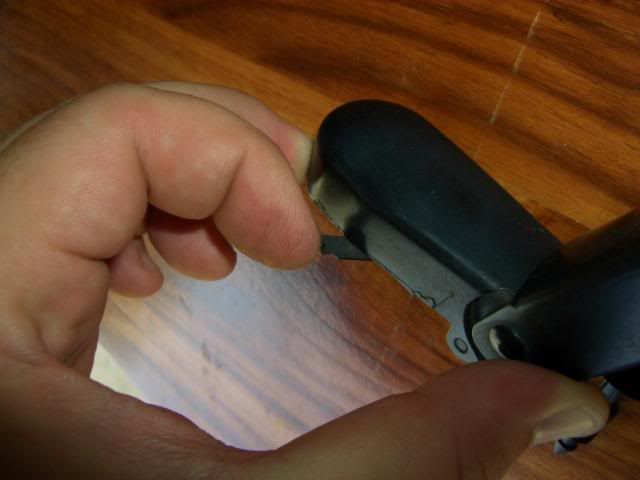
Then pull out the little tabs that hold it down on each side by the bottom of the A-pillar. Just yank them out, you won't break them.
First, let's take a look at the before so you know what we're working with:
So, first, remove the windsheild wipers. Just look for the little tab and pull it out, then gently pull up on the wiper arm and it's off.
Then pull out the little tabs that hold it down on each side by the bottom of the A-pillar. Just yank them out, you won't break them.
#2
04-26-2008, 01:05 PM
Join Date: Aug 2005
Location: New Port Richey, FL
Posts: 2,331
Likes: 0
Received 0 Likes
on
0 Posts
Next, open the hood and remove the rubber strip:
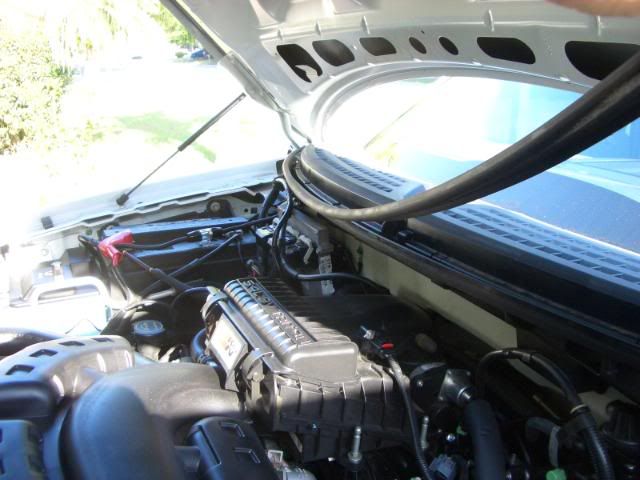
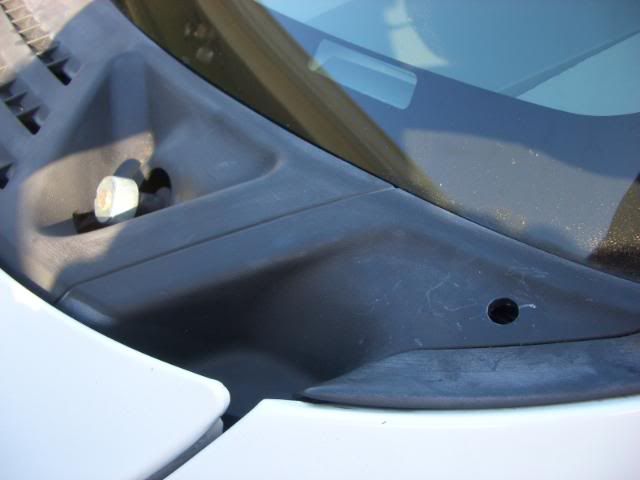
Then begin to finangle the driver side. You sort of have to push down on the part closest to the windsheild and then out. Once you figure it out it'll come loose. There's also 3 tabs on the engine side that need to be undone. Once it's loose remove the washer tubing. Then the washer nozles come out:
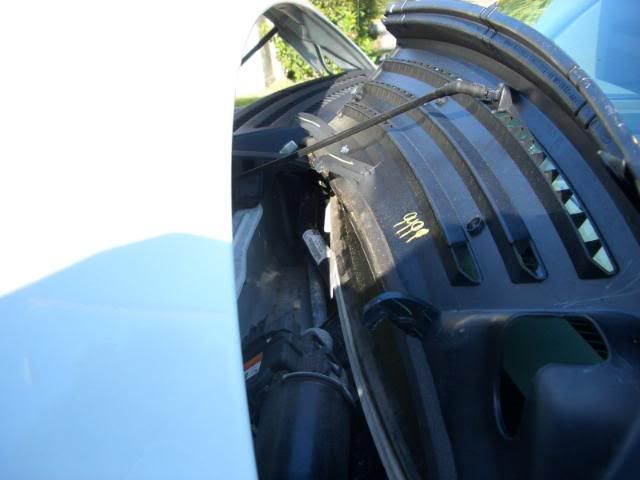
Then there is one screw holding the passenger side down. I think it was 9/32. Then do the same with the washer hose and pull the line through the hole in the cowl. Then both pieces should be free. If you have more parts than this, you screwed something up:

Then begin to finangle the driver side. You sort of have to push down on the part closest to the windsheild and then out. Once you figure it out it'll come loose. There's also 3 tabs on the engine side that need to be undone. Once it's loose remove the washer tubing. Then the washer nozles come out:
Then there is one screw holding the passenger side down. I think it was 9/32. Then do the same with the washer hose and pull the line through the hole in the cowl. Then both pieces should be free. If you have more parts than this, you screwed something up:
Last edited by tardman91; 04-28-2008 at 02:30 PM.


#4
04-26-2008, 01:11 PM
Join Date: Aug 2005
Location: New Port Richey, FL
Posts: 2,331
Likes: 0
Received 0 Likes
on
0 Posts
Next I cleaned everything really well. I sprayed down both pieces with Simple Green, scrubbed them, then rinsed them off and set them in the sun to dry:

After they were dry I used some rubbing alcohol to rub them down and make sure every last bit of grease/grime was off.
Then I painted them.
I used Krylon Fusion in gloss black and then some Krylon clear coat. Go very slow and do EXTREMELY thin layers at a time, wait a minute, then re-apply. Take your time. I was in a hurry and messed up a small part that I had to go back and fix.
Let it dry (only takes about 10 minutes) and then apply the clear in the same fashion.
Then let both pieces dry for about an hour so you don't screw anything up.
Then it's time to reinstall the colw, in the opposite order of the removal.
#5
04-26-2008, 01:12 PM

#6
04-26-2008, 01:12 PM
Join Date: Aug 2005
Location: New Port Richey, FL
Posts: 2,331
Likes: 0
Received 0 Likes
on
0 Posts
So here's the before:
And now the after:
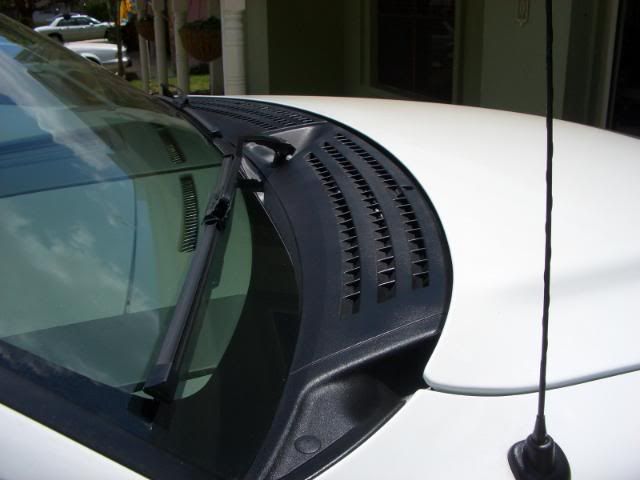
I used a small amount of the low-shine armor-all I had left. I'm extremely pleased with the results. The total cost of the project was $7.50, and the amount of work (not including drying time) was about 1.5 hours.
It's not exactly perfect, but it is leaps and bounds above what it was, and I'm very happy with it, especially the cost.

And now the after:
I used a small amount of the low-shine armor-all I had left. I'm extremely pleased with the results. The total cost of the project was $7.50, and the amount of work (not including drying time) was about 1.5 hours.
It's not exactly perfect, but it is leaps and bounds above what it was, and I'm very happy with it, especially the cost.
Last edited by tardman91; 04-26-2008 at 01:17 PM.
#7
04-26-2008, 01:53 PM

Looks good. I might just paint the extra cowl I have laying around. It's smooth instead of textured. I just couldn't decided if I wanted it gloss or not. But after seeing your's I think I'm going to go gloss.
Damn, the cowl that I have might be for an MY09. Sections of the bottom of your cowl doesn't match the one I have. In my work I usually get to see alot parts and pieces long before the they come out. Sometimes I get to keep the parts like the cowl that I have.
Damn, the cowl that I have might be for an MY09. Sections of the bottom of your cowl doesn't match the one I have. In my work I usually get to see alot parts and pieces long before the they come out. Sometimes I get to keep the parts like the cowl that I have.
Trending Topics
#8
04-26-2008, 02:04 PM

Senior Member
Join Date: Jan 2007
Location: North Carolina
Posts: 462
Likes: 0
Received 0 Likes
on
0 Posts


#10
04-26-2008, 03:15 PM

Senior Member
Join Date: Jun 2005
Location: Lemoore, California
Posts: 369
Likes: 0
Received 0 Likes
on
0 Posts

#12
04-26-2008, 04:25 PM
Join Date: Aug 2005
Location: New Port Richey, FL
Posts: 2,331
Likes: 0
Received 0 Likes
on
0 Posts
I'll have to keep you guys updated. I looked for a clearcoat with some UV protection, but I couldn't find any. I"m guessing it should hold up pretty well since everything that was pictured on the can is typically stuff that's left outside (patio chairs, playhouses, etc.)
#13
04-26-2008, 07:47 PM

Senior Member
Join Date: Oct 2007
Location: Anchorage, Alaska
Posts: 144
Likes: 0
Received 0 Likes
on
0 Posts
x2
and hey keith61760 check this picture out it will go with some of your gallery
http://s286.photobucket.com/albums/l...t=DSCN4034.jpg
sorry for high jacking your thread for as min
and hey keith61760 check this picture out it will go with some of your gallery
http://s286.photobucket.com/albums/l...t=DSCN4034.jpg
sorry for high jacking your thread for as min
#14
04-27-2008, 03:15 AM
Senior Member
Join Date: Jun 2005
Location: Lemoore, California
Posts: 369
Likes: 0
Received 0 Likes
on
0 Posts
x2
and hey keith61760 check this picture out it will go with some of your gallery
http://s286.photobucket.com/albums/l...t=DSCN4034.jpg
sorry for high jacking your thread for as min
and hey keith61760 check this picture out it will go with some of your gallery
http://s286.photobucket.com/albums/l...t=DSCN4034.jpg
sorry for high jacking your thread for as min
#15
04-28-2008, 08:52 AM
Join Date: Aug 2005
Location: New Port Richey, FL
Posts: 2,331
Likes: 0
Received 0 Likes
on
0 Posts
Still looks good after a couple of days. The pollen doesn't really stick to it as much as I thought it would (it's a little tackier than the original plastic finish). It's going to rain today, so we'll see how it goes.
The real test will be to see how it survives a nice hot, humid, Florida summer parked outside.
The real test will be to see how it survives a nice hot, humid, Florida summer parked outside.