DIY: How to Make Your Own Custom LED Tail Lights

Forum member FX4 Harley just posted a crafty, do it yourself fix for late model F150s and even vintage Broncos.
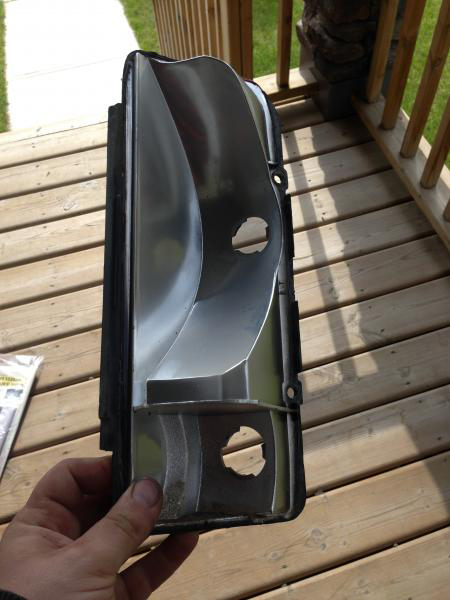
He recently bought some spare tail lights from a junkyard in order to create his own set of custom LED tail lights for his black beauty, a 1992 Nite F150, you can see above.
And judging from his post, the process can be done in three easy steps. Here’s what FX4 Harley recommends:
Step 1: Bake the lights in an oven at 200 degrees for 15 minutes. (Remember not to bake any cookies at the same time or else they might taste like plastic – just add them later and set a timer. – Ed)
After the bake, you can pull the lens off the housing. (FYI: Use some work gloves while handling the hot plastic.)

Step 2: Paint the housing black in order to give it a slightly tinted look, without actually tinting the lens. (A light dusting of flat black spray paint should do the trick. Also, use rubber gloves if you don’t want to paint your nails black, which by the way FX4 Harley rocks very well.)
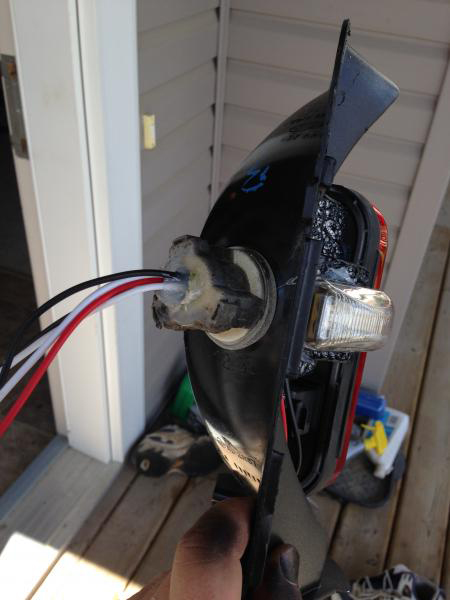
“I installed some trailer LED lights. These are the simplest things I could find. It would look nice with a more square LED light, but the results turned out ok,” he explains.
He then cut a piece of foam and glued it in for support. After that he drilled through a spare bulb plug in order to run the wires.
Step 3: Sand the lens with 2000 grit sandpaper and polish with polishing compound. Re-install the lens with silicon and fill all wire holes and gaps with silicon.
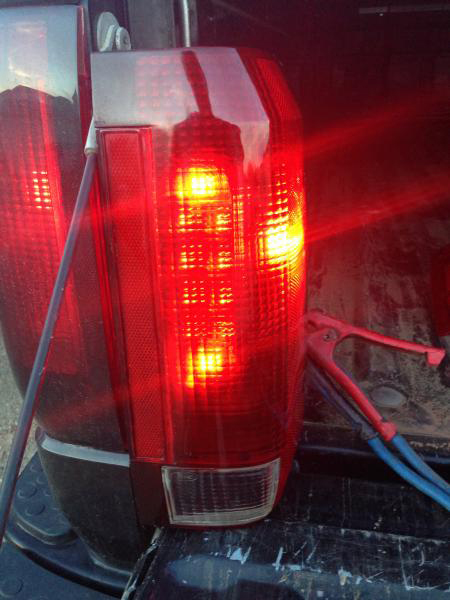
Let there be LED light! Now you can admire finished product and enjoy some cookies too.
Check out the complete thread and more photos here.