Changed out Ball Joints (pics)
#1
 02-29-2008, 08:41 AM


Join Date: Dec 2004
Location: Lake in the Hills,IL
Posts: 382
Likes: 0
Received 0 Likes
on
0 Posts
Changed out Ball Joints (pics)
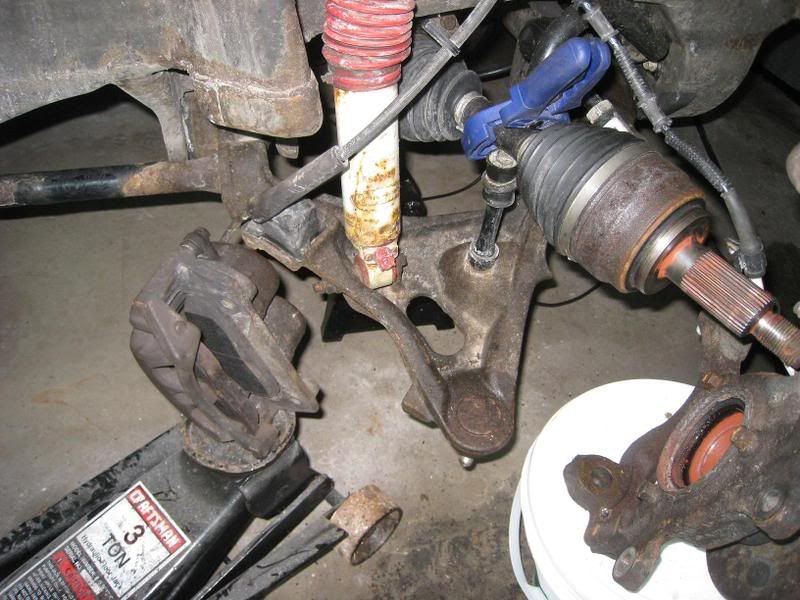
I could write a more descriptive How-To if there was interest for it, but wanted to show some pics from the ball joint replacement I did yesterday. Replaced the upper and lower's with MOOG ball joints. The upper comes pre-pressed in a brand new control arm. Actually seems to be "beefier" than the stock one
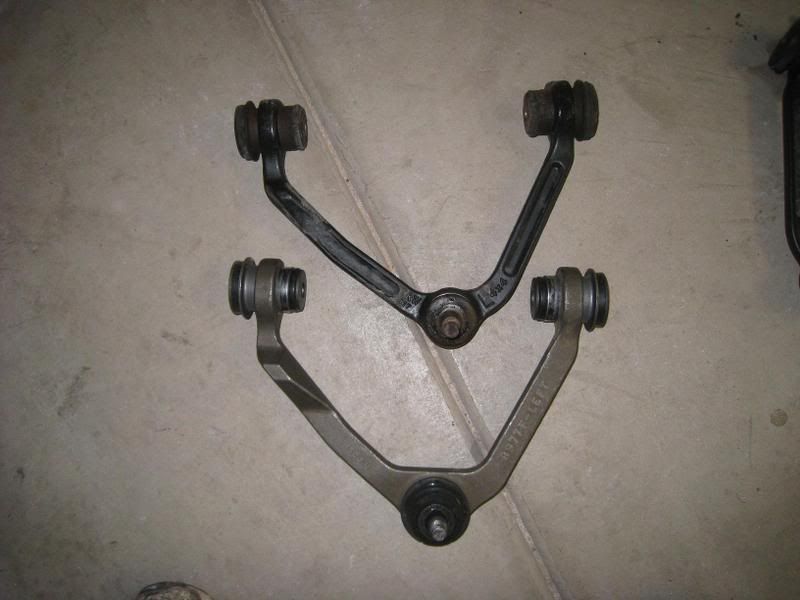
Old vs. New bushings
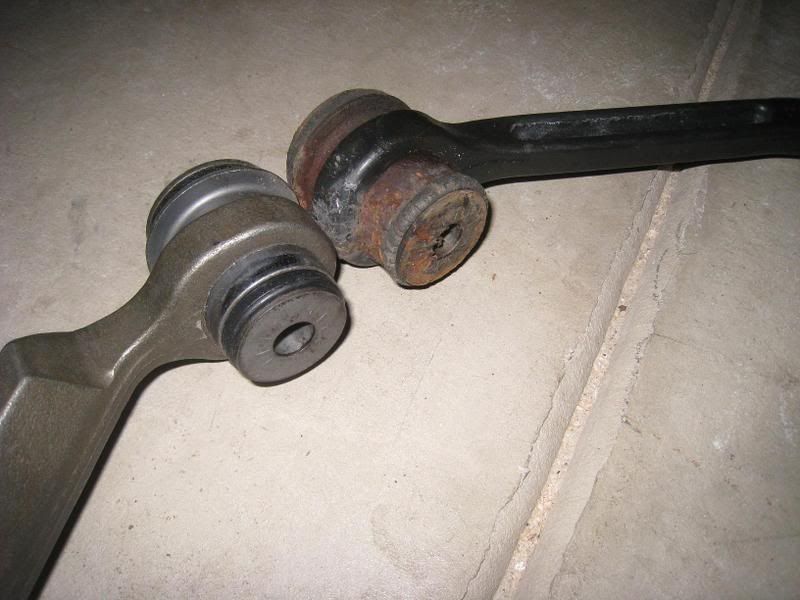
Old:
New, with grease fitting in place
Old vs. New bushings
Old:
New, with grease fitting in place
#2
02-29-2008, 10:47 AM

Senior Member
 Those are some sweet looking control arms you`ve got there, that makes me wish I had replaced my old ones when I had mine tore down but, oh well its a little late now

#3
02-29-2008, 11:45 AM

Member
Join Date: Aug 2006
Location: Ventura SoCal
Posts: 39
Likes: 0
Received 0 Likes
on
0 Posts
Originally Posted by R1Jester
I could write a more descriptive How-To if there was interest for it, but wanted to show some pics from the ball joint replacement I did yesterday. Replaced the upper and lower's with MOOG ball joints. The upper comes pre-pressed in a brand new control arm. Actually seems to be "beefier" than the stock one


#7
02-29-2008, 10:06 PM

Senior Member
Join Date: Jan 2007
Location: Alex Bay, NY
Posts: 978
Likes: 0
Received 0 Likes
on
0 Posts
Trending Topics

#9
03-01-2008, 10:39 PM
Join Date: Dec 2004
Location: Lake in the Hills,IL
Posts: 382
Likes: 0
Received 0 Likes
on
0 Posts
Hey guys....got the ball joints from Summit. Upper and lower Moog's. I'm awaiting my new tires, which should be here in the next day or two, then I will get an alignement done. I'll try to post up a better tutorial tomorrow. In all honesty the first one took me about 4-5x times as long as the second one did! I think I finished the second side in about an hour. Once I had the tools all out and ready to go, it was a breeze. Some quick things that I can think of:
-I froze the lowers for a few hours before hand
-Uppers are side specific(make sure you order drivers side and passengers side)
-Grab some new cotter pins, they come with the ball joints, but you'll need them for the axle nut
-I was able to change mine without removing the tie rods
-The ball joint tool was needed for the lowers, uppers are all ready pressed in
-Pneumatic tools helped quite a bit
-Torque wrench
-Various sockets from 8mm all the way up to 36mm (the 36 was a bit big for the axle nut, but it was all I had)
-Zip ties to hold the caliper up and to hold the axle out of the way
-Grease gun with axle grease, the ball joints come pre-greased but they can use some more
If you have a pretty good mechanical apptitude and some patience you should be able to handle this on your own. I had read through my Haynes manual and a tech article that was posted by another guy on a different forum, just as reference. Basically so I knew what I was getting into. Once you take your time on the first side, you'll learn what needs to be done in what order. I did things like this.
1.Remove cotter pins from axle nut, upper and lower ball joints.
2. Loosen the axle nut
3. Loosen the upper and lower ball joint castle nuts, but do not remove at this time.
4.Mark the washers and bolt placement on the frame for the UCA. Loosen the UCA bolts at the frame, remove from frame
5.A few good whacks with a hammer and it popped right out. ( I should mention that the night before I hosed everything down with some WD-40.
6.Very light tap with hammer on axle face, to help unseat it, it should be able to move by just pushing it after that.
7. Remove the castle nut from the lower ball joint.
8. A few more good whacks on top of the steering knuckle and it will drop right off, so be ready for it.
9. It's a bit of juggling act but you can manuever the axle out with out removing the tie rod, it's tight, but possible
10. Removing the lower ball joint can be tricky. I used a hammer and a piece of solid steel smaller than the ball joint face. It dropped out after about 5 hits.
11. Reverse order time now, replace the lower ball joint using the correct tool, a ball joint press. This made very short work of a otherwise seemingly impossible task
12. Juggling act again, insert the axle back into the knuckle while getting the lower ball joint threads through the bottom, finger tighten the nut.
13. Place the UCA arm ball joint in the top of the knuckle and finger tighten the nut the align the bushings at the top of the arm and push them into the frame where the old ones were.
14.At this point I replaced the axle nut, hand tight and torqued down on the ball joint castle nuts, and inserted new cotter pins.
*The trick to the castle nuts is to get them tight to where there is some resistance, then move them in small increments until the holes line up. DO not tighten a castle nut and then back it off
15.I hand tightened the UCA bolts in the original spot and then replaced all the brake hardware and put the tire back on.
16. I lowerd the truck until the tire just had enough pressure on the tire, and I torqued the axle nut to the correct spot and placed a new cotter pin in.
17. I also torqued the UCA bolts at this time, triple checking to make sure they were in the right spot.
The whole time I worked on the truck I had two sperate stationary jacks and the hydraulic jack underneath the truck, can't take chances when you are pushing and pulling on some tough bolts. If you guys have any questions, let me know I'd be glad to help out and take some more pictures if needed!
Last edited by R1Jester; 03-02-2008 at 04:24 PM.
#10
03-11-2008, 02:22 PM

Member
Join Date: Nov 2007
Location: Illinois
Posts: 88
Likes: 0
Received 0 Likes
on
0 Posts

#12
03-11-2008, 02:39 PM
Member
Join Date: Nov 2007
Location: Illinois
Posts: 88
Likes: 0
Received 0 Likes
on
0 Posts
#13
03-11-2008, 03:10 PM
Join Date: Dec 2004
Location: Lake in the Hills,IL
Posts: 382
Likes: 0
Received 0 Likes
on
0 Posts
Originally Posted by Skyblaster7
Relatively close. Champaign, IL.
Tom
#14
03-11-2008, 03:28 PM
Member
Join Date: Nov 2007
Location: Illinois
Posts: 88
Likes: 0
Received 0 Likes
on
0 Posts
#15
03-11-2008, 03:35 PM
Member
Join Date: Nov 2007
Location: Illinois
Posts: 88
Likes: 0
Received 0 Likes
on
0 Posts

