My install experience - long writeup
#1
 10-29-2010, 01:17 PM


Join Date: Oct 2010
Location: Austin, Tx
Posts: 327
Likes: 0
Received 0 Likes
on
0 Posts
My install experience - long writeup
Preface ()
{
I would like to thank mSaLL150, brn2ryd, Sundevil2188, F 1Fiddy, Stormsearch, and all the others that provide sage advice in this forum. Without ya'll this would have never been possible without breaking a lot of stuff.
}
This last weekend I installed a new audio system in my 2010 SCREW. I am about 95% done with a little cleanup work left. I need to carpet (might use leather) the amp board, move over the hole where the RCAs exit the LC6i, install the correct 4 channel amp, reroute a cable bundle on the driver's side of the amp rack, and wait for the sub and box to be delivered.
Please keep in mind I haven't done any car audio work in over 10 years and I am sure there are easier and better ways to do what I did.
The reason for the Kicker amps is because I have a friend who is a master distributor of Kicker. He was getting me some pretty good deals and sometimes price vs. performance is what matters. This was done on what I consider a budget.
Anyway, here is a little record of the work I did.
Day 1 = Thursday 10pm - Friday 4am
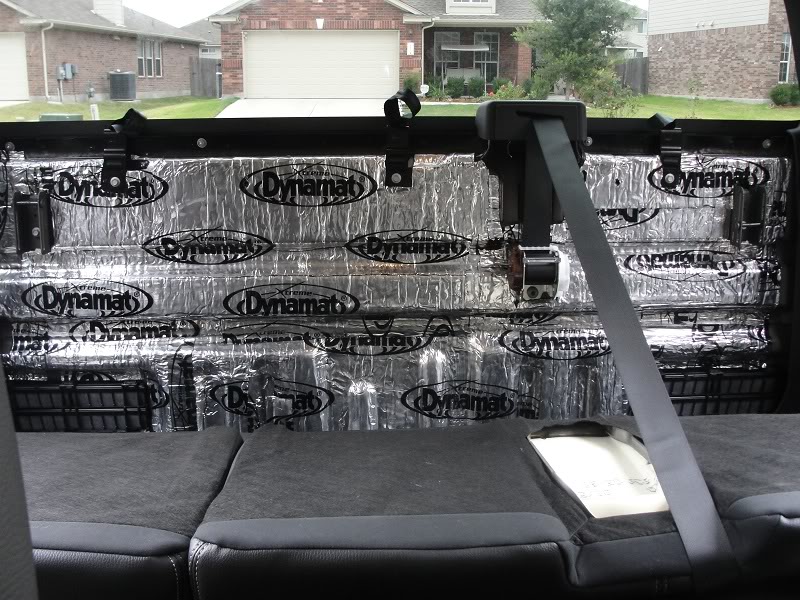
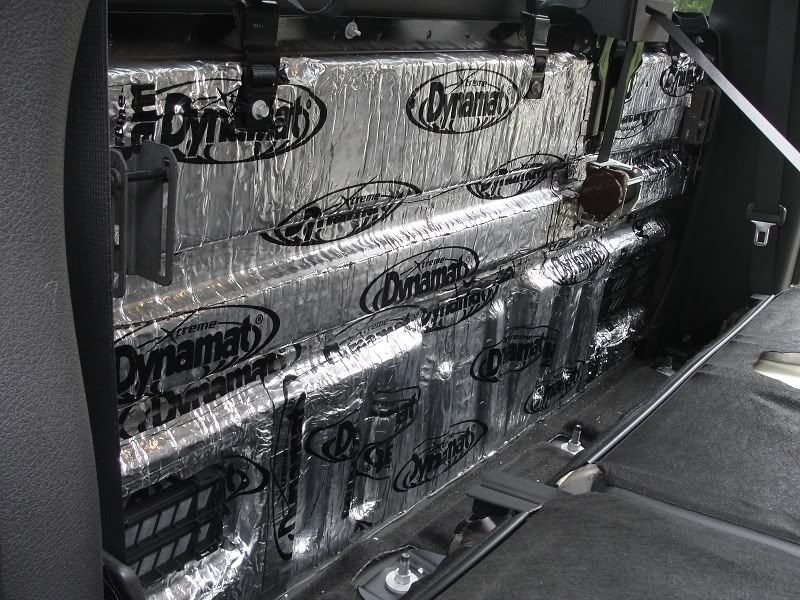
1) Installed Dynamat on rear deck.
Lots of blood loss on this one. That Dynamat edge can be very sharp.
As a side note, I didn't have a mat roller and ended up using a Corona beer bottle instead. This actually worked out very well. I had both the small neck and larger bottom to get in all the rounded areas.
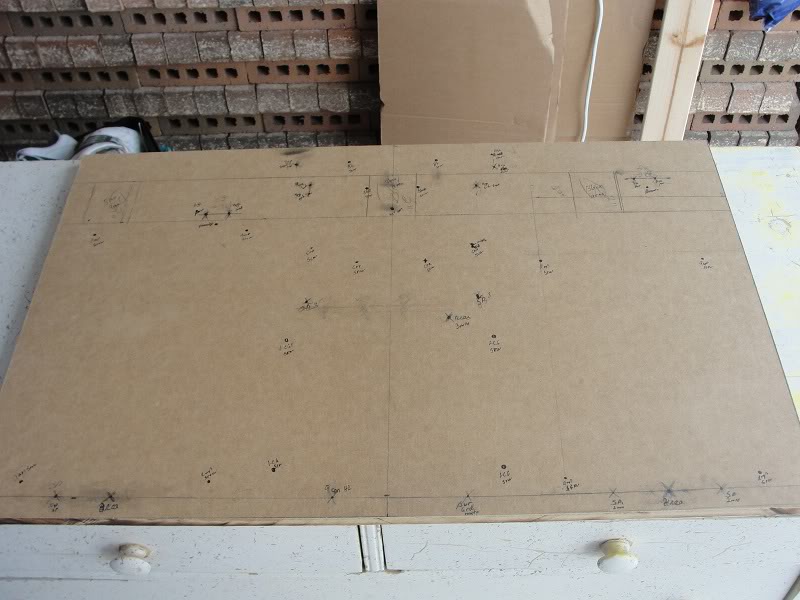
2) Began work on laying out amp rack.
Was waiting on the front comps to be delivered on Friday so didn't have the crossovers for the final layout. I should have gone to sleep but was too excited.
Day 2 = Friday 10am - Saturday 5am
This is where all the major work happened long with multiple trips back and forth to HomeDepot and Lowes.
I used the following write-up as my guide for most of this days work.
https://www.f150online.com/forums/2009-2011-f-150/400492-my-speaker-upgrade-using-factory-head-unit.html
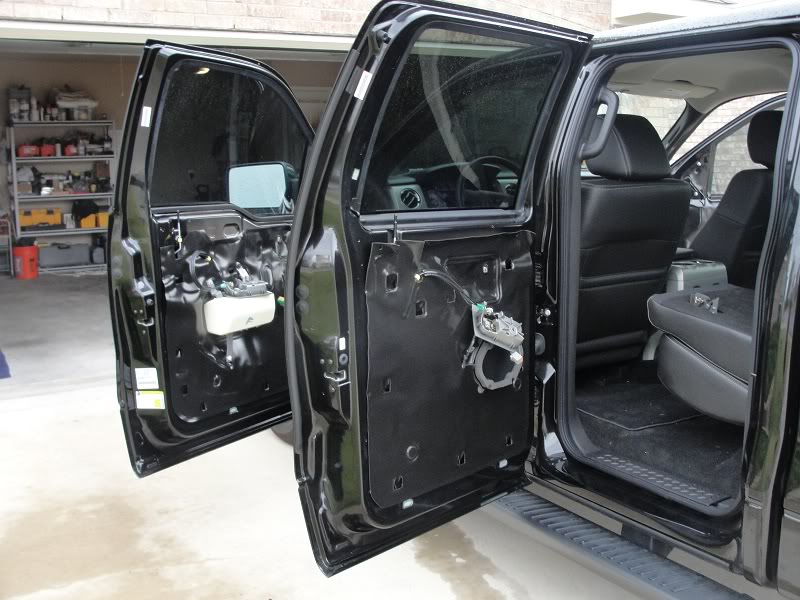
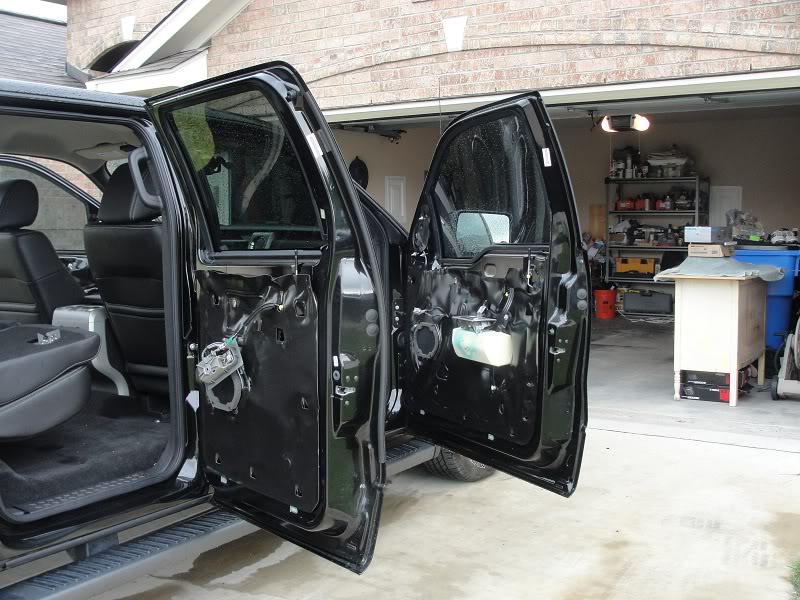
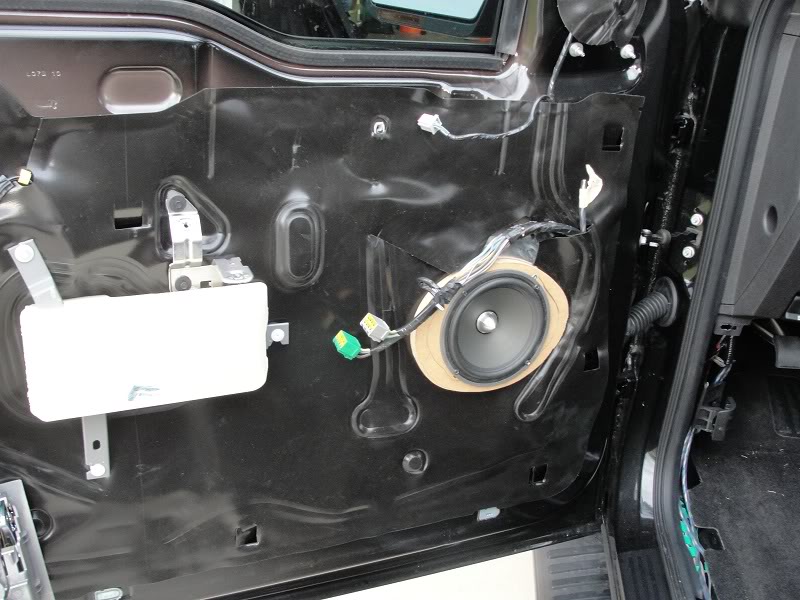
1) Disassembled doors, sills, kick panels, pillar covers between front and rear doors.
2) Removed factory junk speakers.
There was some blood loss here when I was trying to zip tie the factory speaker harnesses out of the way. The door sheet metal is a little sharp around the inside of those speaker holes.
3) Run new speaker wire
Ran new speaker wire to all doors with two pulls each to the front doors for the comps. I was lucky in that I had pass through boots and not the Molex connectors. However that did not make it any easier to get that sheathed cable through. I ended up using a fish to work nylon string in and then used the string to pull my cables. mSaLL150 had a much better solution "I dealt with the boots by scrunching them together and pushing the wire through. A little muscle and you're good". I figure if I had done that it would have saved me a good hour or more.
https://www.f150online.com/forums/sp...aker-wire.html
4) Make speaker adapters
UPS man showed up. I now have my Focal 165VR comps along with my power/ground wire. Made my speaker adapter plates using 1/2 MDF.
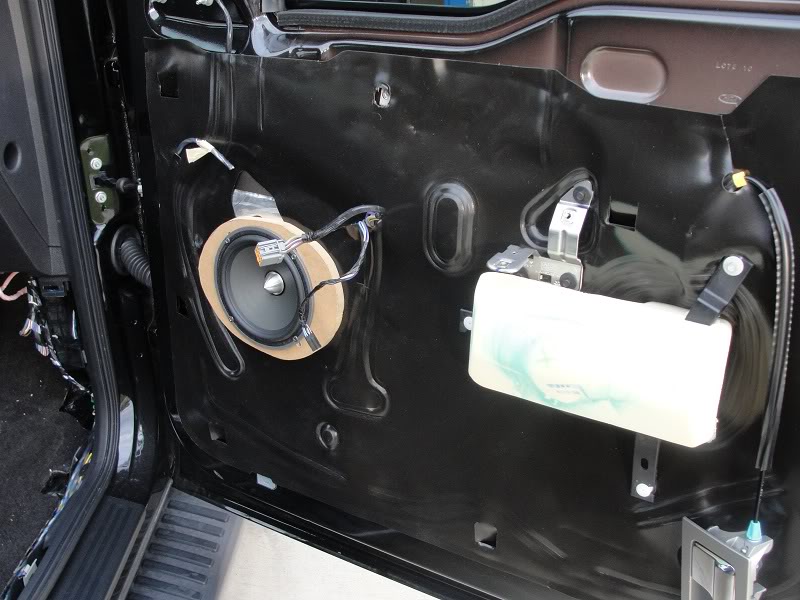
5) Install Dynamat around speaker cutouts.
Pulled back vapor barrier in doors and installed 12x12 Dynamat around speaker hole. I took the 6x8 cutout and attached to inside door skin just so I wouldn't be wasteful.
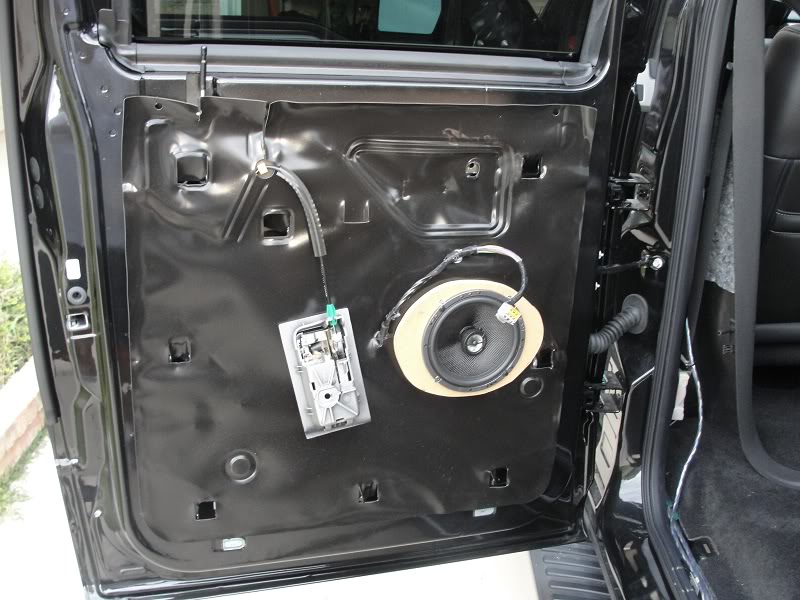
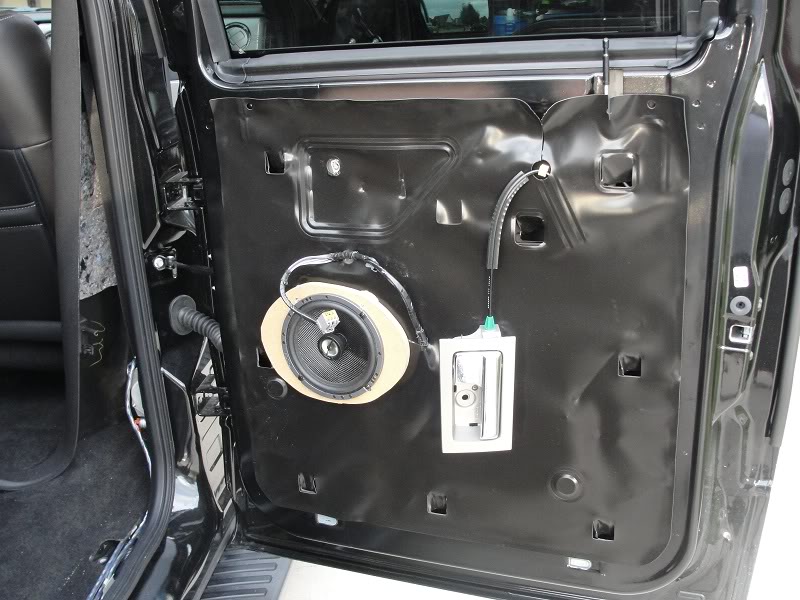
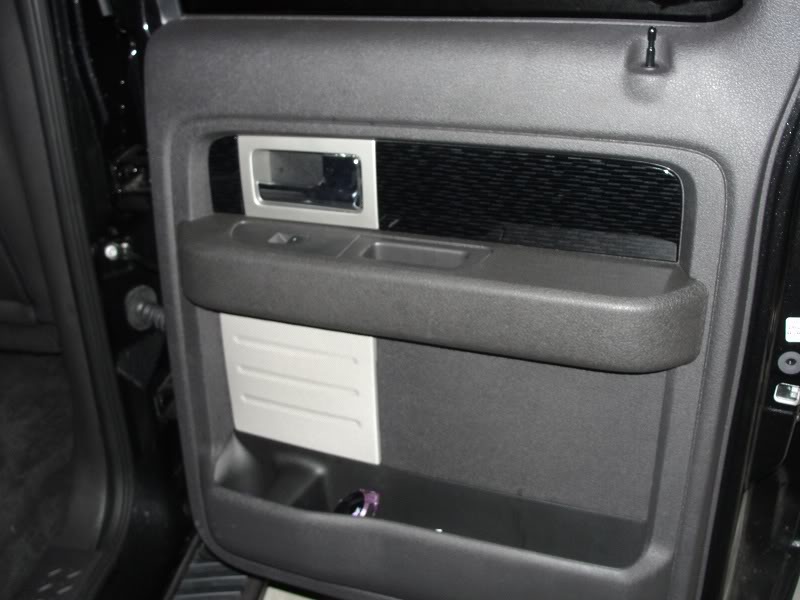
6) Install 6.5 speakers in all doors.
I didn't quite have the adapter plates perfect. On the back doors the bottom left speaker screw was hitting metal. Dremel and a cutoff wheel made short work of that.
7) Cut out door speaker opening
Dremel and utlity knife made short work of this. I wanted to open up the plastic in the doors to make sure there was plenty of clearance.
8) Run 4awg power wire into the cab.
I again was lucky and had a factory grommet right below the ECU on the passenger side of the engine bay. But just like the dang front door boots I had problems fishing the cable.
I first removed the glove box, really easy with only three screws holding it in. I then was able to get my fish wire from the engine bay to inside the cab behind the now empty glove box area. My problem was getting the power wire back through to the engine bay. I must have tried 10 times before I finally got it.
9) Mounted inline fuse in the engine bay.
I did not attach to battery yet. That is the last thing on my list.
10) Get remote power lead ran
I put an add-a-fuse in fuse 41 in the passenger kick fuse box for the remote turn on. The actually fuse box needed a little modification, couple snips with wire cutters did the trick, to make it fit around the add-a-fuse. Ran the remote turn on wire as close to the factory radio as I could.
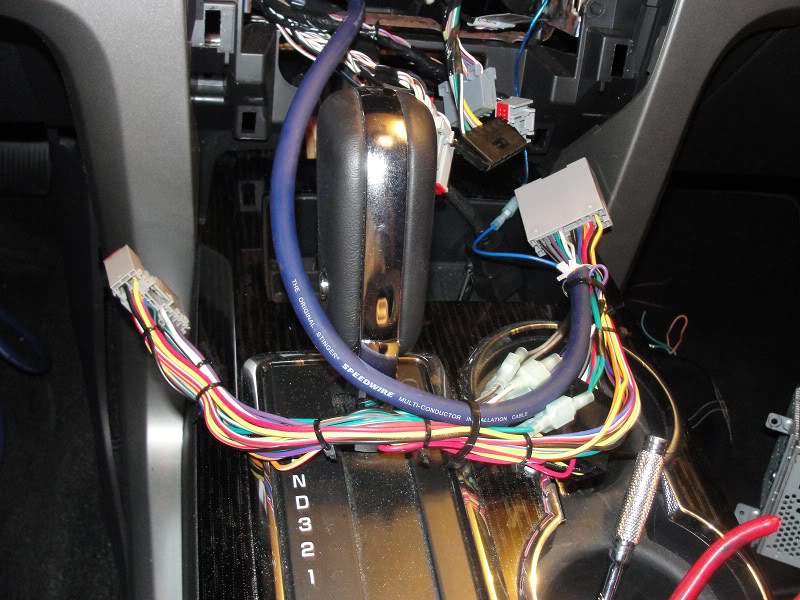
11) Tap into factory HU
Removed the factory stereo and put the Metra BT-5520 harness in place.
I pulled out the 4 extra wires that connected the two black BT connectors and the rest was plug and play. I cut the 8 speaker wires coming out of the Metra factory side and connected the 9 conductor. I used the 9th wire in the 9 conductor for the remote turn on. The nice thing with this 9 conductor wire is the remote turn on was semi shielded. In the end it works perfectly.
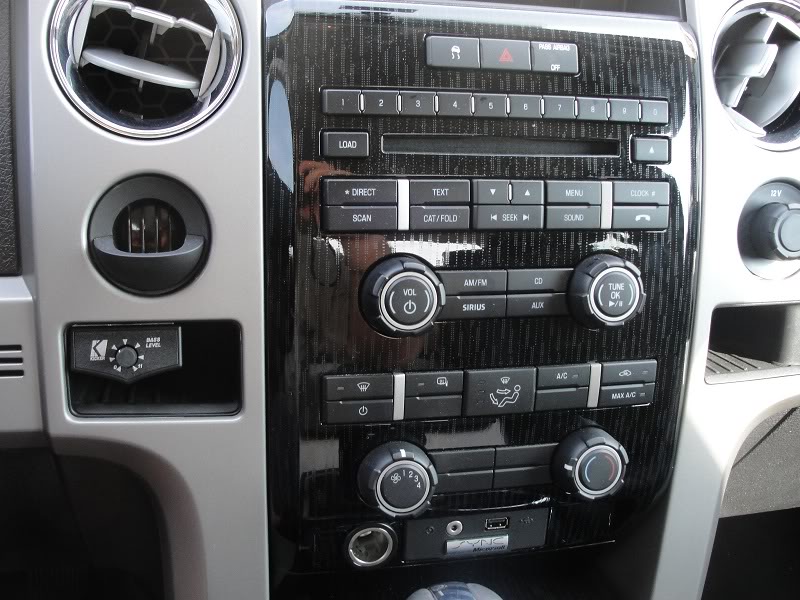
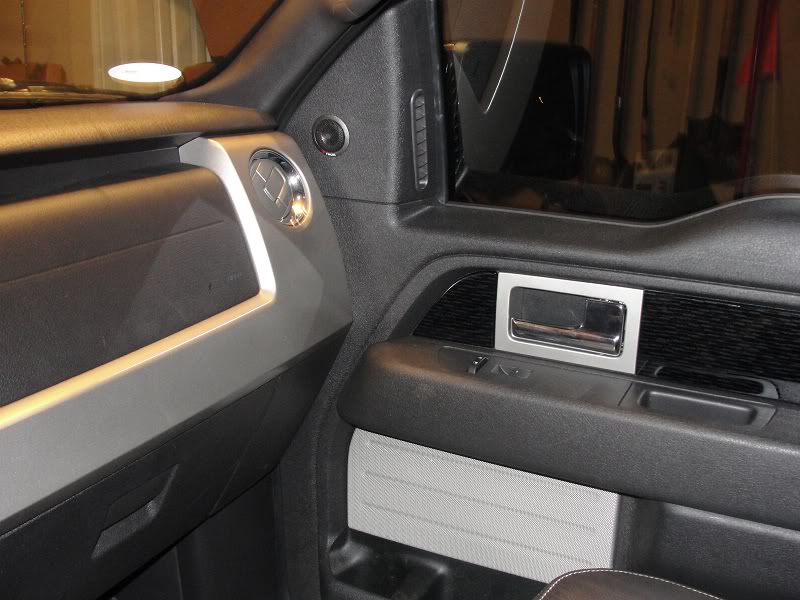
12) Install bass remote
I removed the little pocket to the right of the steering wheel and use the Dremel to cut a little slot. I ran the phone line for the bass control. I then mounted the bass control with heavy duty double sided tape.
I am not sure if this bass **** is the right thing to do. I just read that what I want is a gain and not DB boost. We will see in a few days when the sub arrives.
13) Run HU cables to back
I then ran the 9 conductor cable and phone line along the main harness under the steering wheel down the left kick and into the sill channel. The main harness was easy. Remove one plastic cover, 3 screws, and then the metal support piece with its 4 screws and then start zip tying away.
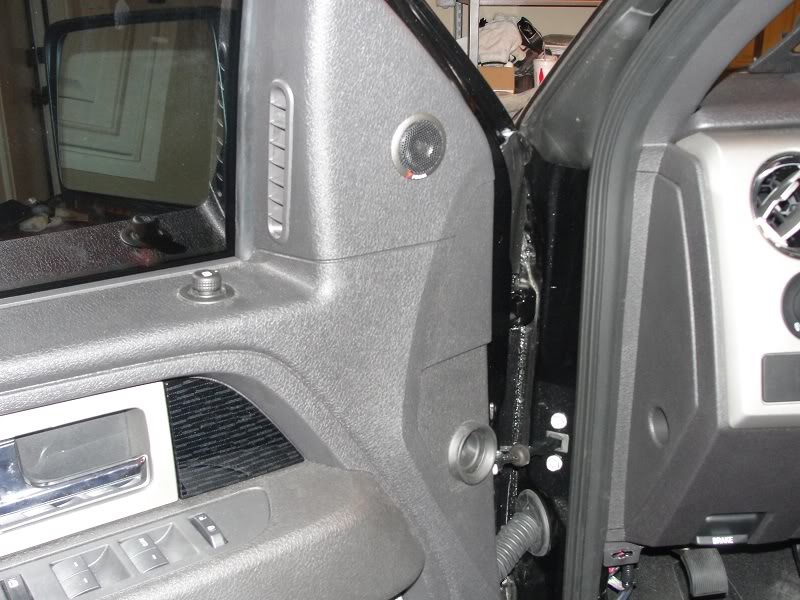
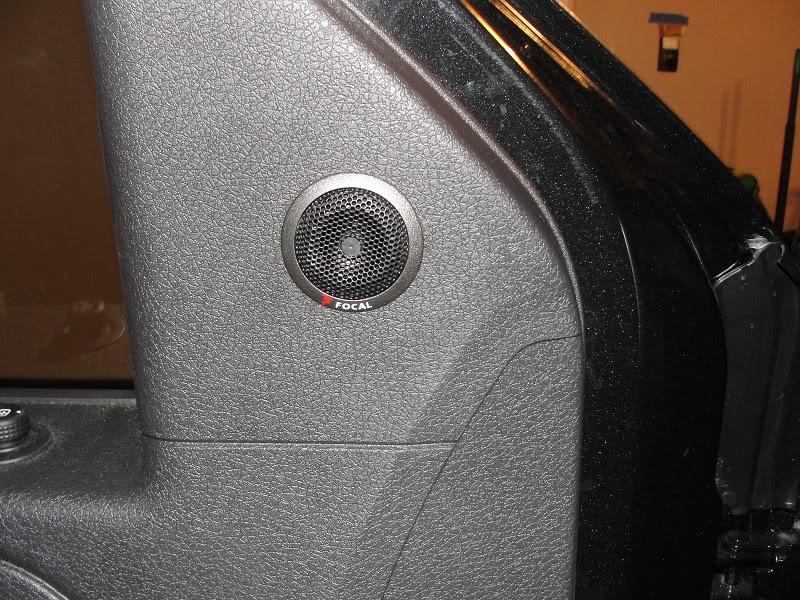
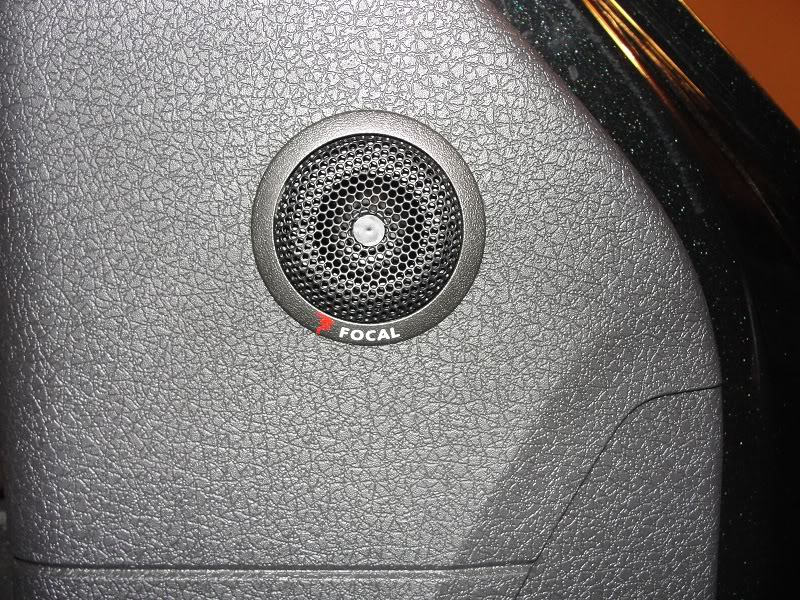
14) Install tweeter in door sails
This is where I got nervous. I must have backed off 5 or 6 times before I actually started to drill. I taped the entire door sail with blue tape and made triple sure I had it right. The crazy thing is the install instructions said make a 45mm cut out. Well neither HomeDepot or Lowes has a 45mm hole saw. I ended up using a 44mm and a very deft hand with the Dremel to finish it off.
I have the tweeters pointed at each other and a little down. Nothing I could really do with the alignment. It was dictated by the slope of the sails. And the location of the tweets was determined by the vents.
15) Install door panels and button up interior
The back doors were a breeze. The front's definitely come off easier than they go on. I had to mess and fiddle with the door lock to get it in the hole. Believe me, at 4am this is not something you want to get frustrated with.
16) I did a test wiring off the head unit and everything worked. Yaaa. Now time for bed.
Day 3 = Saturday 11am - Sunday 1am
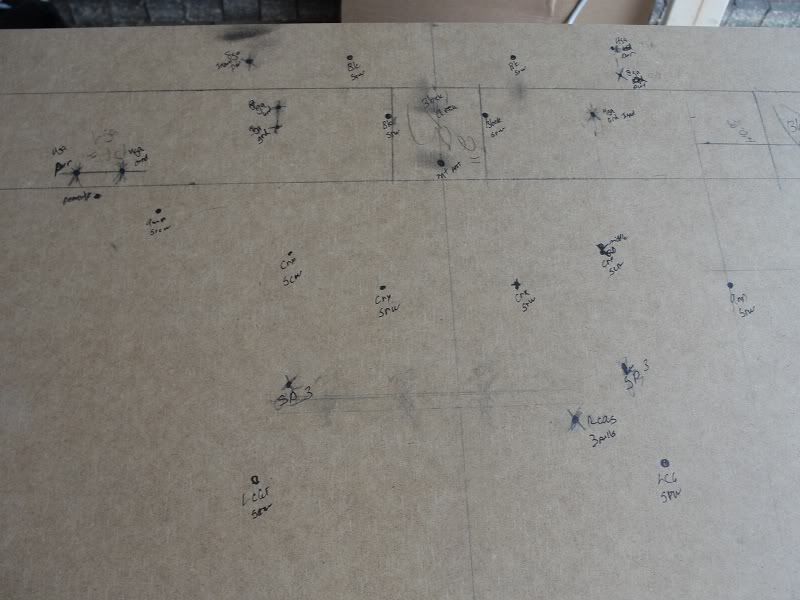
1) Finished amp board layout.
I layed all the parts out and measured to within 1/32". Predrilled all my holes and cut holes for all cables.
I was not expecting those Focal crossovers to be as big as they were. Had to make a few adjustments to my original layout. I wanted to stack them on top of each other or run then vertical. Only way to make them fit was angle them out. I think it looks ok but I am not an expert.
2) Trim the back panel felt
I wanted to leave that back panel alone and just mount on top of it but it was just too tall. Took a utility knife to it and cut it up. I tried to just cut the high spots out but I think when I clean everything up I am going to cut even more. I have not noticing any increase in noise when driving.
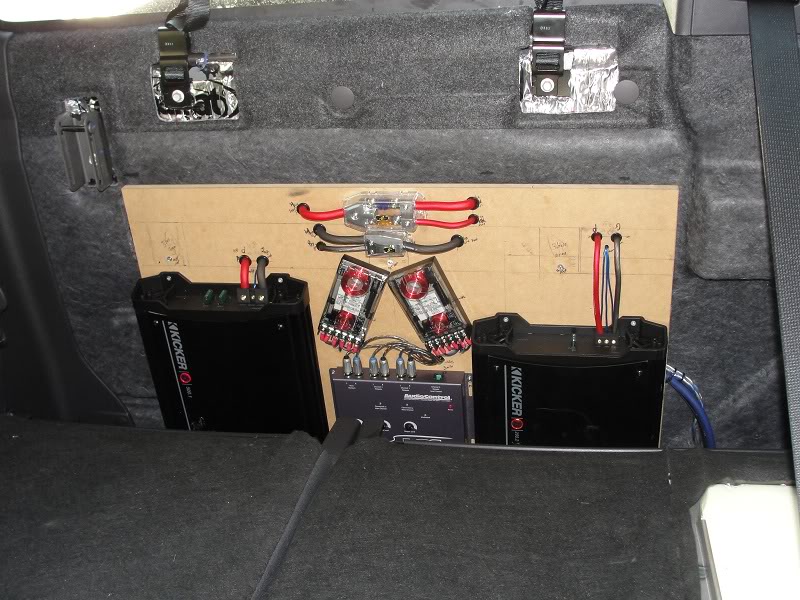
3) Mount everything on amp board
Everything mounted perfectly. I ran all cables behind and made 1/2 standoffs at the top so all power cables would pass the back deck mount points.
4) Deal with rear vents
This is one that I had to research long and hard. I drove the truck around without the back panel in place and it was loud. Those vents are crazy. I read that covering them is not good and removing them is even worse. I did happen to stumble along a post that said to cover them with AC filter and that is what I did. I took a .56 cent household AC filter and doubled it up. I covered the vent using foil tape and then put the back panel back in place.
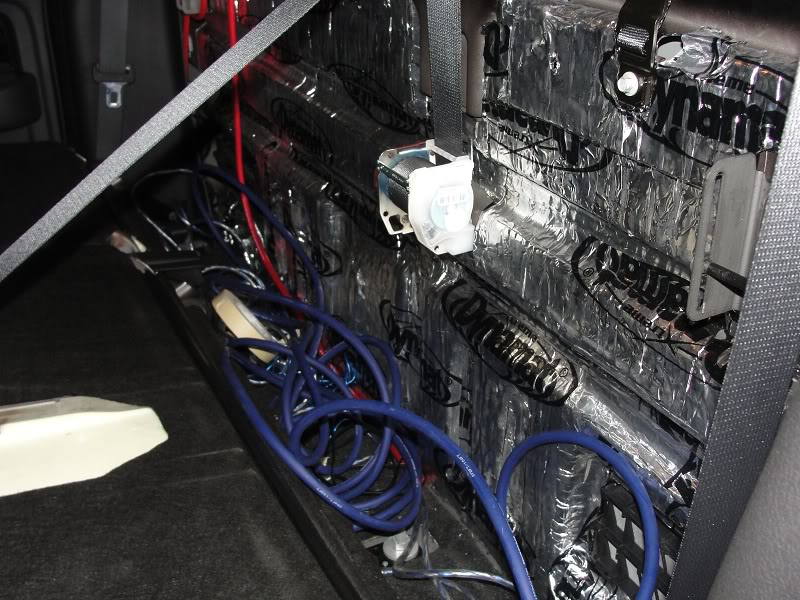
5) Wire up amp board in truck
This was a real chore for me and again a little more blood loss on this on. Read about bolt below.
Took completed amp rack to the back of the truck and started wiring it up.
At this point is when I wish I had taken out the back seat. Also, that second seat bolt from the left is freakishly long. When I pull everything out to clean it up that sucker is getting cut and I mean cut deep.
At this point I only had a 2 channel amp for the front, waiting on the 4 channel, and I ended up making jumper cables for the rear fill. Jumps from the 9 conductor to the speaker runs to the rears. My plan is to run them off the 4 channel but for now they are off the HU.
Because it was just me and I was a little worn out. I was having problems getting the amp rack into the right spot on the back wall. I ended up mounting it about 2 inches to low. It will be corrected but it did happen. The seats closed so I wasn't worried about it.
6) Grounding the system
I was going to use one of the seat bolts for my ground but I heard conflicting comments on whether that was appropriate or not. I ended up grounding to the Torx 45 bolt that holds the rear seat belt mechanism to the back panel. At this point it seems to have worked out really well. I have no whine or noise at all.
7) Connect power to battery
This was anticlimactic. Just wired it up and nothing blew or caught fire.
8) It's alive
I did make a few mistakes. I accidentally wired output 1 from the LC6i to the sub amp. No sound at all. I had to disassemble the back to correct. I had everything routed and zip tied tight on the back of the amp rack. In the end all that work I had done routing cables behind the amp board got cut to fix clearance and routing issues. It will be corrected when I cover the board.
In the end was it worth all the work "39 hours in 3 days", lack of sleep, and blood loss?
Heck yes it was. It sounds great and will be even better with the additional of some low end. I also like having the feeling of doing something myself knowing it was done the way I wanted.
Here is my list of major components. This list has been revised again.
Amplifiers
Sundown SAZ-1000D = Sub amp (1 ohm)
Clarion XH5410 = 4 channel amp for fronts and rear fill
Sundown sub gain ****
Kicker ZX500.1 = Sub amp "Replaced"
Kicker ZXRC = Bass remote "Replaced"
Kicker ZX200.2 = 2 channel for front stage "Replaced"
OEM Control
AudioControl LC6i = sound processor
Front and Rear fill speakers
Focal 165VR = Front Components
Focal 165CA1 = Rear fills
Subwoofers
Stereo Integrity BM MKIII X2
single Image Dynamics ID10D4 "Replaced"
Sub enclosure
Custom "aka" homemade
Supercrews single 10 sub box"Replaced"
Sound deadening
Dynamat Extreme Wedge packs 10425 x3 = rear wall
Dynamat Extreme Shop Pack 20410 = around door speakers
Distro/fuses/wiring/cable
Stinger SHD20 = Ground Distribution Block
Stinger SHD820 = Power Distribution Block
Stinger SHD801 = Inline fuse block
Stinger 60amp MIDI fuse
Stinger 80amp MIDI fuse
Stinger 150amp MIDI fuse
Metra BT-5520 = factory wiring harness
Kicker ZI21 = RCA interconnects x1
Kicker ZI22 = RCA interconnects x2
Stinger 9 conductor speed wire = 20ft
Stinger Stinger SGW516BC 16ga= 2x 50ft plus an addition 10ft
Stinger Stinger SHW510BC 10ga = 10ft
KnuKonceptz 4awg red = 18ft
KnuKonceptz 4awg black = 8ft
KnuKonceptz 8awg red = 3ft
KnuKonceptz 8awg black = 3ft
Here are some picks of my install


{
I would like to thank mSaLL150, brn2ryd, Sundevil2188, F 1Fiddy, Stormsearch, and all the others that provide sage advice in this forum. Without ya'll this would have never been possible without breaking a lot of stuff.
}
This last weekend I installed a new audio system in my 2010 SCREW. I am about 95% done with a little cleanup work left. I need to carpet (might use leather) the amp board, move over the hole where the RCAs exit the LC6i, install the correct 4 channel amp, reroute a cable bundle on the driver's side of the amp rack, and wait for the sub and box to be delivered.
Please keep in mind I haven't done any car audio work in over 10 years and I am sure there are easier and better ways to do what I did.
The reason for the Kicker amps is because I have a friend who is a master distributor of Kicker. He was getting me some pretty good deals and sometimes price vs. performance is what matters. This was done on what I consider a budget.
Anyway, here is a little record of the work I did.
Day 1 = Thursday 10pm - Friday 4am
1) Installed Dynamat on rear deck.
Lots of blood loss on this one. That Dynamat edge can be very sharp.
As a side note, I didn't have a mat roller and ended up using a Corona beer bottle instead. This actually worked out very well. I had both the small neck and larger bottom to get in all the rounded areas.
2) Began work on laying out amp rack.
Was waiting on the front comps to be delivered on Friday so didn't have the crossovers for the final layout. I should have gone to sleep but was too excited.
Day 2 = Friday 10am - Saturday 5am
This is where all the major work happened long with multiple trips back and forth to HomeDepot and Lowes.
I used the following write-up as my guide for most of this days work.
https://www.f150online.com/forums/2009-2011-f-150/400492-my-speaker-upgrade-using-factory-head-unit.html
1) Disassembled doors, sills, kick panels, pillar covers between front and rear doors.
2) Removed factory junk speakers.
There was some blood loss here when I was trying to zip tie the factory speaker harnesses out of the way. The door sheet metal is a little sharp around the inside of those speaker holes.
3) Run new speaker wire
Ran new speaker wire to all doors with two pulls each to the front doors for the comps. I was lucky in that I had pass through boots and not the Molex connectors. However that did not make it any easier to get that sheathed cable through. I ended up using a fish to work nylon string in and then used the string to pull my cables. mSaLL150 had a much better solution "I dealt with the boots by scrunching them together and pushing the wire through. A little muscle and you're good". I figure if I had done that it would have saved me a good hour or more.
https://www.f150online.com/forums/sp...aker-wire.html
4) Make speaker adapters
UPS man showed up. I now have my Focal 165VR comps along with my power/ground wire. Made my speaker adapter plates using 1/2 MDF.
5) Install Dynamat around speaker cutouts.
Pulled back vapor barrier in doors and installed 12x12 Dynamat around speaker hole. I took the 6x8 cutout and attached to inside door skin just so I wouldn't be wasteful.
6) Install 6.5 speakers in all doors.
I didn't quite have the adapter plates perfect. On the back doors the bottom left speaker screw was hitting metal. Dremel and a cutoff wheel made short work of that.
7) Cut out door speaker opening
Dremel and utlity knife made short work of this. I wanted to open up the plastic in the doors to make sure there was plenty of clearance.
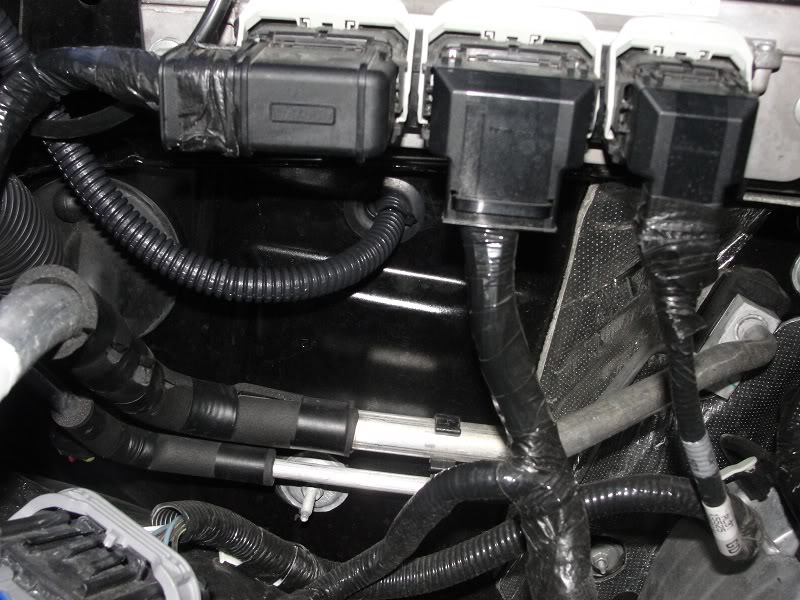
8) Run 4awg power wire into the cab.
I again was lucky and had a factory grommet right below the ECU on the passenger side of the engine bay. But just like the dang front door boots I had problems fishing the cable.
I first removed the glove box, really easy with only three screws holding it in. I then was able to get my fish wire from the engine bay to inside the cab behind the now empty glove box area. My problem was getting the power wire back through to the engine bay. I must have tried 10 times before I finally got it.
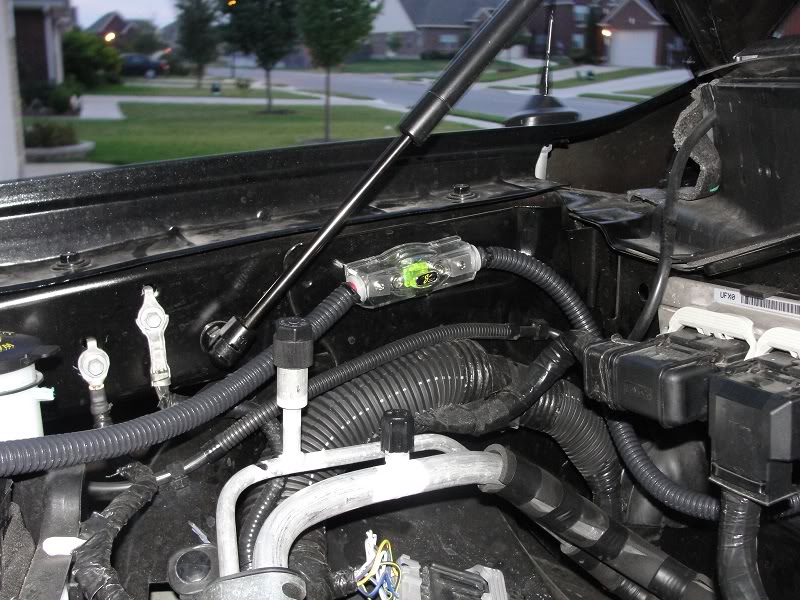
9) Mounted inline fuse in the engine bay.
I did not attach to battery yet. That is the last thing on my list.
10) Get remote power lead ran
I put an add-a-fuse in fuse 41 in the passenger kick fuse box for the remote turn on. The actually fuse box needed a little modification, couple snips with wire cutters did the trick, to make it fit around the add-a-fuse. Ran the remote turn on wire as close to the factory radio as I could.
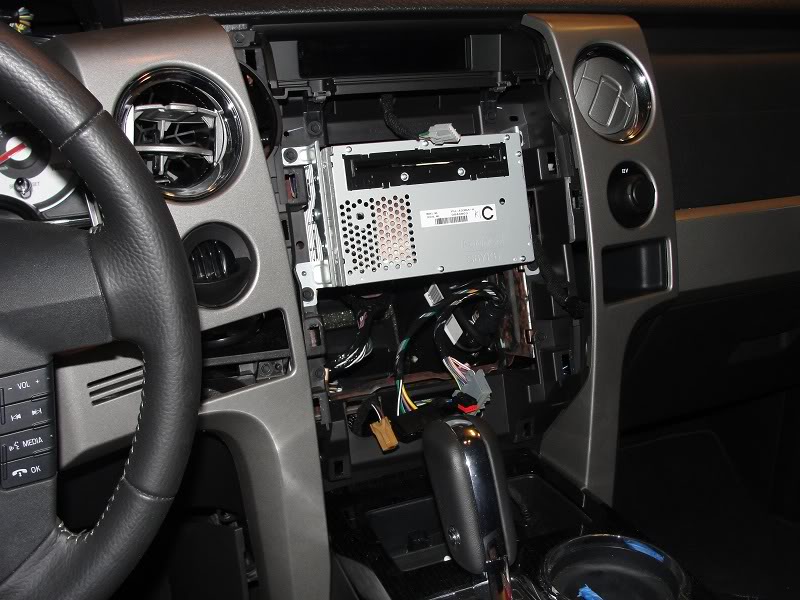
11) Tap into factory HU
Removed the factory stereo and put the Metra BT-5520 harness in place.
I pulled out the 4 extra wires that connected the two black BT connectors and the rest was plug and play. I cut the 8 speaker wires coming out of the Metra factory side and connected the 9 conductor. I used the 9th wire in the 9 conductor for the remote turn on. The nice thing with this 9 conductor wire is the remote turn on was semi shielded. In the end it works perfectly.
12) Install bass remote
I removed the little pocket to the right of the steering wheel and use the Dremel to cut a little slot. I ran the phone line for the bass control. I then mounted the bass control with heavy duty double sided tape.
I am not sure if this bass **** is the right thing to do. I just read that what I want is a gain and not DB boost. We will see in a few days when the sub arrives.
13) Run HU cables to back
I then ran the 9 conductor cable and phone line along the main harness under the steering wheel down the left kick and into the sill channel. The main harness was easy. Remove one plastic cover, 3 screws, and then the metal support piece with its 4 screws and then start zip tying away.
14) Install tweeter in door sails
This is where I got nervous. I must have backed off 5 or 6 times before I actually started to drill. I taped the entire door sail with blue tape and made triple sure I had it right. The crazy thing is the install instructions said make a 45mm cut out. Well neither HomeDepot or Lowes has a 45mm hole saw. I ended up using a 44mm and a very deft hand with the Dremel to finish it off.
I have the tweeters pointed at each other and a little down. Nothing I could really do with the alignment. It was dictated by the slope of the sails. And the location of the tweets was determined by the vents.
15) Install door panels and button up interior
The back doors were a breeze. The front's definitely come off easier than they go on. I had to mess and fiddle with the door lock to get it in the hole. Believe me, at 4am this is not something you want to get frustrated with.
16) I did a test wiring off the head unit and everything worked. Yaaa. Now time for bed.
Day 3 = Saturday 11am - Sunday 1am
1) Finished amp board layout.
I layed all the parts out and measured to within 1/32". Predrilled all my holes and cut holes for all cables.
I was not expecting those Focal crossovers to be as big as they were. Had to make a few adjustments to my original layout. I wanted to stack them on top of each other or run then vertical. Only way to make them fit was angle them out. I think it looks ok but I am not an expert.
2) Trim the back panel felt
I wanted to leave that back panel alone and just mount on top of it but it was just too tall. Took a utility knife to it and cut it up. I tried to just cut the high spots out but I think when I clean everything up I am going to cut even more. I have not noticing any increase in noise when driving.
3) Mount everything on amp board
Everything mounted perfectly. I ran all cables behind and made 1/2 standoffs at the top so all power cables would pass the back deck mount points.
4) Deal with rear vents
This is one that I had to research long and hard. I drove the truck around without the back panel in place and it was loud. Those vents are crazy. I read that covering them is not good and removing them is even worse. I did happen to stumble along a post that said to cover them with AC filter and that is what I did. I took a .56 cent household AC filter and doubled it up. I covered the vent using foil tape and then put the back panel back in place.
5) Wire up amp board in truck
This was a real chore for me and again a little more blood loss on this on. Read about bolt below.
Took completed amp rack to the back of the truck and started wiring it up.
At this point is when I wish I had taken out the back seat. Also, that second seat bolt from the left is freakishly long. When I pull everything out to clean it up that sucker is getting cut and I mean cut deep.
At this point I only had a 2 channel amp for the front, waiting on the 4 channel, and I ended up making jumper cables for the rear fill. Jumps from the 9 conductor to the speaker runs to the rears. My plan is to run them off the 4 channel but for now they are off the HU.
Because it was just me and I was a little worn out. I was having problems getting the amp rack into the right spot on the back wall. I ended up mounting it about 2 inches to low. It will be corrected but it did happen. The seats closed so I wasn't worried about it.
6) Grounding the system
I was going to use one of the seat bolts for my ground but I heard conflicting comments on whether that was appropriate or not. I ended up grounding to the Torx 45 bolt that holds the rear seat belt mechanism to the back panel. At this point it seems to have worked out really well. I have no whine or noise at all.
7) Connect power to battery
This was anticlimactic. Just wired it up and nothing blew or caught fire.
8) It's alive
I did make a few mistakes. I accidentally wired output 1 from the LC6i to the sub amp. No sound at all. I had to disassemble the back to correct. I had everything routed and zip tied tight on the back of the amp rack. In the end all that work I had done routing cables behind the amp board got cut to fix clearance and routing issues. It will be corrected when I cover the board.
In the end was it worth all the work "39 hours in 3 days", lack of sleep, and blood loss?
Heck yes it was. It sounds great and will be even better with the additional of some low end. I also like having the feeling of doing something myself knowing it was done the way I wanted.
Here is my list of major components. This list has been revised again.
Amplifiers
Sundown SAZ-1000D = Sub amp (1 ohm)
Clarion XH5410 = 4 channel amp for fronts and rear fill
Sundown sub gain ****
Kicker ZX500.1 = Sub amp "Replaced"
Kicker ZXRC = Bass remote "Replaced"
Kicker ZX200.2 = 2 channel for front stage "Replaced"
OEM Control
AudioControl LC6i = sound processor
Front and Rear fill speakers
Focal 165VR = Front Components
Focal 165CA1 = Rear fills
Subwoofers
Stereo Integrity BM MKIII X2
single Image Dynamics ID10D4 "Replaced"
Sub enclosure
Custom "aka" homemade
Supercrews single 10 sub box"Replaced"
Sound deadening
Dynamat Extreme Wedge packs 10425 x3 = rear wall
Dynamat Extreme Shop Pack 20410 = around door speakers
Distro/fuses/wiring/cable
Stinger SHD20 = Ground Distribution Block
Stinger SHD820 = Power Distribution Block
Stinger SHD801 = Inline fuse block
Stinger 60amp MIDI fuse
Stinger 80amp MIDI fuse
Stinger 150amp MIDI fuse
Metra BT-5520 = factory wiring harness
Kicker ZI21 = RCA interconnects x1
Kicker ZI22 = RCA interconnects x2
Stinger 9 conductor speed wire = 20ft
Stinger Stinger SGW516BC 16ga= 2x 50ft plus an addition 10ft
Stinger Stinger SHW510BC 10ga = 10ft
KnuKonceptz 4awg red = 18ft
KnuKonceptz 4awg black = 8ft
KnuKonceptz 8awg red = 3ft
KnuKonceptz 8awg black = 3ft
Here are some picks of my install
Last edited by Langlowe; 02-09-2011 at 08:27 PM.
#2
10-29-2010, 02:13 PM

Wow, I really like how your tweeters are mounted! Is that the stock location in the newer 2009+ F-150's? My truck has the factory tweeters installed next to the door handle. I may try and relocate my new tweeters to the same spot when I install my components.
Great job though, I just ordered all of my sound deadening materials from Second Skin and wiring materials today. I'm going to start pulling the interior out this weekend and cleaning/prepping all the surfaces for the Damplifier Pro and Luxury Liner Pro. It's been a while since I did a complete build up like this, but it should be a lot of fun. Good luck with your new gear. I debated using Focals in my build too, I have a set of their 6x9 CVX's in the fairing on my Harley Road King Custom. Focal really makes a great speaker!
Great job though, I just ordered all of my sound deadening materials from Second Skin and wiring materials today. I'm going to start pulling the interior out this weekend and cleaning/prepping all the surfaces for the Damplifier Pro and Luxury Liner Pro. It's been a while since I did a complete build up like this, but it should be a lot of fun. Good luck with your new gear. I debated using Focals in my build too, I have a set of their 6x9 CVX's in the fairing on my Harley Road King Custom. Focal really makes a great speaker!


#5
10-29-2010, 04:37 PM
Join Date: Oct 2010
Location: Austin, Tx
Posts: 327
Likes: 0
Received 0 Likes
on
0 Posts
I think the factory Sony radio had the tweets in the A pillar.
When I was looking at front components I had it in my head that I would be going with JL Audio C3 or C5. Over 12 years ago I had JL in a truck and back then it was either JL and MB Quart.
The place I was looking at had the new Focal 165V30 and I really liked them except they were really bright but the midbass was wonderful. I couldn't find any place locally that had any of the higher end JL components but then I came across a posting where the 165VR were on sale for half off. Now again price vs. performance came into play and I ordered the 165VR without having been able to listen to them. I did post on diyma if anyone had any comments on the 165VR and no body said anything bad about them.
Now after they are installed I am glad those tweeters are not pointed right at me otherwise I think I would be bleeding from my ears. With them pointed just a touch down and at each other I get all the clarity I could ask for but not the brightness I didn't want.
Last edited by Langlowe; 10-29-2010 at 05:19 PM.
#6
10-30-2010, 10:19 PM


Join Date: Aug 2006
Location: Northern California
Posts: 7,862
Likes: 0
Received 0 Likes
on
0 Posts
#7
10-31-2010, 05:14 PM

Trending Topics

#9
10-31-2010, 06:52 PM

Member
Join Date: Jun 2010
Location: West Deptford, NJ
Posts: 82
Likes: 0
Received 0 Likes
on
0 Posts
#10
11-01-2010, 07:14 AM

Senior Member
God I wish I didn't have the Molex door booties. Great install. Nice to see somebody put in effort on some sound deadening and decent components. Wait until you get your subs in. I put in about 50 hours into my install, and I get to do a door all over again, got sideswiped and have to deal with that damn Molex connector.
If you do a lot of highway driving, a future project is to 100% sound deaden your doors. After a couple hours of driving, I get tired of the loud music and is nice that I don't have to hear the road noise nearly as much. Although, I had plans to do my floor and after my install, I'm done, more work than I expected originally but same as you, the reward is great.
If you do a lot of highway driving, a future project is to 100% sound deaden your doors. After a couple hours of driving, I get tired of the loud music and is nice that I don't have to hear the road noise nearly as much. Although, I had plans to do my floor and after my install, I'm done, more work than I expected originally but same as you, the reward is great.
#11
11-01-2010, 11:17 AM
Join Date: Oct 2010
Location: Austin, Tx
Posts: 327
Likes: 0
Received 0 Likes
on
0 Posts
I read that Thompsons was acceptable but I would be honored if you would share with me how you would handle it.
#12
11-01-2010, 11:25 AM
Join Date: Oct 2010
Location: Austin, Tx
Posts: 327
Likes: 0
Received 0 Likes
on
0 Posts
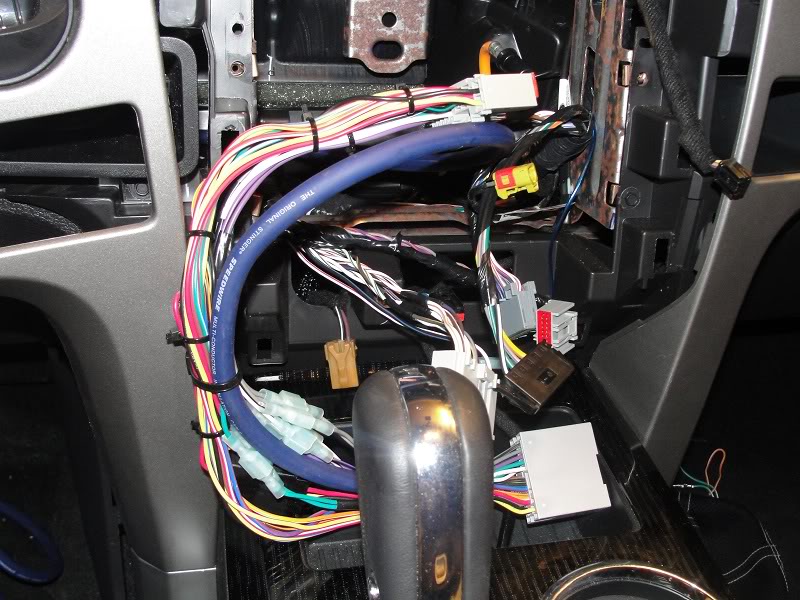
In the middle there are two black connectors. One male and one female. There are 4 wires that connect only between the two black connectors. Of the other 10 wires that run to the black connectors 8 are the speaker leads.
I basically pulled out the 4 wires that connect just between the black connectors. I didn't want to cut and by pulling I got the wire and pin in one move.
I cut the speaker leads between the metra factory connector and first black connector. The reason for cutting on HU side and not the wire harness side harness side was there was more speaker cable on the HU side.
From there you can connect whatever you want to the cut speaker leads. I happen to run 9 connductor wire back to my LC6i.
When I get rid of this truck all I have to do is disconnect the BT-5520 and plug the factory harness back into the HU. No cut factory wires and no hassles.
#13
11-01-2010, 12:05 PM
Join Date: Aug 2006
Location: Northern California
Posts: 7,862
Likes: 0
Received 0 Likes
on
0 Posts
Other options would be to rebuild them with something like masonite, but this will obviously require a lot more effort and is probably unnecessary.
#14
11-01-2010, 03:56 PM

Senior Member
Join Date: Jun 2010
Location: Holt, MO
Posts: 510
Likes: 0
Received 0 Likes
on
0 Posts
#15
11-01-2010, 08:20 PM
Join Date: Oct 2010
Location: Austin, Tx
Posts: 327
Likes: 0
Received 0 Likes
on
0 Posts
Very nice job. Those Metra harnesses make it easy to go back to stock when trade in time occurs.
How did you mount your amp board to the cab? Did you use self tapping screws or what? I still need to put my amp back there, but am afraid I will punch and screw through the back of the cab.
How did you mount your amp board to the cab? Did you use self tapping screws or what? I still need to put my amp back there, but am afraid I will punch and screw through the back of the cab.
On the back wall about 2/3 of the way up there is a raised area. There is actually two layers of metal. I figure for support of the back wall. I was real carefull and drilled a pilot hole through the first layer of metal and sound deadner and then made sure I had the right length of metal screws for my little spacer blocks. I then just screwed the amp board to the blocks.
I needed the extra 1/2 of space for the power and ground cables.