How to change driveshaft universal joints
#1
 09-10-2007, 04:17 PM


Join Date: Jan 2006
Location: Vienna, Georgia
Posts: 2,835
Likes: 0
Received 0 Likes
on
0 Posts
How to change driveshaft universal joints
I heard a back and forth squeaking sound coming from the rear of my truck the other day while backing up, and I figured it was a universal joint going out. So, I decided to replace them. I took pics along the way, so I could share with you folks how to do it. It's a relatively difficult job. The procedure is simple, but lining up those needle bearings is a pain. I hope these directions are useful. If there are any questions, just ask away.
Last edited by chester8420; 09-10-2007 at 05:26 PM.
#2
09-10-2007, 04:18 PM
Join Date: Jan 2006
Location: Vienna, Georgia
Posts: 2,835
Likes: 0
Received 0 Likes
on
0 Posts
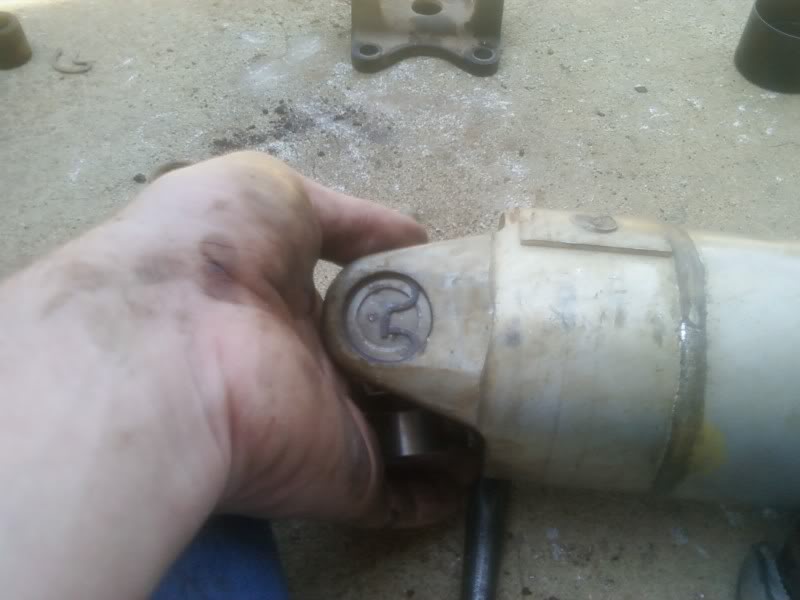
Before you start, be sure the parking brake is set, and the wheels are chocked (in case your e-brakes don't work) If you don't do this, your truck will run over you when you unbolt the driveshaft. After it's secure, unbolt the driveshaft from the back axle. On my truck, it is held on by 4 bolts. They require a #12 wrench and they weren't very tight. I would suggest a shot of WD-40 on the exposed threads on the back side of the driveshaft.
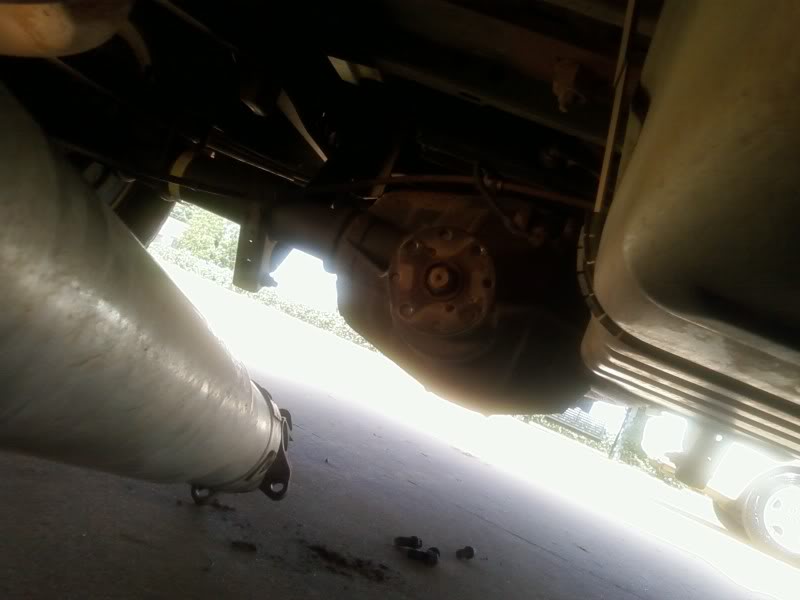
Pull the driveshaft out of the back of the transmission. It will leak a couple ounces of trans fluid when you pull it out. Be sure not to beat up the shiny end of the driveshaft. If you do, it might cause your rear seal to leak. Don't tear the harmonic balancing ring off either.
Pull the driveshaft out of the back of the transmission. It will leak a couple ounces of trans fluid when you pull it out. Be sure not to beat up the shiny end of the driveshaft. If you do, it might cause your rear seal to leak. Don't tear the harmonic balancing ring off either.
Last edited by chester8420; 09-10-2007 at 05:27 PM.
#3
09-10-2007, 04:19 PM
Join Date: Jan 2006
Location: Vienna, Georgia
Posts: 2,835
Likes: 0
Received 0 Likes
on
0 Posts
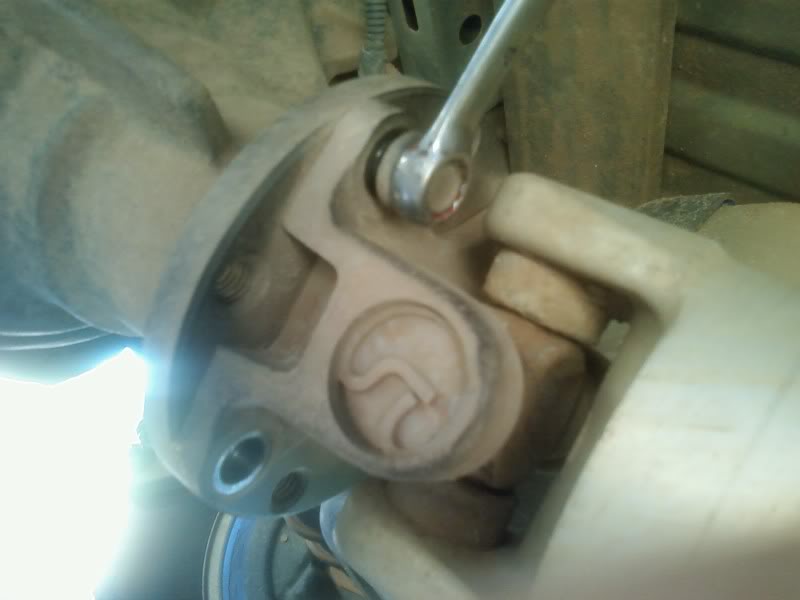
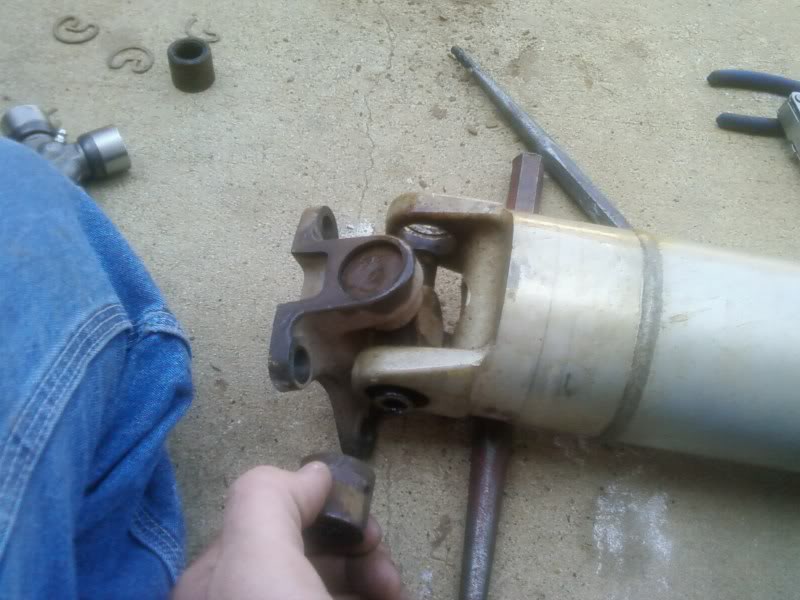
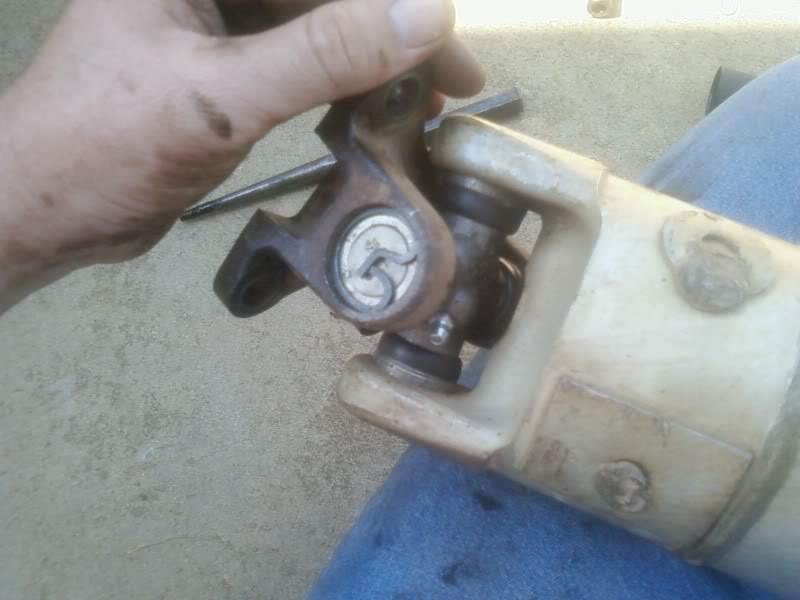
Remove the internal c-clips with a regular pair of pliers. Just compress them, and they pop right out.
After soaking the bearing races in WD-40, knock one of them in, thus driving the opposite one out.
Continue knocking it in, until the u-joint bottoms out on the yoke.
Locking pliers are an easy way to remove the bearing race if it is still stuck a little.
After soaking the bearing races in WD-40, knock one of them in, thus driving the opposite one out.
Continue knocking it in, until the u-joint bottoms out on the yoke.
Locking pliers are an easy way to remove the bearing race if it is still stuck a little.
Last edited by chester8420; 09-10-2007 at 05:38 PM.
#4
09-10-2007, 04:20 PM
Join Date: Jan 2006
Location: Vienna, Georgia
Posts: 2,835
Likes: 0
Received 0 Likes
on
0 Posts
Knock the u-joint back the way it came, thus driving the race back out the way it came.

Pull the race out.
Remove the u-joint, and grind any marrs or dents on the yoke smooth with a rat-tail file.
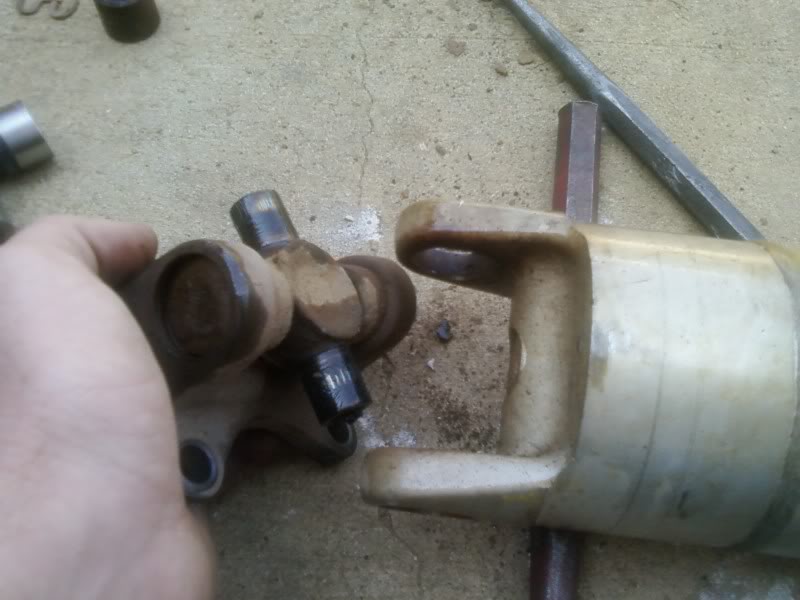
Continue the process with the remaining 2 races.
Pull the race out.
Remove the u-joint, and grind any marrs or dents on the yoke smooth with a rat-tail file.
Continue the process with the remaining 2 races.
Last edited by chester8420; 09-10-2007 at 05:08 PM.
#5
09-10-2007, 04:21 PM
Join Date: Jan 2006
Location: Vienna, Georgia
Posts: 2,835
Likes: 0
Received 0 Likes
on
0 Posts
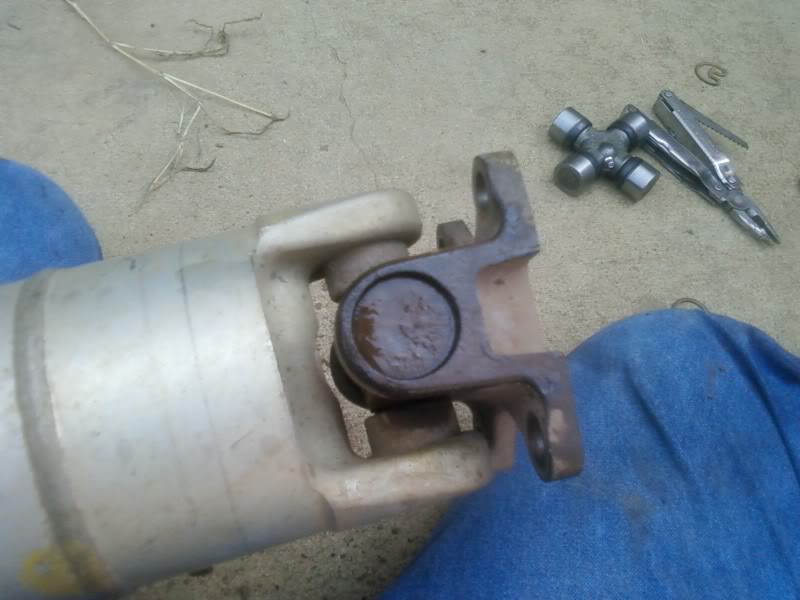
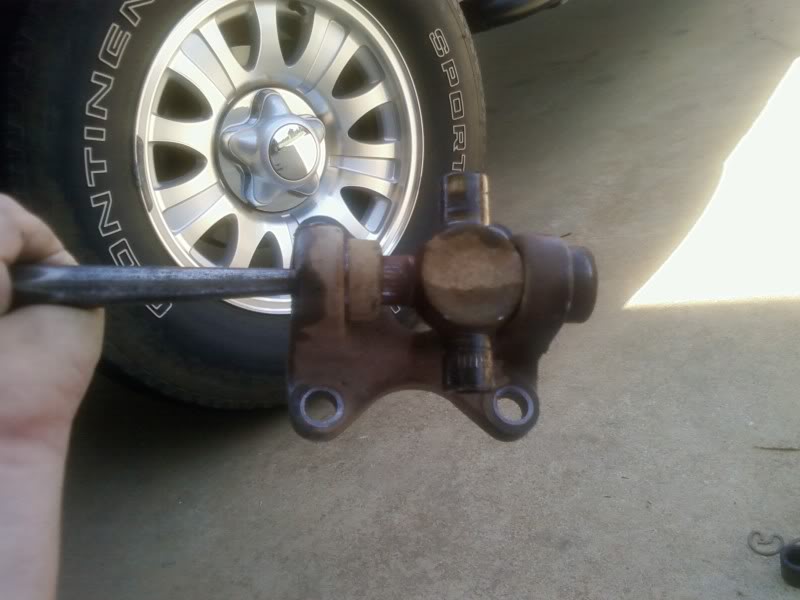
This is the bearing that was yelling on my truck. Notice how the needle bearings have run dry for a while, and have begin to dig into the u-joint race. This bearing would have been causing some trouble soon.

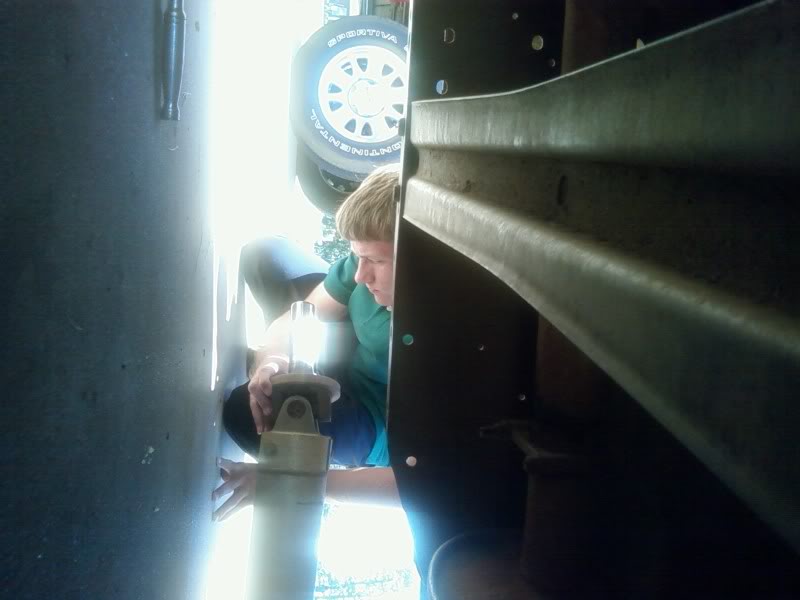
Now comes the HARD part. Start the re-assembly by removing 2 of the bearing races from your new u-joint. place the u-joint in the yoke, being careful not to get one of the races dirty. Place a bearing/race in the corresponding yoke hole, and press it in with your finger. CAREFULLY press the u-joint into the bearing/race, being VERY careful not to dislodge the needle bearings. If you do, don't worry, just pick them out and re-align them along their track.
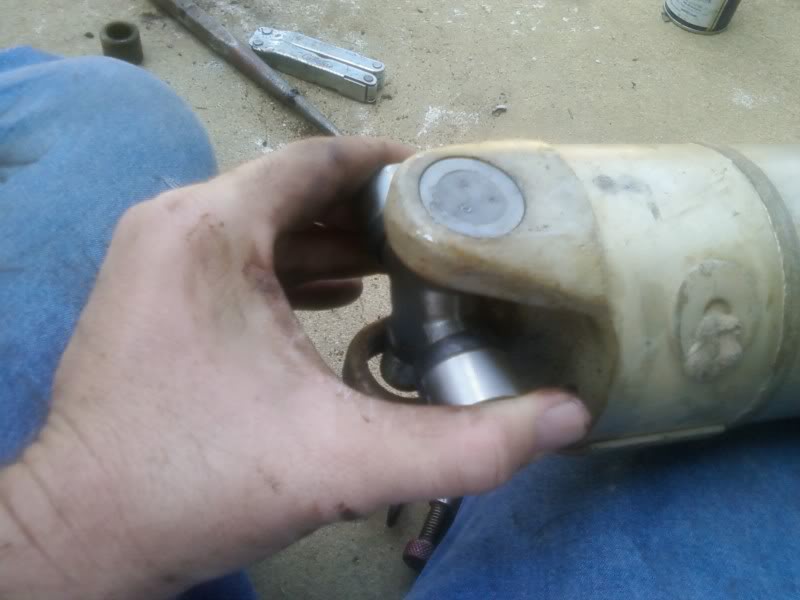
While holding the u-joint and keeping it mated to the bearing/race, tap the race further into the hole with a hammer. This will make the u-joint be in the appropriate position to allow the opposing bearing/race to line up, and join with the u-joint.
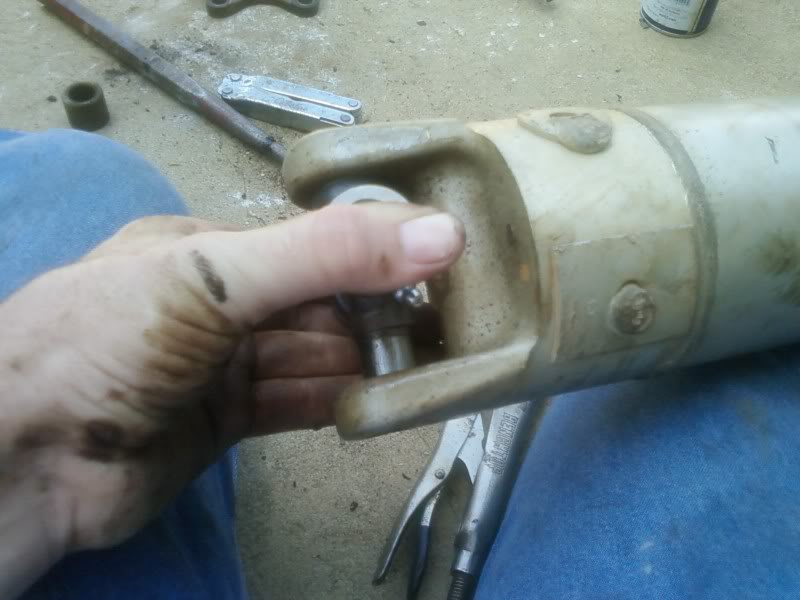
Clean the dirt off of the u-joint race with carb cleaner, starting fluid, or brake cleaner.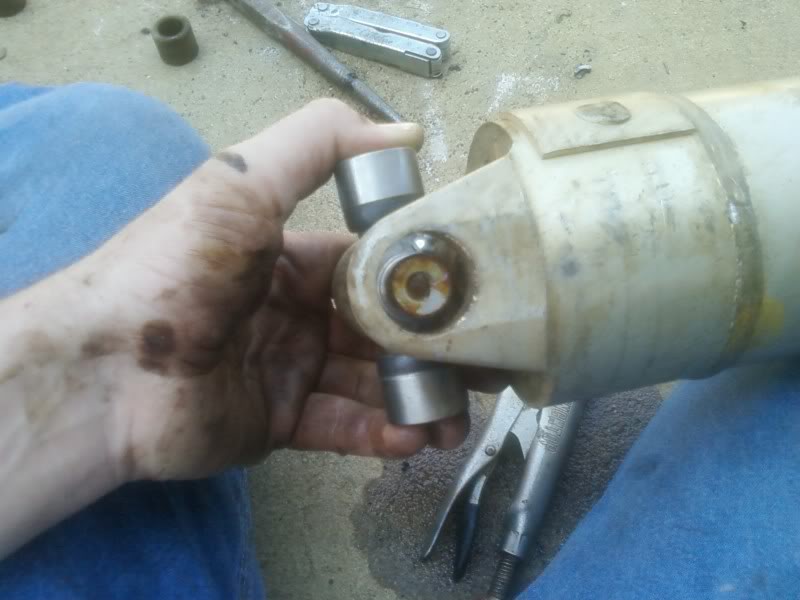
Now comes the HARD part. Start the re-assembly by removing 2 of the bearing races from your new u-joint. place the u-joint in the yoke, being careful not to get one of the races dirty. Place a bearing/race in the corresponding yoke hole, and press it in with your finger. CAREFULLY press the u-joint into the bearing/race, being VERY careful not to dislodge the needle bearings. If you do, don't worry, just pick them out and re-align them along their track.
While holding the u-joint and keeping it mated to the bearing/race, tap the race further into the hole with a hammer. This will make the u-joint be in the appropriate position to allow the opposing bearing/race to line up, and join with the u-joint.
Clean the dirt off of the u-joint race with carb cleaner, starting fluid, or brake cleaner.
Last edited by chester8420; 09-10-2007 at 04:58 PM.
#6
09-10-2007, 04:23 PM
Join Date: Jan 2006
Location: Vienna, Georgia
Posts: 2,835
Likes: 0
Received 0 Likes
on
0 Posts
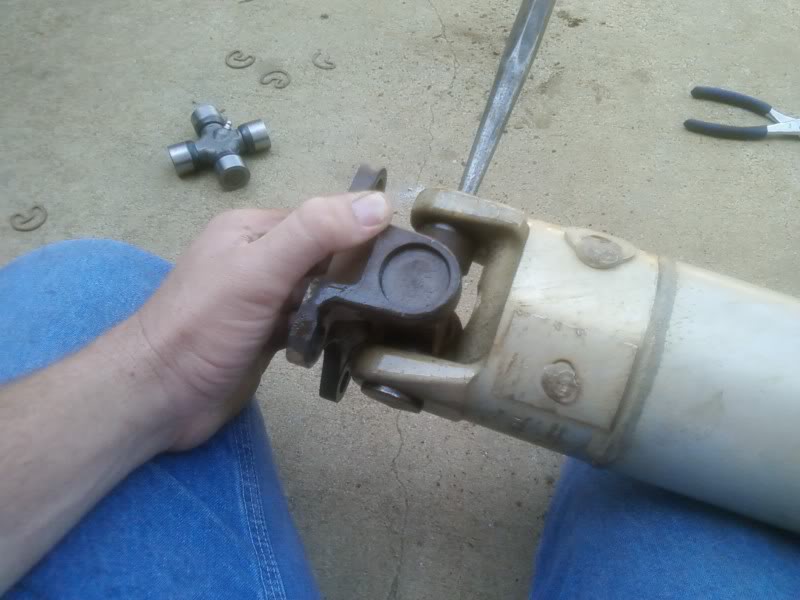
This is the SUPER hard part, but it isn't hard if you do it right. CAREFULLY align the bearing/race with the u-joint. Press it as far as it will go,(hopefully far enough to mate with the u-joint and seat the needle bearings) and then strike it FIRMLY with a hammer. If everything was aligned correctly, it will seat the race enough to hold the u-joint. Slide the u-joint up and down, to make sure the grease seals line up and pop into place. IF they don't, then you probably dislodged a needle bearing during the assembly process and it is preventing the parts from assembling completely. If this happens, you should take it back apart, and verify that they're all still where they are supposed to be.
Tap the race until it lines up with the grooves.
Re-install the new internal c-clamps.
Do the same to the other side, and it's ready to go! Put a couple of shots of grease in it.
Tap the race until it lines up with the grooves.
Re-install the new internal c-clamps.
Do the same to the other side, and it's ready to go! Put a couple of shots of grease in it.
Last edited by chester8420; 09-10-2007 at 05:20 PM.
#7
09-10-2007, 05:07 PM
Join Date: Jan 2006
Location: Vienna, Georgia
Posts: 2,835
Likes: 0
Received 0 Likes
on
0 Posts
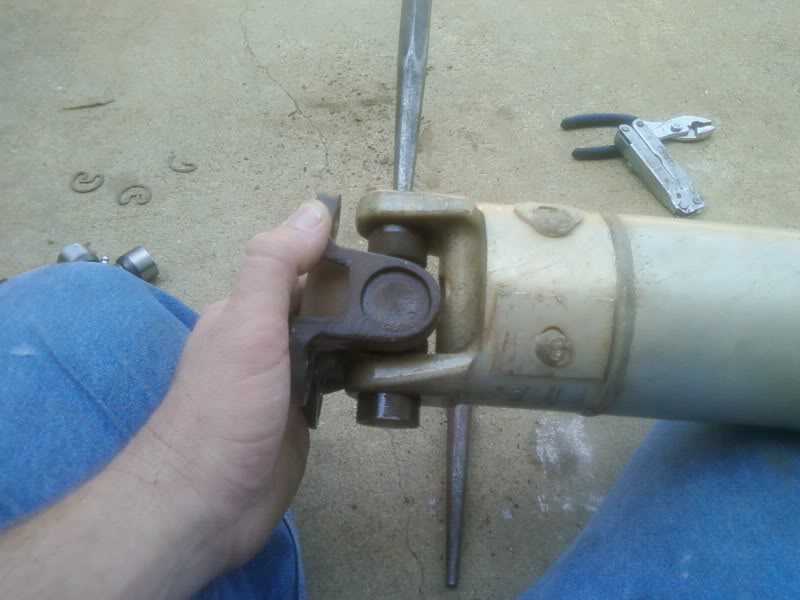
This is what happens if you don't keep the u-joint in contact with the bearing/race when you tap it. It happened to me 4 times on the same bearing!! 

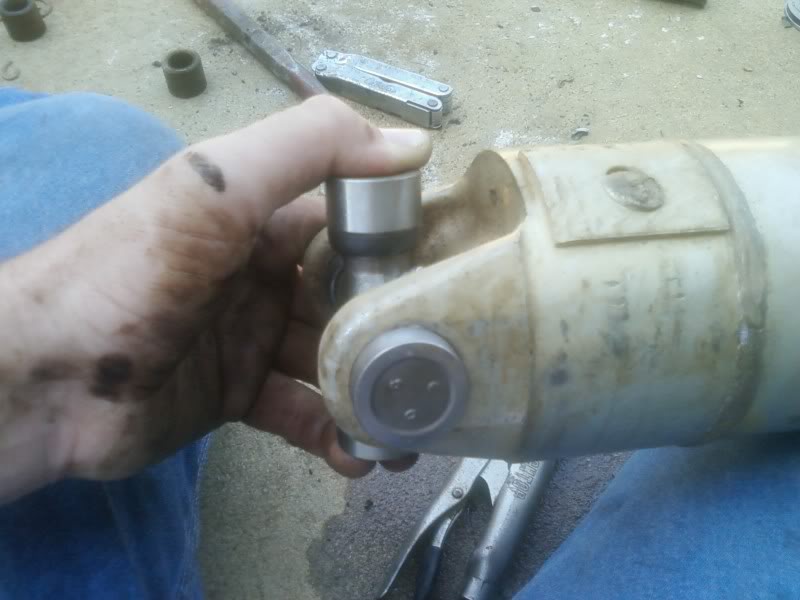
When you change the other u-joint, make sure you align both the grease zerks in the same direction so that you can grease the driveshaft without having to move the truck. Also be careful not to beat the harmonic balancing ring off. After you change the other universal joint, the driveshaft is ready to be re-installed.
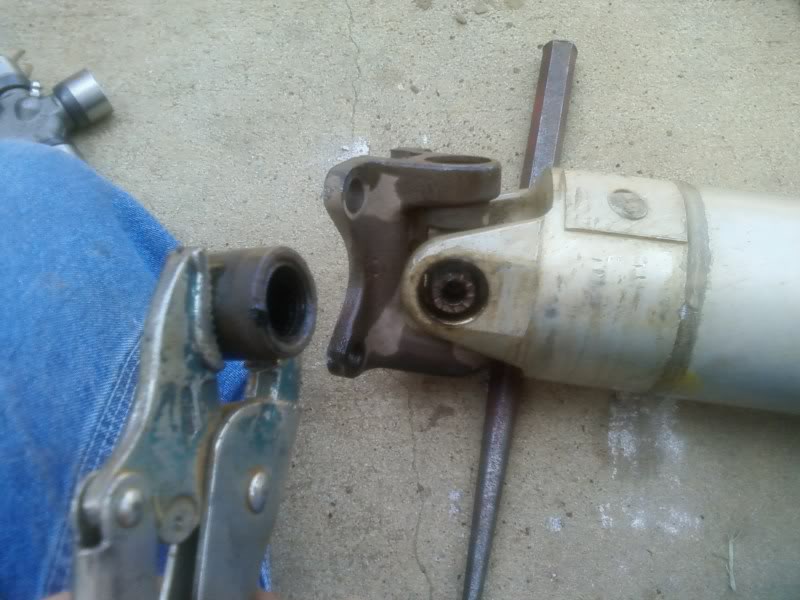
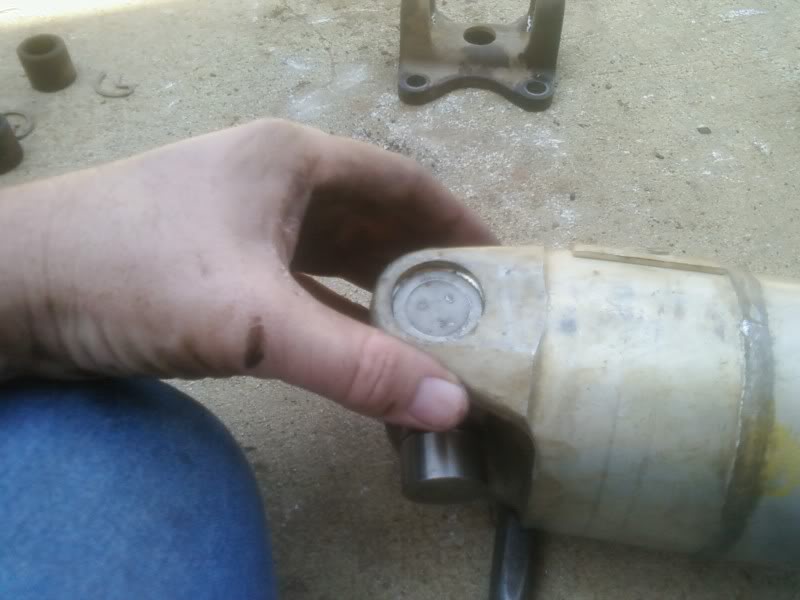
IMPORTANT: Take note that the splines on the driveshaft are missing one tooth. This missing tooth has to align with a slot on the transmission. So the driveshaft will only go back on one way. Make sure the transmission end is smooth and clean. Tighten the driveshaft bolts TIGHT. Don't forget to unlock your parking brake. The new u-joints are going to sling grease all over the underside of your truck, when you get going down the road. Don't worry, just think of it as corrosion protection.
I completed the whole procedure in about 1.5 hours. That was in my driveway with minimal tools, no powertools, no workbench, and no vise. (all of which would have been helpful and would have made it a 30 minute job) I used a #12 wrench, pliers, 2 punches (one was used as an anvil), hammer, rat-tail file, WD-40, grease gun, and brake cleaner.
I hope these directions help somebody.
When you change the other u-joint, make sure you align both the grease zerks in the same direction so that you can grease the driveshaft without having to move the truck. Also be careful not to beat the harmonic balancing ring off. After you change the other universal joint, the driveshaft is ready to be re-installed.
IMPORTANT: Take note that the splines on the driveshaft are missing one tooth. This missing tooth has to align with a slot on the transmission. So the driveshaft will only go back on one way. Make sure the transmission end is smooth and clean. Tighten the driveshaft bolts TIGHT. Don't forget to unlock your parking brake. The new u-joints are going to sling grease all over the underside of your truck, when you get going down the road. Don't worry, just think of it as corrosion protection.
I completed the whole procedure in about 1.5 hours. That was in my driveway with minimal tools, no powertools, no workbench, and no vise. (all of which would have been helpful and would have made it a 30 minute job) I used a #12 wrench, pliers, 2 punches (one was used as an anvil), hammer, rat-tail file, WD-40, grease gun, and brake cleaner.
I hope these directions help somebody.
Last edited by chester8420; 07-18-2009 at 12:34 AM.
Trending Topics
#8
09-10-2007, 05:17 PM

#9
09-11-2007, 01:12 PM
Those 12mm 12-point bolts (#16 in this diagram) should have threadlocker on them, and they should be torqued to ~80 lb-ft (VERY tight).

Packing the caps with grease will keep the needle bearings in place, and properly lube the joint. It'll be messy during assembly, though, since hammering the caps will shoot grease out.
Non-greasable u-joints are physically stronger (no holes drilled thru them; no Zerk trying to crack them) and their seals are tighter, so they tend to last longer than greasable. They're also cheaper to produce, and those 4 reasons are why Ford uses them as OE. But pre-lubing the caps is CRITICAL since you can't add grease without disassembling the joint.
After assembling any cardan-type (cross) u-joint, the cross needs to be centered to releive the friction in the caps & to keep it balanced. Hammer the d'shaft yoke & flange back & forth against each other to drive the caps out against the snap rings (not so hard that the rings bulge out).
Using a heavy socket to drive the caps is preferred because it doesn't bend them in the center like a drift (punch) does. You can also use a larger one as a cup to receive the cap coming out the bottom.
#10
09-11-2007, 02:22 PM

Senior Member
Join Date: Nov 2005
Location: Belleville, IL
Posts: 680
Likes: 0
Received 0 Likes
on
0 Posts

#11
09-11-2007, 02:38 PM

Senior Member
#12
09-11-2007, 03:56 PM
#13
09-11-2007, 05:10 PM
Senior Member

#14
09-11-2007, 10:37 PM

Senior Member
Join Date: Jul 2007
Location: 856
Posts: 175
Likes: 0
Received 0 Likes
on
0 Posts
I just replaced both U-Joints on my 84' on the rear shaft. Only the one closest to the diff really needed it, but I figured I'd do em both while I was under there.
As you said, getting the pins to stay aligned is the hardest and biggest pain in the **** in the whole process. Couldn't tell you how many times I had to take it out and reseat the pins/replace pins that got smashed. Granted this was the first time I ever did U-joints, but it took a lot longer then it should have if I would have just took my time to ensure the bearing pins have not fallen in or moved out of place.
Nice guide. Wish I would have seen it a few days ago when I did mine though, sure it would have saved me quite a bit of sweat and blood (smashed my thumb while trying to hammer out the old joints).