DIY Harley Davidson Edition Taillamps 04 - 08 F150
#1
 04-11-2010, 12:33 PM


DIY Harley Davidson Edition Taillamps 04 - 08 F150
This is my write up on '04 - '08 DIY Harley Davidson F150 tail lamps. Why spend $160.00 when the supplies cost $7.00? I also recorded video of the write up with a few helpful pointers, it is located at the end of this write up.
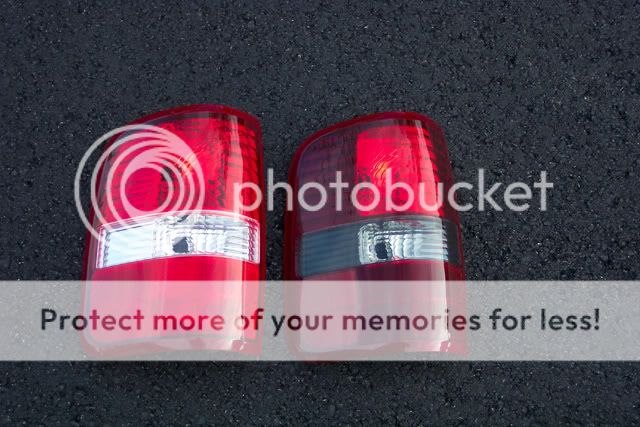
So basically everyone knows the 04+ Harley tails are a shade darker, except for the brake and reverse sections.
Heres how its done.
Begin my removing the tails which are held in my two 8mm bolts. Clean the back of the lights and mounting area while your back there. Maybe put some wax in too. Remove the bulbs carefully with the light upside down to prevent dust & debris from going inside.
Go inside and pre-heat your oven to 200 degrees. Put one light at a time in the oven on-top of a baking pan of some sorts as the heat of the oven grills will melt the plastic. Let them bake for 8 to 10 minutes. Once the reverse section starts looking foggy, take it out and work on the lens removal. Once its out of the oven the fog goes away.
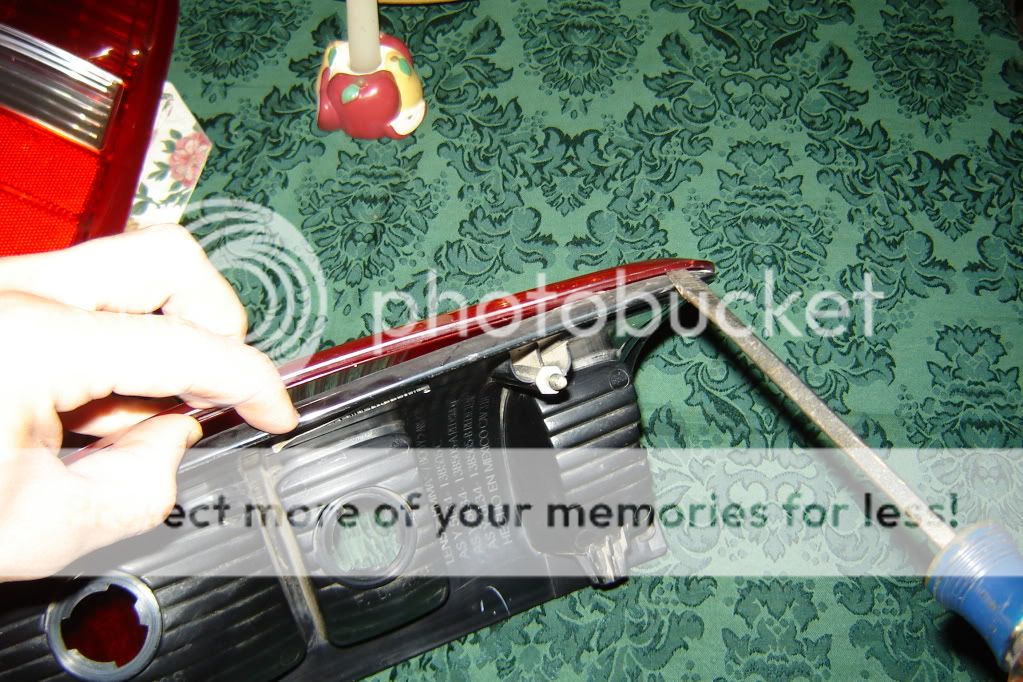
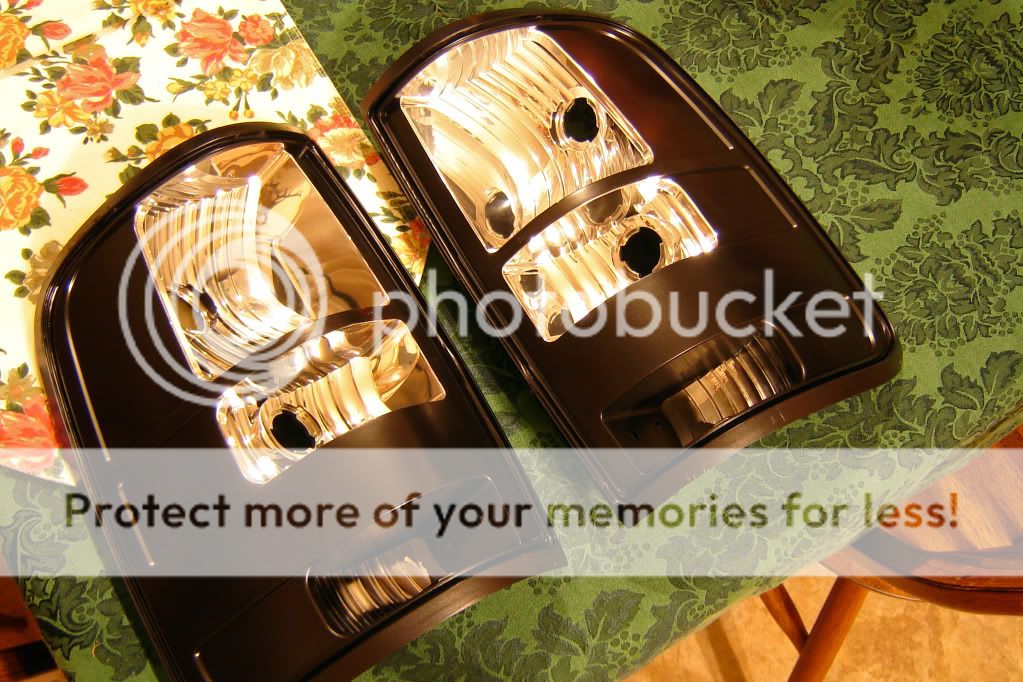
Begin removing the lamp lens with a wide flathead driver, working from the bottom inner corner ( side that neighbors the tailgate ) and work your way up, once you make it to the top its smooth sailing for the other side. There will be some scary noises that sound like plastic is cracking, but its not. Use up and down motions to pull the lens away. DO NOT twist left and right, you will nick up the lens trim and it will be visible.
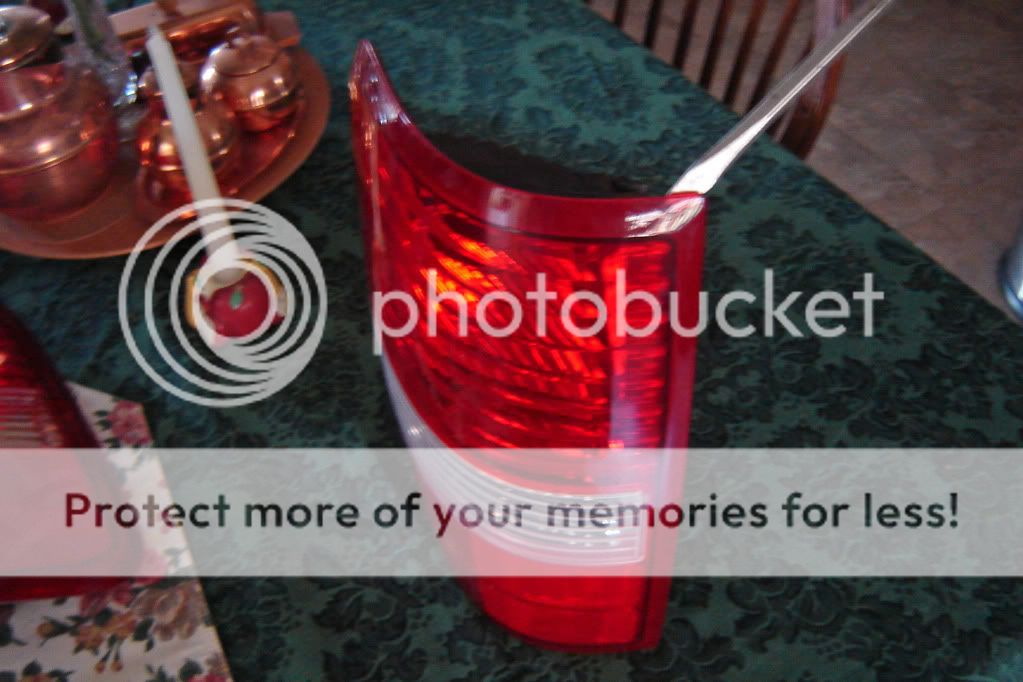
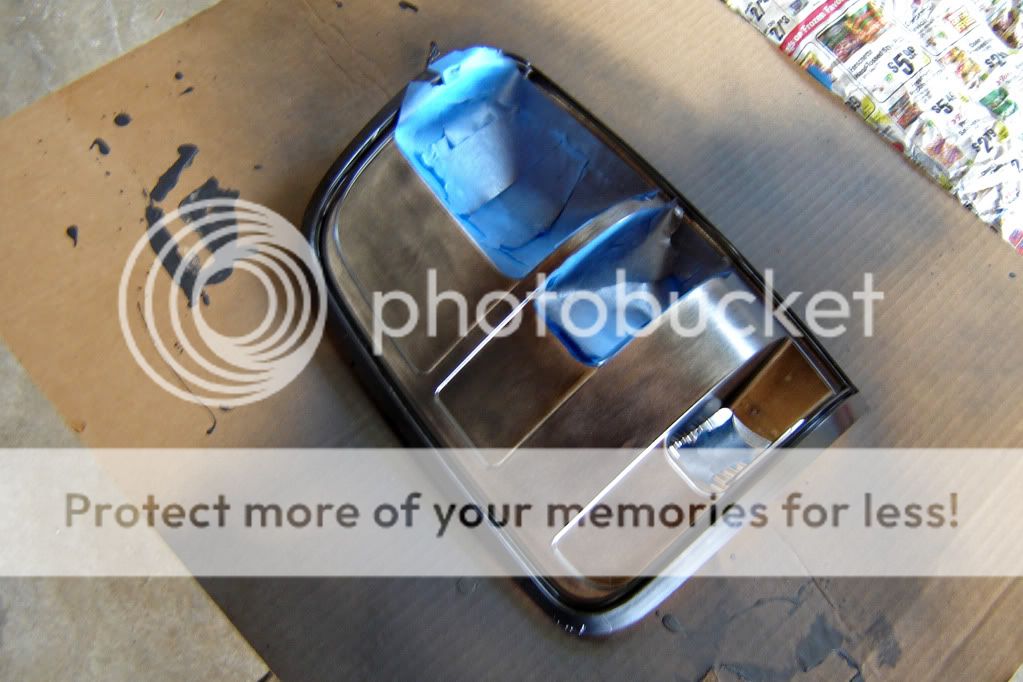
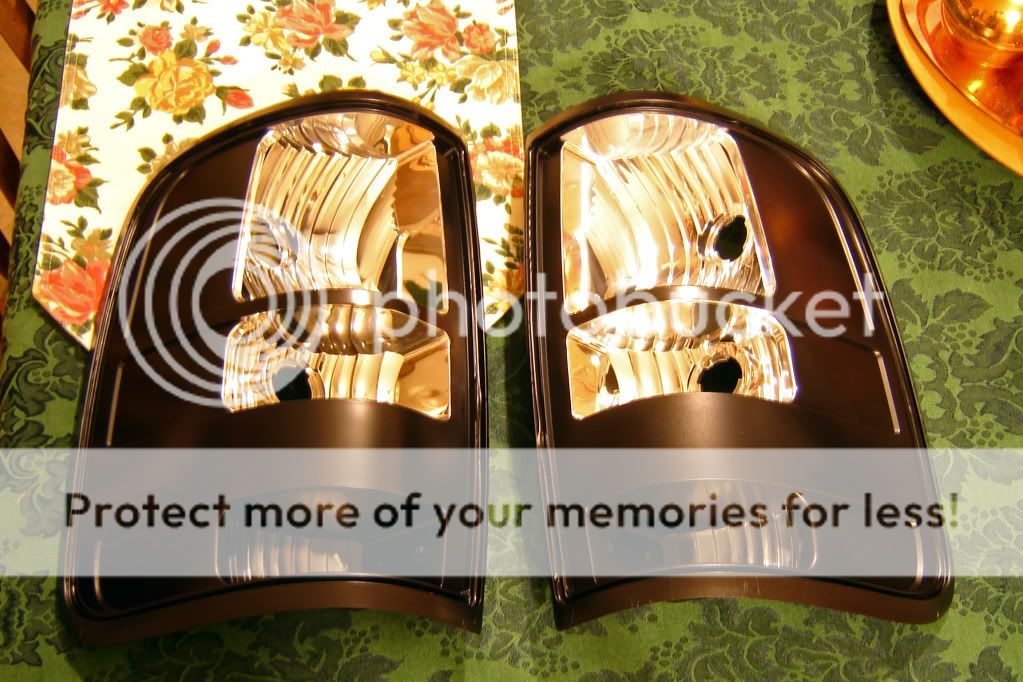
After the lens is removed, here is what your looking at.
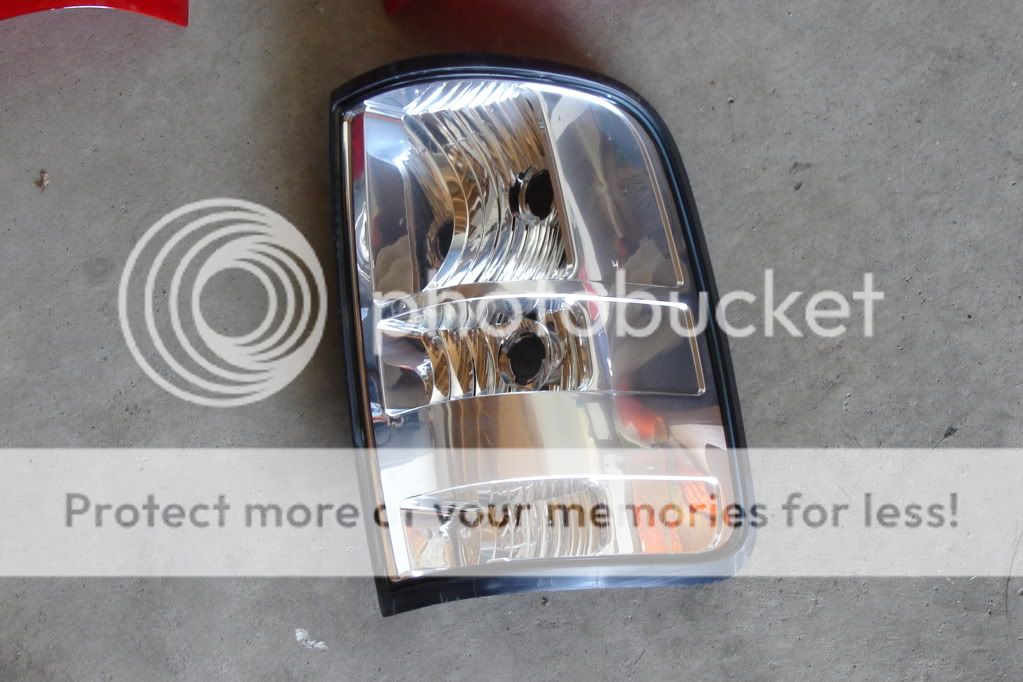
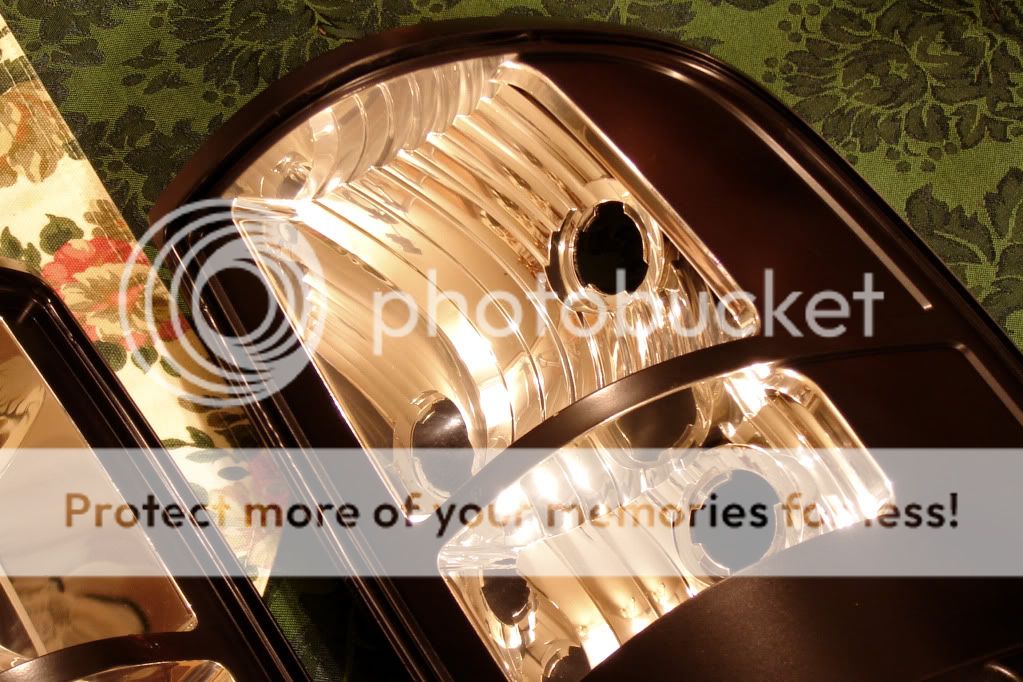
Once you have the lens off, do not touch or clean the chrome shell too roughly as it will look smeared/smudged due to its a low quality reflective paint. The section that will be painted wont matter, but be cautious and gentle with the reverse and brake light sections. That area is your output glow.
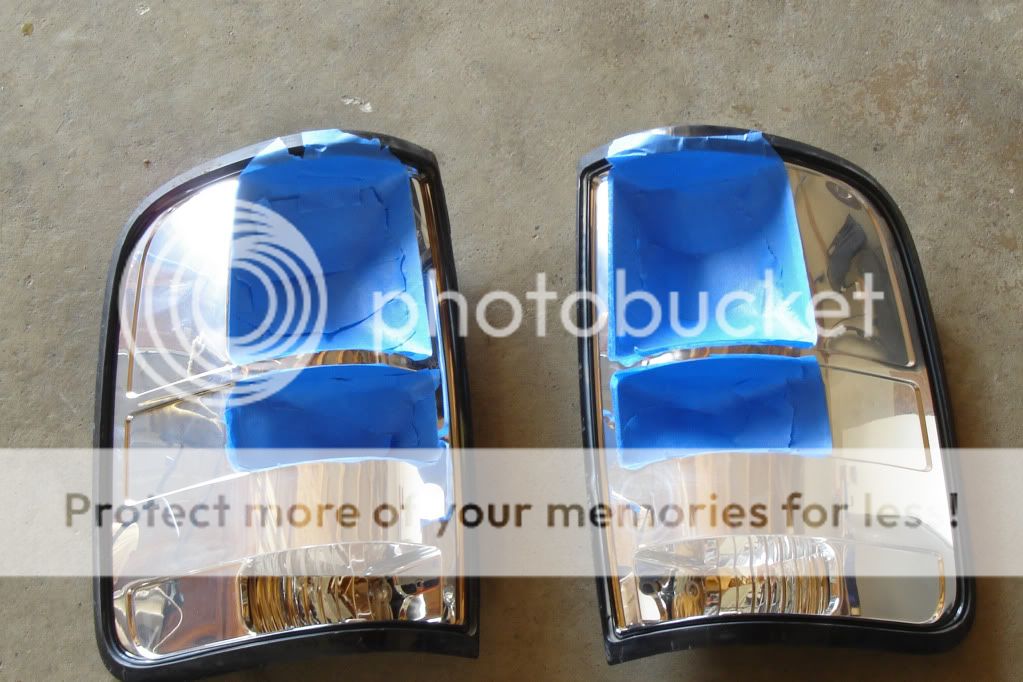
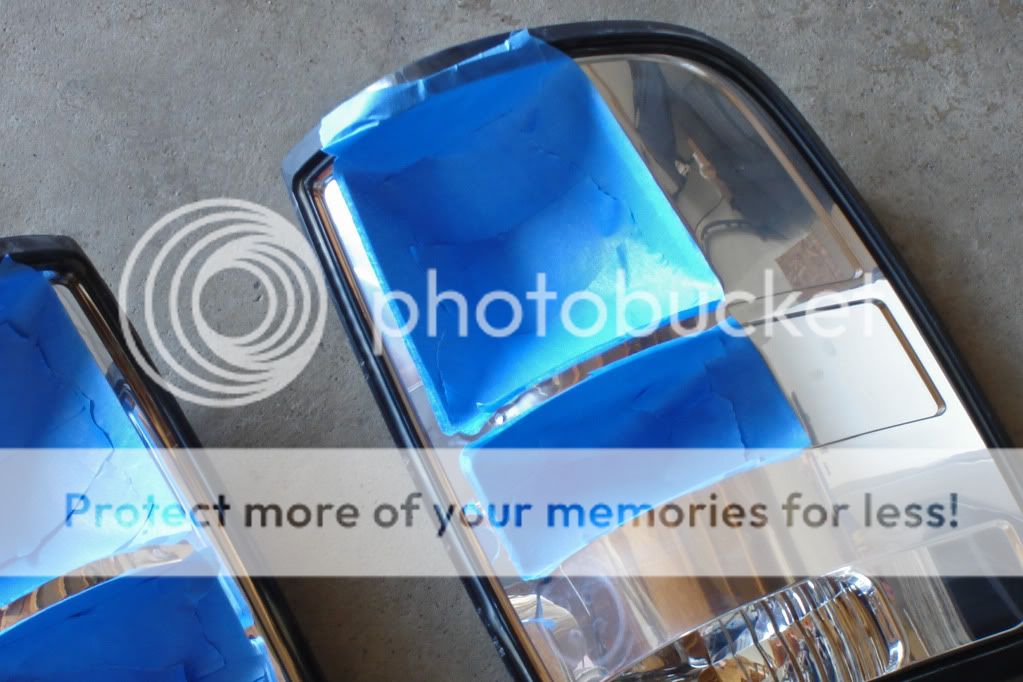
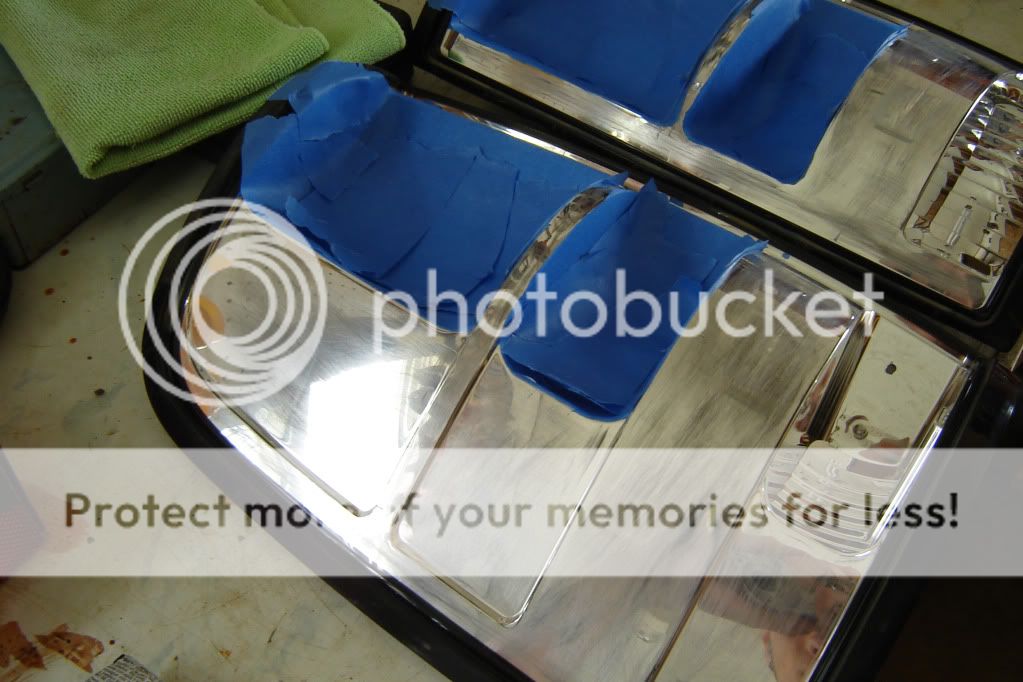
After both lights lenses are removed, its time to get to masking. In my opinion, this was the toughest part because you need to use precision, make some excess tape cut offs, trim a lot of tape for cleaner fitment, and you need to be gentle while sticking the tape in the reverse and brake light sections as explained above, it may smudge, or lose some paint and leave a black spot. Use blue painters tape, or equal quality painting tape. A good tip is to kill some of EACH piece of tapes adhesion, by pressing it against your cotton shirt at least 3 times before sticking it in the lens. This lessens the chances of smudging or stripping the needed chrome, and leaves it with enough adhesion.
I started with the smallest ends first which are the East/West spots on reverse side, trimmed the tape as necessary, and filled in the center section. For the brake section, I did the longest ends North/South with brake side. I filled the center with 3 square tape pieces. This took me 45 minutes at a steady patient pace, and to go get a soda.
Next, I began sanding the remaining chrome very lightly with 2000 grit paper. Use finger tip strength only, and not alot of it. Just need to give it a nice brushed stainless look. Then clean the sanded areas off with a micro fiber cloth and prepare for painting.

I used the ever famous Krylon Fushion Satin Black. I was considering using Gloss Black, but I had more Satin Black at hand and i'm still going to smoke my lenses later down the road anyways. I did not use any adhesion promoter, or primer, I did the exact same process as I did on my fog lamps from 2008, which look fantastic still. Adhesives and primers are not necessary here. I did 3 light coats with no clear coat. I finished with a 4th coating, which I did heavier, in spot spraying motions to catch corners and jams that steady passes missed. Let them dry in the garage for an hour, and brought them inside to dry more since it rained outside and it got cold.
First pass.
Fourth final pass on one shell, the other chrome.
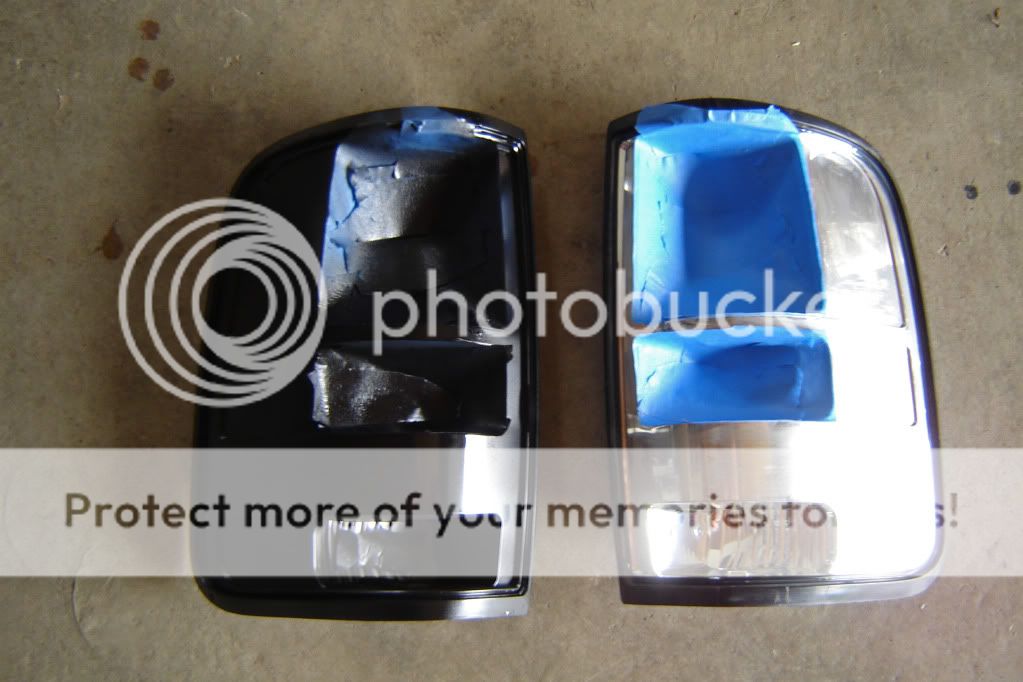
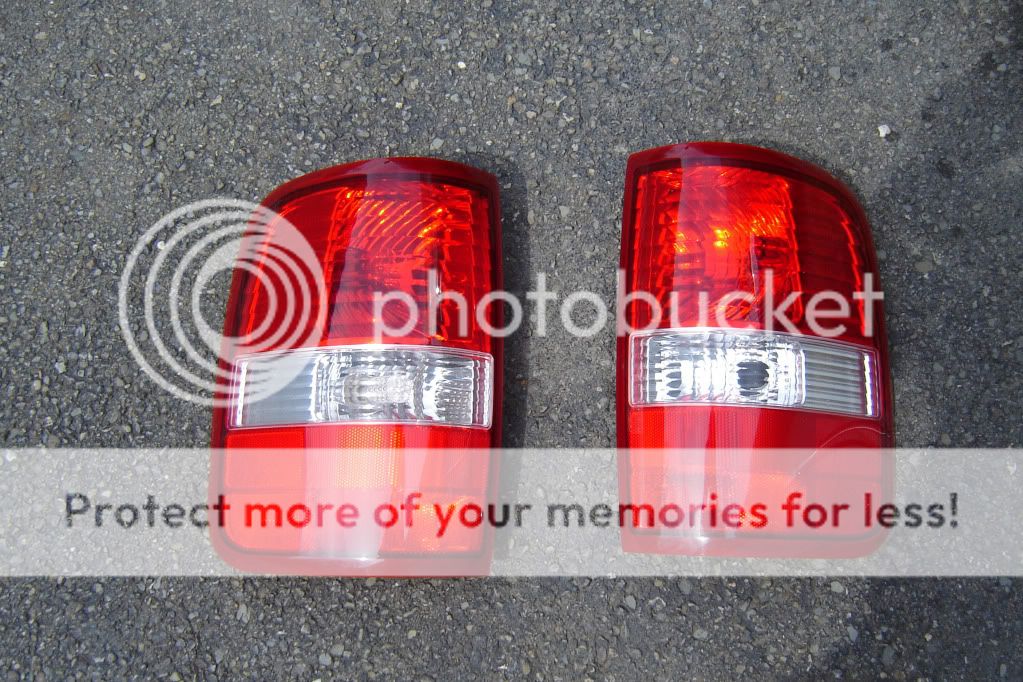
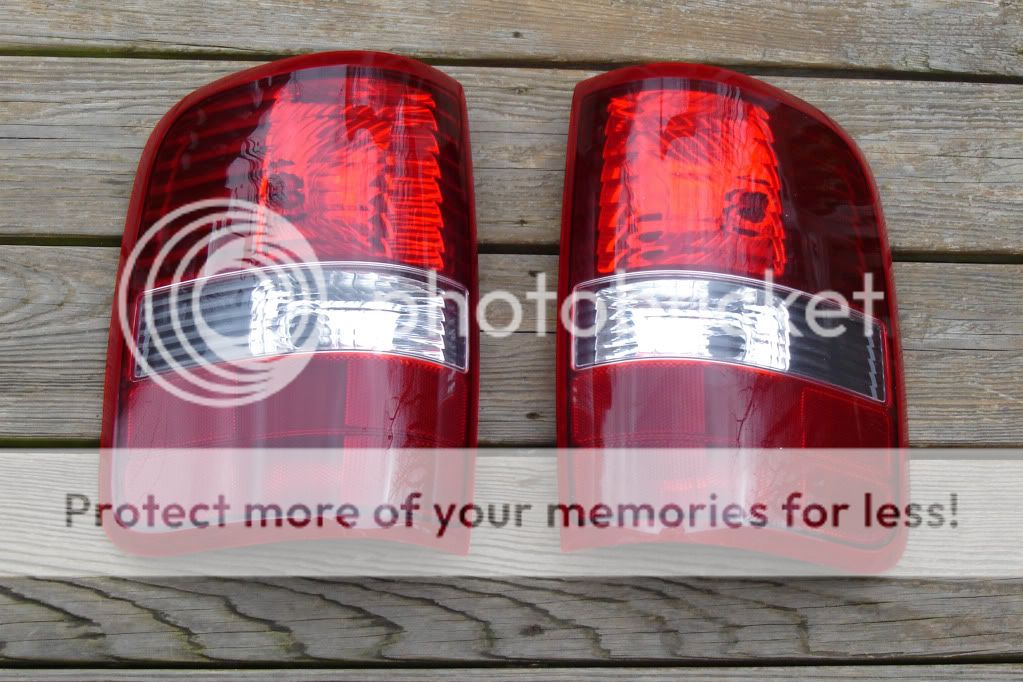
Both complete.
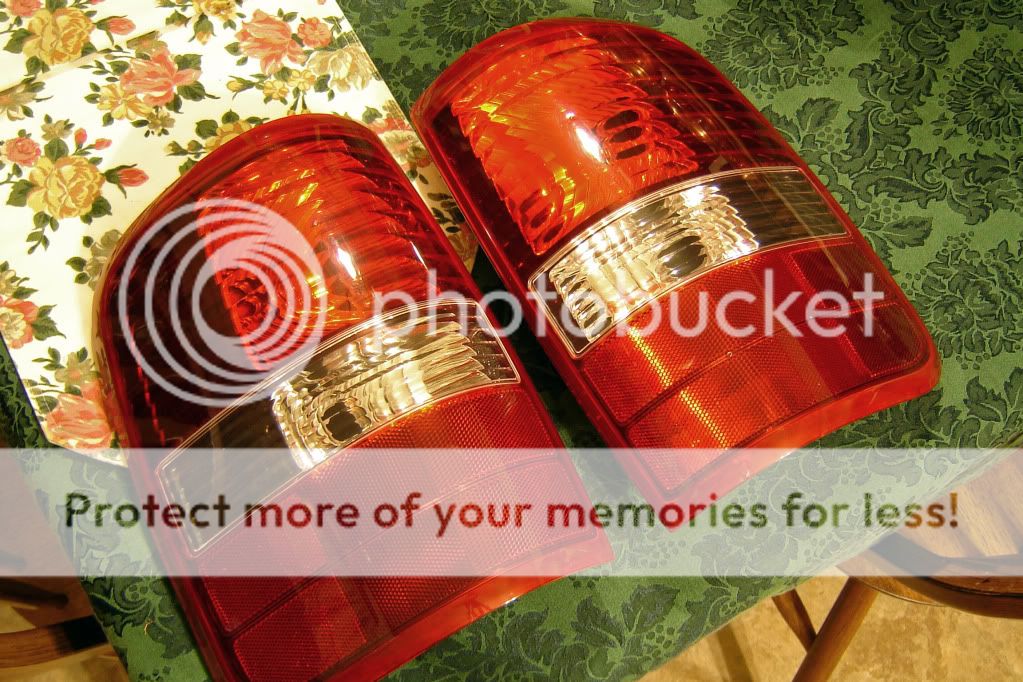
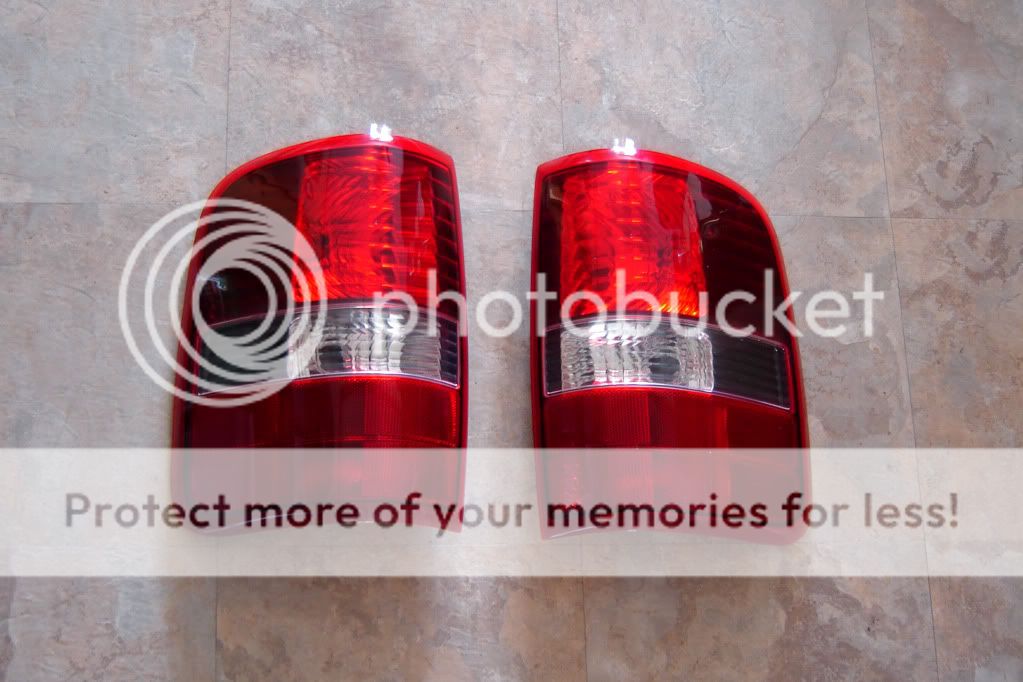
And for kicks, I put the lens carefully on one lamp to compare to a clear background lamp I already had. The reverse section only is whats painted in the project one. But the color compare shows very well here.
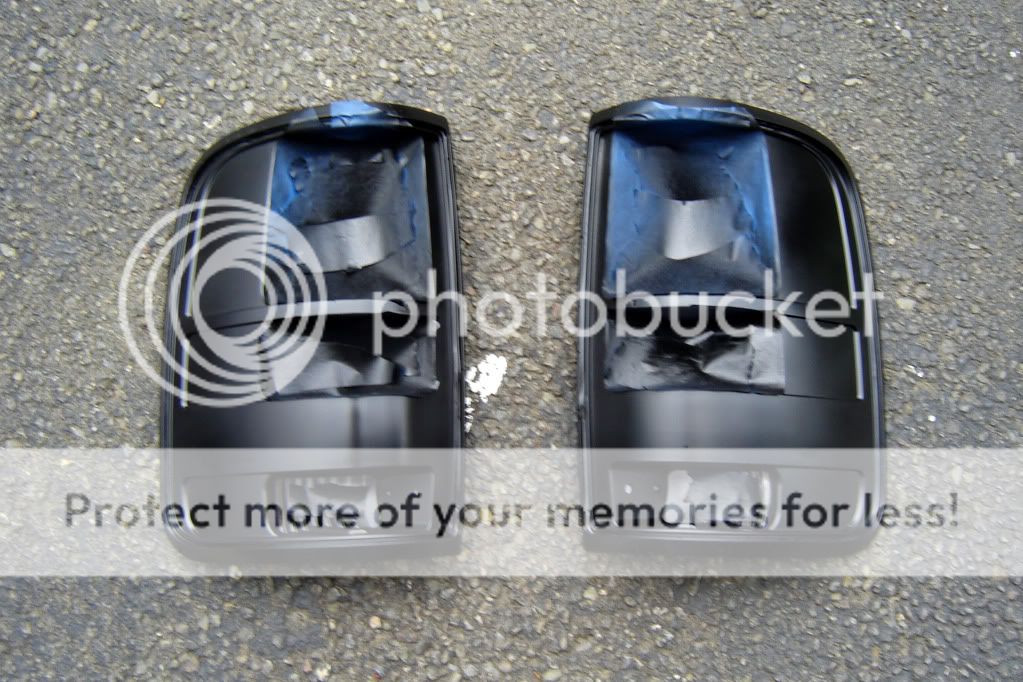
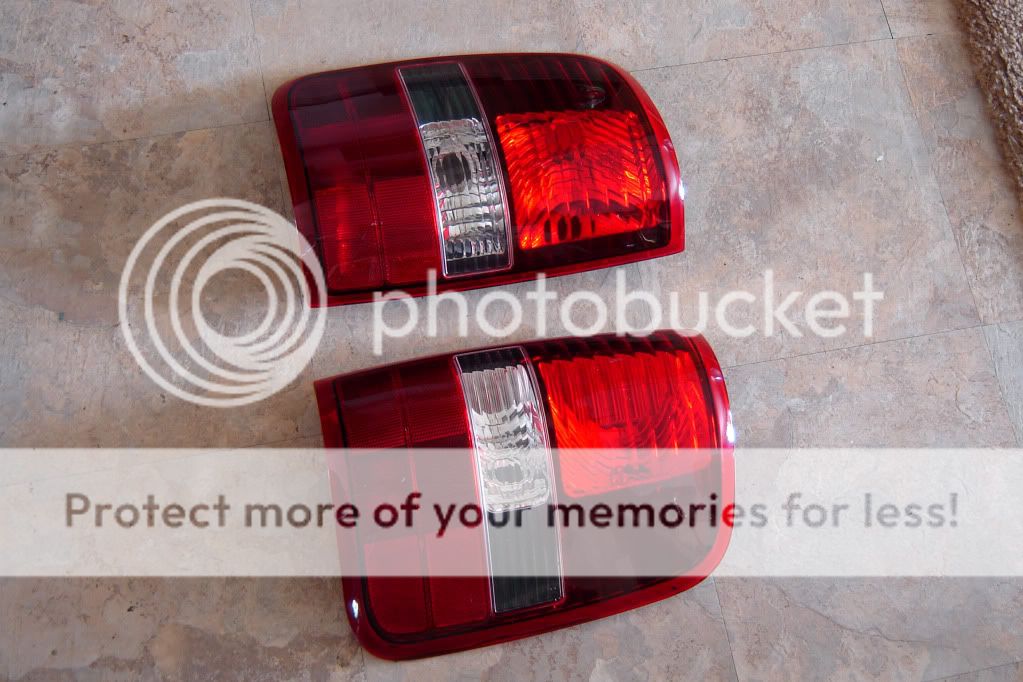
It began raining, so I didn't rush to get the lenses back on, so I let the shells dry in open air for three more hours. After that, I began carefully de-masking. This should be done slowly for the chromes finish to remain fine, and to not rip any paint from the edge. Here was the result.
After they are dry to the touch, its good to wipe them up gently with an MF cloth to remove some minor lint and paint haze. I had left over black sealant from when I did my fog lamps so I used that. Knead the tube and squeeze in a small thin amount of sealant into the crevasse section in the edges of the shells. Work with a patient pace of coarse as no not scratch your fresh paint, especially up on top, but know your product and know how fast it will dry.
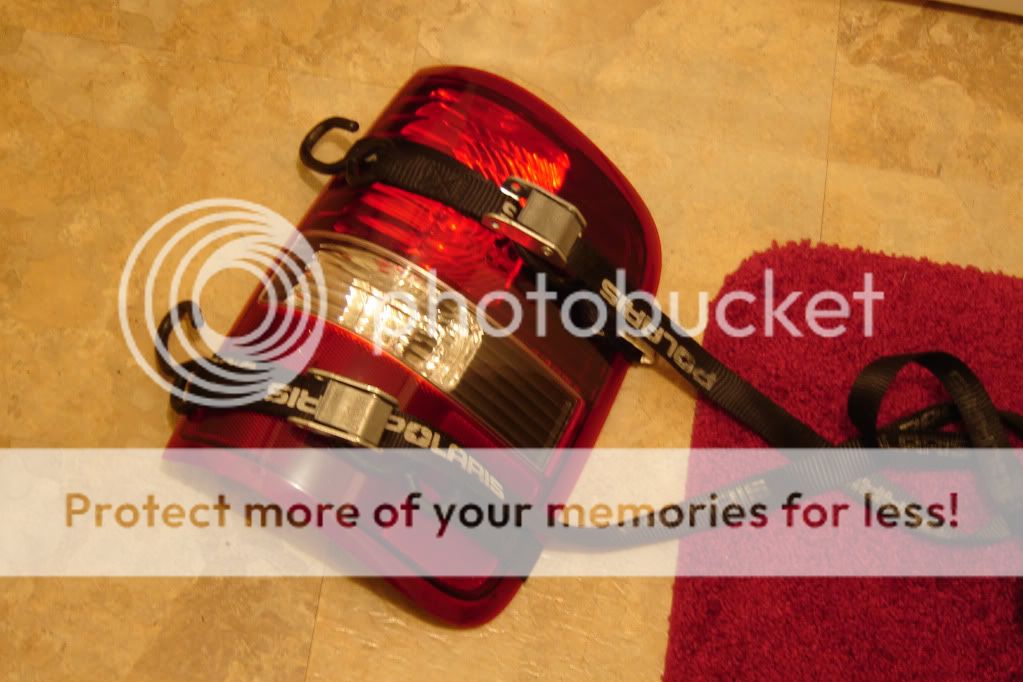
After reinstalling the lenses to their shells, press down on them with enough force to tighten it down. There wont be any snap sounds or anything, but it will spread the sealant over the rim of the lens that inserts into the tail lamp, and will adhere properly. Using a utility strap is good personal insurance for tight adhesion for the lens. Leaving it wrapped tight for at a minimum of one hour. I have only two small straps for my fourwheeler, so I did one tail lamp at a time. I let them dry overnight, and in the morning I used some clear all purpose silicon on the outside corners only for a little more insurance. Do not squeeze silicon into the edge because it will fill in the section on the edge, and that will be visible.
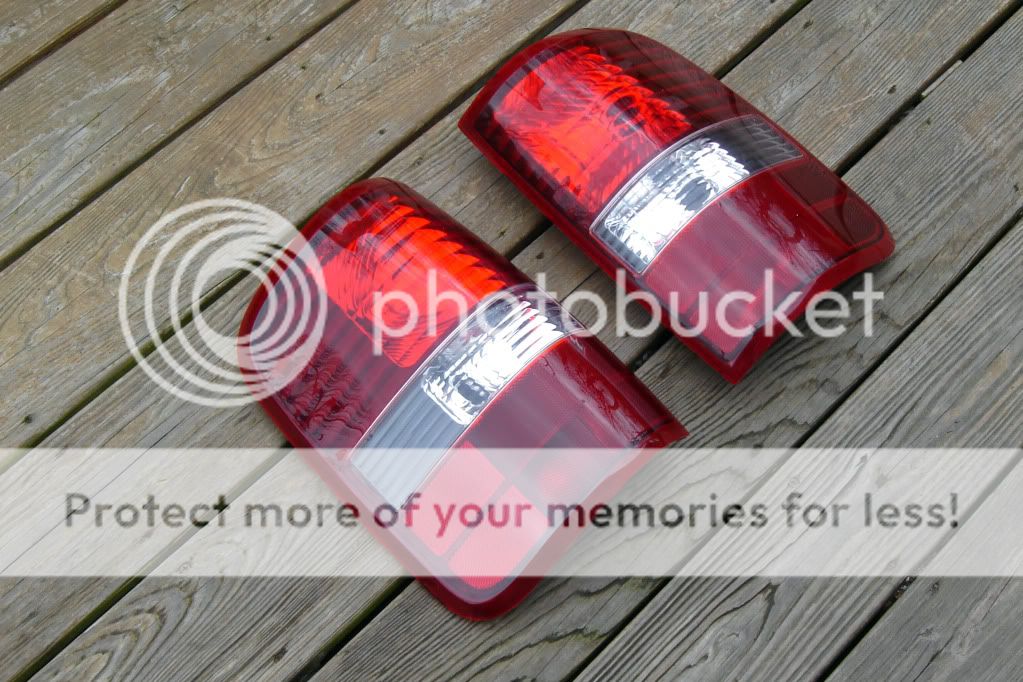
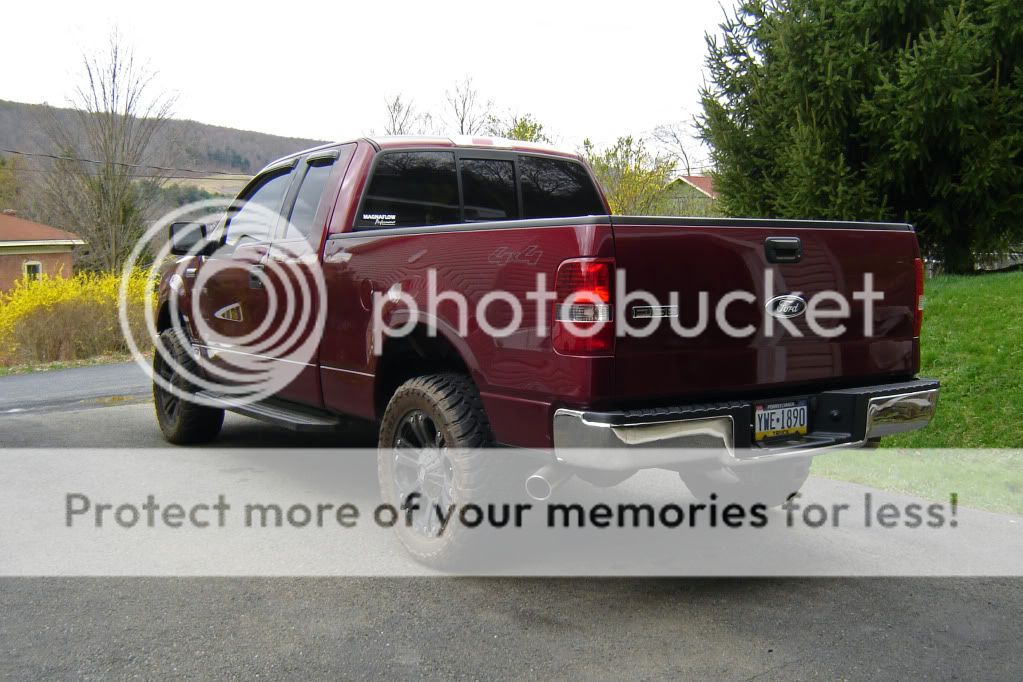
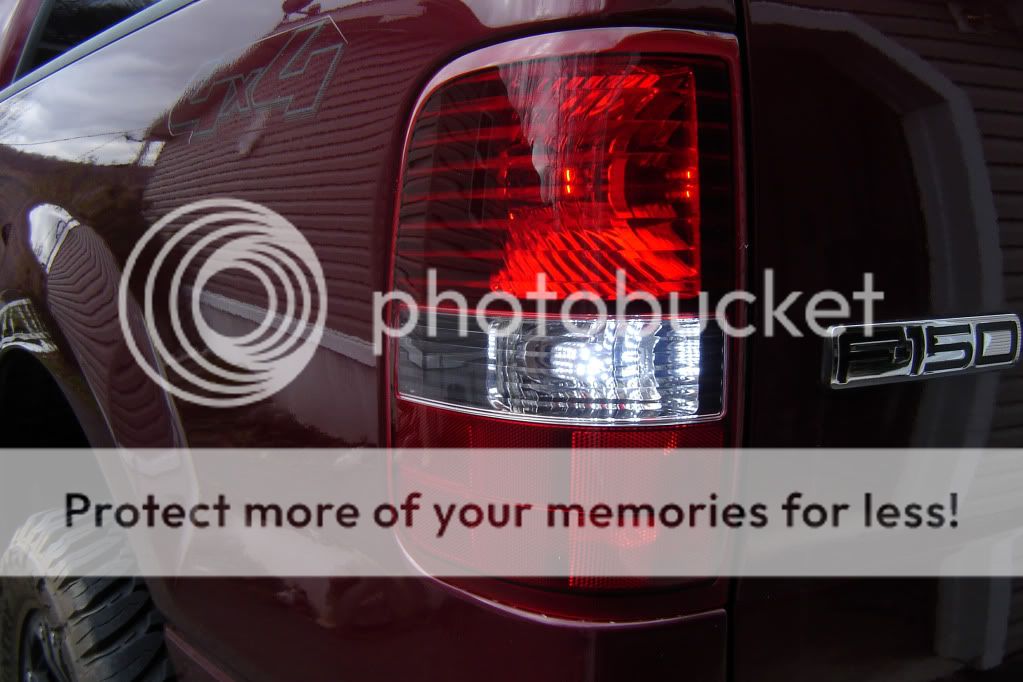
The next morning, this is what all my work had resulted in.

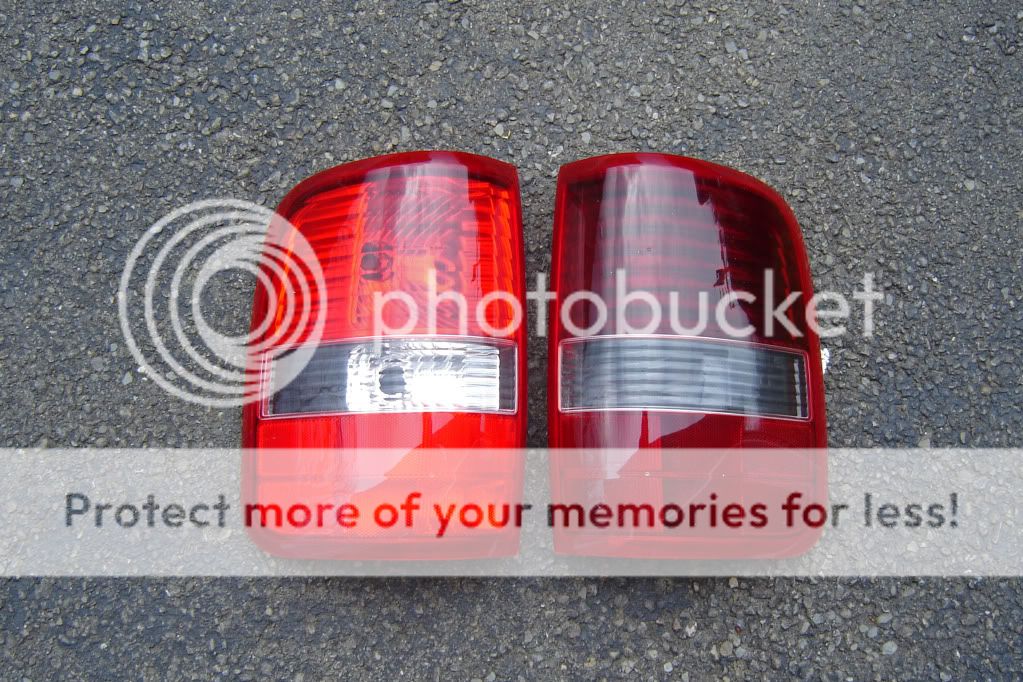
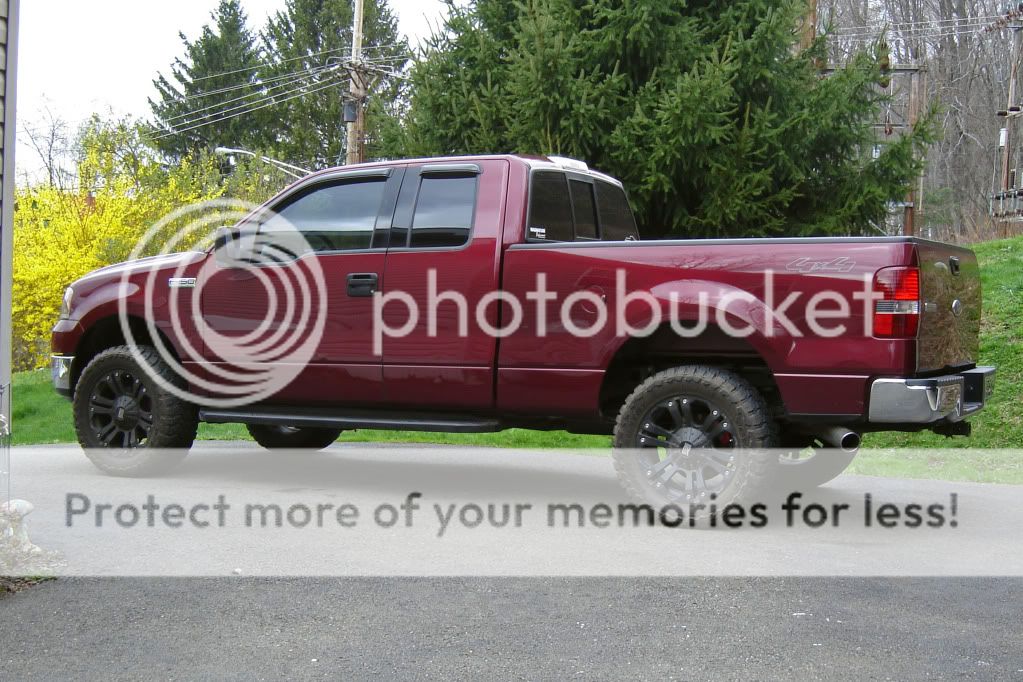
So if you have 18 hours of spare time, and wont need your truck, and would like the Harley tail lamps, you can do it for about $7.00 vs $160.00. Its possible with headlamps, and its definitely possible with the tail lamps.

Lit up.
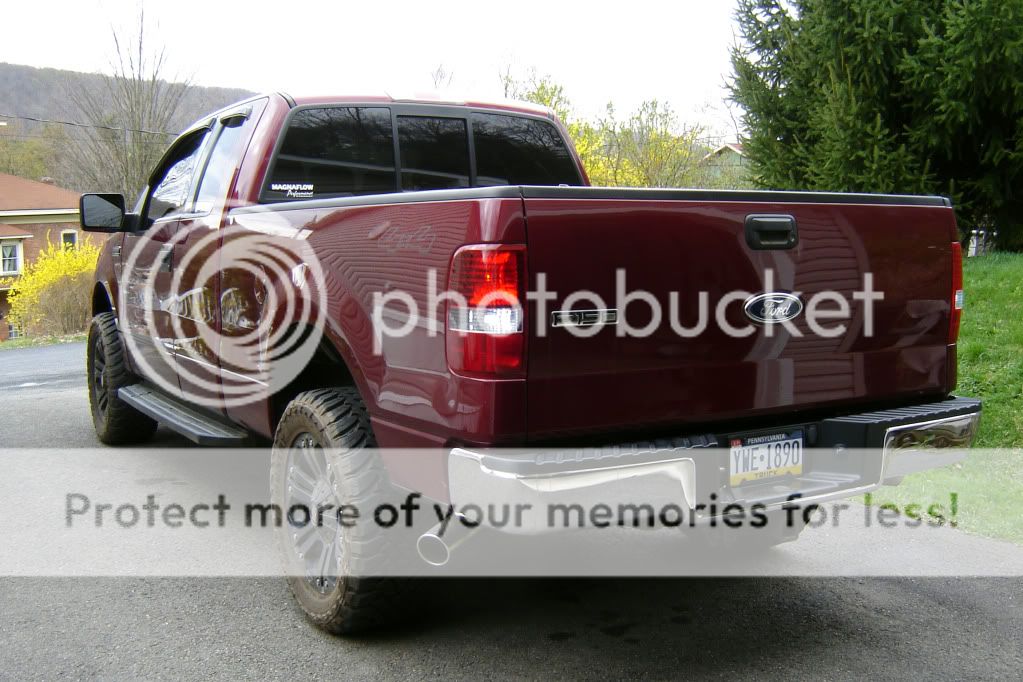
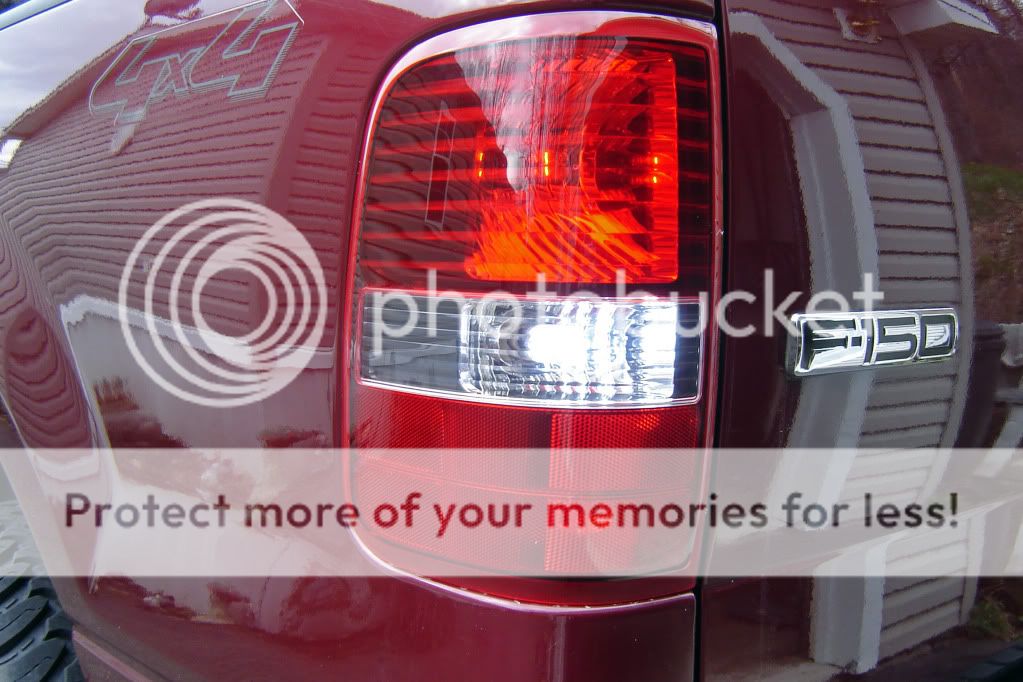
Faster shutter speed
They do appear darker than they look from the photos, but in direct sunlight all you can tell is the reverse section and a little of the upper brake portion is darker.
And here are two instructional videos I did of the process to capture technique, and methods.
Part 1.
http://www.youtube.com/watch?v=k2pC6lFs5Sc
Part 2.
http://www.youtube.com/watch?v=bRtltbt8gWU
This concludes my write up.
So basically everyone knows the 04+ Harley tails are a shade darker, except for the brake and reverse sections.
Heres how its done.
Begin my removing the tails which are held in my two 8mm bolts. Clean the back of the lights and mounting area while your back there. Maybe put some wax in too. Remove the bulbs carefully with the light upside down to prevent dust & debris from going inside.
Go inside and pre-heat your oven to 200 degrees. Put one light at a time in the oven on-top of a baking pan of some sorts as the heat of the oven grills will melt the plastic. Let them bake for 8 to 10 minutes. Once the reverse section starts looking foggy, take it out and work on the lens removal. Once its out of the oven the fog goes away.
Begin removing the lamp lens with a wide flathead driver, working from the bottom inner corner ( side that neighbors the tailgate ) and work your way up, once you make it to the top its smooth sailing for the other side. There will be some scary noises that sound like plastic is cracking, but its not. Use up and down motions to pull the lens away. DO NOT twist left and right, you will nick up the lens trim and it will be visible.
After the lens is removed, here is what your looking at.
Once you have the lens off, do not touch or clean the chrome shell too roughly as it will look smeared/smudged due to its a low quality reflective paint. The section that will be painted wont matter, but be cautious and gentle with the reverse and brake light sections. That area is your output glow.
After both lights lenses are removed, its time to get to masking. In my opinion, this was the toughest part because you need to use precision, make some excess tape cut offs, trim a lot of tape for cleaner fitment, and you need to be gentle while sticking the tape in the reverse and brake light sections as explained above, it may smudge, or lose some paint and leave a black spot. Use blue painters tape, or equal quality painting tape. A good tip is to kill some of EACH piece of tapes adhesion, by pressing it against your cotton shirt at least 3 times before sticking it in the lens. This lessens the chances of smudging or stripping the needed chrome, and leaves it with enough adhesion.
I started with the smallest ends first which are the East/West spots on reverse side, trimmed the tape as necessary, and filled in the center section. For the brake section, I did the longest ends North/South with brake side. I filled the center with 3 square tape pieces. This took me 45 minutes at a steady patient pace, and to go get a soda.
Next, I began sanding the remaining chrome very lightly with 2000 grit paper. Use finger tip strength only, and not alot of it. Just need to give it a nice brushed stainless look. Then clean the sanded areas off with a micro fiber cloth and prepare for painting.
I used the ever famous Krylon Fushion Satin Black. I was considering using Gloss Black, but I had more Satin Black at hand and i'm still going to smoke my lenses later down the road anyways. I did not use any adhesion promoter, or primer, I did the exact same process as I did on my fog lamps from 2008, which look fantastic still. Adhesives and primers are not necessary here. I did 3 light coats with no clear coat. I finished with a 4th coating, which I did heavier, in spot spraying motions to catch corners and jams that steady passes missed. Let them dry in the garage for an hour, and brought them inside to dry more since it rained outside and it got cold.
First pass.
Fourth final pass on one shell, the other chrome.
Both complete.
And for kicks, I put the lens carefully on one lamp to compare to a clear background lamp I already had. The reverse section only is whats painted in the project one. But the color compare shows very well here.
It began raining, so I didn't rush to get the lenses back on, so I let the shells dry in open air for three more hours. After that, I began carefully de-masking. This should be done slowly for the chromes finish to remain fine, and to not rip any paint from the edge. Here was the result.
After they are dry to the touch, its good to wipe them up gently with an MF cloth to remove some minor lint and paint haze. I had left over black sealant from when I did my fog lamps so I used that. Knead the tube and squeeze in a small thin amount of sealant into the crevasse section in the edges of the shells. Work with a patient pace of coarse as no not scratch your fresh paint, especially up on top, but know your product and know how fast it will dry.
After reinstalling the lenses to their shells, press down on them with enough force to tighten it down. There wont be any snap sounds or anything, but it will spread the sealant over the rim of the lens that inserts into the tail lamp, and will adhere properly. Using a utility strap is good personal insurance for tight adhesion for the lens. Leaving it wrapped tight for at a minimum of one hour. I have only two small straps for my fourwheeler, so I did one tail lamp at a time. I let them dry overnight, and in the morning I used some clear all purpose silicon on the outside corners only for a little more insurance. Do not squeeze silicon into the edge because it will fill in the section on the edge, and that will be visible.
The next morning, this is what all my work had resulted in.
So if you have 18 hours of spare time, and wont need your truck, and would like the Harley tail lamps, you can do it for about $7.00 vs $160.00. Its possible with headlamps, and its definitely possible with the tail lamps.
Lit up.
Faster shutter speed
They do appear darker than they look from the photos, but in direct sunlight all you can tell is the reverse section and a little of the upper brake portion is darker.
And here are two instructional videos I did of the process to capture technique, and methods.
Part 1.
http://www.youtube.com/watch?v=k2pC6lFs5Sc
Part 2.
http://www.youtube.com/watch?v=bRtltbt8gWU
This concludes my write up.
#2
04-11-2010, 12:41 PM

Senior Member
Join Date: Nov 2007
Location: Dallas, Texas
Posts: 2,469
Likes: 0
Received 0 Likes
on
0 Posts
#4
04-11-2010, 01:02 PM

Senior Member
Join Date: May 2006
Location: Green Bay, WisconSIN
Posts: 856
Likes: 0
Received 0 Likes
on
0 Posts
#5
04-11-2010, 01:59 PM

Senior Member
Join Date: Feb 2007
Location: Native New Yorker
Posts: 3,329
Likes: 0
Received 0 Likes
on
0 Posts

#7
04-11-2010, 03:20 PM

Trending Topics

#9
04-11-2010, 04:07 PM

Senior Member
Join Date: Oct 2009
Location: Everett, Pa.
Posts: 567
Likes: 0
Received 0 Likes
on
0 Posts
#10
04-11-2010, 05:10 PM

Member
Join Date: Mar 2010
Location: Bellevue, NE
Posts: 28
Likes: 0
Received 0 Likes
on
0 Posts


#12
04-11-2010, 10:19 PM
Thanks very much everyone 
Very good question. I am not too sure, but I know 200 degrees isn't enough to melt paint, clear coat i'm not sure, but it should be fine. Just check on it every few minutes.
Very good question. I am not too sure, but I know 200 degrees isn't enough to melt paint, clear coat i'm not sure, but it should be fine. Just check on it every few minutes.
#13
04-12-2010, 06:28 AM

Member
Join Date: Jan 2010
Location: Jerzey
Posts: 18
Likes: 0
Received 0 Likes
on
0 Posts
#14
04-12-2010, 11:27 AM

Member
Join Date: Apr 2010
Location: Texas
Posts: 51
Likes: 0
Received 0 Likes
on
0 Posts
#15
04-12-2010, 12:43 PM
 Yeah man, A lot of people have already discovered this. Since 2005 I believe. Thats how a great majority of us got our black headlamps.